Skip to content
YARNutopia & M0re
All things Yarn Related: Crochet, DIY, and Crafts
Blog
365 Days of Granny Squares
Stitch Gallery & Glossary
Crochet Video Tutorials
Frequently Asked Questions
Crochet Glossary: Learn the Lingo
Contact
Search
Search
baby booties
YARNutoia & More
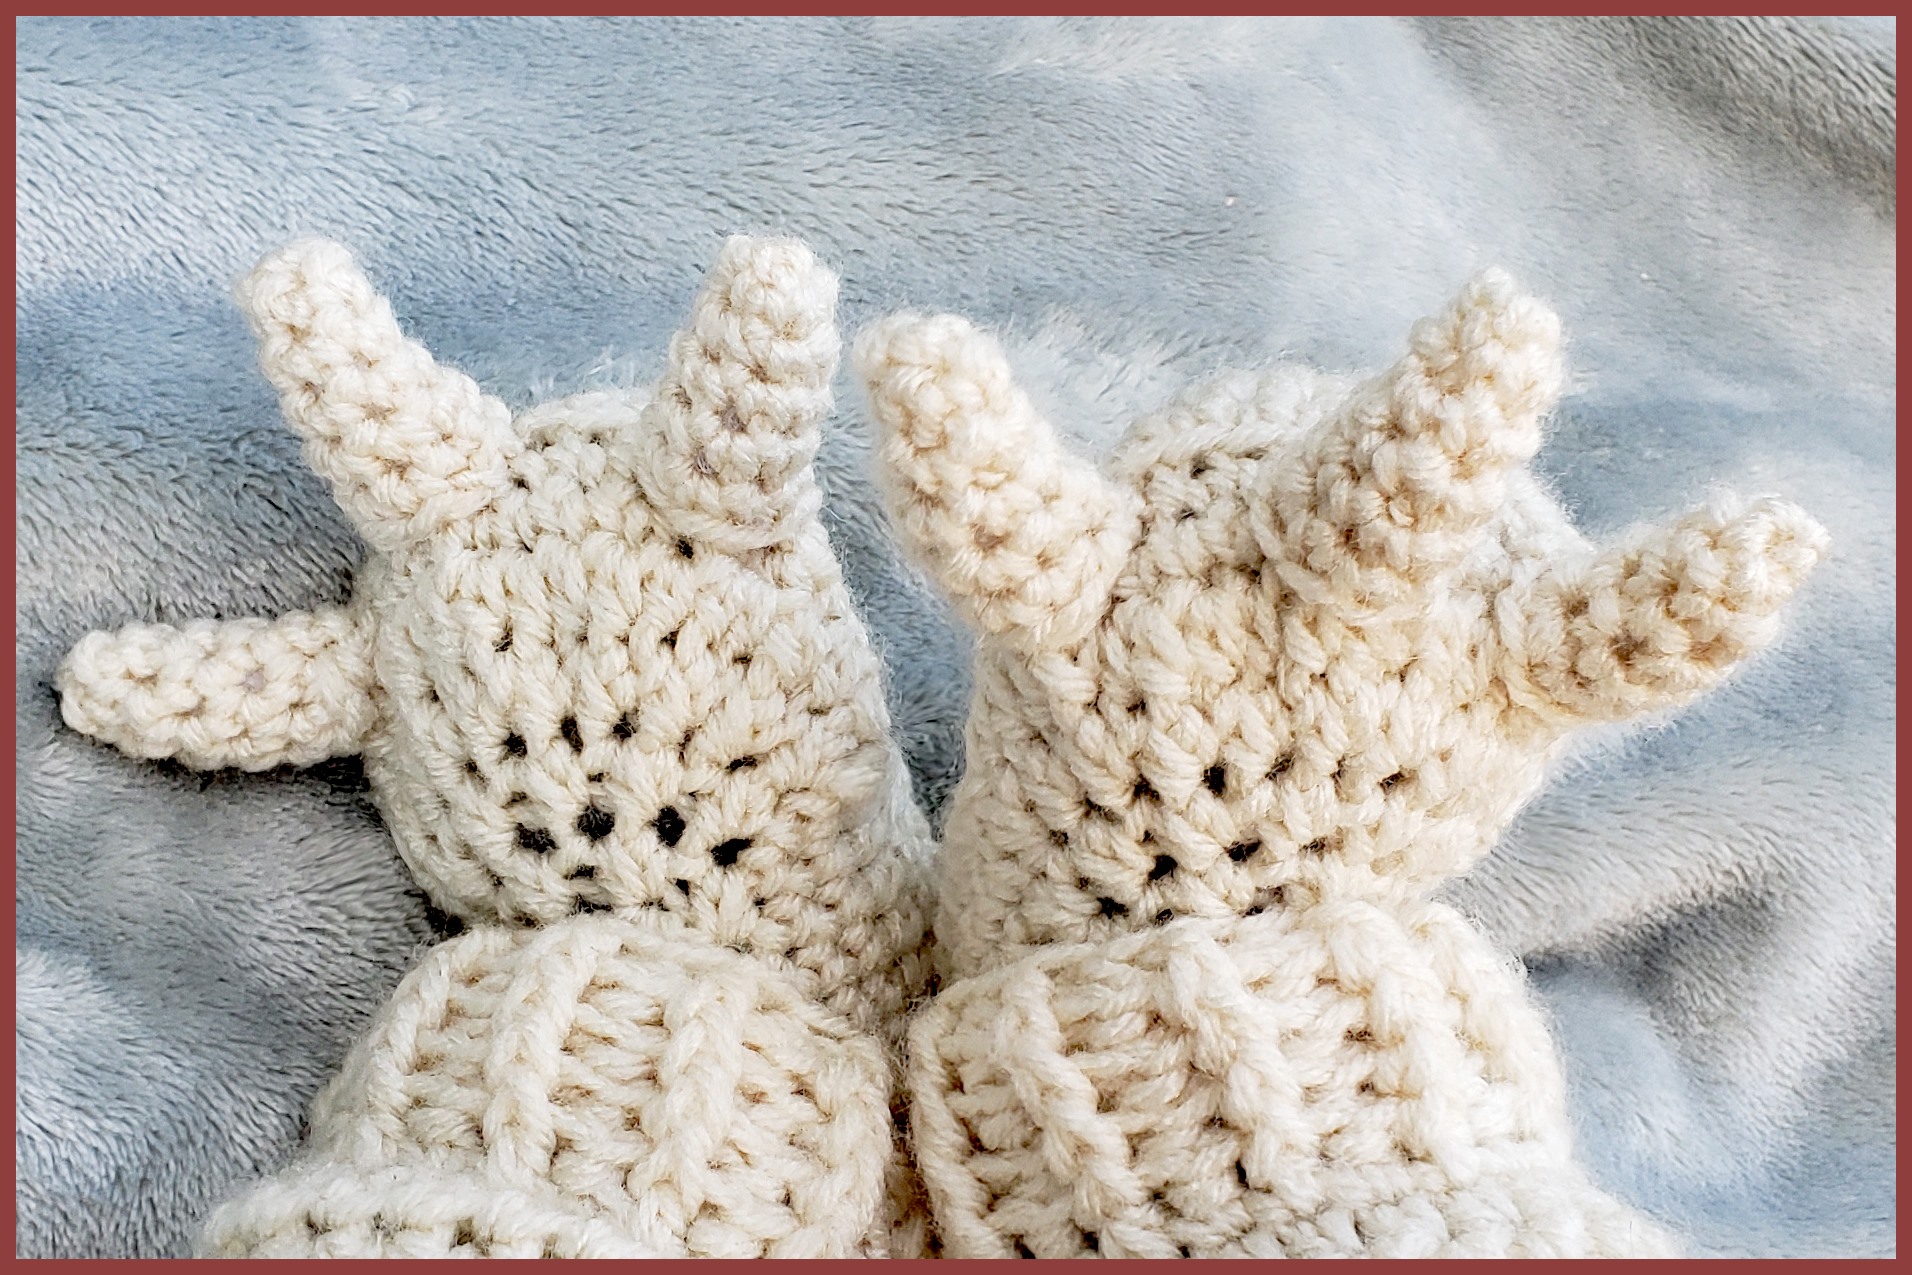
FREE Written Crochet Pattern: Monster Feet Baby Booties
Crochet Tutorial: Baby Hiking Sandals
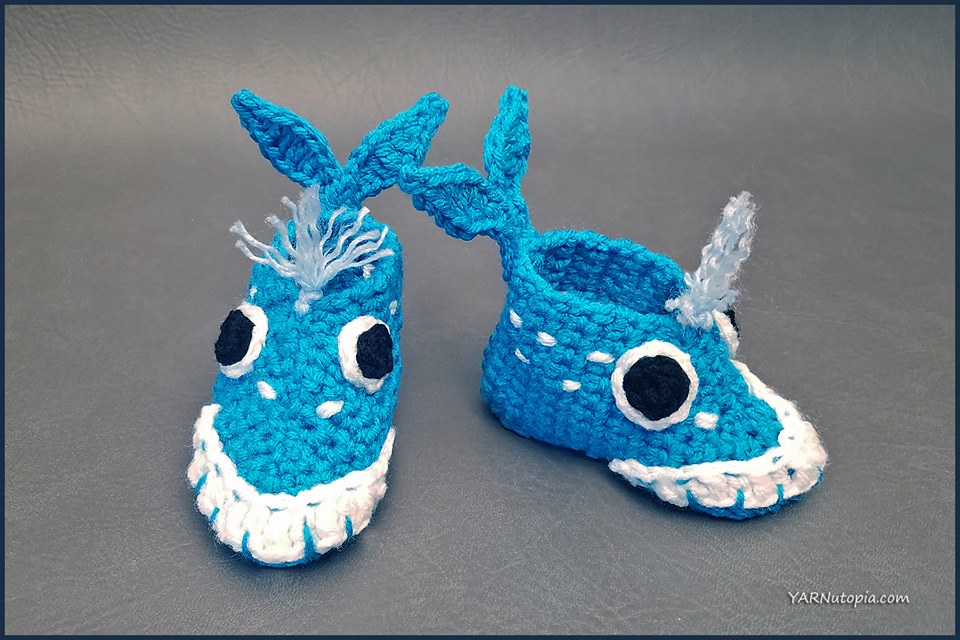
Crochet Tutorial: Whale-y Awesome Baby Booties
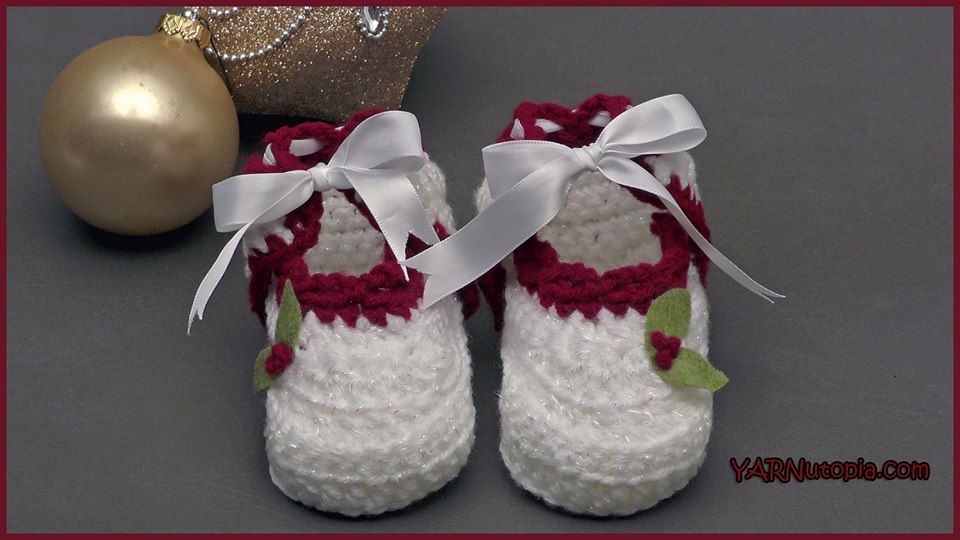
Crochet Tutorial: Holly-Days Booties
Crochet Tutorial: Mini Square Baby Shoes
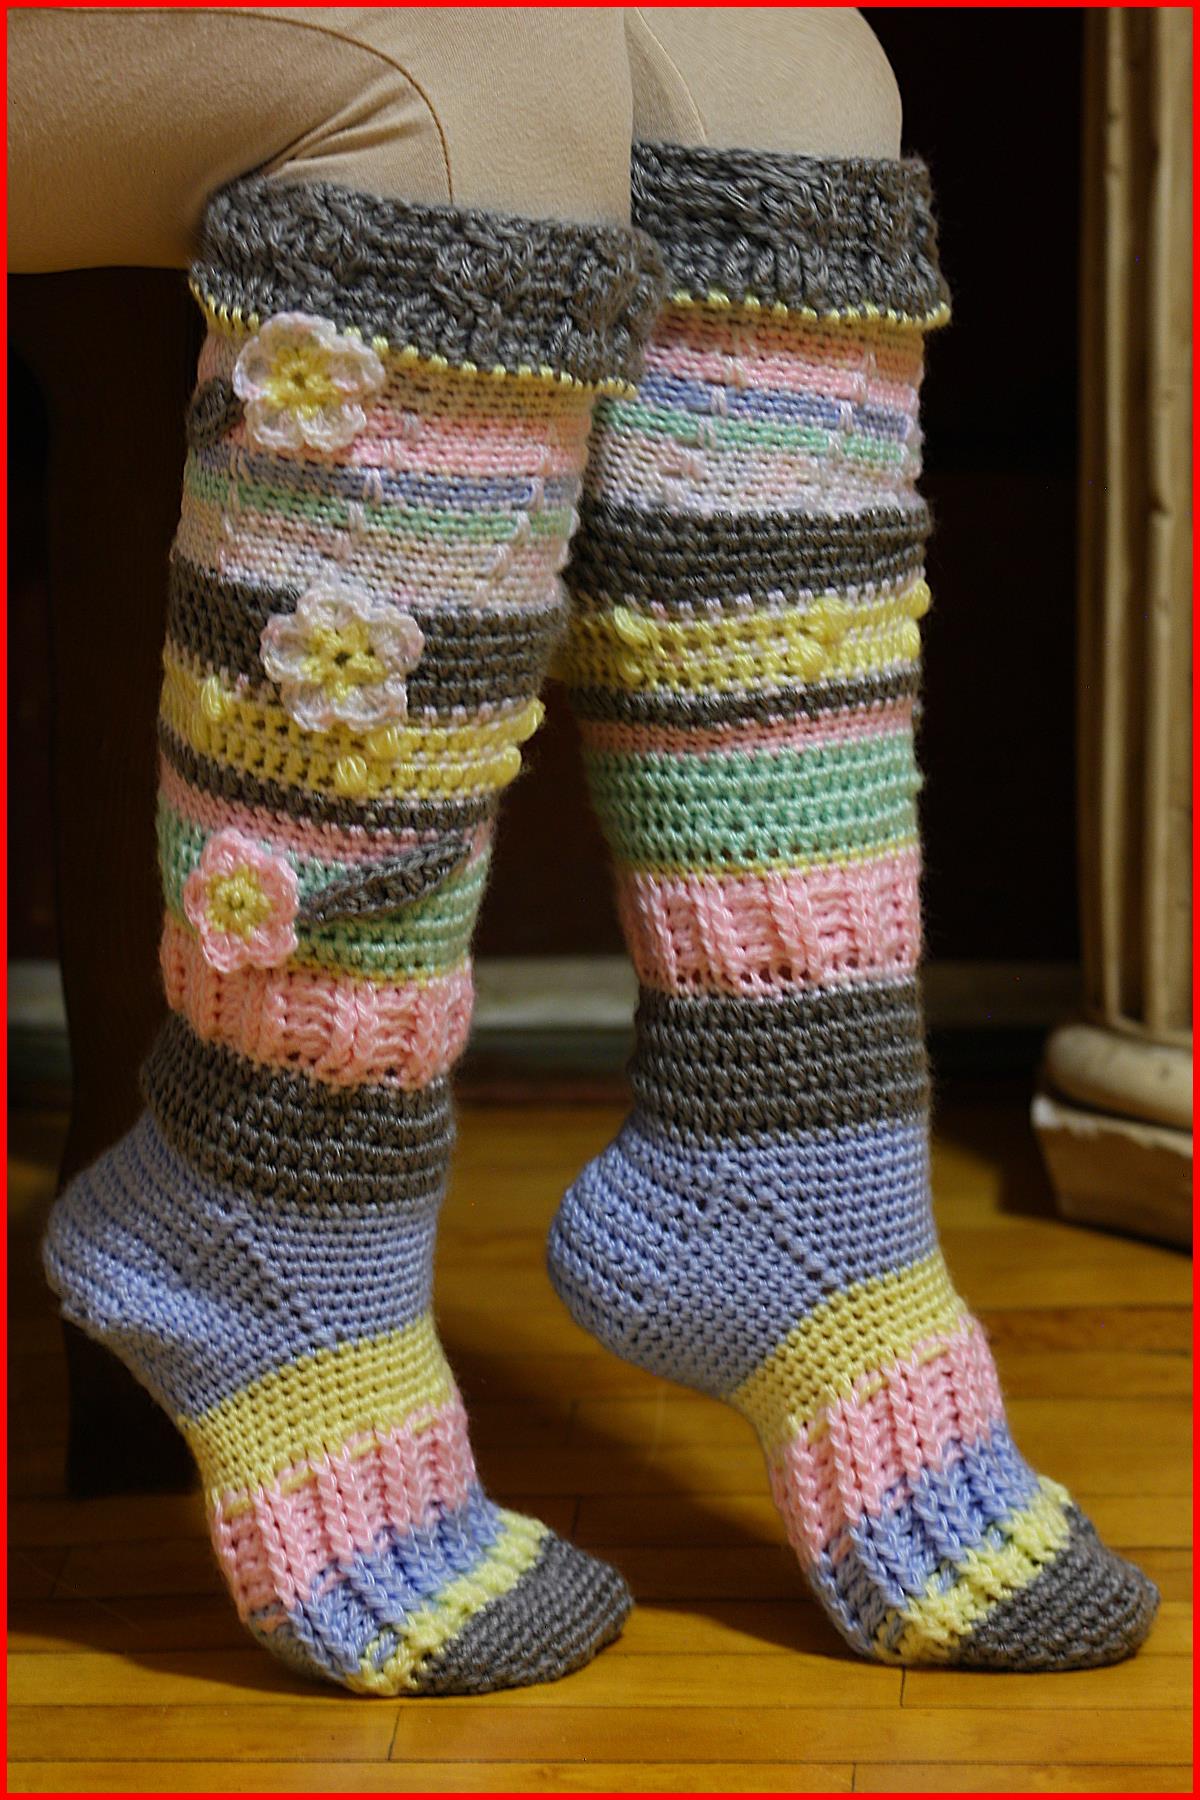
Crochet Tutorial: Knee-High Socks
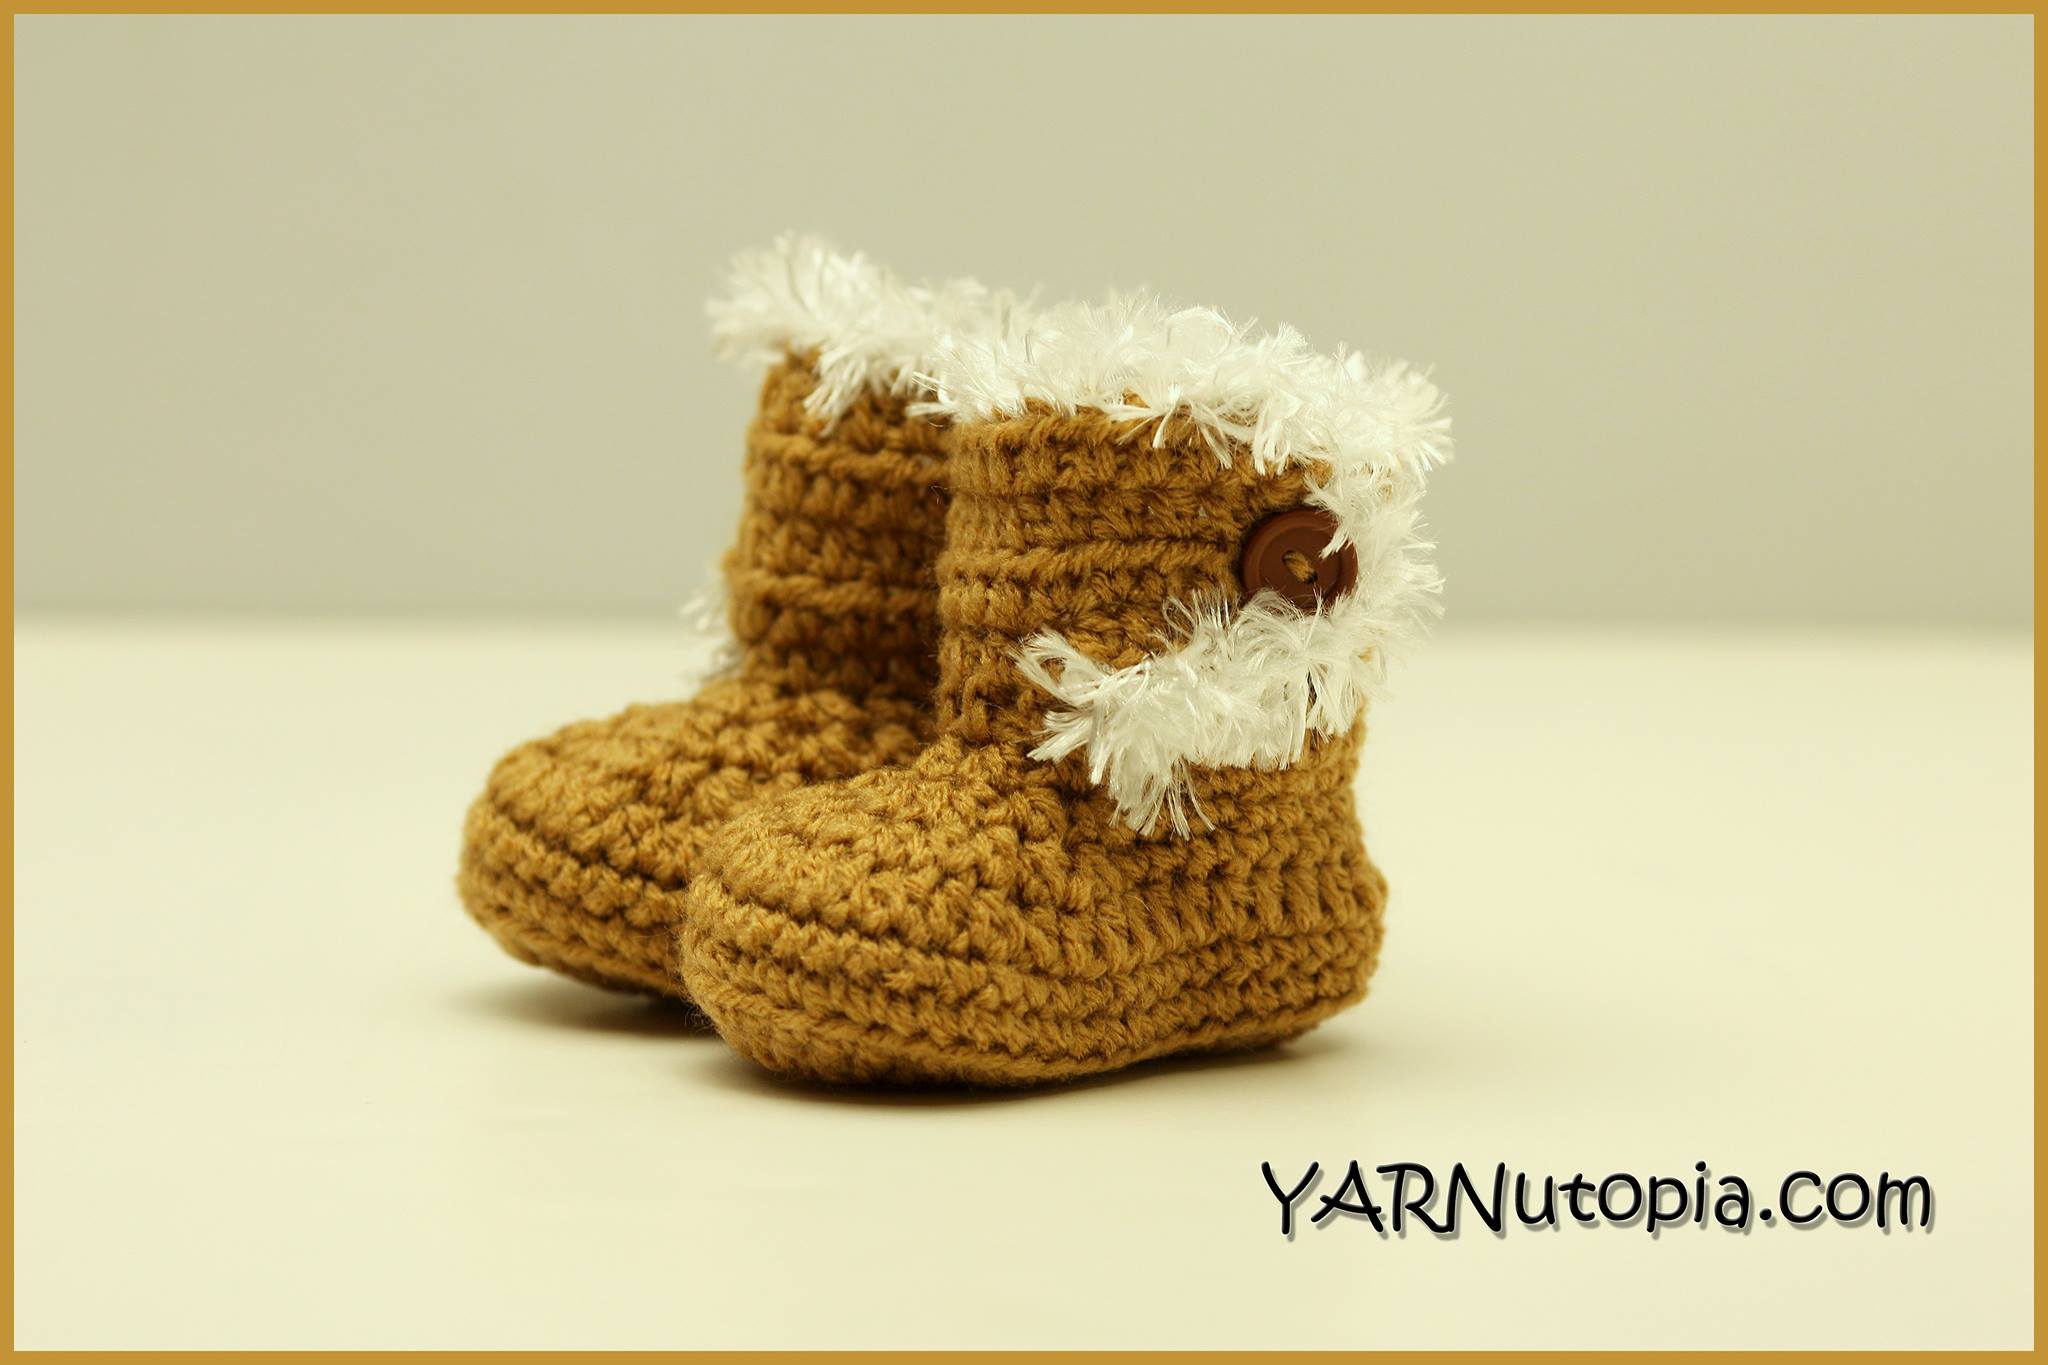
Crochet Tutorial: Booties with the Fur
Crochet Tutorial: 3-Piece Bow-tastic Baby Outfit
Crochet Tutorial: Baby Sandals with a Bow
Crochet Tutorial: Basic Baby Booties
Crochet Tutorial: Multi-Colored Baby Booties
Loading Comments...
Write a Comment...
Email (Required)
Name (Required)
Website