Bring a bit of *Joy* to your holiday home this season. Using a little yarn-art, you can create this door/wall hanging in a few short minutes using my step-by-step instructions. This lovely homemade, home town decor piece is sure to bring joy and happiness to any home it graces.
Disclaimer: this project requires the use of a hot glue gun. Please be careful using any type of heated tool as these can cause burns. Please supervise children when attempting this project.
I used the following supplies listed below to complete this project
Then I attached the feather and the holly berries to the wreath with hot glue
This is how it all turned out!! I LOVE IT!!
This post contains affiliate links, which I may be compensated for when you make a purchase. That means if you click on any link and buy from the linked websites, I will receive a small percentage of the value of your order. The amount you pay is not changed. Thank you for all your support in clicking the links in my blog!! You all are so amazing!! ~Nadia
The yarn provided for this pattern is courtesy of Lion Brand Yarn
Teacher: Nadia Fuad
Video and Editing: Fuad Azmat (My Daddy)
Share your work on Facebook!
Add me on Snapchat: YARNutopia
Follow me on Instagram
Visit My Ravelry Store and add this to your Favorites!
Follow me on Twitter: @YARNutopia
Enjoy this video and subscribe to my channel on YouTube for more tutorials on how to crochet!
Leave a comment, and share with your friends!
On March 4th, 2017, while traveling through Europe, Nate surprised me with a spontaneous proposal in the Amsterdam Schipol Airport. As we were heading to the bathrooms (haha!) he got down on one knee and asked me to marry him!
He was shaking, I was shaking, I was crying, and of course, I said YES! We’ve been talking about it for some time now and all the plans we were making were leading to this exciting event.
It was very fitting that we had this private moment that included the two of us, my brother and my mom who was able to capture these lovely photos.
No matter how tired we were from all the traveling, our joy carried us through our 13 hour layover where we ventured into Amsterdam city for a celebration dinner.
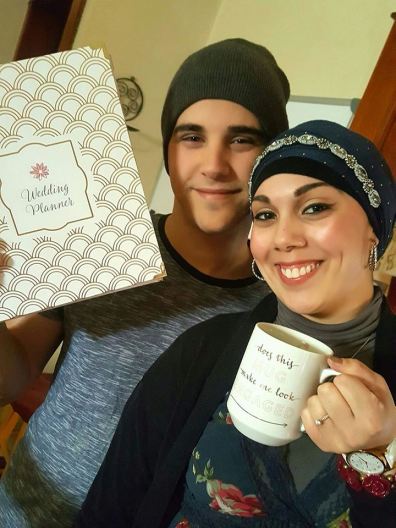
Upon arrival back to the United States, and of course after letting my close friends and family know this exciting news, we started making immediate plans for our wedding.
We are looking ahead and planning an early 2018 wedding celebration. We recently had some engagement photos taken and made our formal announcement on our personal social media accounts. We now wish to share it with all the YARNutopians!
Photo credit: Fuad Azmat (My daddy!)
As we journey ahead in the next year planning our event, we are excited to tie in elements of our cultures and OF COURSE, elements of crochet! I am going a different route on my dress, as many have already asked me if I was going to crochet my wedding gown, but I am absolutely 100% going to incorporate other small details of crochet for this special day.
I’m excited to share this year-long journey with my amazing YARNutopia family and I will be creating tutorials of fun elements that I plan to use on the big day!
I am excited to hear suggestions on crochet projects that you have used for your special events! I’m always open to hearing, so please feel free to share your ideas!! This will be a fun way to share this together!
Please join us in sharing our joy and happiness as we move onto this new and exciting chapter of our lives!
Holiday entertaining is right around the corner. I personally enjoy tea with friends. Add a special touch to your table setting with The Joyful Teapot Cozy!
I added the word “Joy” to my teapot, but you can add any word. It’s very simple to chain and sew it onto the cozy. You don’t have to use holly leaves and berries as your embellishments either. Have fun with it and get creative by adding flowers, leaves, or other appliqués to make your teapot cozy personal.
The Joyful Teapot Cozy makes a lovely gift idea. Wrapped around a vintage teapot and filled with specialty teas, this would go far in making someone’s holiday tea-rrific!
Now it’s time to pour yourself a cup of hot tea, pull out your hook and get started today!
Follow along with this video tutorial to learn how to make this Teapot Cozy:
Information at the beginning of the video, Tutorial actually starts at 9 minutes.
My dad will continue to be the videographer, editor, and photographer for our videos when I move away.
Support YARNutopia today so we can continue to bring you clear, quality crochet tutorials even after I move into my new home!
There will be an added expense of more travel and hopefully this won’t deter our ability to provide consistent videos on a weekly basis.
Enjoy this video and subscribe to my channel on YouTube for more tutorials on how to crochet!
Leave a comment, and share with your friends!
Pattern:
Designed by Nadia Fuad
Questions? Leave a comment! You may sell items made from my pattern, but please reference my name and Etsy Shop (YARNutopia). Please do not copy and post this pattern and claim it as your own.
-This pattern is for a standard 4-cup round, side handle teapot with a lid and a curved spout. You could make it smaller or bigger just making more rows on the sides.
-You can make this cozy with any yarn: Cotton, Acrylic, Polyester
-You can make this using a bigger crochet hook if your tension is tighter
-You do not have to add the appliques, you could just have a plain teapot cozy sans the leaf/word design.
-This teapot Cozy is worked from the top down.
Special Stitches:
Ch: chain
St(s): Stitch(es)
Sl st: slip stitch
SC: Single Crochet
DC: Double Crochet
Puff: [YO, Insert Hook, YO, Pull Through] 2 times. YO, pull through all 5 loops on hook. Puff made.
Picot: Ch 2, Sl st in 2nd ch from hook
Backing of Teapot Cozy
With Gleam Yarn in Creamy,
Ch 12, sl st to 1st ch to form a large ring.
Round 1: Ch 1, SC in each ch around, sl st to 1st SC. (12 sts)
Round 2: Ch 1, SC in each st around, sl st to 1st SC. (12 sts)
Round 3: Ch 1, [Puff, Ch 1, Puff, Ch 1] in each st around, Sl St to 1st Puff St. (16 puff sts)
Round 4: Working in ch 1 sps: Ch 1, 2 HDC in same Ch 1 Sp, 1 HDC in next Ch 1 sp, *2 HDC in next ch 1 sp, HDC in next ch 1 sp, repeat from * around. Sl st to 1st HDC. (36 sts)
Round 5: Ch 1, HDC in each st around, sl st to 1st st. (36 sts)
Round 6: Ch 1, [Puff, Ch 2] in each st around, sl st to 1st Puff st. (36 Puff sts)
Round 7: In any ch 2 sp: Ch 2, HDC in each ch 2 sp around, sl st to beg. ch 2. (36 sts)
**You will now be working in rows:
Row 8: Ch 1, [Puff, ch 1] in same st and next 17 sts. Leave the rest unworked. Ch 1, turn. (18 sts)
Row 9: 2 HDC in each Ch 1 sp across. Ch 1, turn. (34 sts)
Rows 10-13: 1 HDC in each st across. Ch 1, turn. (34 sts)
(Optional: Continue working these rows until your piece is as tall as you need it to be, then go on to row 14)
Row 14: HDC2TOG, HDC in each st until the last 2 sts, HDC2TOG on the last 2 sts, ch 1, turn. (32 sts)
Row 15: HDC2TOG, HDC in each st until the last 2 sts, HDC2TOG on the last 2 sts, ch 1, turn. (30 sts)
Row 16: *HDC2TOG, HDC in next 3 sts, repeat from * across. Ch 1, turn. (24 sts)
Row 17: *HDC2TOG, HDC in next 2 sts, repeat from * across. Ch 1, turn. (18 sts)
Row 18: HDC in each st across.
Fasten off with Long tail for this side.
When you make the other side, you can cut your yarn short. (See video tutorial for visual instructions.
Attach your yarn to the unworked st from Round 7. Repeat Rows 8-18
Crochet a button hole loop after your last row by chaining 6, and sl st back into st. Fasten off.
Assembly step:
Sew front closed around spout of teapot. (see video tutorial for visual instructions)
Sew button to bottom back of cozy on the opposite side of button hole loop.
Leaf: Make 7
With Patina Gleam Yarn
Ch 9 Round 1: Sl st in 2nd ch from hook, SC in next Ch, HDC in next 4 Chs, SC in next, Sl st in next, Ch 2, Sl back in the same ch,
Working on opposite side of foundation chain: SC in next, HDC in next 4, SC in next, Sl st in last. Do not attach.
Round 2: [Sl st in next 2 sts, Picot] 3 times, sl st in ch 2 sp, ch 2, Sl st in same ch 2 sp, [Sl st in next 2 sts, Picot] 3 times. Sl st to beginning. Fasten off with long tail for sewing.
Berry: Make 9
With Red Shimmer
Ch 2 Round 1: 6 SC in 2nd ch from hook
Fasten off with long tail for sewing. Assembly step:
I recommend watching the video tutorial to learn how to sew all the pieces to your teapot cozy.
Sew leaves and berries to teapot cozy.
For the word “JOY” just chain an amount and pin it to the cozy and sew it on. You can also embroider the word to the cozy if you wish. Have fun with it!
See video tutorial for visual instructions on all the pieces and where they go.
Weave in all ends.
Enjoy!!
This post contains affiliate links, which I may be compensated for when you make a purchase. That means if you click on any link and buy from the linked websites, I will receive a small percentage of the value of your order. The amount you pay is not changed. Thank you for all your support in clicking the links in my blog!! You all are so amazing!! ~Nadia
The yarn provided for this pattern is courtesy of Red Heart Yarns
")