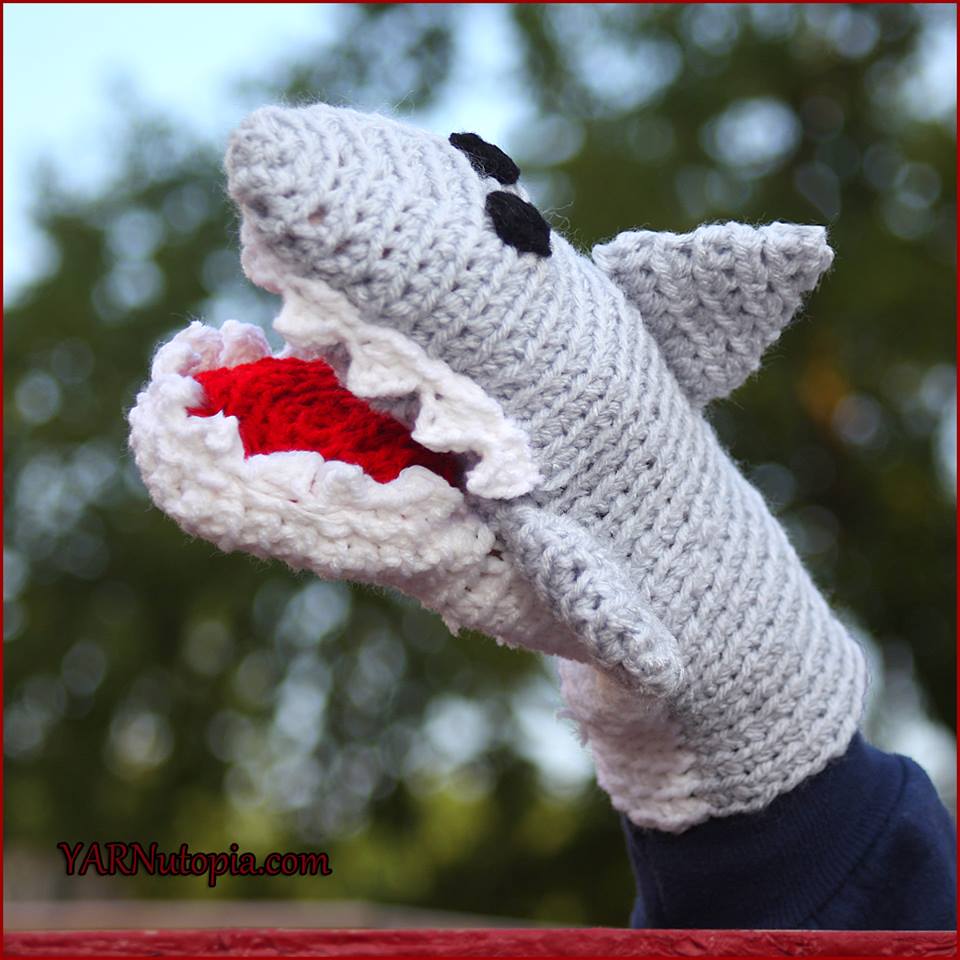
Queue Jaws Theme Song to set the stage for my “Fin-tastic” Great White Shark Hand Puppet!! I tend to get carried away with “waves” of creativity during Discovery Channel’s Shark Week designing and sharing “jaw-some” things shark related. I decided to “sink my teeth” into a great idea and make this fun puppet creation!


Get creative with these puppets. Children and adults will love the inventive ways to use these puppets that allow imagination to grow!! They provide hours and hours of fun! Make a pair to create shark mittens! There is definitely something fun about walking about in winter with two sharks on your hands! LOL!!

Please check out the new beginning graphic in the video tutorial designed and developed by my brother Nabeel. He and his wife own and operate NFD Graphics. Please hop over to their Facebook page and show them some love! For all your graphic and video/logo design needs be sure to contact them today!
http://www.nfdgraphics.com
To learn how to make this puppet, follow along with this video tutorial:
Support YARNutopia today so we can continue to bring you clear, quality crochet tutorials

**You can always contact me via Facebook if you have any problems with the pattern. I am happy to help if you have any questions along the way.
***These patterns are copyright YARNutopia © so PLEASE DO NOT COPY, SHARE, ADJUST OR RESELL MY PATTERN. I wrote and tested this pattern myself, from beginning to end. It took a lot of time and work, and I would really like to have it remain “my pattern.”
***You can definitely sell anything you make from my patterns, please just link back to my website YARNutopia.com. Thank you!
Teacher: Nadia Fuad
Video and Editing: Fuad Azmat (My Daddy)
Share your work on Facebook!
Add me on Snapchat: YARNutopia
Follow me on Instagram
Visit My Ravelry Store and add this to your Favorites!
Follow me on Twitter: @YARNutopia
Enjoy this video and subscribe to my channel on YouTube for more tutorials on how to crochet!
Leave a comment, and share with your friends!
Pattern:
Designed by Nadia Fuad
You *may* sell items made from my pattern, but please reference my website YARNutopia.com.
Please do not copy, sell, and/or post this pattern and claim it as your own.
NOTES:
-Use a smaller hook to make these smaller
-Use a bigger hook to make these bigger
-Watch the FULL introduction of the video tutorial for frequently asked questions and watch the full video for tips and tricks!
-Work in Continuous Rounds
-Use a Stitch Marker to mark your rounds
**View the full kit of supplies you will need for this project here!!**
Materials:
–Red Heart Super Saver in Light Gray
–Red Heart Super Saver in Red
–Red Heart Super Saver in Black
–Red Heart Super Saver in White
–Crochet Hook Size H-5.00mm
–Yarn Needle
–Scissors
–Measuring Tape
Shop Red Heart Yarns Website Today!
You can buy any of the items in this kit. Buy all or buy one item. Check it out to see the supplies you can get online to make this project!

Special stitches:
Ch(s): chain(s)
YO: Yarn Over
St(s): Stitch(es)
Sl st: slip stitch
SK: Skip
SC: Single Crochet
HDC: Half Double Crochet
Pattern:
Top Jaw: With Gray
Ch 2
Rnd 1: 6 SC in 2nd Ch from hook
Rnd 2: 2 SC in each st around. (12)
Rnd 3: SC in each st around. (12)
Rnd 4: [2SC in next st, SC in next st] 6 times. (18)
Rnd 5: [2SC in next st, SC in next 2 sts] 6 times. (24)
Rnd 6: [2SC in next st, SC in next 3 sts] 6 times. (30)
Rnds 7-15: SC in each st around.
Fasten off with long tail for sewing.
Bottom Jaw: With White
Ch 2
Rnd 1: 6 SC in 2nd Ch from hook
Rnd 2: 2 SC in each st around. (12)
Rnd 3: [2SC in next st, SC in next st] 6 times. (18)
Rnd 4: [2SC in next st, SC in next 2 sts] 6 times. (24)
Rnds 5-12: SC in each st around. (24)
Do not fasten off.
For the next rounds, I HIGHLY recommend watching the video tutorial to learn this part. It can get tricky with changing color back and forth so many times.
Next rounds
Attaching the pieces:
Insert stitch marker
Rnd 1: With White, SC in 6 sts, Attach Gray, SC in gray piece only, in 18 sts, change back to white, SC in last 6 sts
Using the gray strand, sew the seam of the mouth closed. (See video tutorial for visual instructions)
Rnd 2: SC in first 6 sts, Change to Gray, SC in 18 sts on the gray piece, Change to White, SC in last 6 sts.
Rnds 3-15: Repeat Round 2 for however long you want to make the sleeve part.
Fasten off, weave in all ends.
See video tutorial to learn how to cut and sew in all the ends.
Dorsal fin:
Ch 2
Rnd 1: 6 SC in 2nd Ch from hook. (6)
Rnd 2: SC in each st around. (6)
Rnd 3: 2 SC in each st around. (12)
Rnd 4: SC in each st around. (12)
Rnd 5: [2SC in next st, SC in next st] 6 times. (18)
Rnd 6: SC in each st around.
Fasten off with long tail for sewing.
Red Mouth Insert:
Ch 2
Rnd 1: 6 SC in 2nd Ch from hook
Rnd 2: 2 SC in each st around. (12)
Rnd 3: [2SC in next st, SC in next st] 6 times. (18)
Rnd 4: [2SC in next st, SC in next 2 sts] 6 times. (24)
Rnd 5: [2 SC in next st, SC in next 3 sts] 6 times. (30)
Fasten off with long tail for sewing.
Pectoral Fins:
Ch 2
Rnd 1: 6 SC in 2nd Ch from hook
Rnd 2: 2 SC in each st around. (12)
Rnd 3: SC in each st around. (12)
Rnd 4: [2SC in next st, SC in next st] 6 times. (18)
Rnd 5-6: SC in each st around. (18)
Fasten off with long tail for sewing.
Teeth: Make 2 sets
With White
Ch 33
Row 1: *SC in 2nd Ch from hook, HDC in next, Sk 2 chs, Sl st in next, Ch 3, repeat from * across. Sl st in last ch, Fasten off with long tail for sewing.
Eyes: With black:
Ch 2
Rnd 1: 6 SC in 2nd Ch from hook
Assembly:
Sew fins, Mouth, Teeth, and eyes to puppet. See video tutorial for visual guide and use photos for location.

If you have any confusion or difficulty with reading this pattern, please watch the video tutorial to have visual instructions.
Enjoy!!
This post contains affiliate links, which means if you click on the link and buy from the linked websites, I will receive a small percentage of the value of your order. The amount you pay is not changed.
The yarn provided for this pattern is courtesy of Red Heart Yarns
Like this shark puppet? Try the Shark Bag!!


