Skip to content
YARNutopia & M0re
All things Yarn Related: Crochet, DIY, and Crafts
Blog
365 Days of Granny Squares
Stitch Gallery & Glossary
Crochet Video Tutorials
Frequently Asked Questions
Crochet Glossary: Learn the Lingo
Contact
Search
Search
christmas
YARNutoia & More
Crafting Over the Weekend: A Stay-Home Retreat
Happy Halloween 2024 – PLUS FREE Crochet Pattern
FREE Written Crochet Pattern: New Year, New Me Chunky Hat
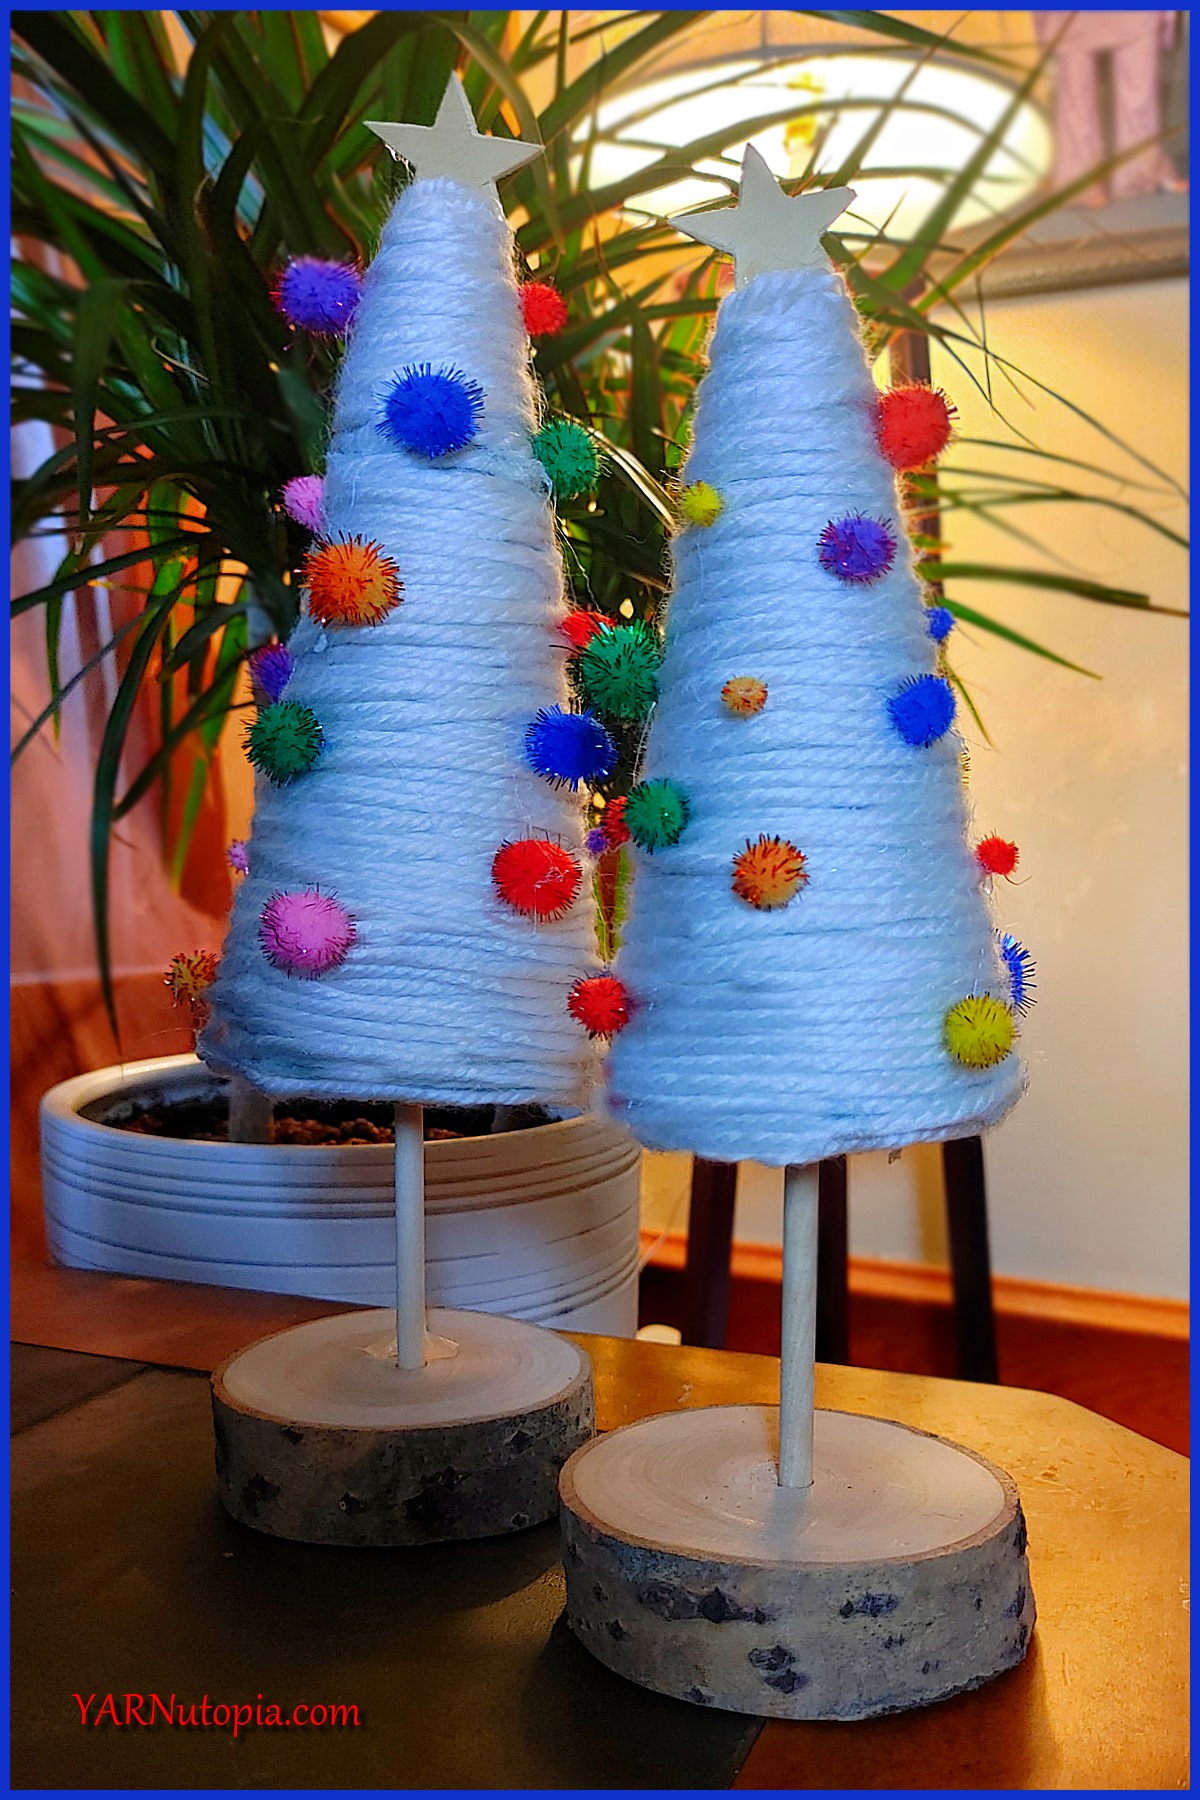
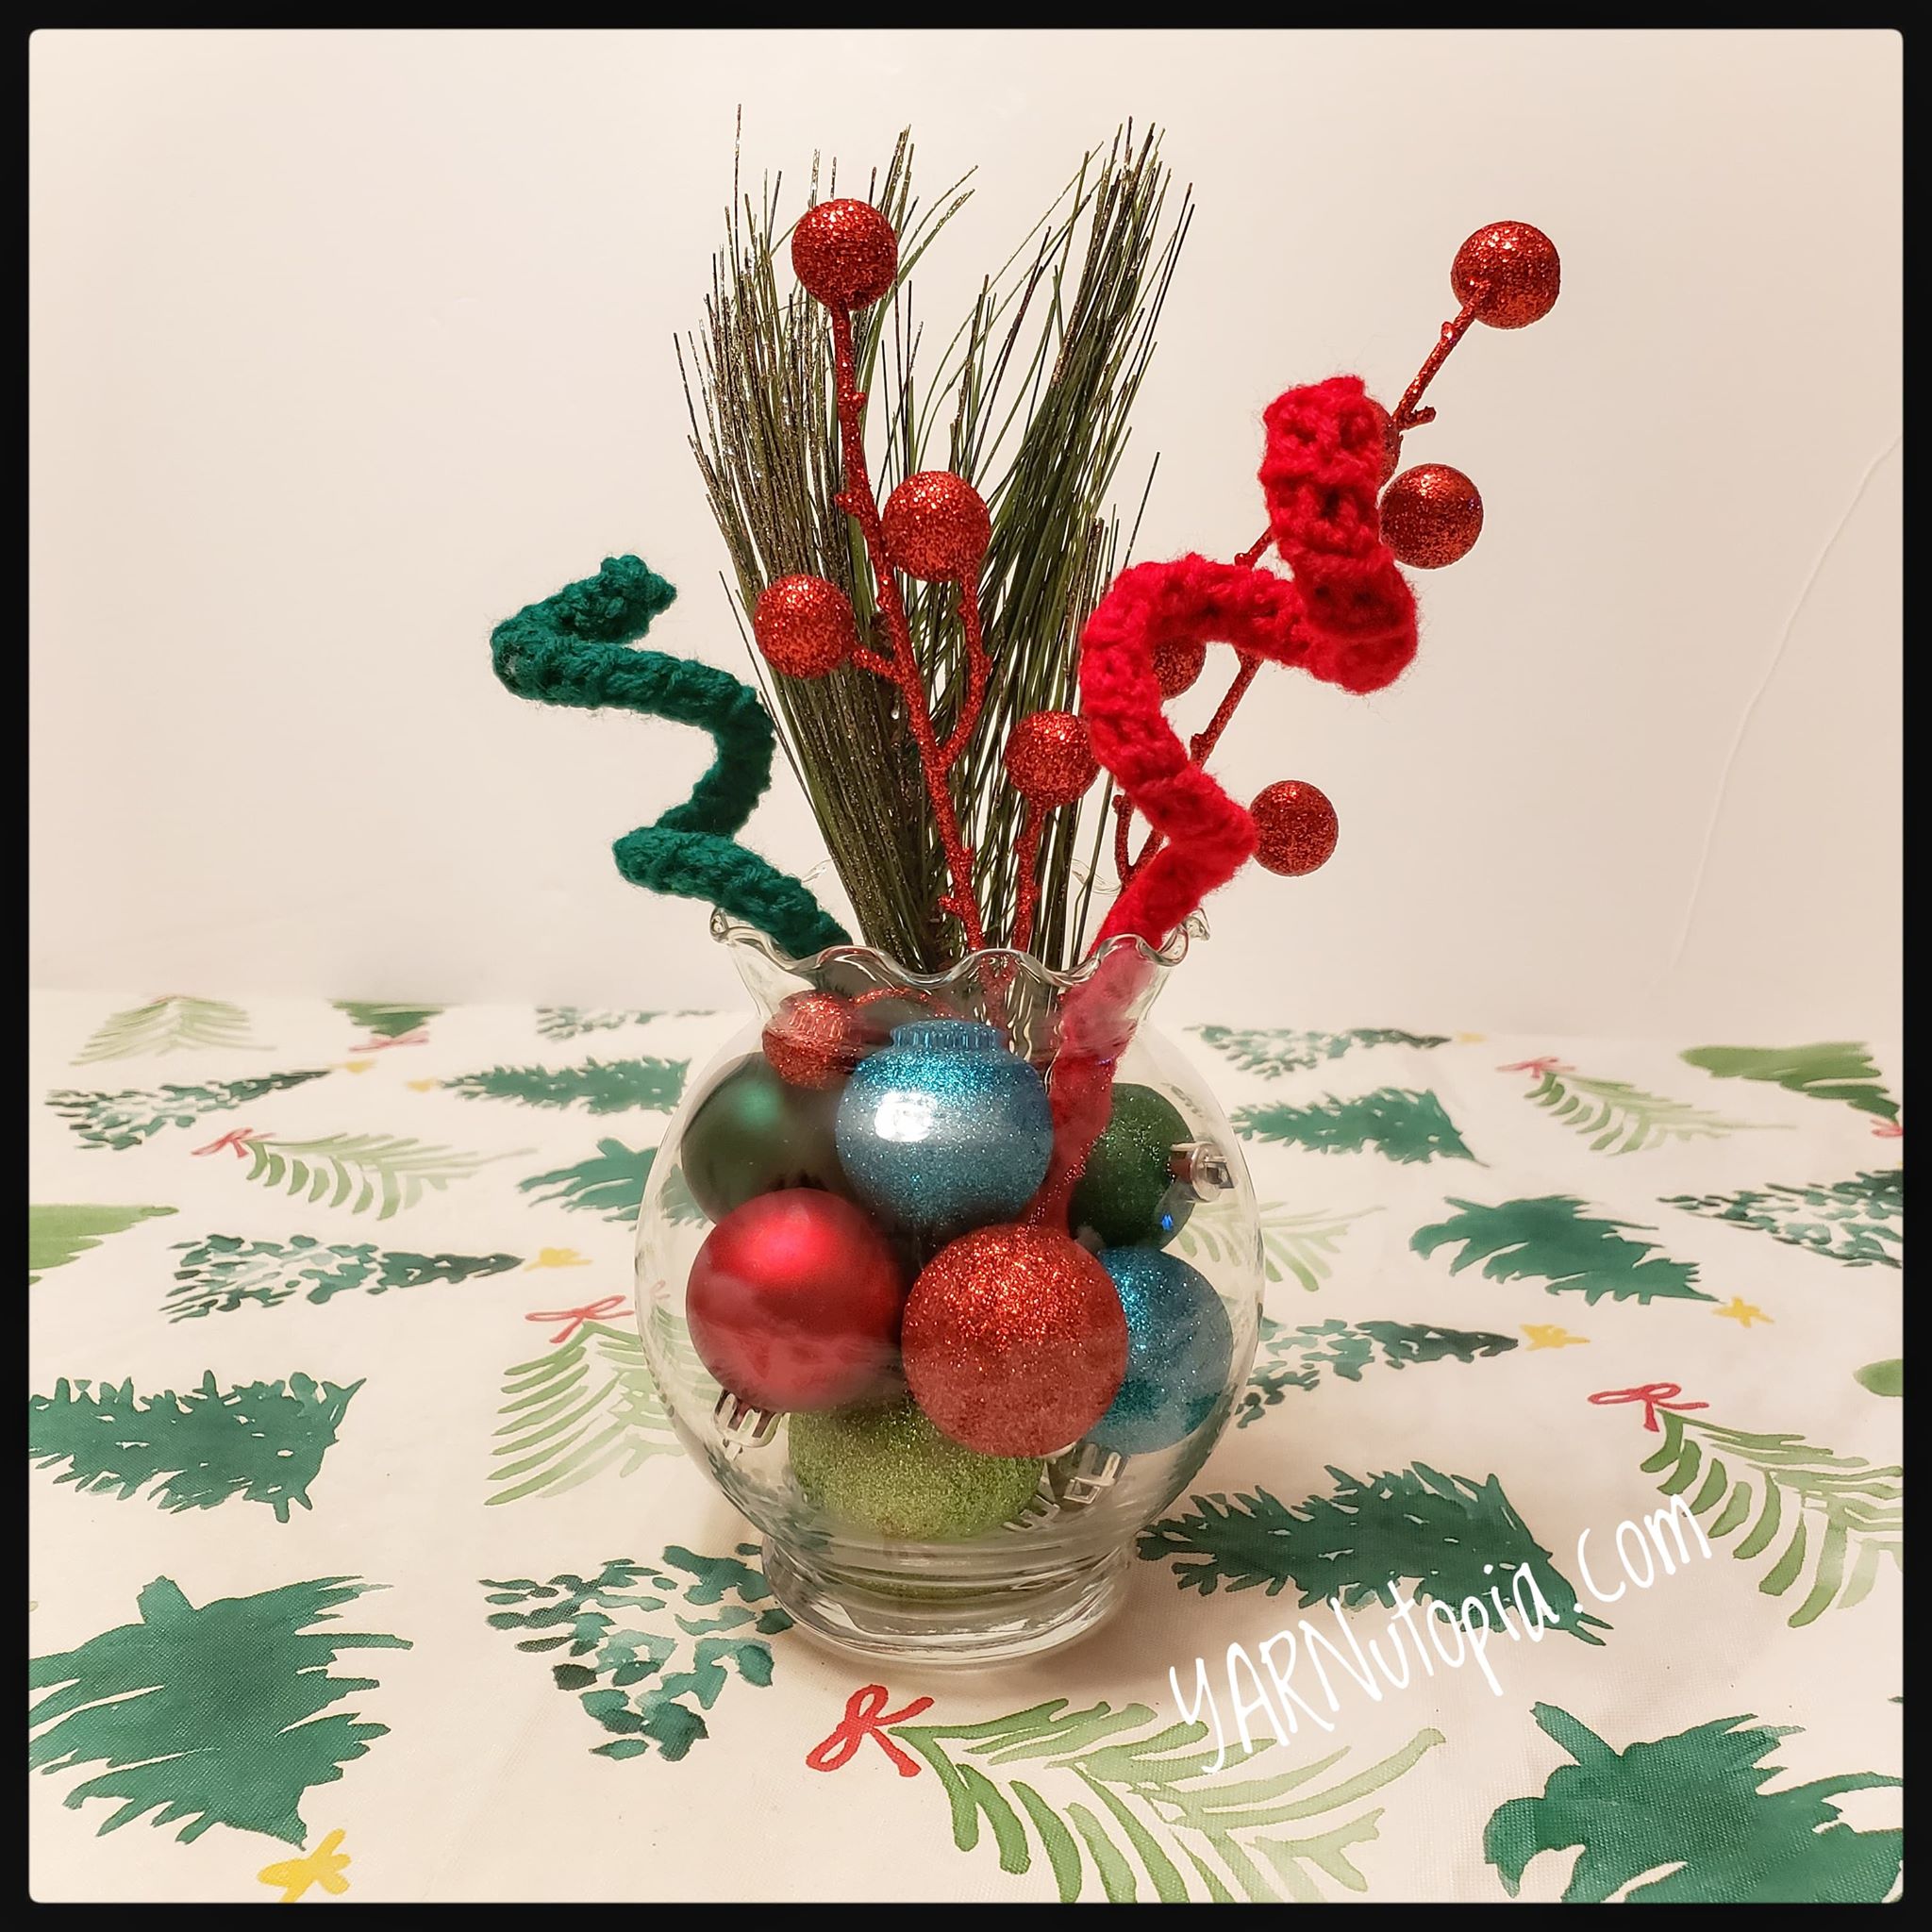
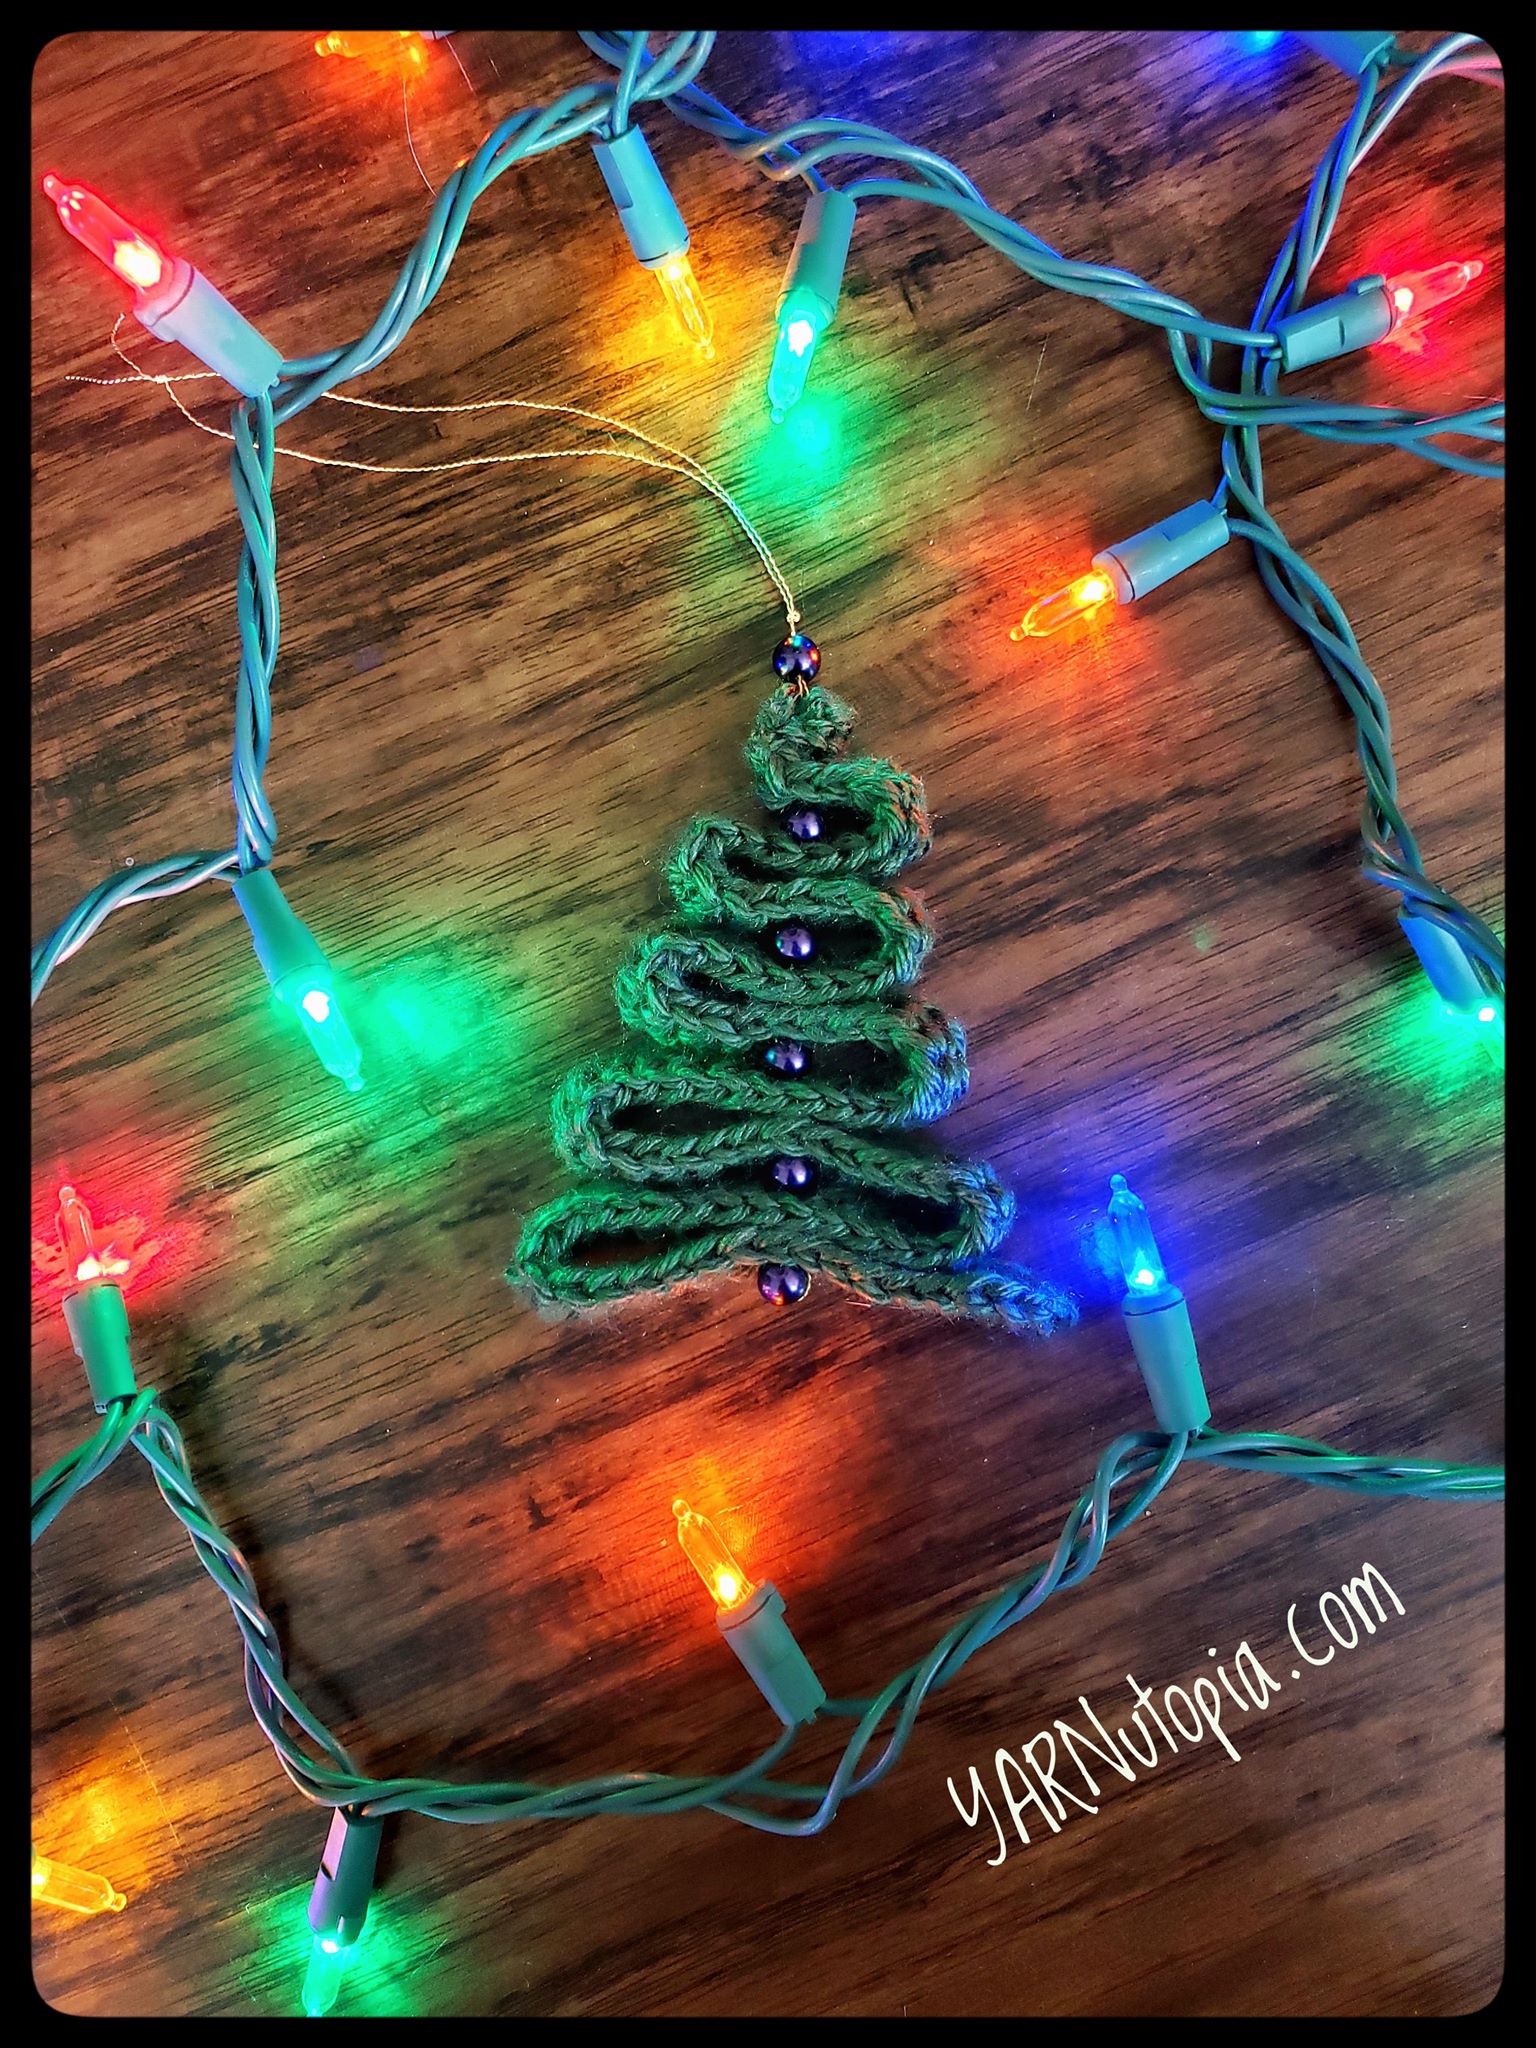
12 Days of Christmas: Yarn Art Jingle Trees
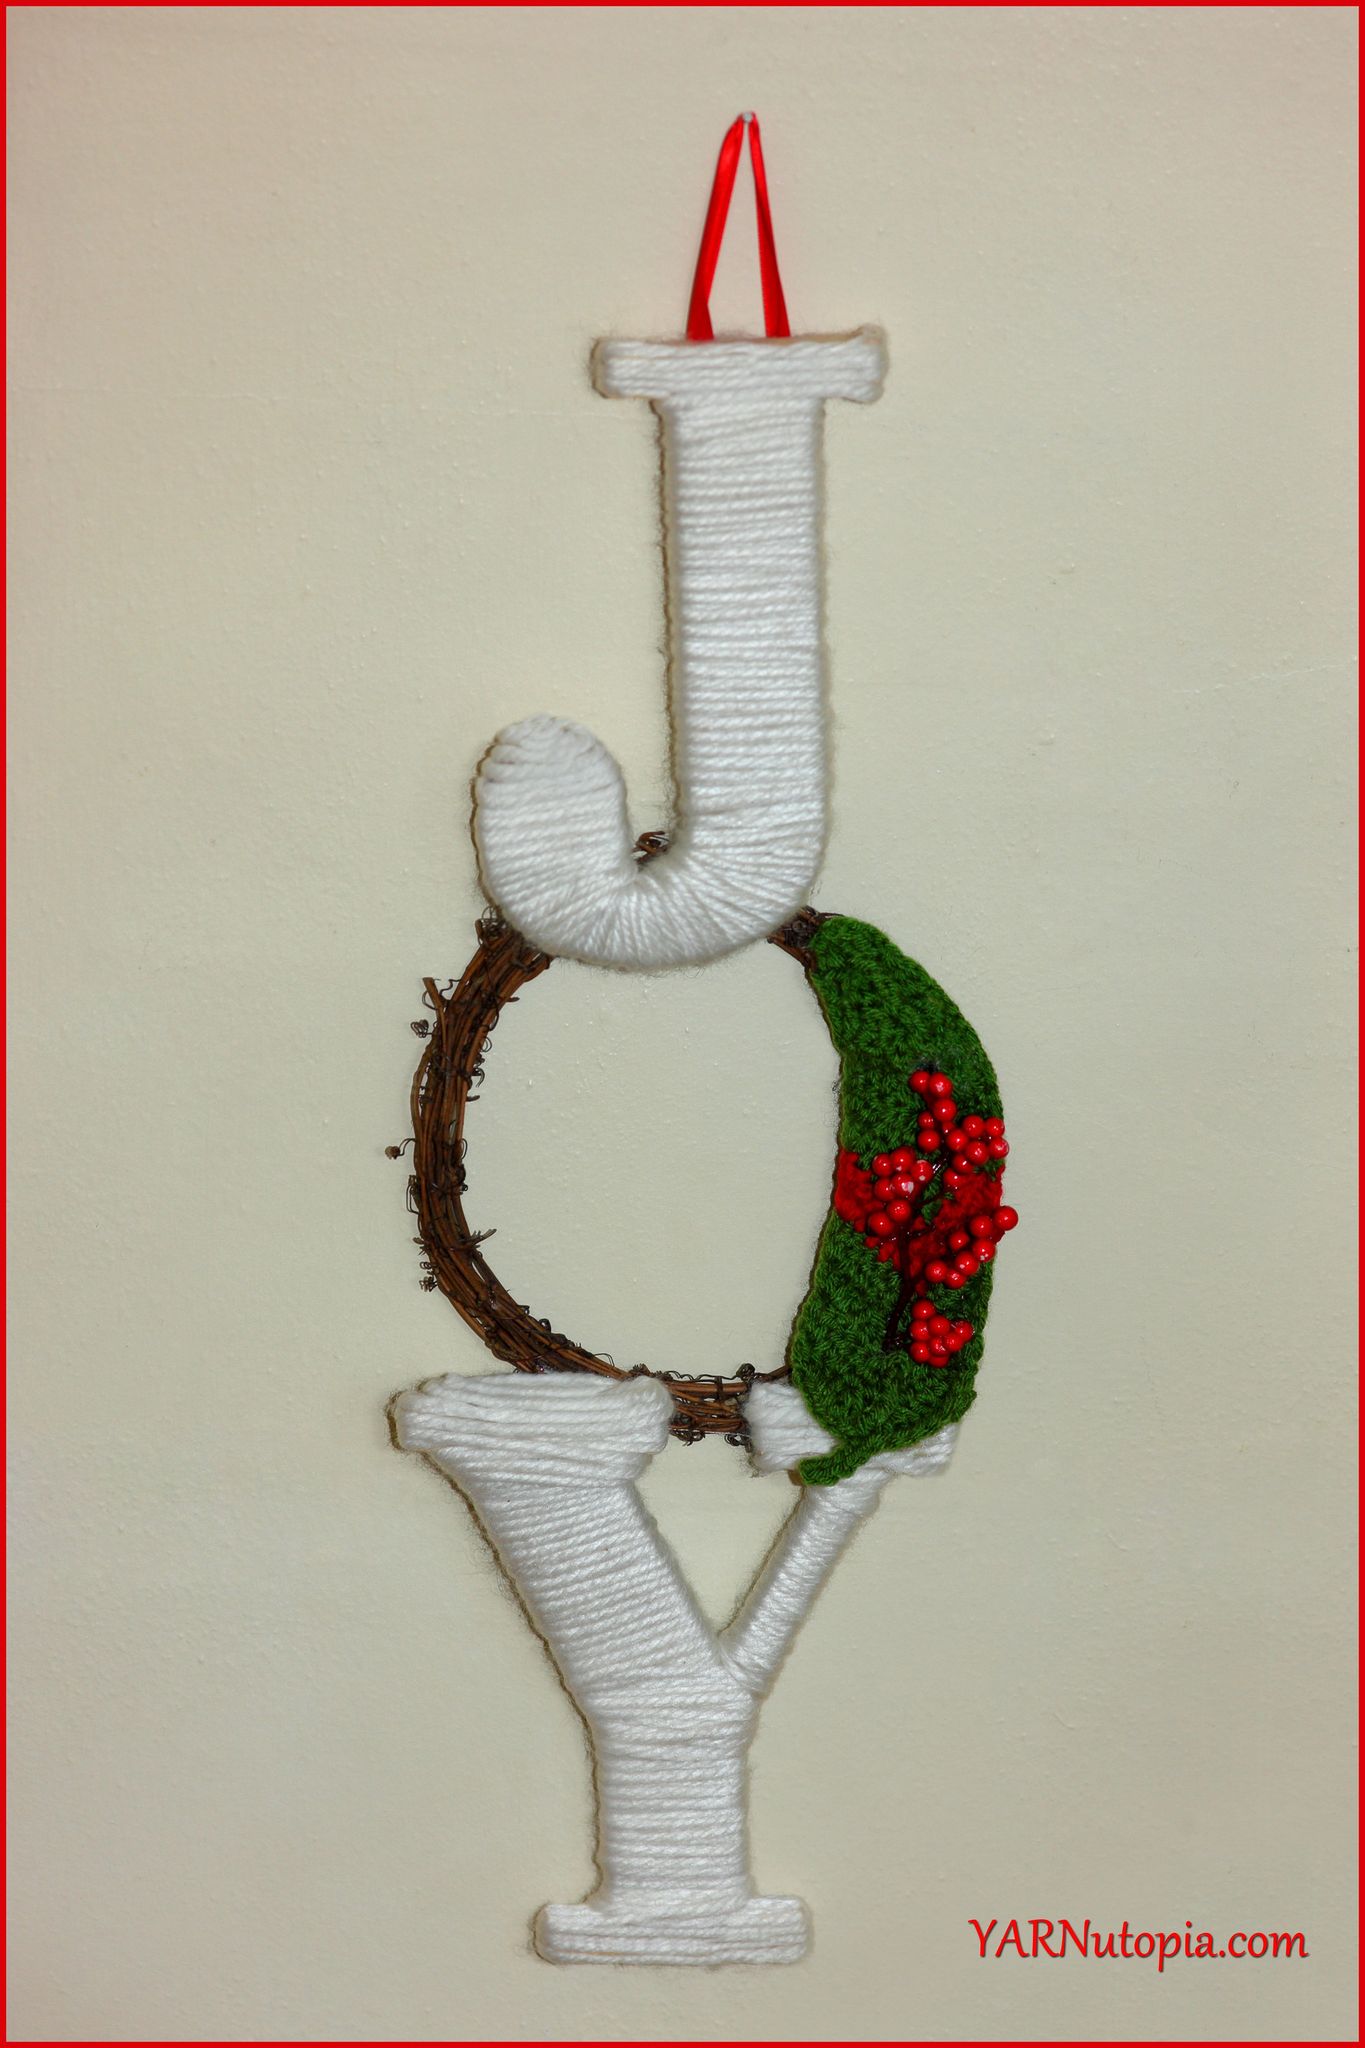
12 Days of Christmas: Festive Holiday JOY Wall Hanging (Photo Tutorial)
12 Days of Christmas: Shell Stitch Fingerless Gloves FREE CROCHET PATTERN
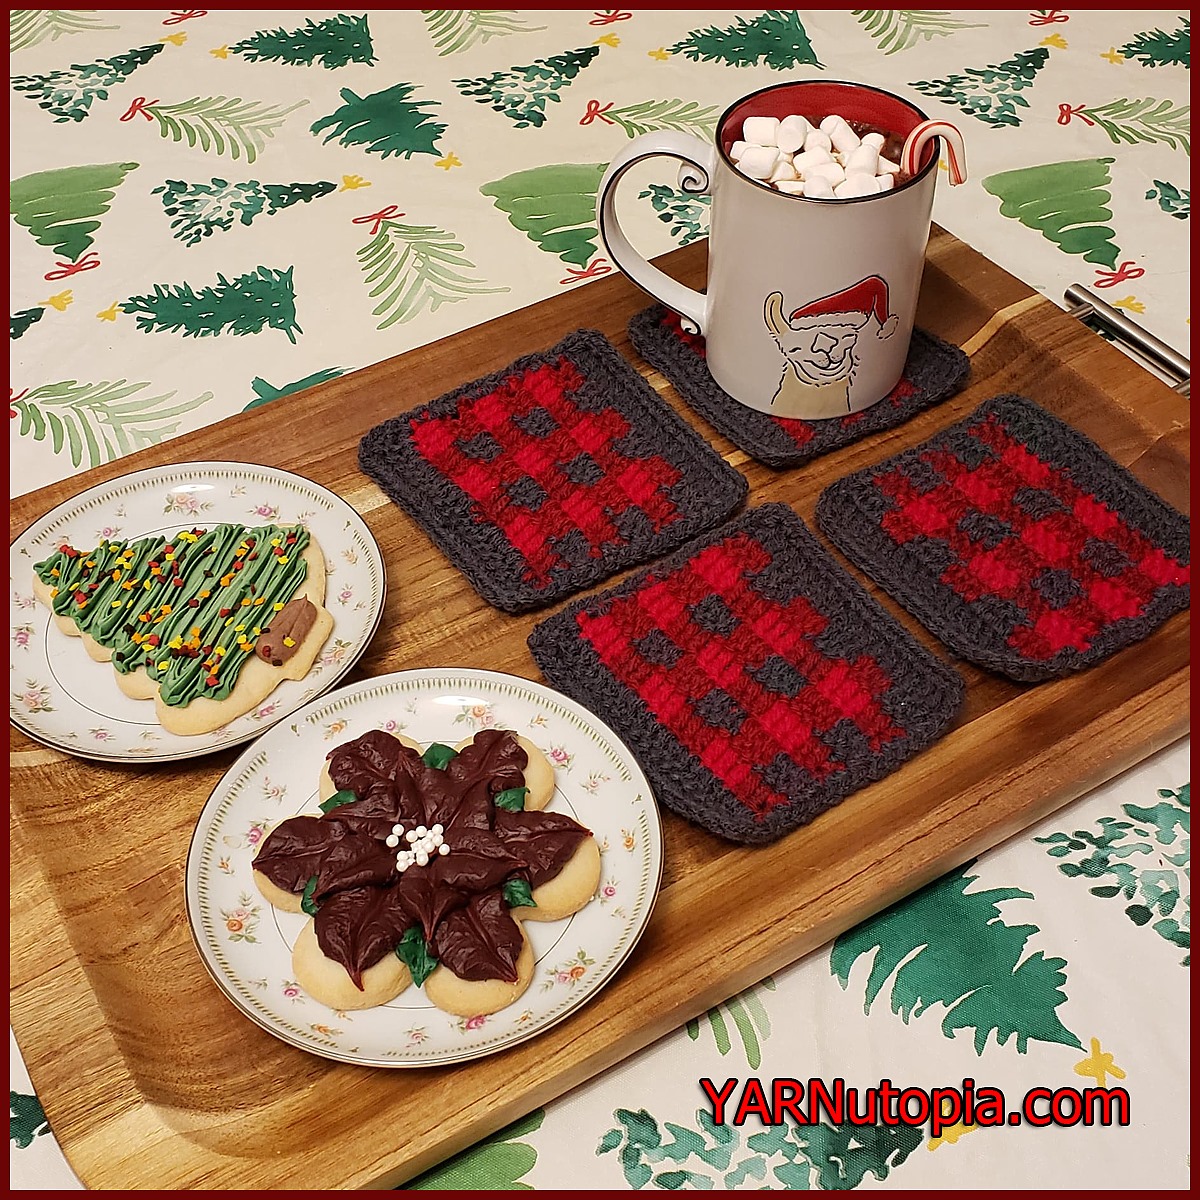
12 Days of Christmas: Snowman Coasters
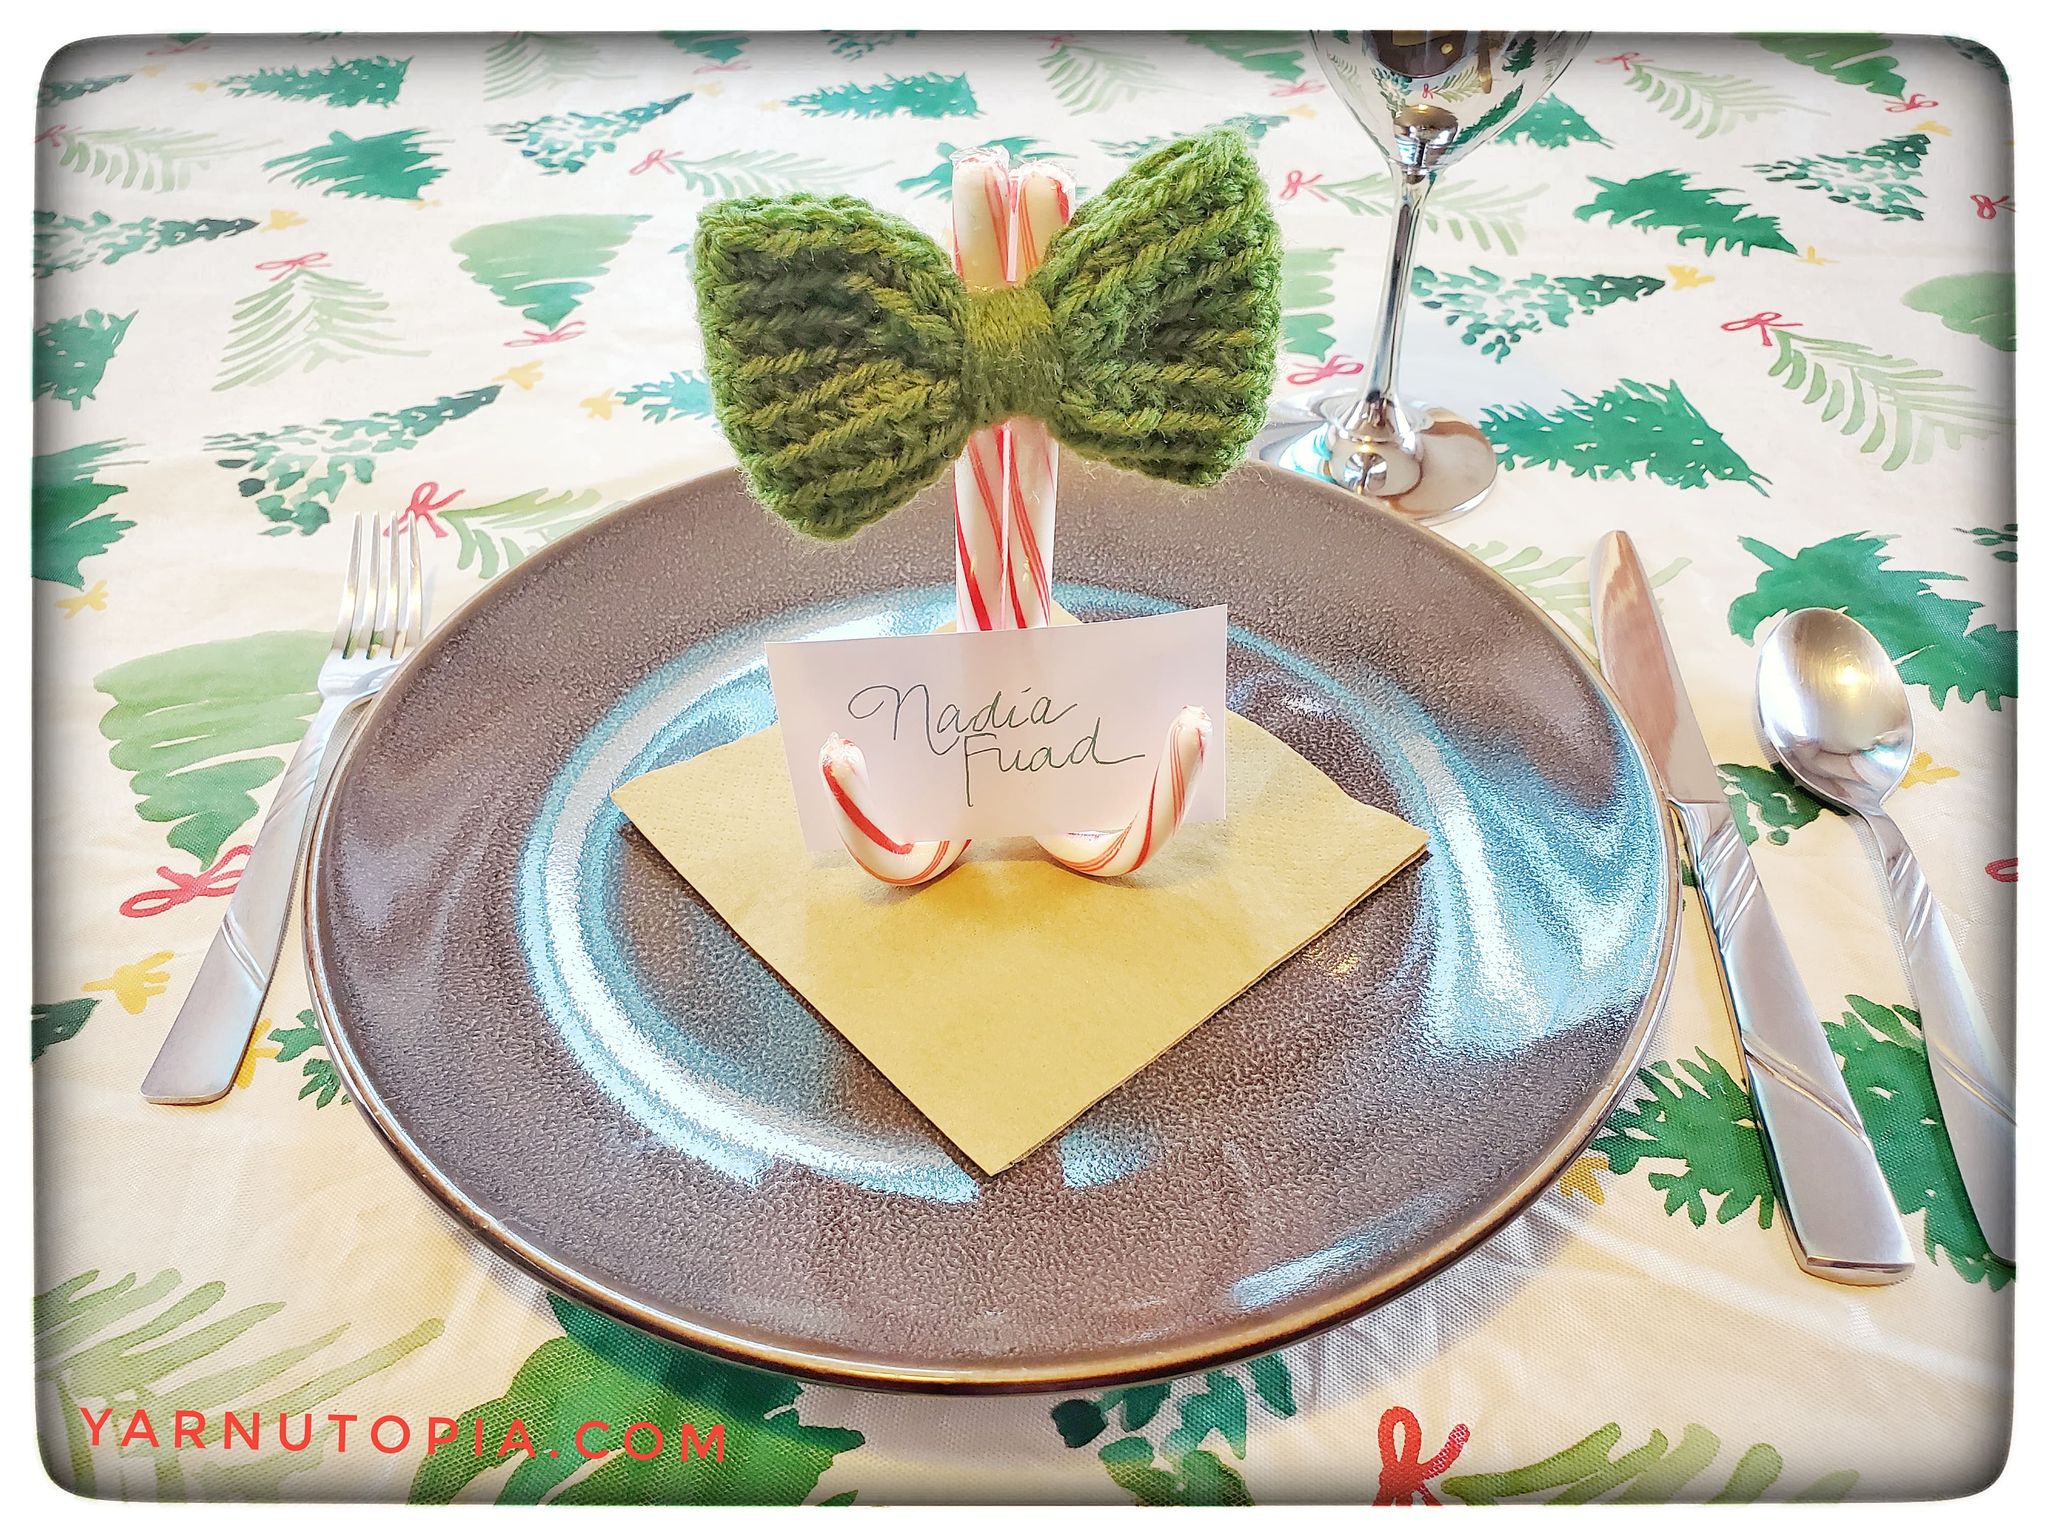
12 Days of Christmas: Candy Cane Place-card Holder with a Bow
12 Days of Christmas 2019
12 Days of Christmas: Simple Stocking Hat – FREE Crochet Video Tutorial
12 Days of Christmas: Simple Stocking Hat – FREE Written Crochet Pattern
12 Days of Christmas: Bow & Bauble Door Hanging – Photo Tutorial
12 Days of Christmas: Buffalo Plaid Coasters – FREE Crochet Video Tutorial
12 Days of Christmas: Buffalo Plaid Coasters – FREE Written Crochet Pattern
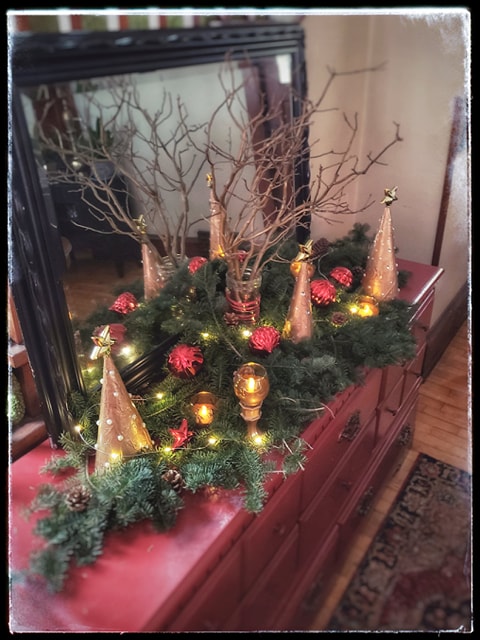
12 Days of Christmas: Holiday Centerpiece
St. Jude’s & Dollar General Holiday Decorating Challenge Collab
12 Days of Christmas: Candy Curl Swirl Ornament – FREE Written Crochet Pattern and Video Tutorial
12 Days of Christmas: Rustic Wall Hanging – Photo & Written Tutorial
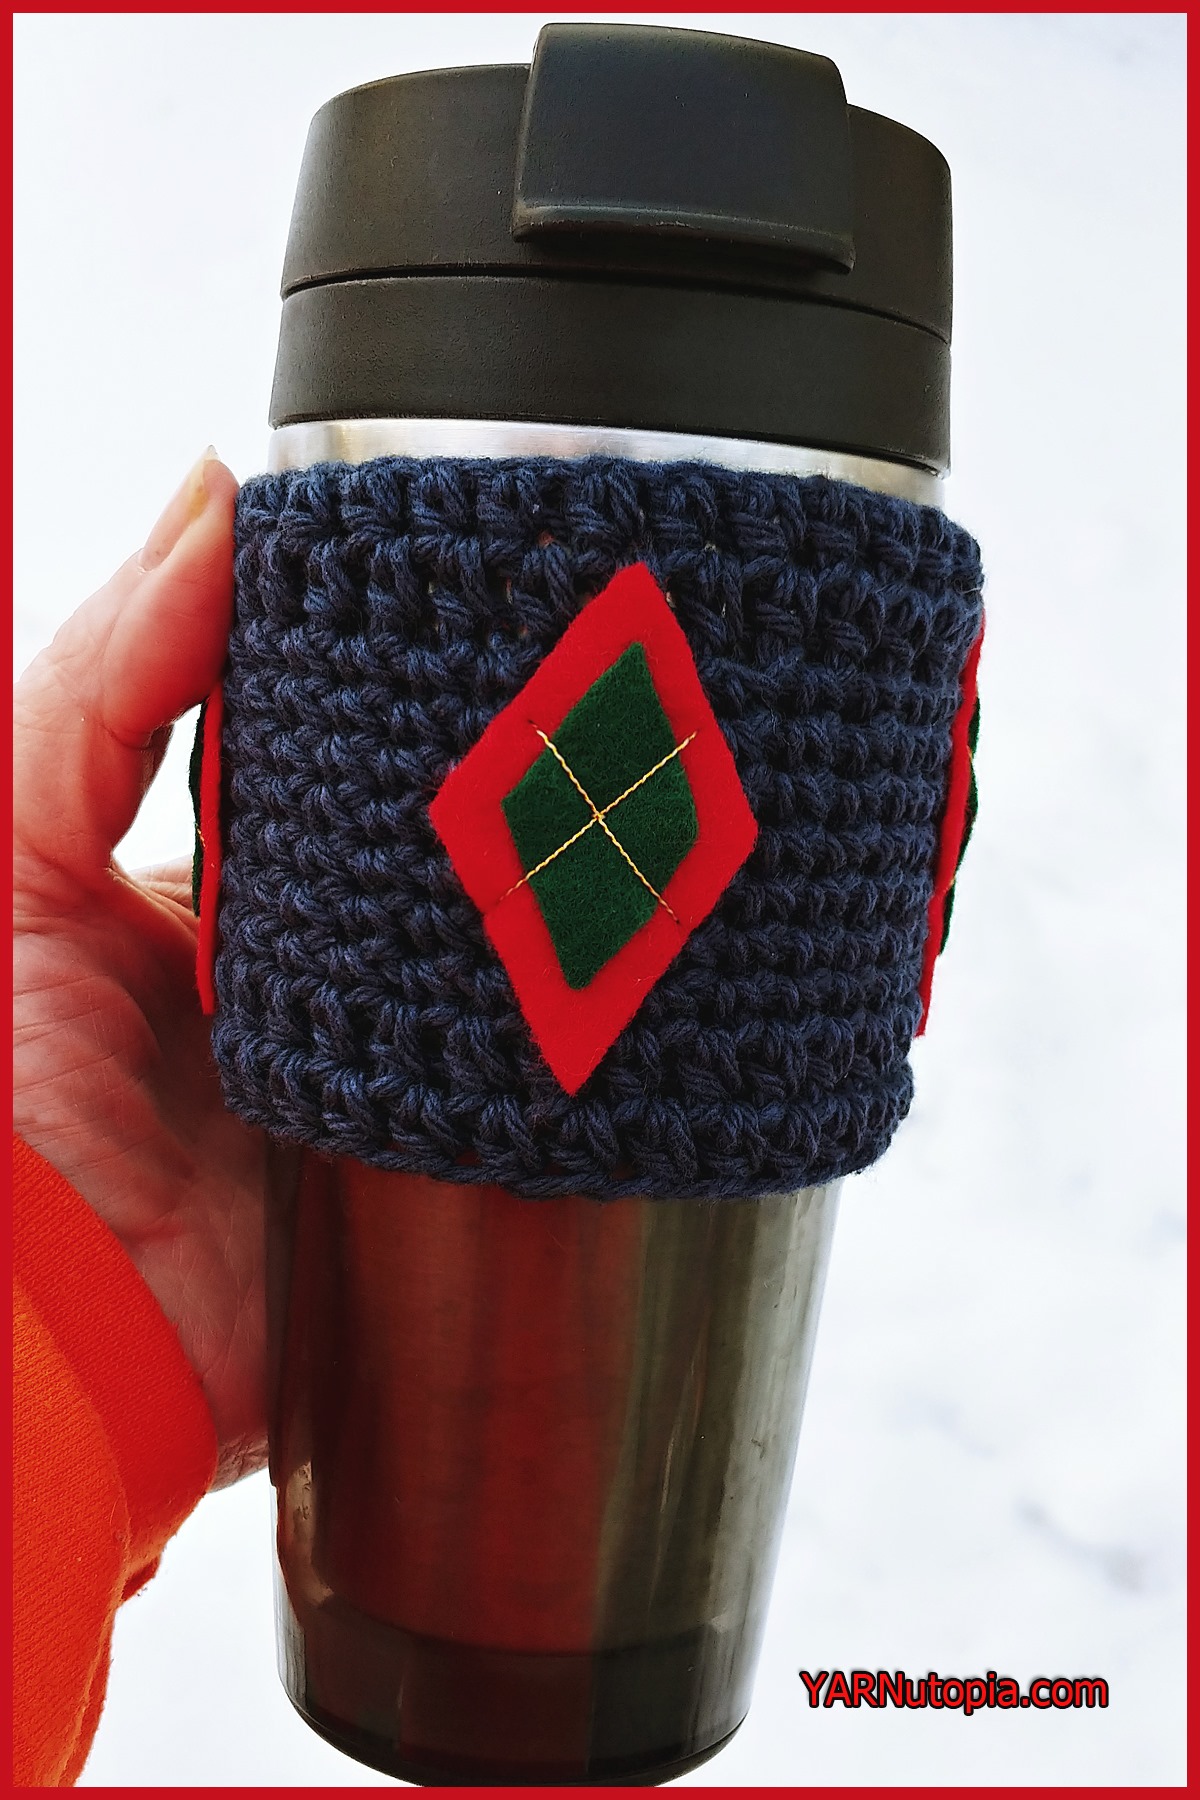
12 Days of Christmas: Argyle Cup Cozy – FREE Crochet Video Tutorial
12 Days of Christmas: Argyle Cup Cozy – FREE Written Crochet Pattern
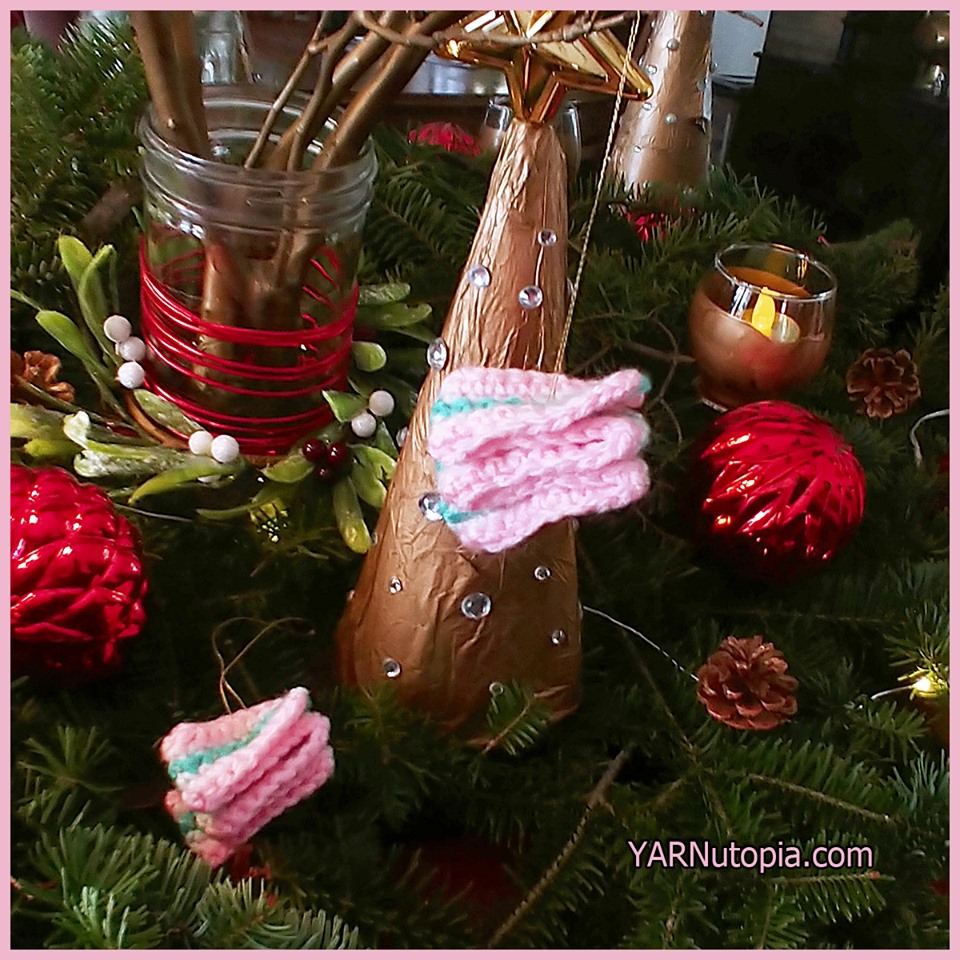
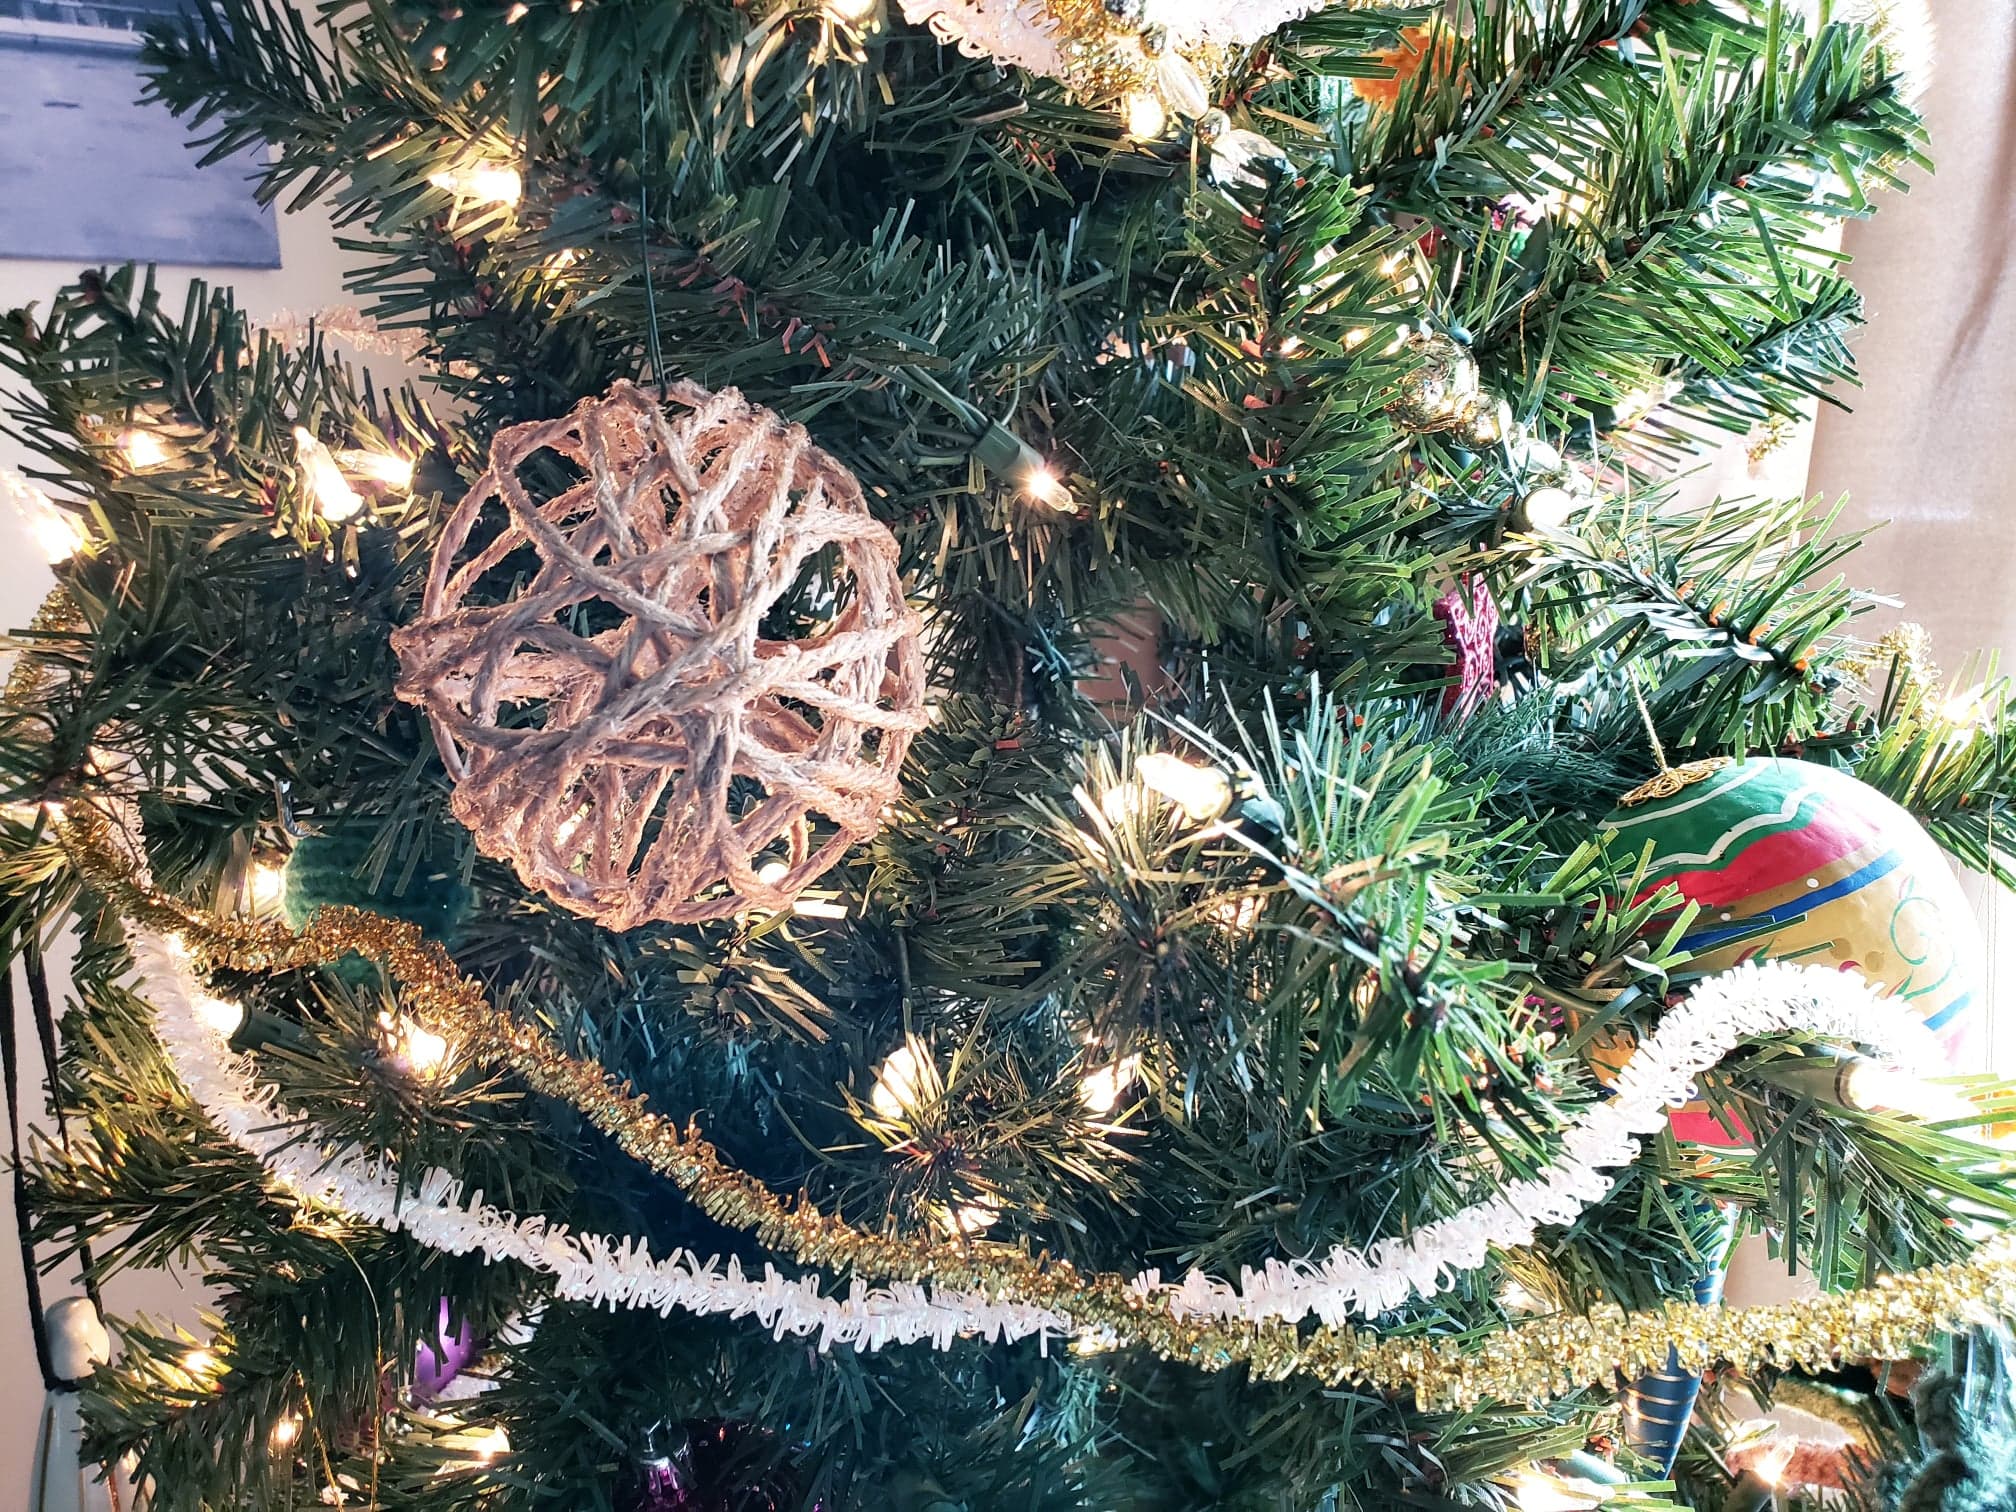
12 Days of Christmas: Rustic Holiday Decoration – Step by Step Photo Tutorial
12 Days of Christmas: Beanie with Bling – FREE Crochet Video Tutorial
12 Days of Christmas: Beanie with Bling – FREE Written Crochet Pattern
12 Days of Christmas: Winding Ribbon Tree Ornament – Photo Tutorial
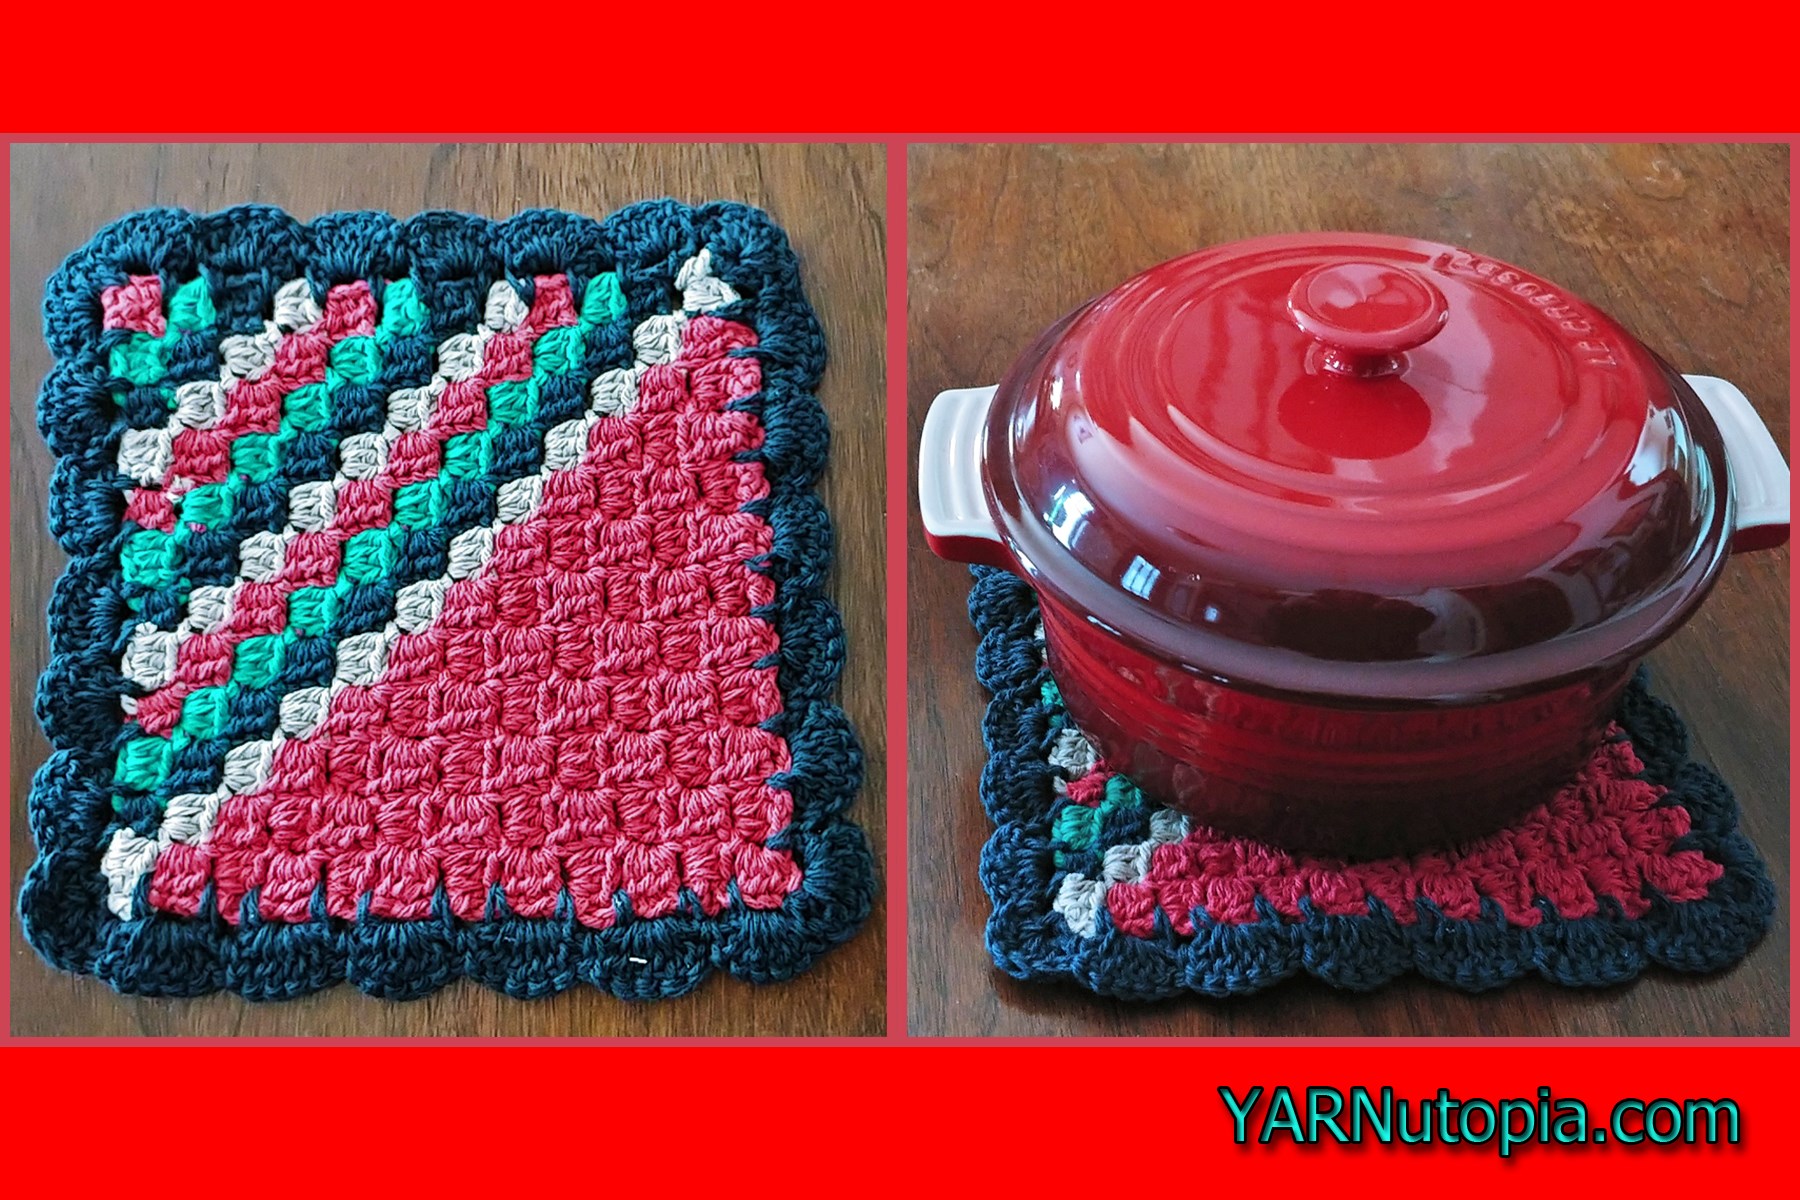
12 Days of Christmas: Corner to Corner (C2C) Holiday Hot Pad – FREE Crochet Video Tutorial
12 Days of Christmas: Corner to Corner (C2C) Holiday Hot Pad – FREE Written Crochet Pattern
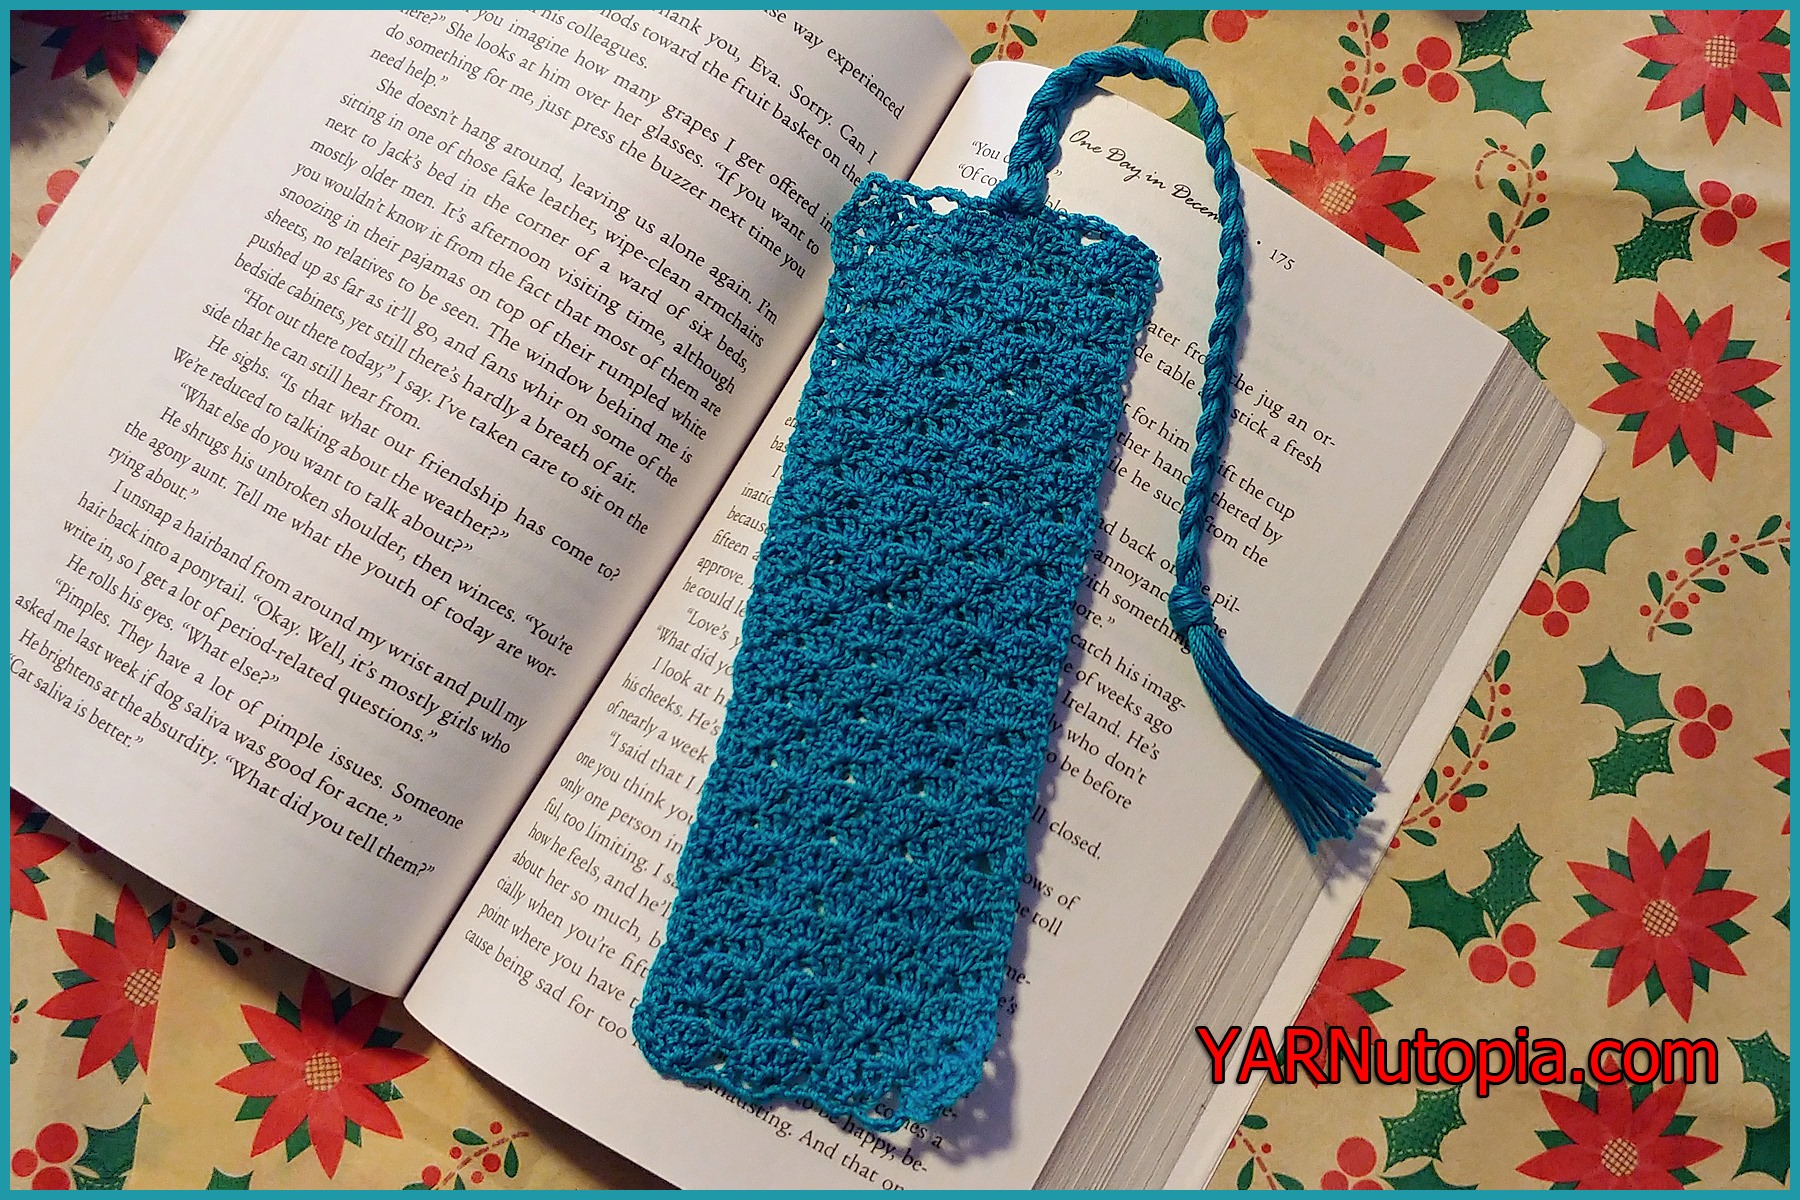
12 Days of Christmas: Lace Shell Bookmark – FREE Crochet Video Tutorial
12 Days of Christmas: Lace Shell Bookmark – FREE Written Crochet Pattern
FREE Crochet Video Tutorial: Family Fair Isle Hat
FREE Written Crochet Pattern: Family Fair Isle Hat
Let’s Play A Game!
Crochet Tutorial: Fair Isle Knee High Socks
Crochet Tutorial: Simple Infant Booties
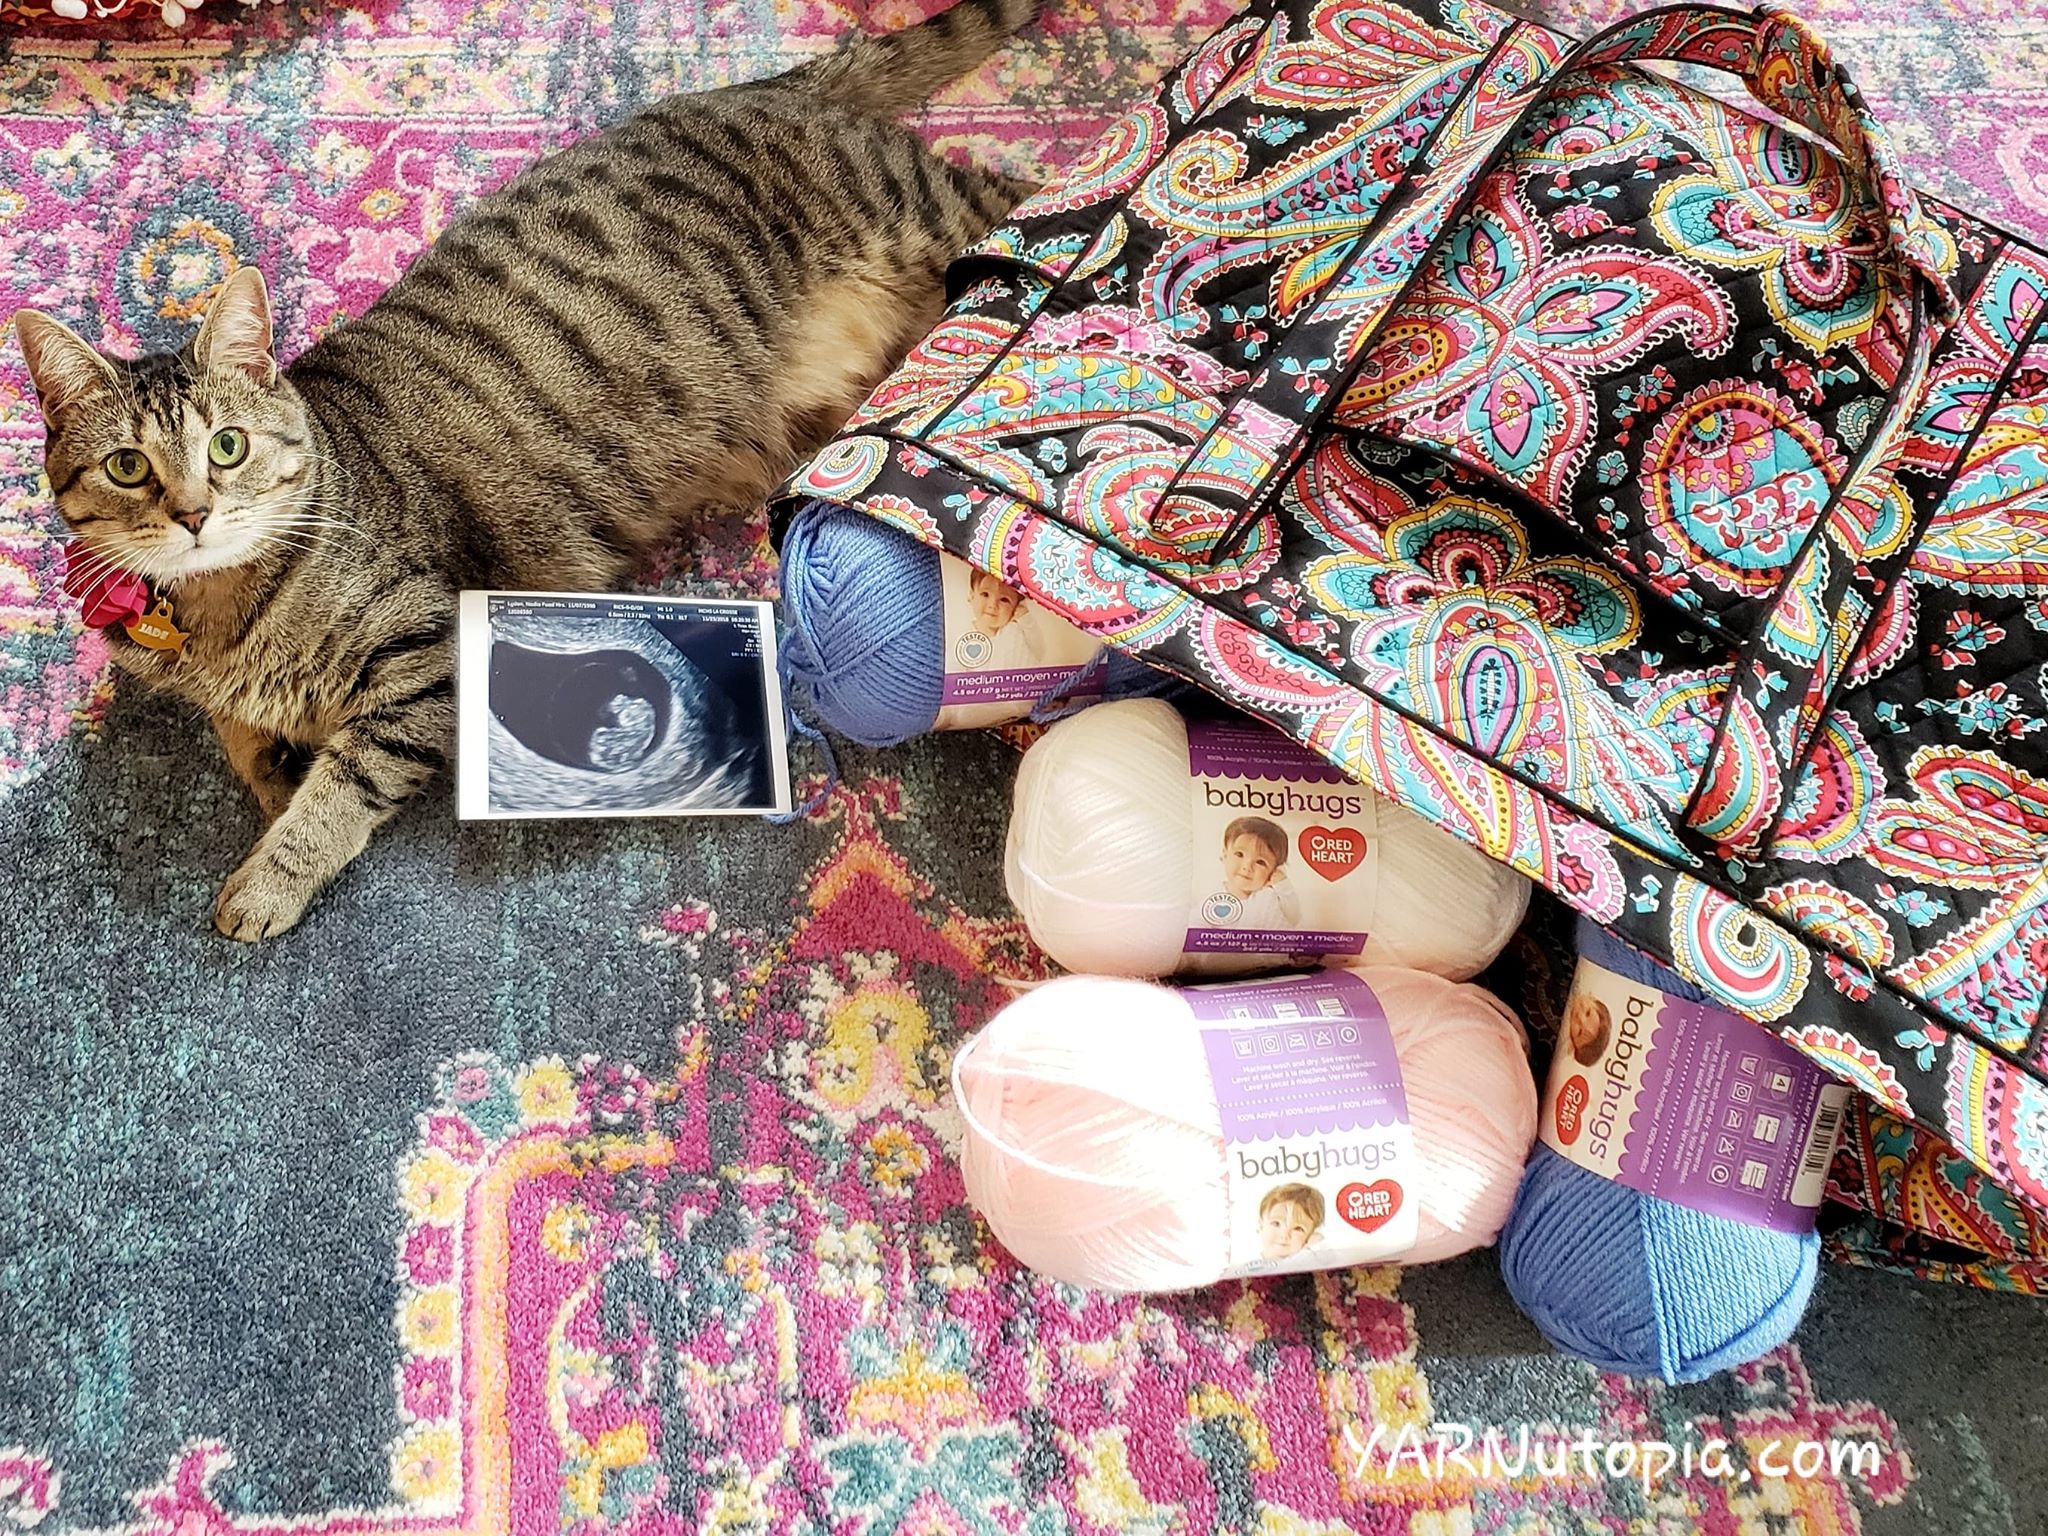
The Cat’s Out of the (YARN) Bag!
Memory Lane 2018
12 Days of Christmas: Holiday Festive Wreath
12 Days of Christmas: Holiday Mitten Gift Card Holder
How to Crochet Tutorial: Rose Flower Headband & Floral Wedding Bouquet
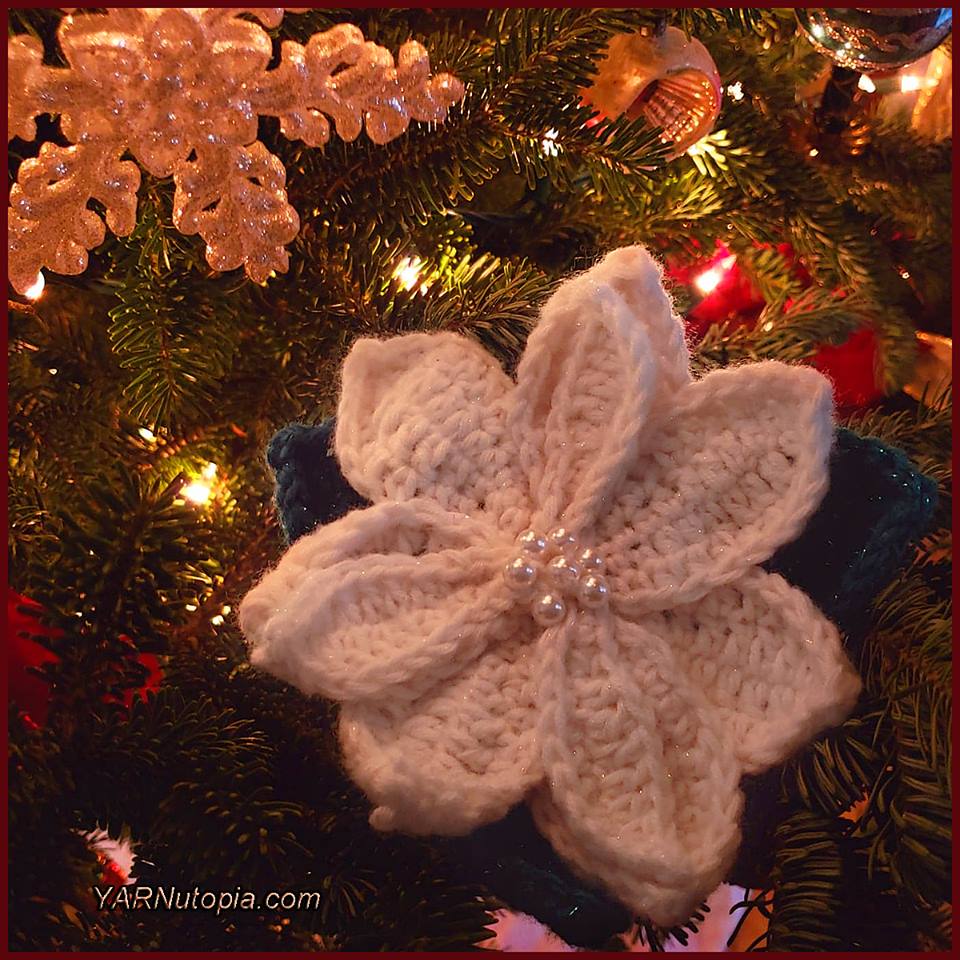
12 Days of Christmas: Poinsettia with Pearls
12 Days of Christmas: Peppermint Candy Garland
12 Days of Christmas: Paw Print Ornament
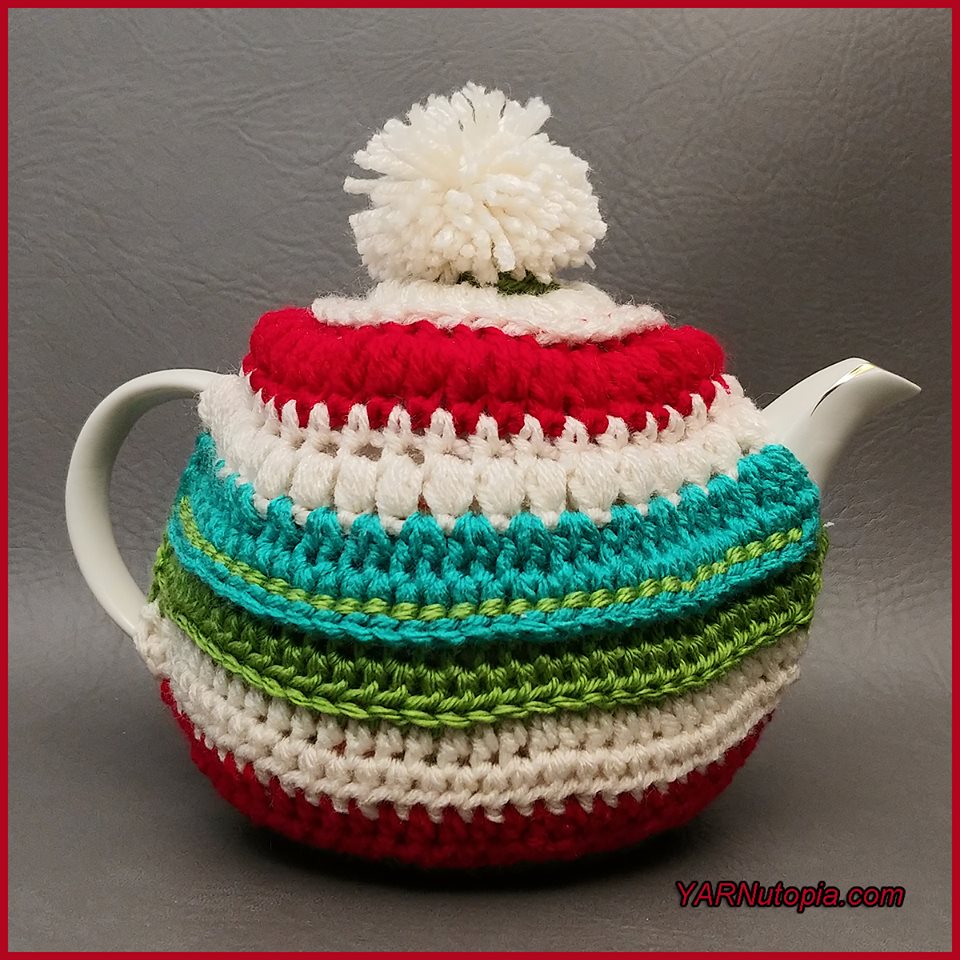
12 Days of Christmas: Festive Teapot Cozy
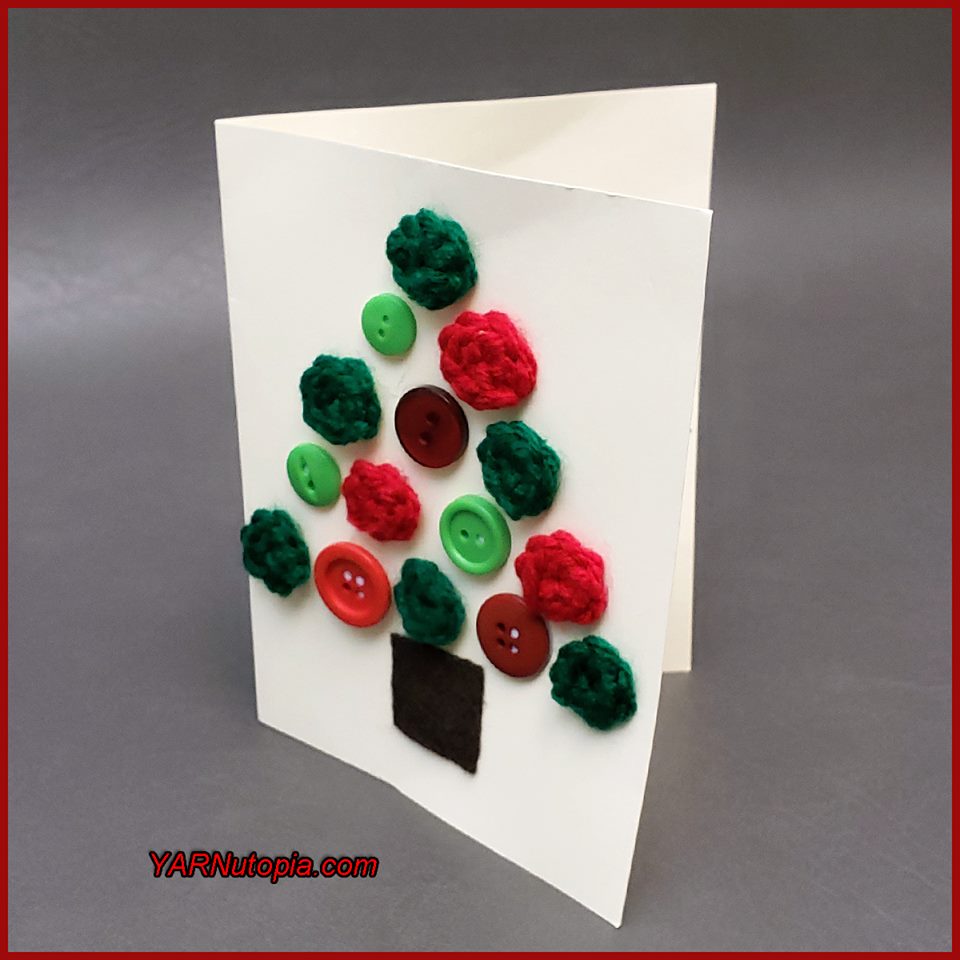
12 Days of Christmas: Christmas Tree Greeting Card
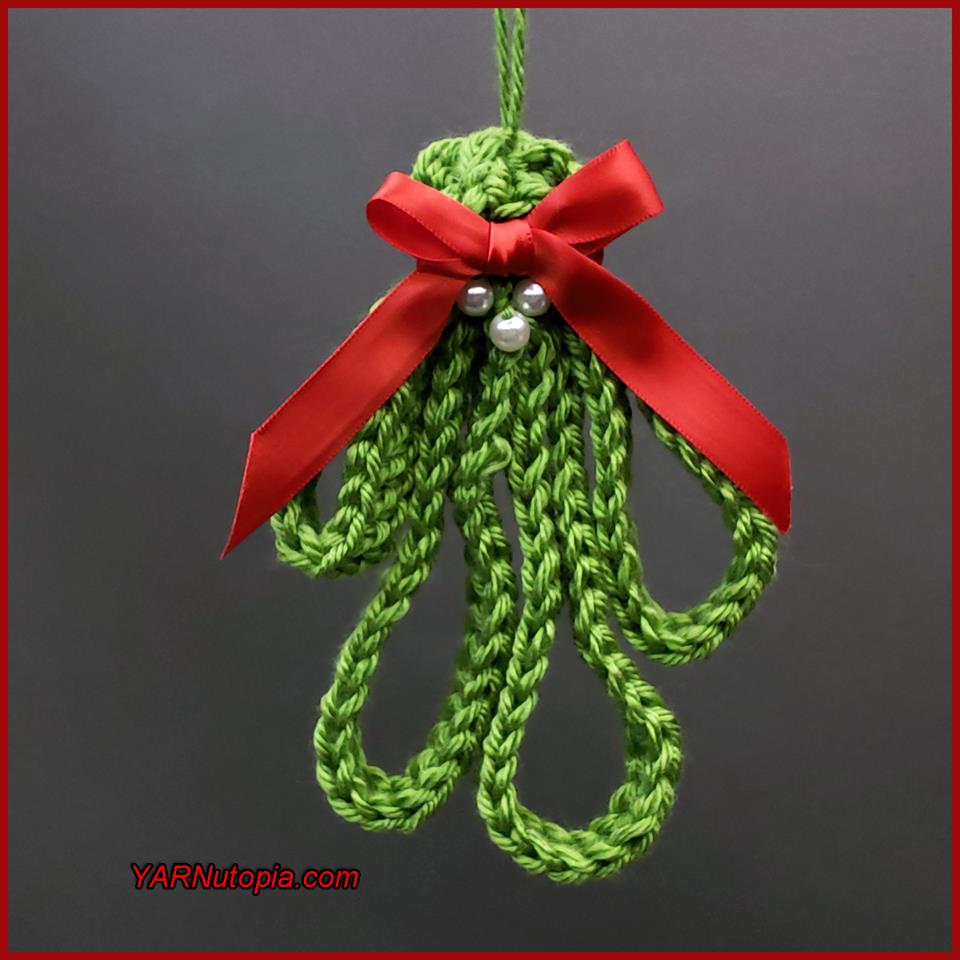
12 Days of Christmas: Mistletoe Sprig
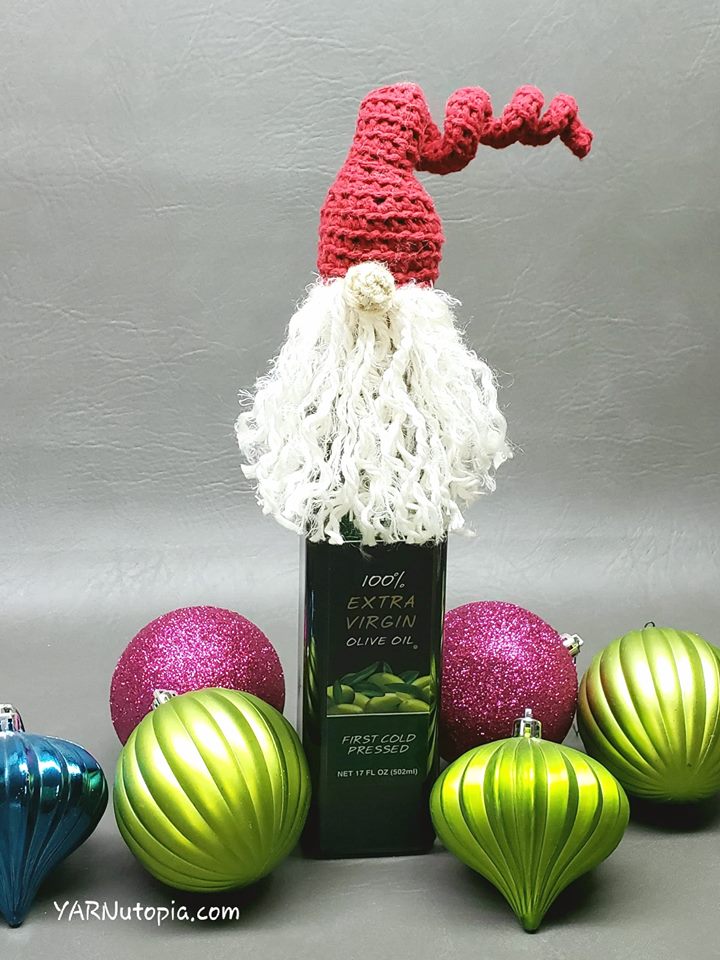
12 Days of Christmas: Santa Bottle Topper
12 Days of Christmas: Christmas Tree Canvas Art
12 Days of Christmas: Polar Bear Cup Cozy
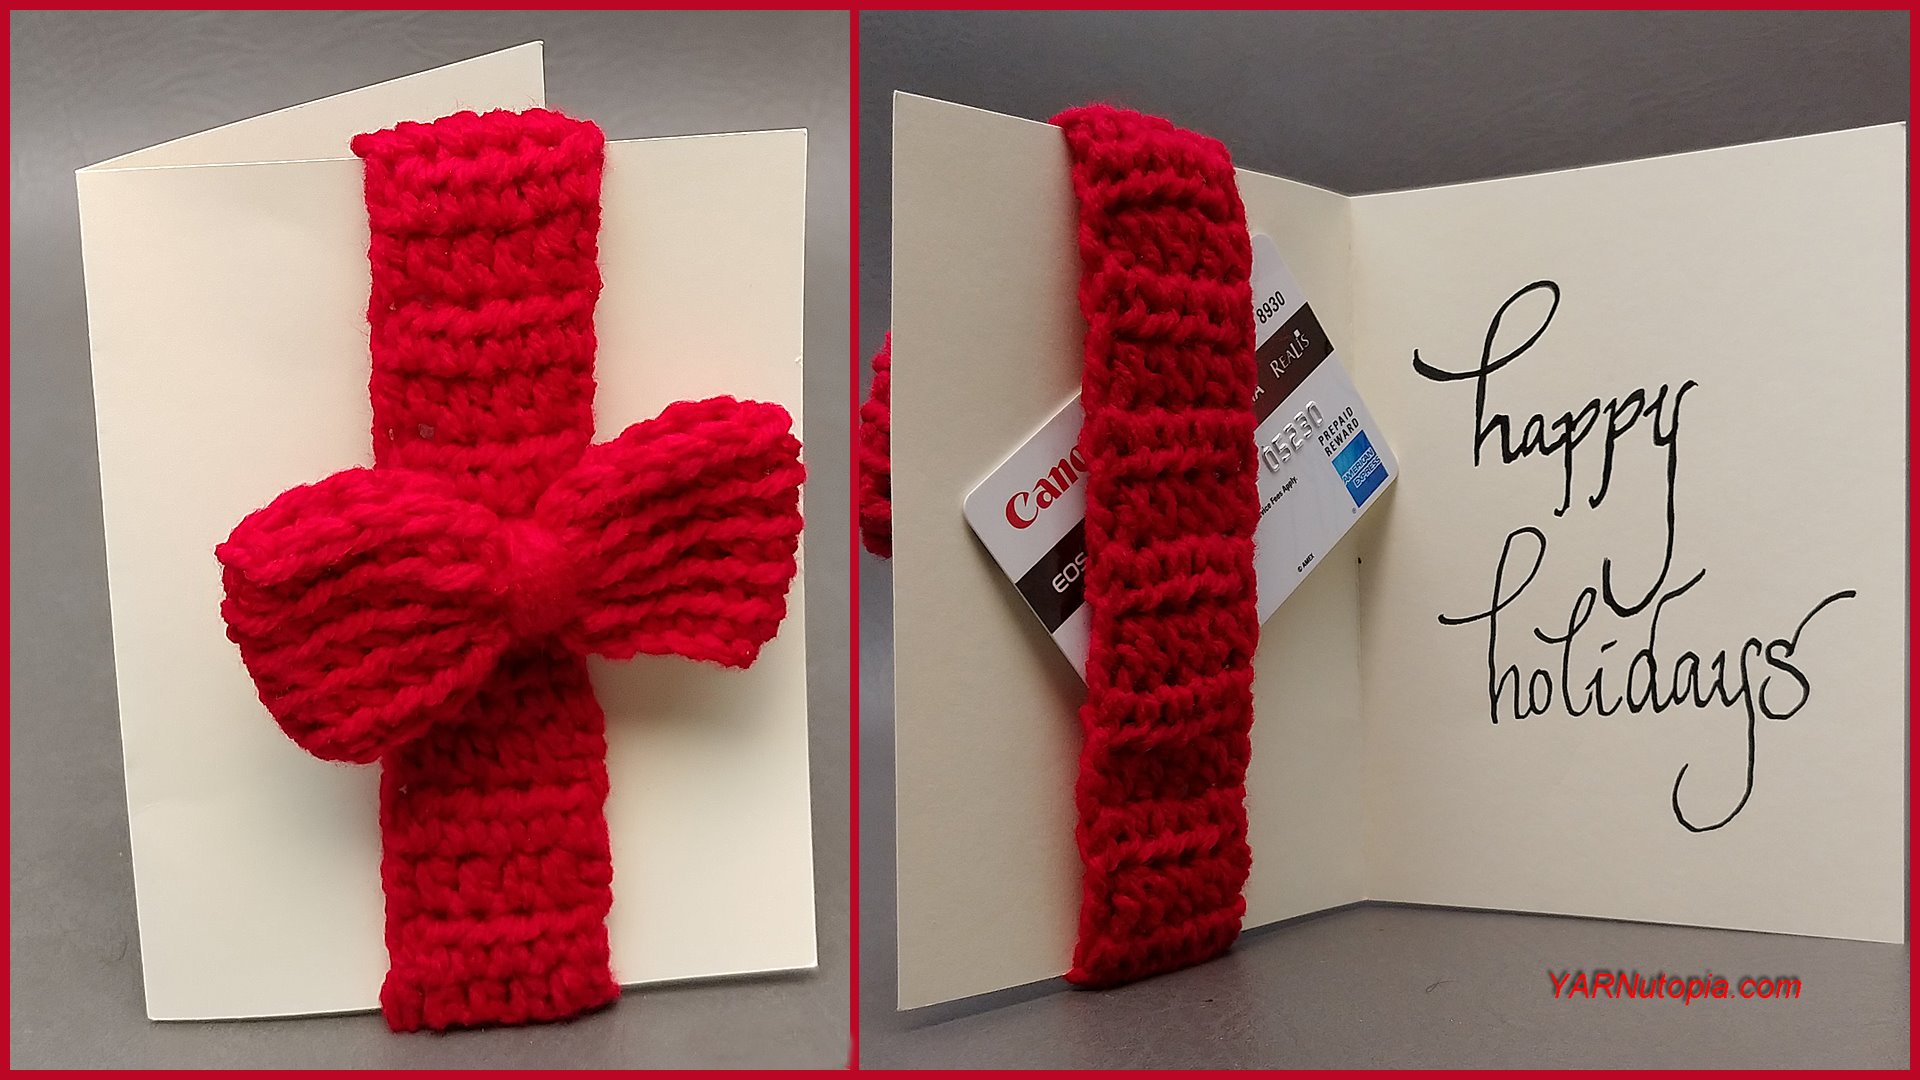
How to Crochet Tutorial: Bow Greeting Card with Gift Card Holder
Crochet Tutorial: Vintage Inspired Pelerine Collar
Video Tutorial: Make Your Mark Bookmark
1
2
3
Next Page
Loading Comments...
Write a Comment...
Email (Required)
Name (Required)
Website