
Hi Yarnutopians!
I hope your month is off to a great start! I love this time of year and all the festivities it brings.
October in Wisconsin has such a wonderful feel to it. The days start to get a bit shorter, colors start to change, and there is a crispness in the air that you feel when those temperatures begin to drop.
This month also brings “spooky season” upon us. If you are like me, you love this month because of Halloween. I love to decorate my home with all the fun and fantastic decor of the season. That is a breeze when you use Mod Podge to add some festive details to your plain items. Below, follow along with us as we demonstrate in photos how to take an ordinary tray that we purchased from the Dollar Tree and change it into a lovely decorative item for the season in a few simple steps! Let’s get started using Mod Podge to decoupage this tray!
Supplies needed:
Tray
Mod Podge (we used satin finish found here)
Scissor
Decorative Napkin
Paint brush or sponge
Paper towels
We start out with a simple plain tray we bought at the local Dollar Tree. This one is a brass-looking plastic tray approximately 14″ x 7″ (outside dimension).

Here we apply the Mod Podge generously to the inside of the tray that we plan to add our detail.


Be sure to cover the area completely with a thick layer of your Mod Podge. It doesn’t matter if it looks messy! It will dry clear and you can clean up the edges later!

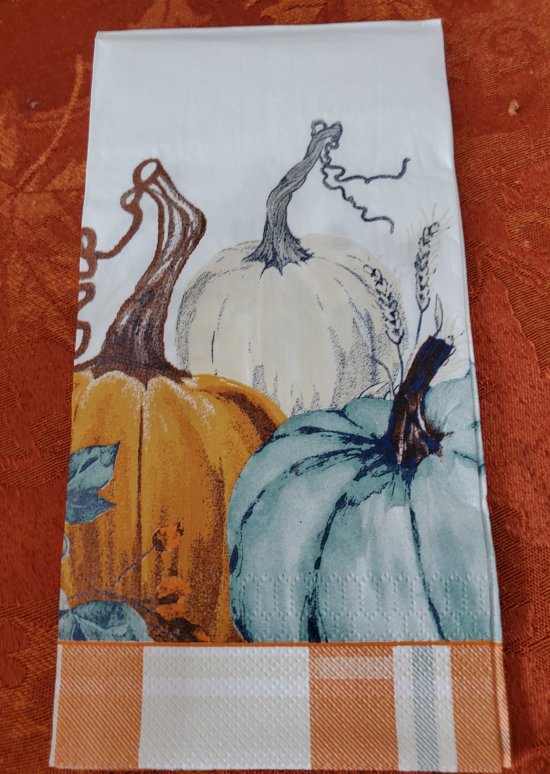
On our tray we are going to use the artwork from this napkin we also found at our Dollar Tree. We loved the color combination and how festive it looked!
We opened the napkin and separated the two layers. We only used the layer that has the artwork. We carefully cut the napkin to fit the INNER dimension of our tray. This piece of the napkin will fit perfectly in the bottom of our piece.

Once you have your napkin cut and ready to place, you must carefully place it in the center of the tray using great care to not have to move it around to get best placement. The napkin is very thin and can tear so be CAREFUL! Trust me, it’s worth it!

Once you have your napkin art carefully placed and centered, you can begin to gently apply a layer of Mod Podge over the top of the napkin.


Be generous with your Mod Podge as to create a nice layer over the top of the napkin. This WILL dry clear and give a nice finish to your final piece. Once you have applied a nice layer of Mod Podge, use a flat item to smooth the surface to eliminate any bubbling or rippling. We used a lid from a plastic jar. We glided it gently over the napkin’s surface.

Once the surface was smooth (there will be a few wrinkles but this will give a cool weathered look), be sure to take a paper towel and clean up any excess Mod Podge around the napkin. We also used a sharp knife to gently remove any excess fibers or messy edges.

Once the item is to your liking, let dry overnight.

The napkin no longer looks like a NAPKIN! Instead as you see in the photo, it looks as if it is part of this tray or painted on! The photo doesn’t do this justice! It is just lovely!
Once you have your tray finished and dried, you can use it to decorate your home for the season! This is perfect for any time of the year!

So now you know just how easy it can be to transform a simple item into a decorative piece fitting for any holiday! AND on a budget! Minus the Mod Podge, this project cost $2.50! You can’t beat that! Make yours today and be sure to tag us in your posts! We can’t wait to see what you create!
 Until next time!
Happy Hooking & More!
Fuad, Shannon, & Nadia
This post contains affiliate links, which I may be compensated for when you make a purchase. That means if you click on any link and buy from the linked websites, I will receive a small percentage of the value of your order. The amount you pay is not changed. Thank you for all your support in clicking the links in my blog!! You all are so amazing!!