Skip to content
YARNutopia & M0re
All things Yarn Related: Crochet, DIY, and Crafts
Blog
365 Days of Granny Squares
Stitch Gallery & Glossary
Crochet Video Tutorials
Frequently Asked Questions
Crochet Glossary: Learn the Lingo
Contact
Search
Search
home
YARNutoia & More
How to: Create Decor Using Mod Podge
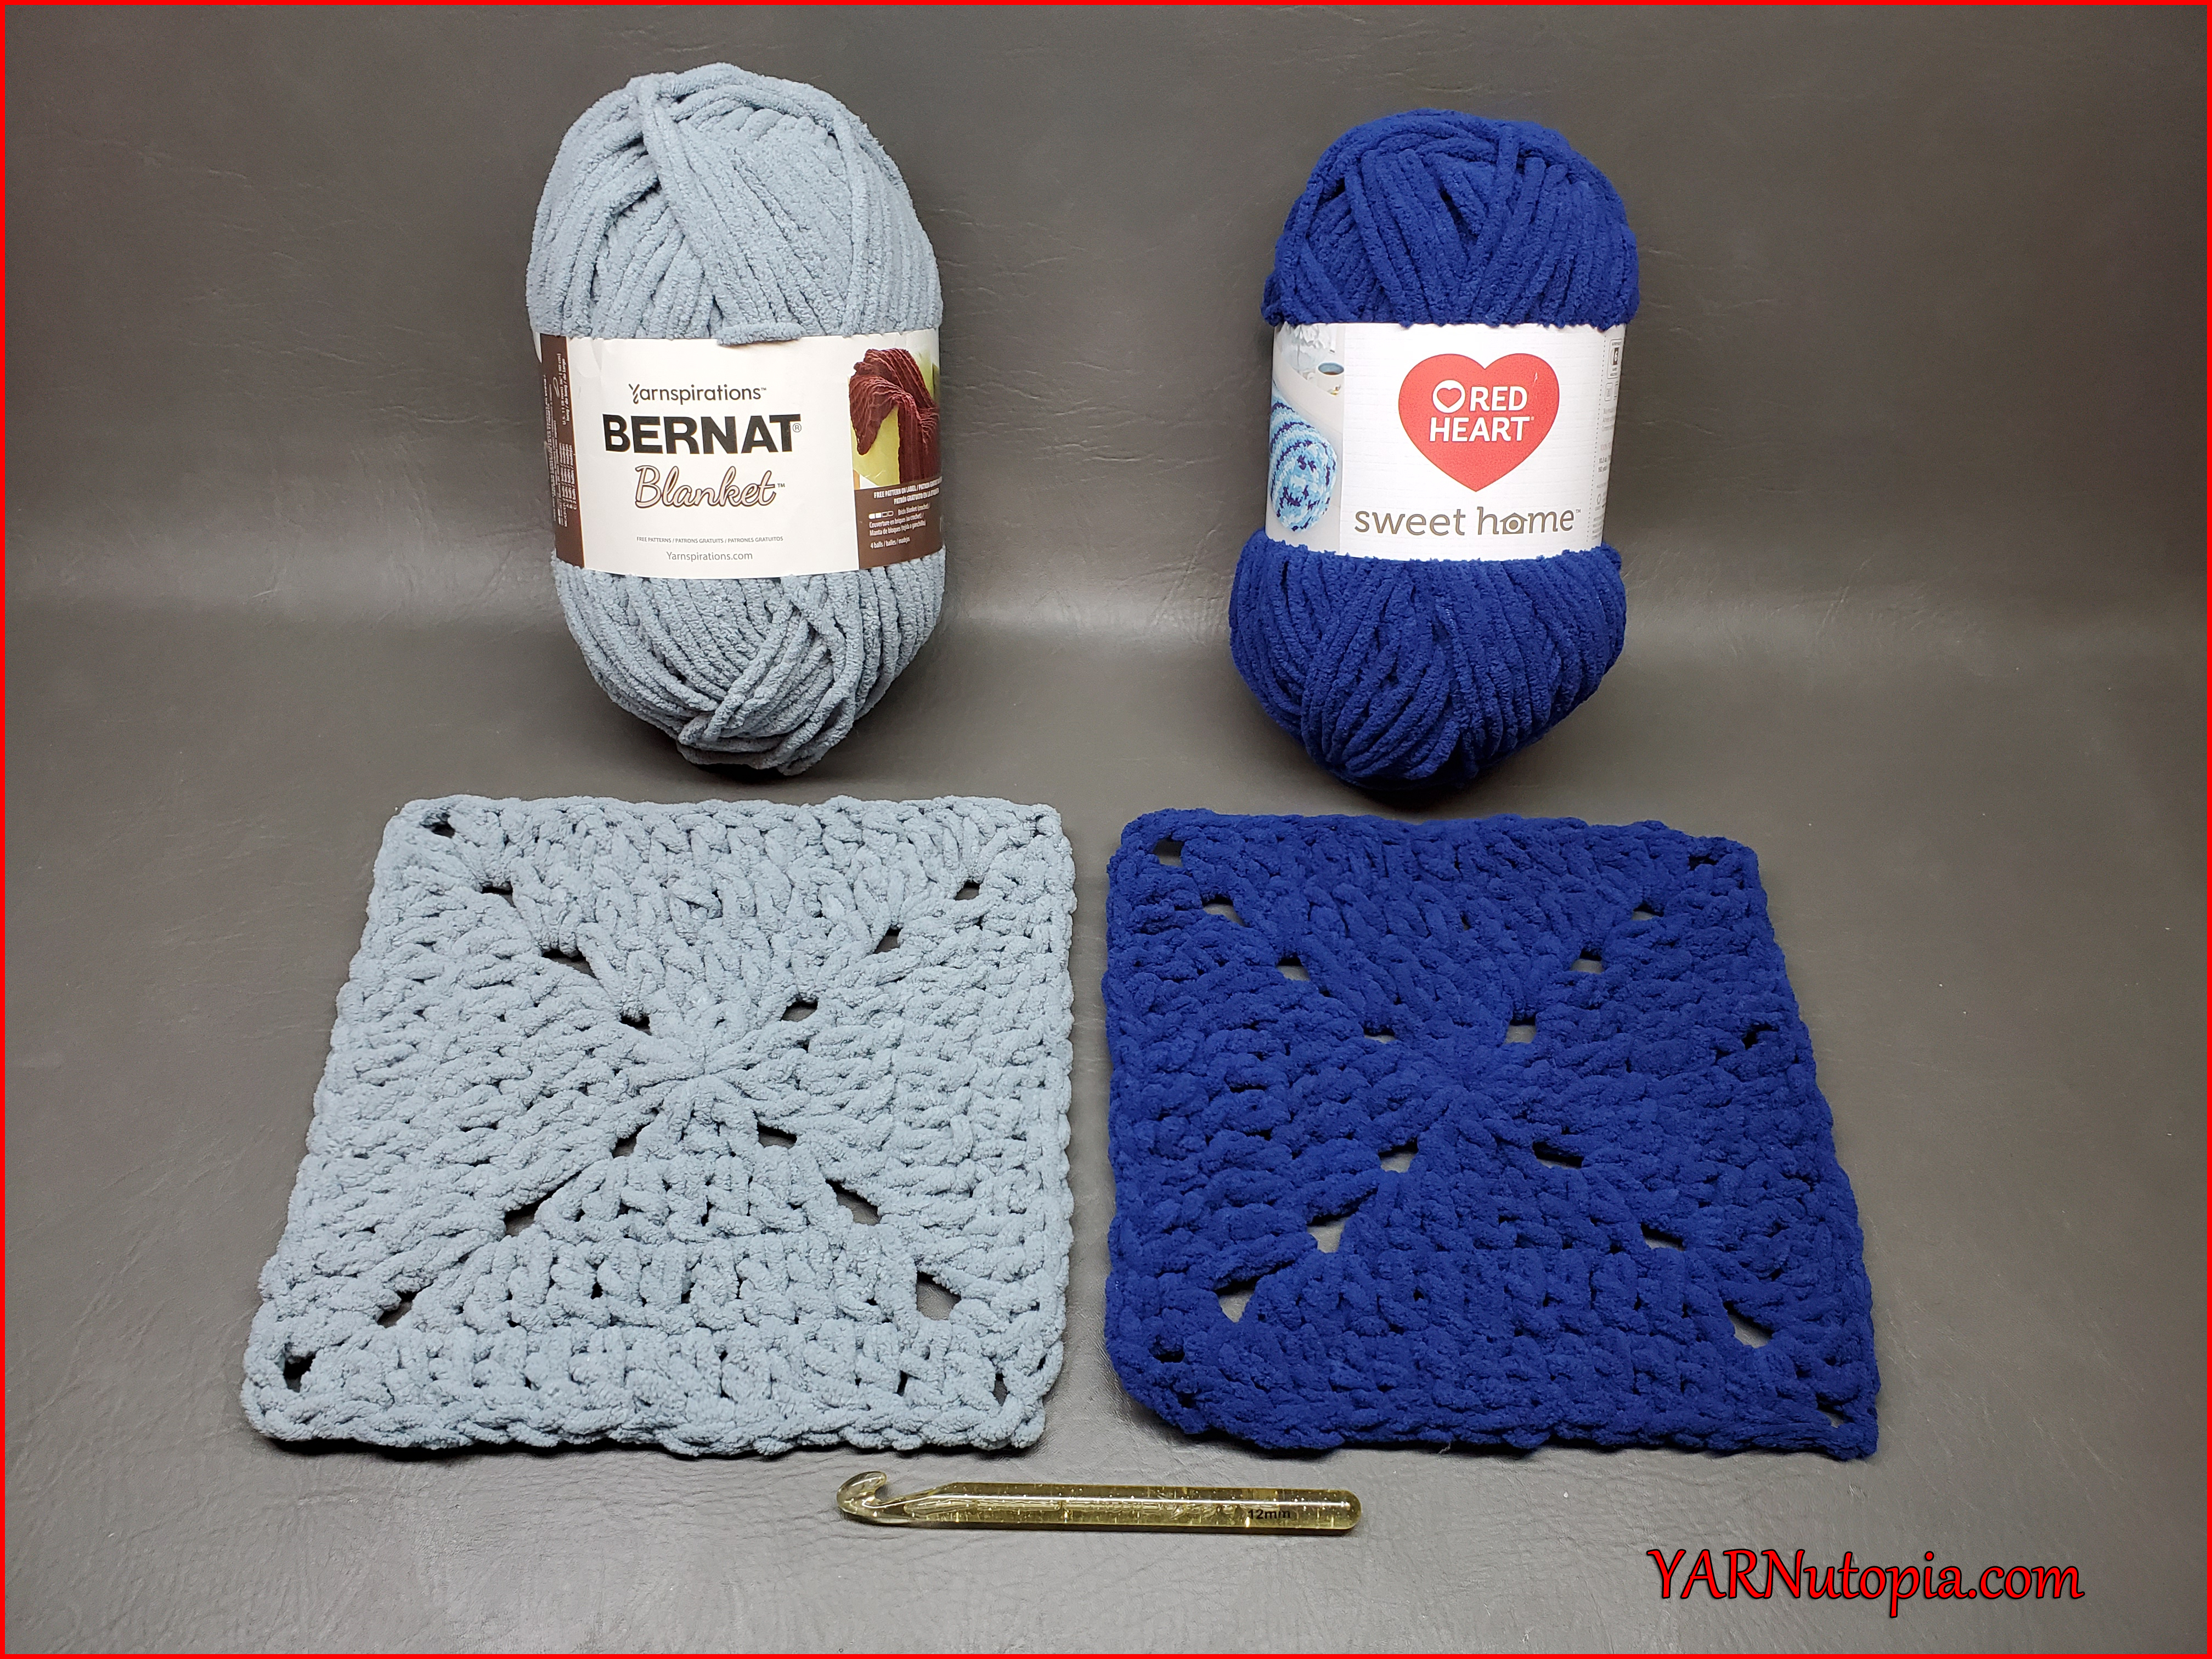
Compare & Contrast: Red Heart Yarns Sweet Home vs. Bernat Blanket Yarn
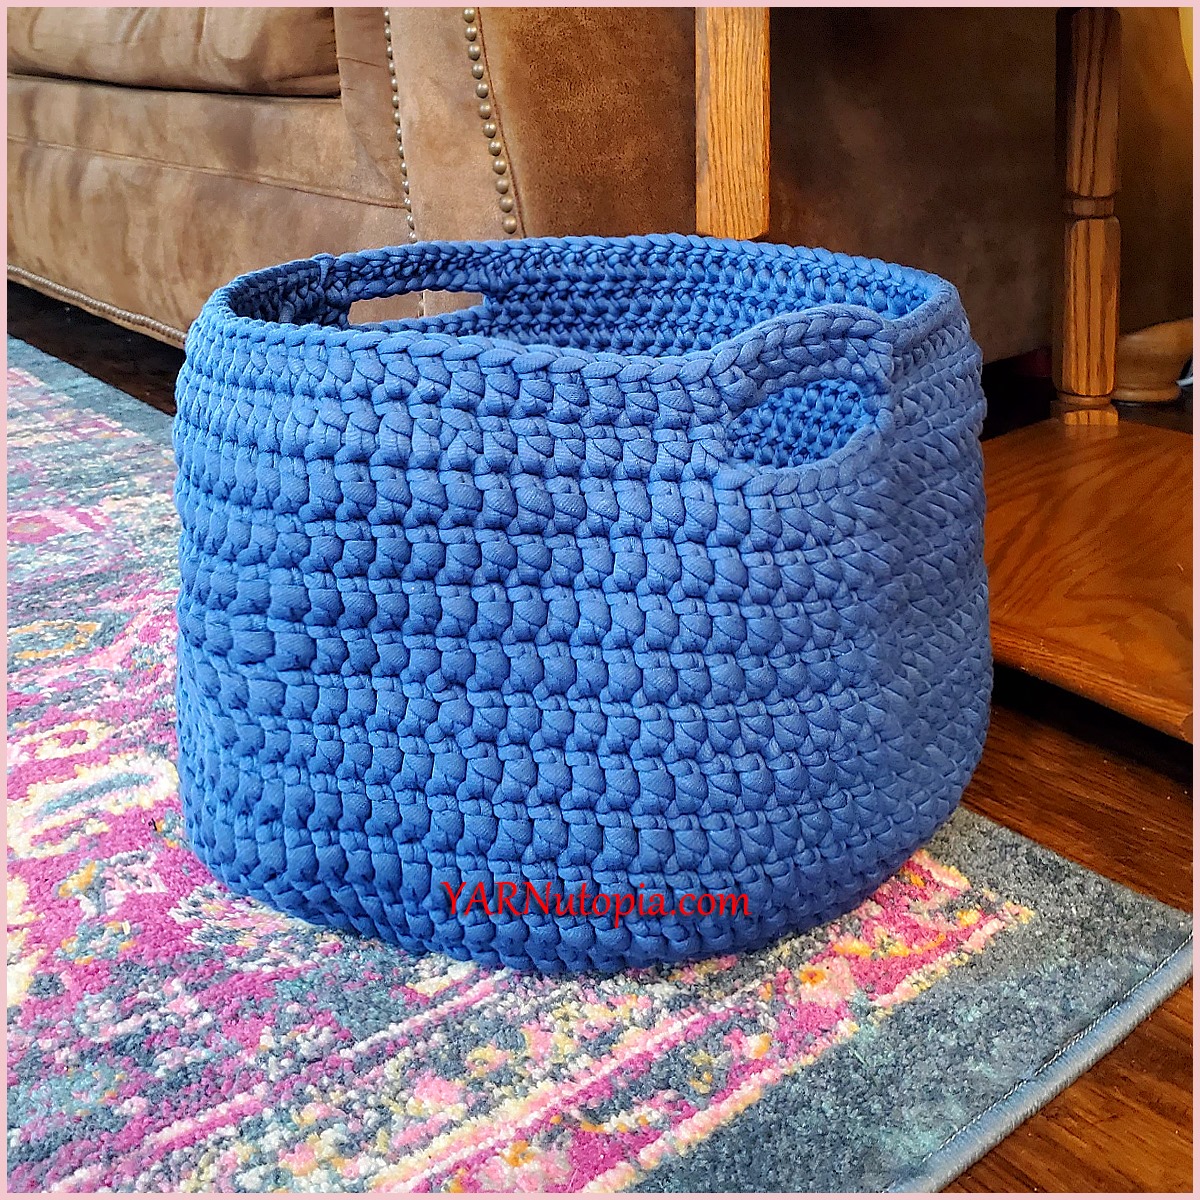
FREE Crochet Video Tutorial: Large Basket using Chunky Yarn
FREE Written Crochet Pattern: Large Basket using Chunky Yarn
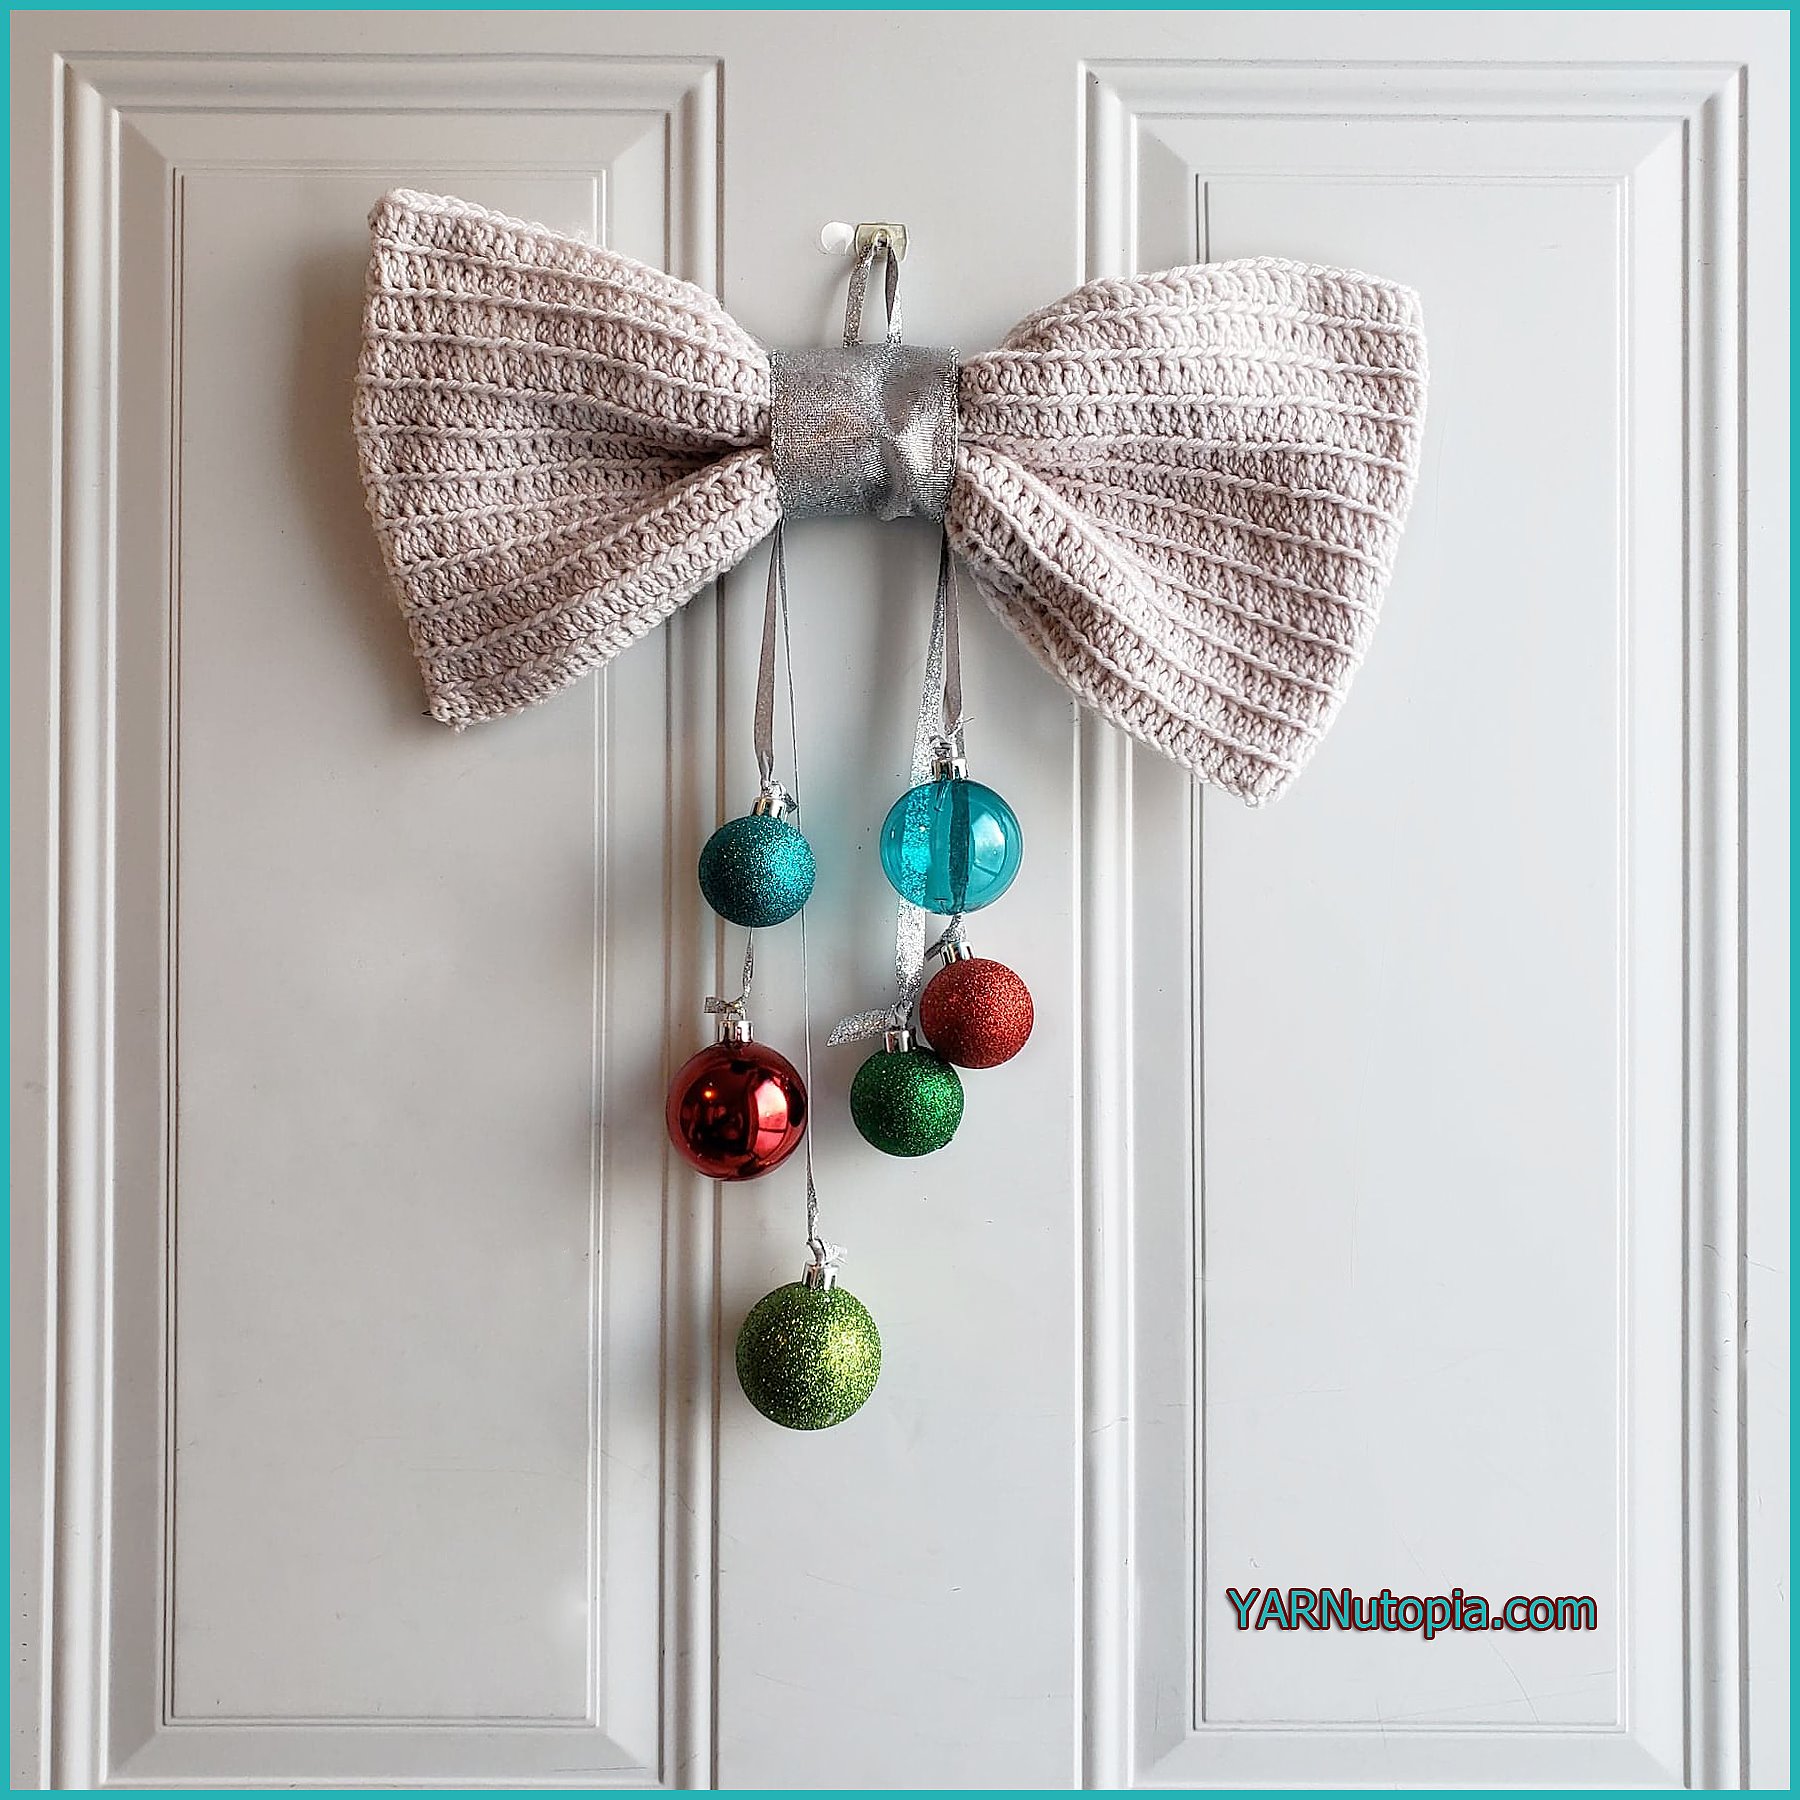
12 Days of Christmas: Bow & Bauble Door Hanging – Photo Tutorial
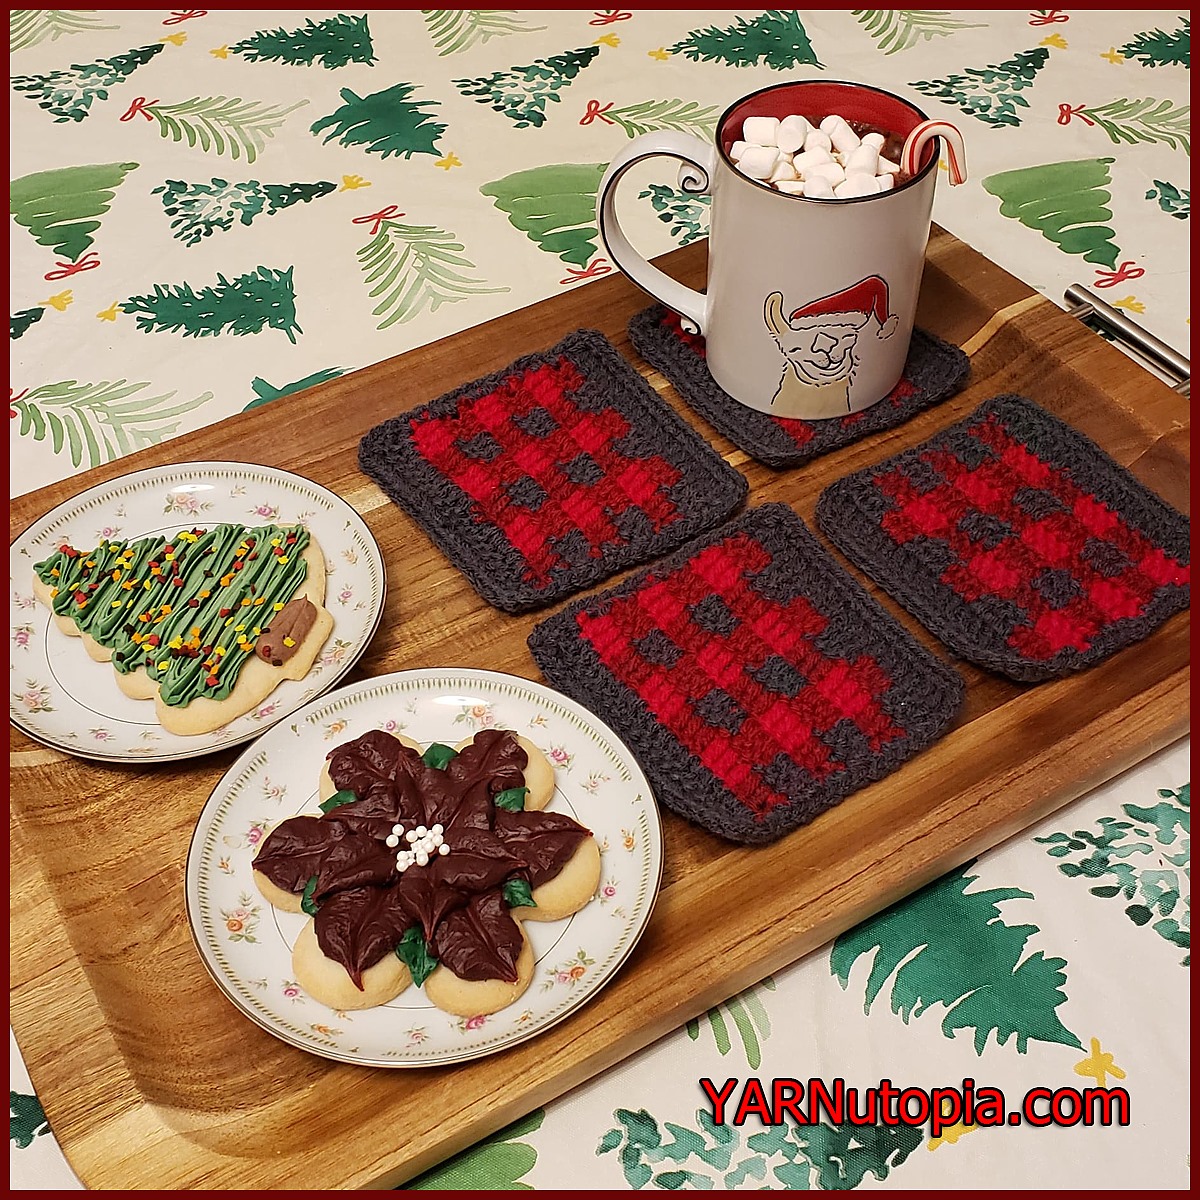
12 Days of Christmas: Buffalo Plaid Coasters – FREE Written Crochet Pattern
12 Days of Christmas: Rustic Wall Hanging – Photo & Written Tutorial
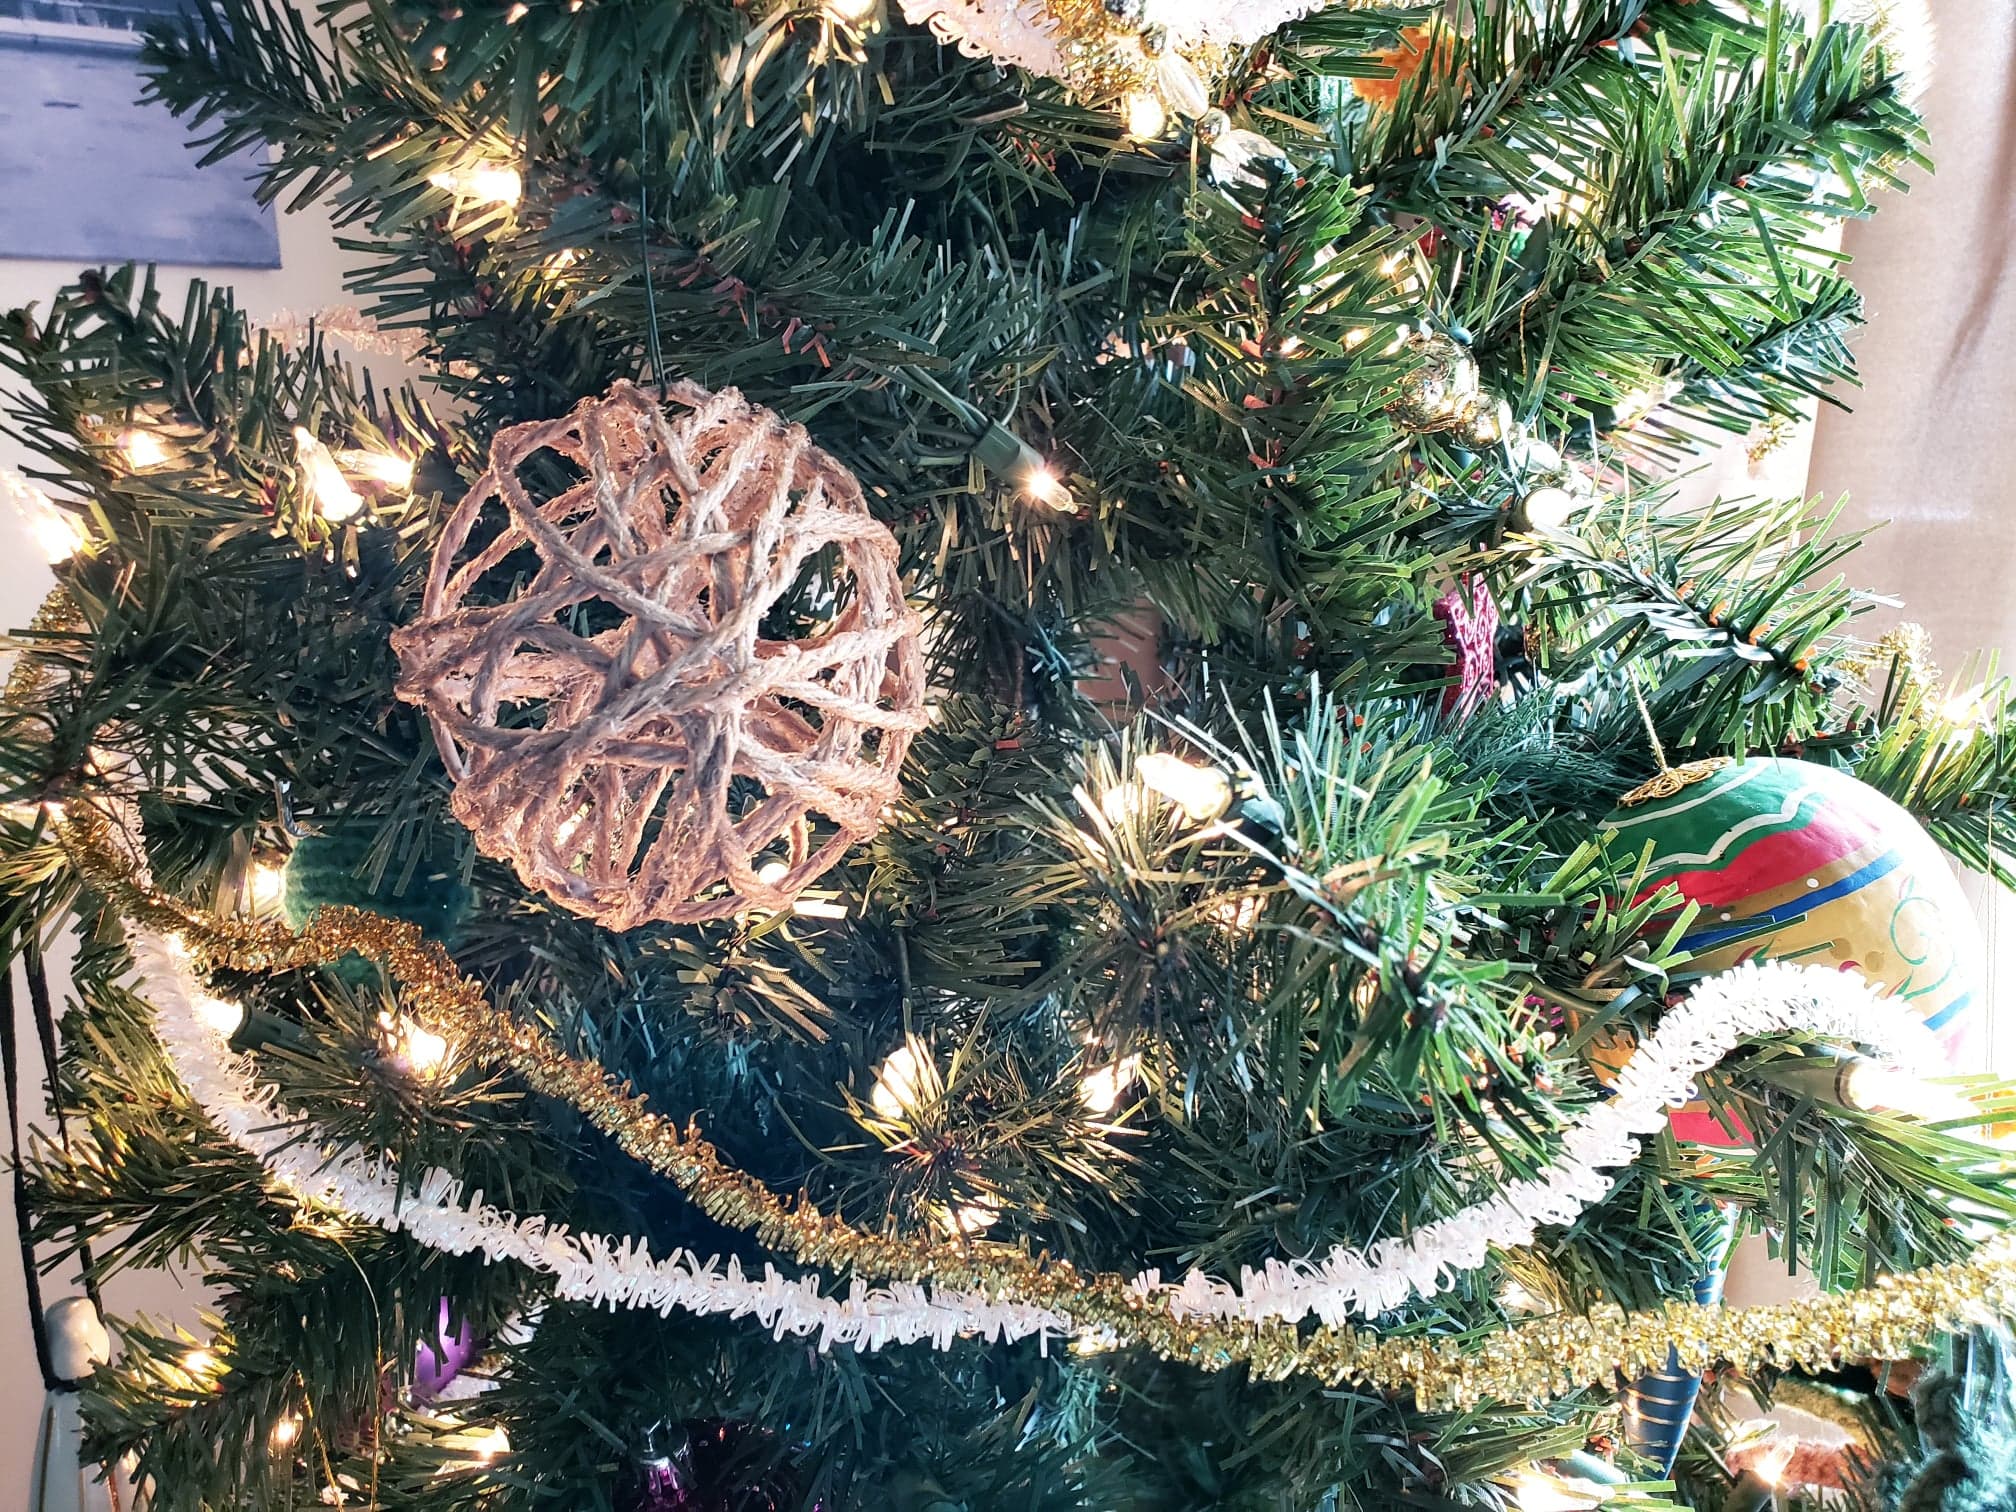
12 Days of Christmas: Rustic Holiday Decoration – Step by Step Photo Tutorial
12 Days of Christmas: Holiday Festive Wreath
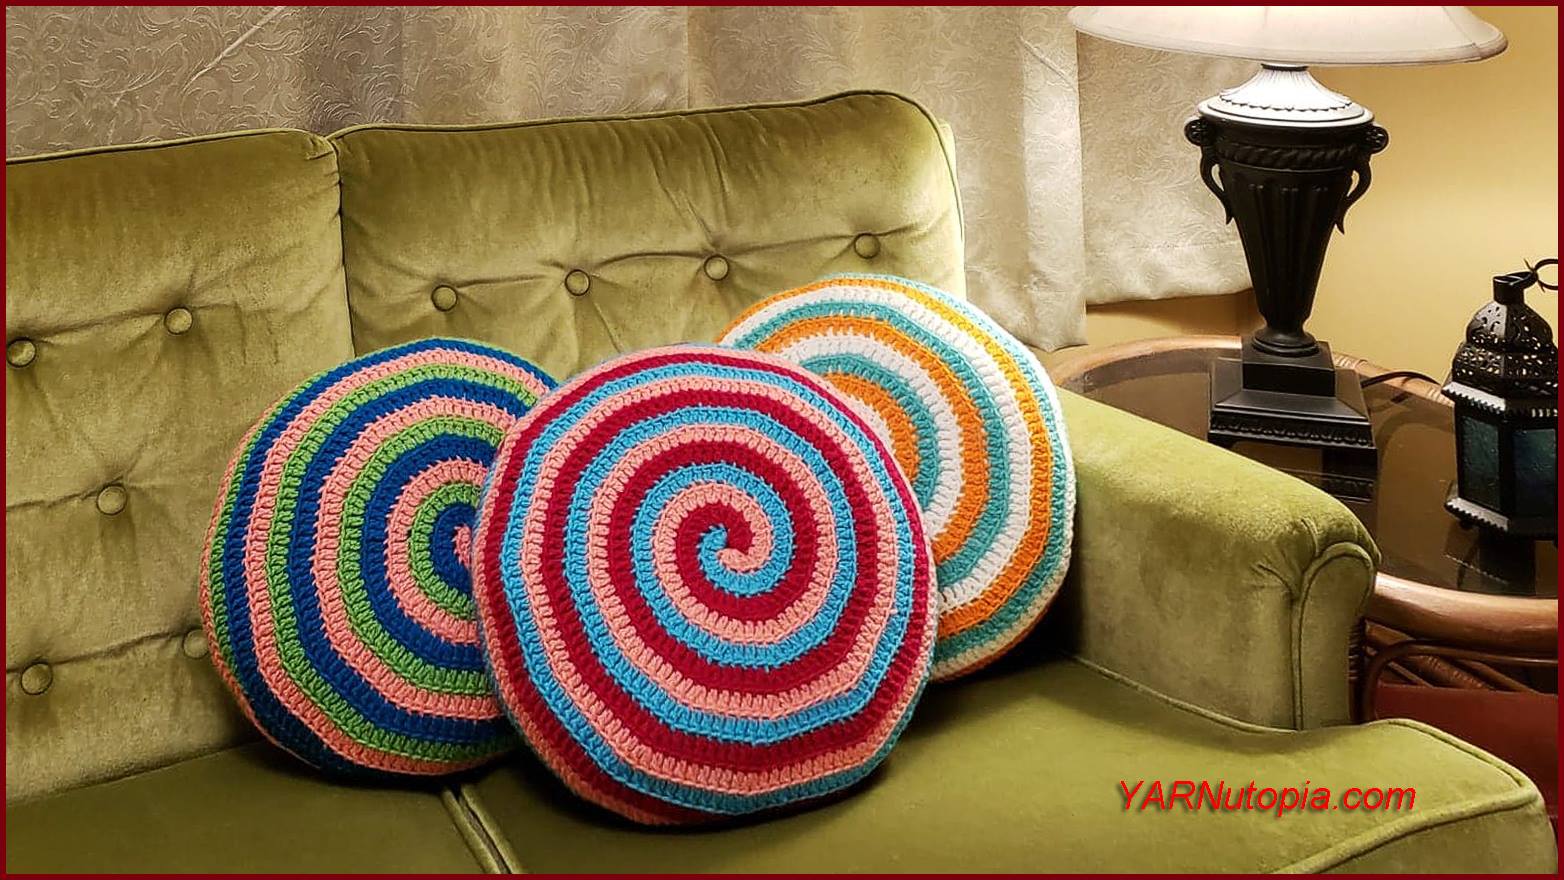
How to Crochet Tutorial: Candy Swirl Pillow
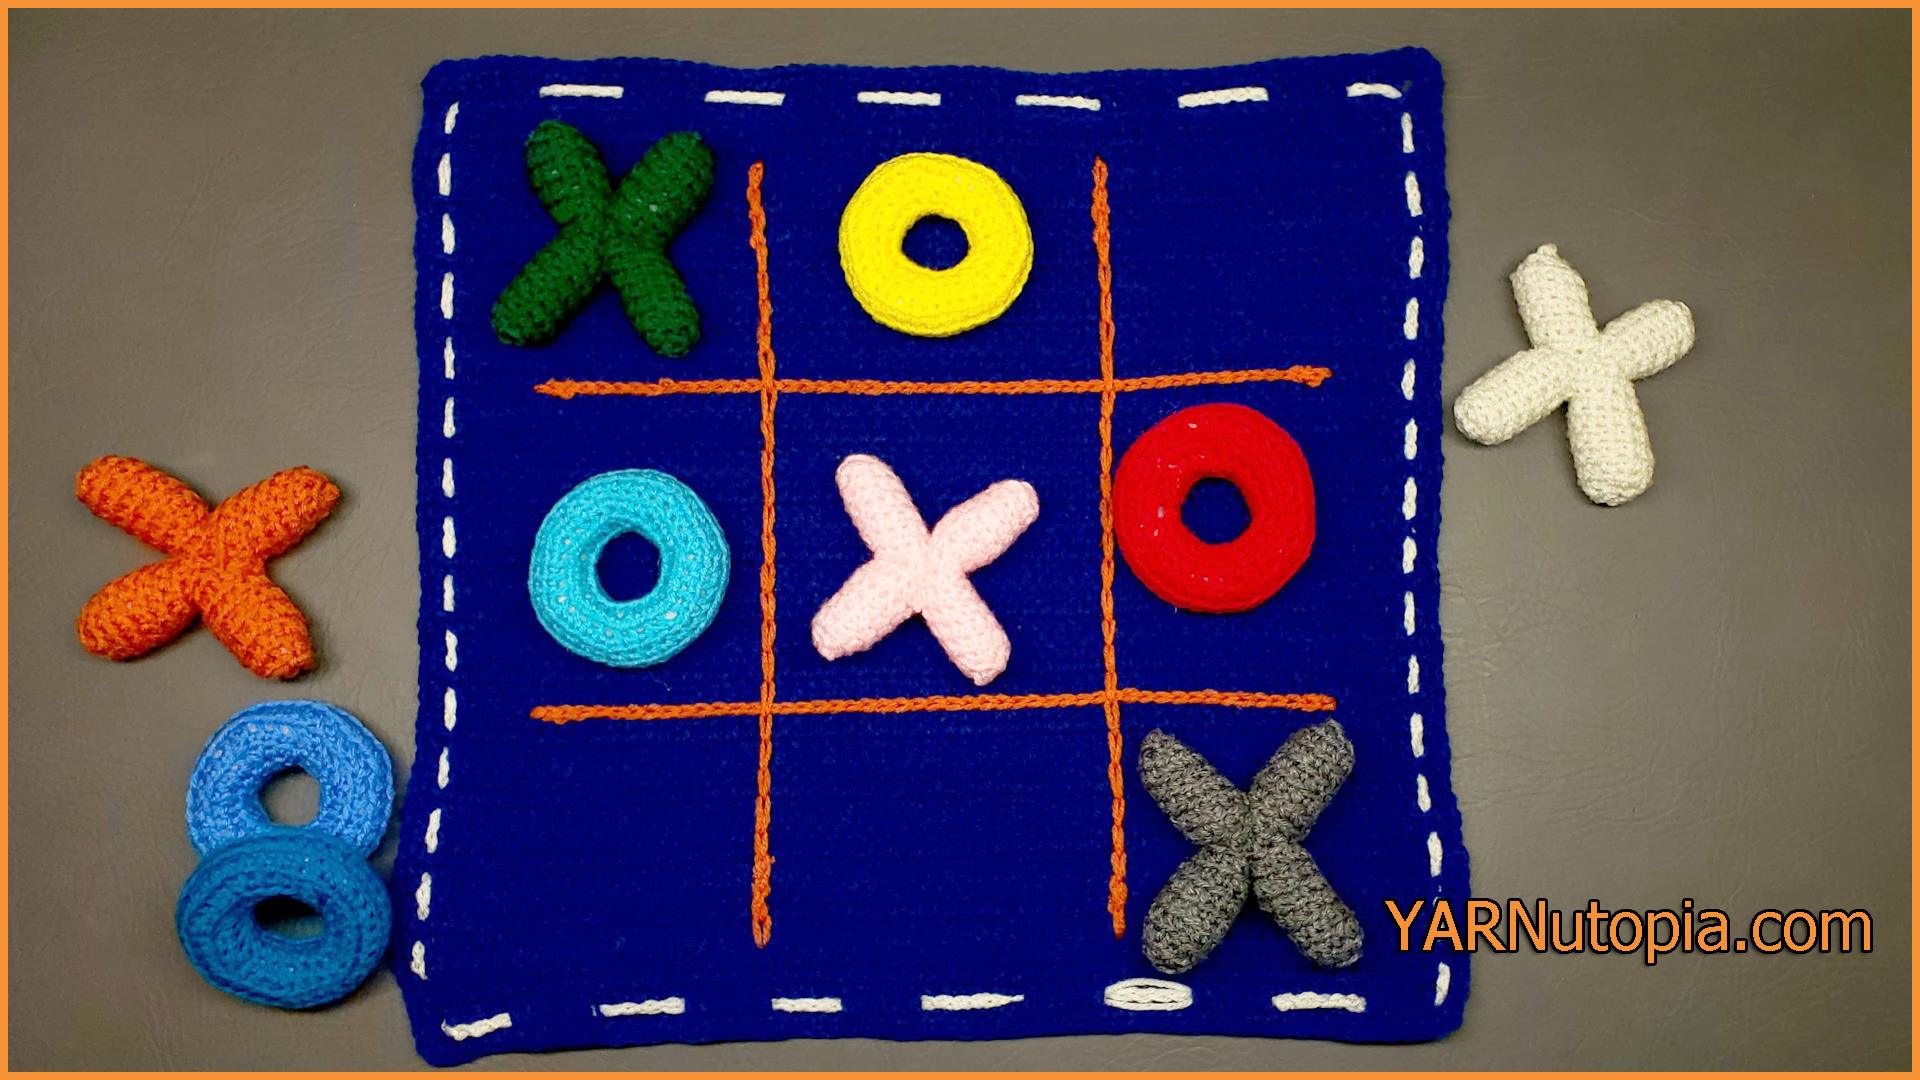
Crochet Tutorial: Tic Tac Toe Game and Tote
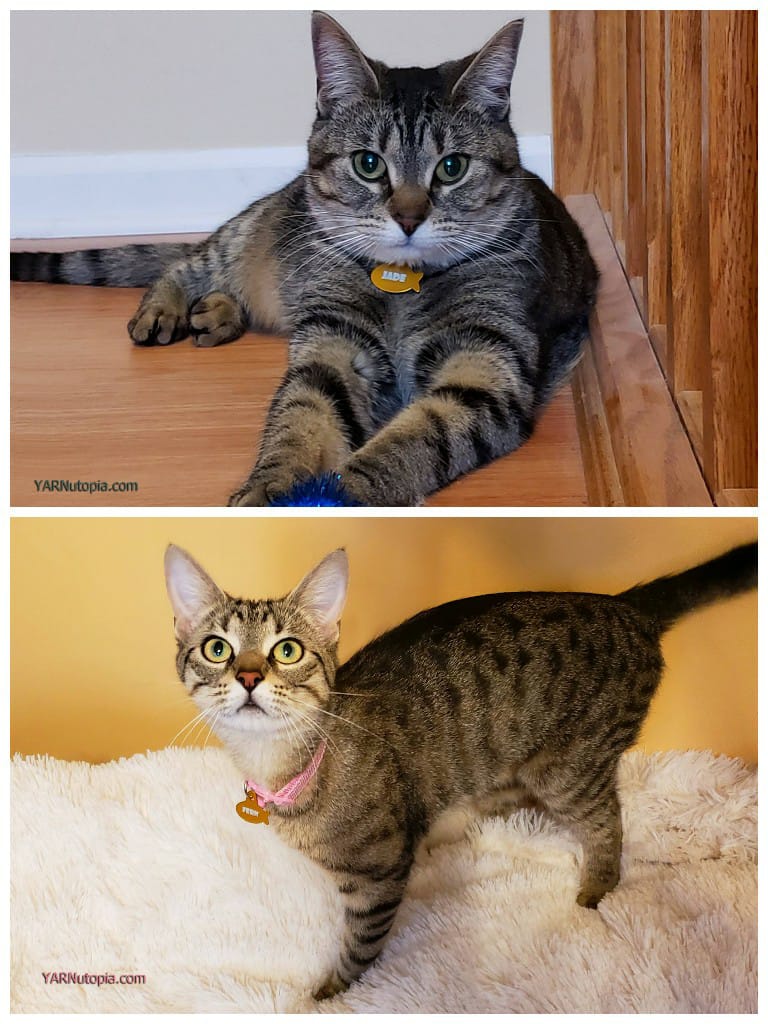
Meet Jade and Fern
Crochet Tutorial: Simple Basket
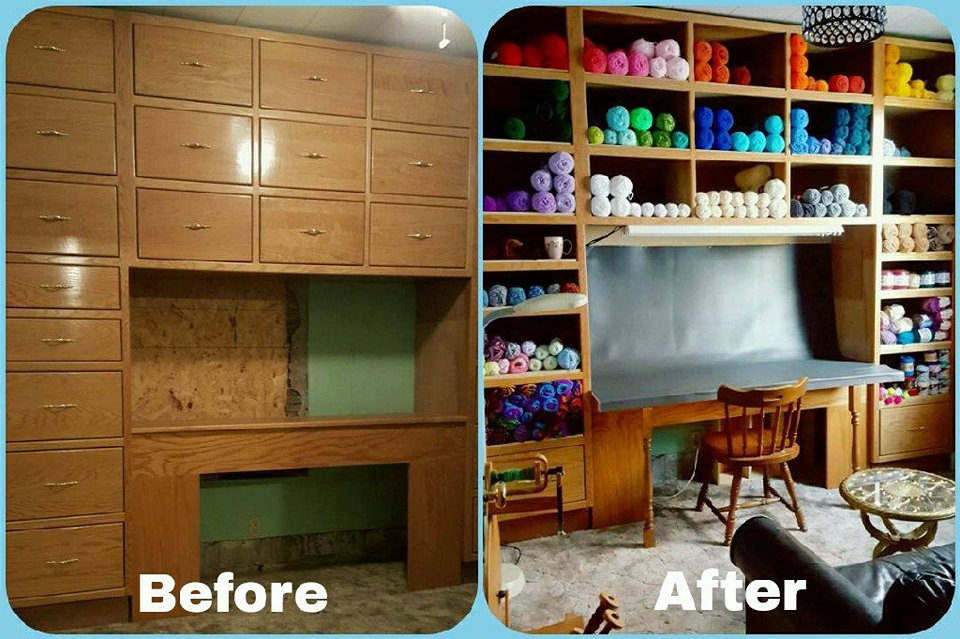
My New Craft Room
Crochet Tutorial: Chunky Basketweave Blanket
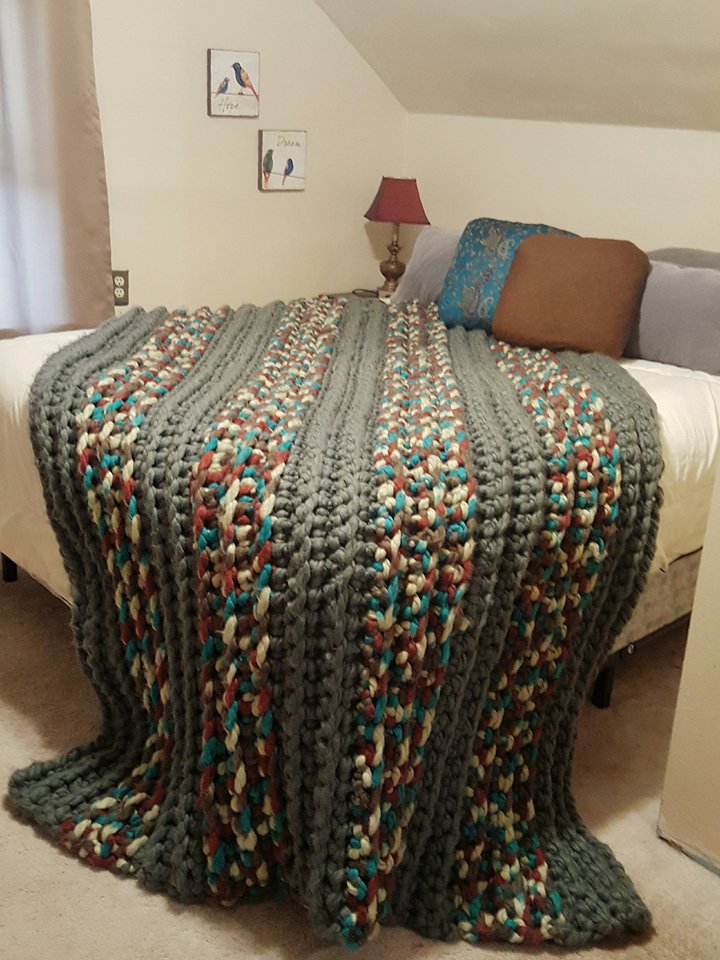
Crochet Tutorial: The Cozy Colossal Blanket
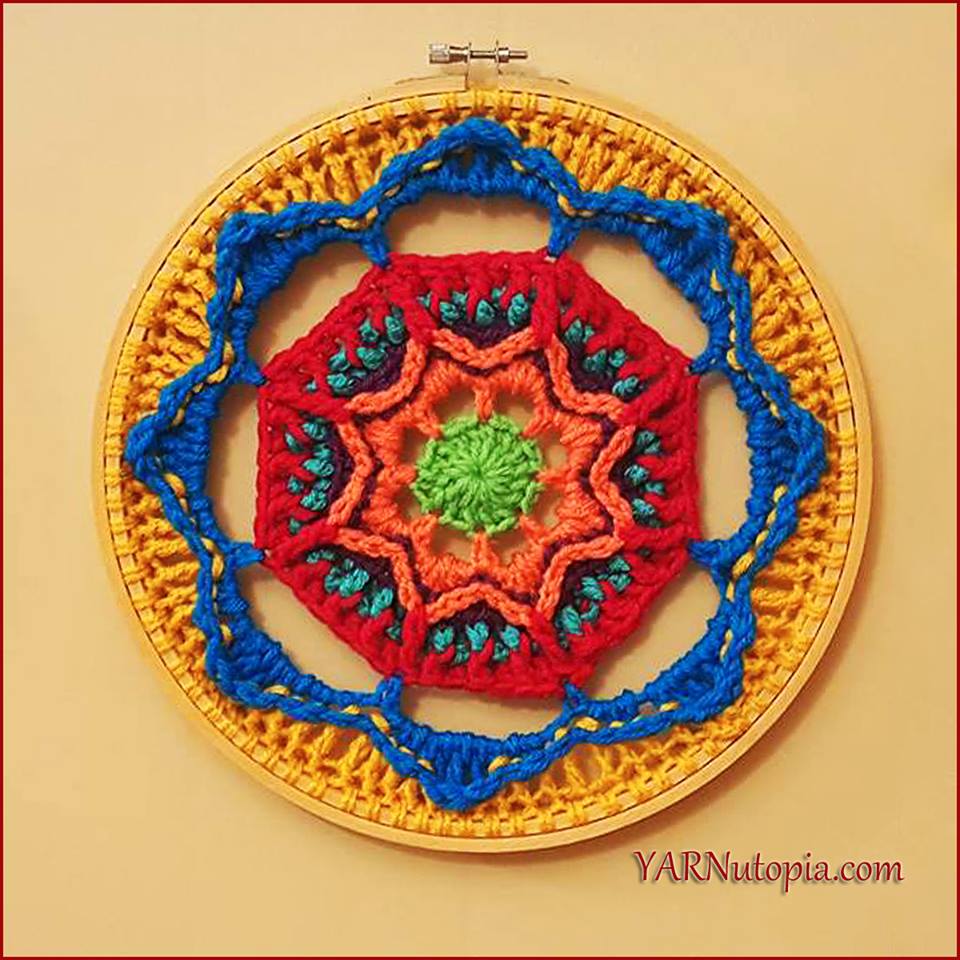
Crochet Tutorial: How to Crochet a Mandala in an Embroidery Hoop
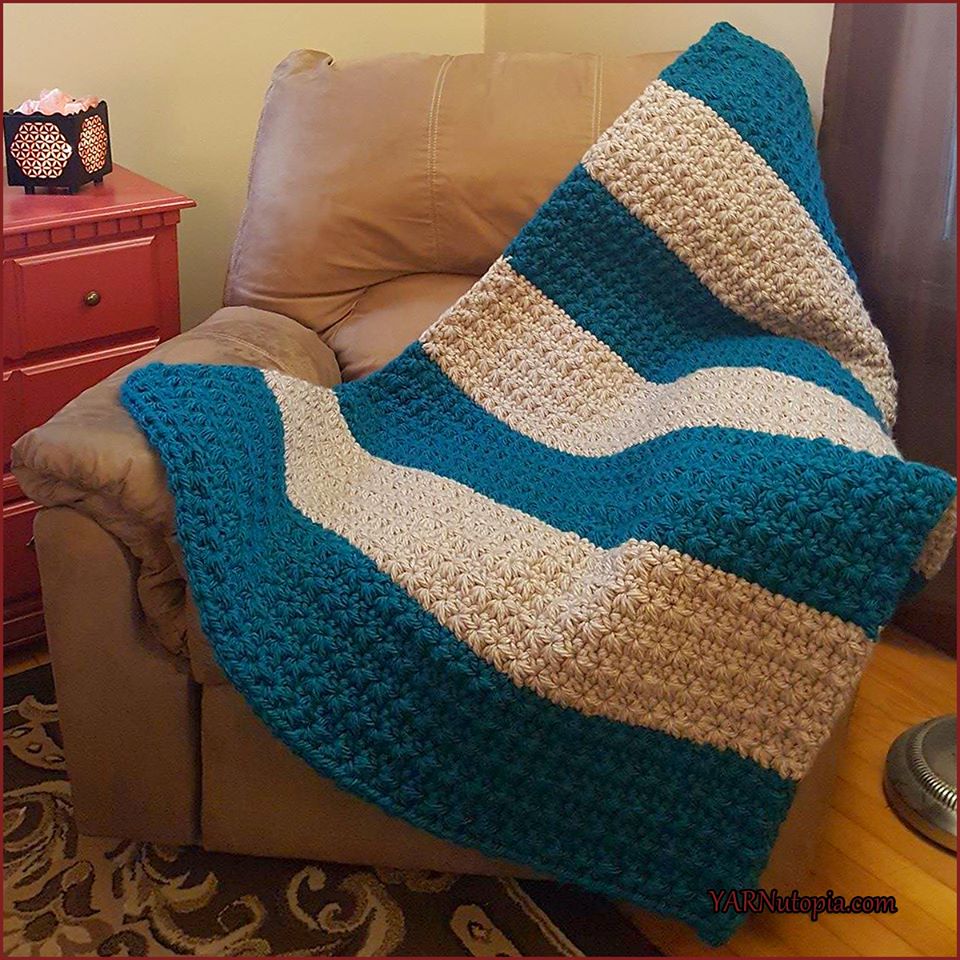
Crochet Tutorial: Star Stitches and Stripes Chunky Blanket
Broken Roads Point the Way
Crochet Tutorial: Let’s Bake a Cake Apron
Crochet Tutorial: On the Fringe Cushion
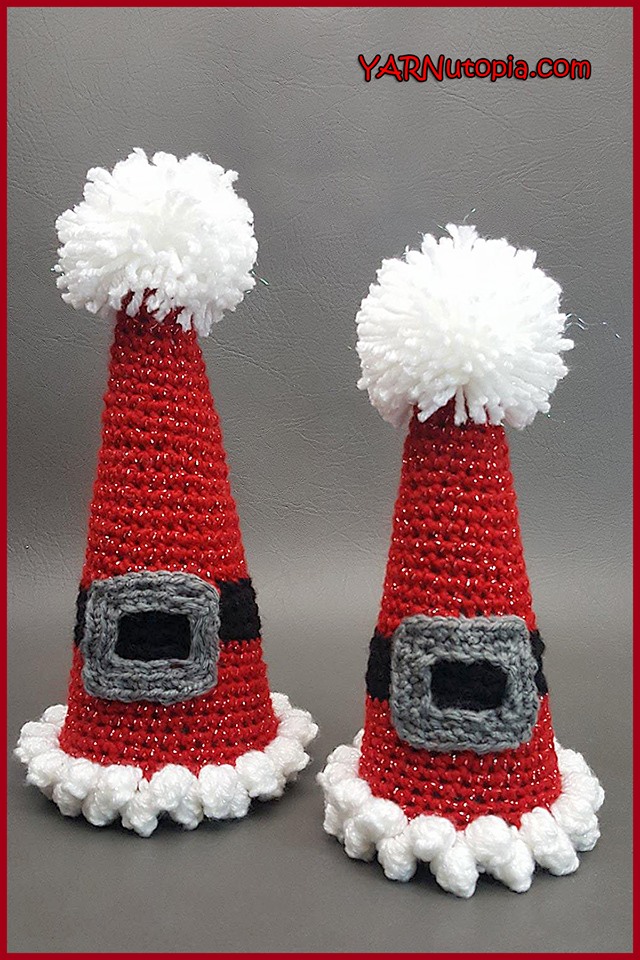
Crochet Tutorial: Sparkle and Puff Holiday Cones
Crochet Tutorial: Winter Snowman Coasters
Crochet Tutorial: Bows and Bells Napkin Rings
Crochet Tutorial: Halloween Table Runner
Heart Will Lead You Home Blanket
Loading Comments...
Write a Comment...
Email (Required)
Name (Required)
Website