FREE Written Crochet Pattern: Doll Clothes

FREE Written Crochet Pattern: Doll Clothes
There’s a movie out, there’s hype, and there’s also some great fun when it comes to the doll industry! I had to jump on the bandwagon for a moment and try my hand at doll clothes! Here are two simple outfits for you to try. My free patterns are both in this one blog so have fun!
I purchased my dolls from Amazon and here are the links if you want to purchase them too!

Barbie Doll

Ken Doll

**You can always contact me via Facebook if you have any problems with the pattern. I am happy to help if you have any questions along the way.
***These patterns are copyright YARNutopia © so PLEASE DO NOT COPY, SHARE, ADJUST OR RESELL MY PATTERN. I wrote and tested this pattern myself, from beginning to end. It took a lot of time and work, and I would really like to have it remain “my pattern.”
***You can sell anything you make from my patterns, please just link back to my website YARNutopia.com. Thank you!Teacher: Nadia Fuad
Video and Editing: Fuad Azmat (My Daddy)
Share your work on Facebook!
Add me on Snapchat: YARNutopia
Follow me on Instagram
Visit My Ravelry Store and add this to your Favorites!
Follow me on Twitter: @YARNutopia
Enjoy this video and subscribe to my channel on YouTube for more tutorials on how to crochet!
Leave a comment, and share with your friends!Designed by Nadia Fuad
You *may* sell items made from my pattern, but please reference my website YARNutopia.com.
Please do not copy, sell, and/or post this pattern and claim it as your own.
Materials you will need:
Get the supplies individually by clicking the links below
Cotlin DK Weight in color Cyan by KnitPicks/WeCrochet
Willow Summer yarn in Geranium
NOTES:
-Use a smaller hook to make these smaller
-Use a bigger hook to make these bigger
-You can use any size 4 medium, worsted weight yarn for this project
-You can check out yarnsub.com to see yarn substitutions that are equal to the yarn I used in this project.
-There is no video tutorial for this pattern.


Special stitches:
Ch(s): chain(s)
YO: Yarn Over
St(s): Stitch(es)
Sl st: slip stitch
SK: Skip
SC: Single Crochet
HDC: Half Double Crochet
DC: Double Crochet

Pattern:

There is no video tutorial to follow along with this pattern.

Dress:

Ch 27, sl st to first ch to form a ring, Ch 1

Rnd 1: HDC in each ch around, Sl st to first st, Ch 1, TURN. (26)

Rnd 2: [2 HDC in next st, HDC in next 4 sts] 5 times, HDC in last st, Sl st to first st, Ch 1, Turn. (31)

Rnd 3: [2 HDC in next st, HDC in next 5 sts] 5 times, HDC in last st, Sl st to first st, Ch 1, Turn. (36)

Rnd 4: [2 HDC in next st, HDC in next 6 sts] 5 times, HDC in last st, Sl st to first st, Ch 1, Turn. (41)

Rnd 5: [2 HDC in next st, HDC in next 7 sts] 5 times, HDC in last st, Sl st to first st, Ch 1, Turn. (46)

Rnds 6-12: HDC in each st around, Sl st to first st, Ch 1, Turn. (46)

Fasten off after Rnd 12 or continue to repeat to make the dress longer and fasten off when the dress is as long as you want it to be.
Flip the skirt over and work on the foundation row of the base of Rnd 1 to make the top part of the dress.

Attach yarn to any st on the base of Rnd 1 on your foundation row of your work.

Row 1: HDC in first st where you attached your yarn, HDC2TOG, HDC in each st until 3 sts remain, HDC2TOG, HDC in last st, CH 3, Do not Sl st, Turn. (24)

Row 2: HDC in 2nd Ch from hook and next ch, HDC in each st across, Ch 1, Turn. (26)

Rows 3-6: HDC in each st across, Ch 1, Turn. (26)

Row 7: (Making the arm holes), HDC in first 4 sts, Ch 3, Sk 3 sts, HDC in next 10 sts, Ch 3, Sk 3 sts, HDC in last 6 sts, Ch 1, Turn. (20 sts, 2 ch 3 sps)

Row 8: HDC in each St and each ch across. Fasten off, Weave in all ends. (26)

Sew velcro on the back opening of the dress for closure.


Shirt:

Ch 20

Row 1: HDC in 2nd Ch and each ch across, Ch 1, Turn. (19)
Rows 2-4: HDC in each St across, Ch 1, Turn. (19)
Row 5: HDC in 12 sts, Ch 4, Sk 4 sts, HDC in last 3 sts, Ch 1, Turn. (15 sts, 1 Ch 4 sp)
Row 6: HDC in each st and each ch across, Ch 1, Turn. (19)
Rows 7-15: HDC in each st across, Ch 1, Turn. (19)
Row 16: HDC in 3 sts, Ch 4, Sk 4 sts, HDC in last 12 sts, Ch 1, Turn. (15 sts, 1 Ch 4 sp)
Row 17: Repeat Row 6
Rows 18-23: HDC in each st across, Ch 1, Turn.
Fasten off after Row 23.
Weave in all ends.
Add Velcro to back flap to close back of shirt.

Enjoy!

This post contains affiliate links, which I may be compensated for when you make a purchase. That means if you click on any link and buy from the linked websites, I will receive a small percentage of the value of your order. The amount you pay is not changed. Thank you for all your support in clicking the links in my blog!! You all are so amazing!! ~Nadia

The yarn provided for this pattern is courtesy of Knitpicks/WeCrochet and Herrschner’s (Willow Yarns)

FREE Crochet Video Tutorial: Beach Vibes Bucket Hat

FREE Crochet Video Tutorial: Beach Vibes Bucket Hat
Hot off my hook is my Beach Vibes Bucket Hat! Just in time for the best days of summer! Lazy days at the beach, lounging poolside, or cruising around with the windows down, this hat brings all the vibes!
It’s the perfect boho-style fashion headwear to bring your warm weather wardrobe up a cool 😎 trendy notch. My easy to make Beach Vibes Bucket Hat is your accessory passport to a fun energy summer, and you can pick colors that reflect your spirit and flair! I chose fibers in polyester and cotton by Lion Brand Yarn and Willow Yarns to bring mine to life. Are you ready to do the same!? Go grab your hook and get started on yours now! Can’t wait to see them all!
Follow along to this video tutorial to learn how to make this hat:

My dad will continue to be the videographer, editor, and photographer for our videos when I move away.
Support YARNutopia today so we can continue to bring you clear, quality crochet tutorials even after I move into my new home!
There will be an added expense of more travel and hopefully this won’t deter our ability to provide consistent videos on a weekly basis.

Donate Button with Credit Cards
**You can always contact me via Facebook if you have any problems with the pattern. I am happy to help if you have any questions along the way.
***These patterns are copyright YARNutopia © so PLEASE DO NOT COPY, SHARE, ADJUST OR RESELL MY PATTERN. I wrote and tested this pattern myself, from beginning to end. It took a lot of time and work, and I would really like to have it remain “my pattern.”
***You can sell anything you make from my patterns, please just link back to my website YARNutopia.com. Thank you!
Teacher: Nadia Fuad
Video and Editing: Fuad Azmat (My Daddy)
Share your work on Facebook!
Add me on Snapchat: YARNutopia
Follow me on Instagram
Visit My Ravelry Store and add this to your Favorites!
Follow me on Twitter: @YARNutopia
Enjoy this video and subscribe to my channel on YouTube for more tutorials on how to crochet!
Leave a comment, and share with your friends!Designed by Nadia Fuad
You *may* sell items made from my pattern, but please reference my website YARNutopia.com.
Please do not copy, sell, and/or post this pattern and claim it as your own.
Materials you will need:
Get the supplies individually by clicking the links below
–Size 4 Medium Worsted Weight yarn (I used Lion Brand Yarn Basic Stitch  color: Baby Pink (Rnd 2 of square), Lion Brand Vanna’s Choice Pink Grapefruit (Rnd 3 of the square), Willow Yarns Summer in Waterfall (main color), and Lion Brand Yarn Modern Baby color: Yellow (middle of square))
Size H-5.00mm Crochet Hook
Yarn Needle
Scissors
NOTES:
-Use a smaller hook to make these smaller
-Use a bigger hook to make these bigger
-You can use any size 4 medium, worsted weight yarn for this project
-You can check out yarnsub.com to see yarn substitutions that are equal to the yarn I used in this project.
-There is no video tutorial for this pattern yet.
-To make this hat smaller, I would recommend leaving off the last round of the square and sewing the squares together after round 3 of the squares are done. OR you could use a smaller crochet hook to make the stitching tighter and smaller.Special stitches:
Ch(s): chain(s)
YO: Yarn Over
St(s): Stitch(es)
Sl st: slip stitch
SK: Skip
SC: Single Croche
DC: Double Crochet
3 DC cluster: [YO, insert hook, YO, pull through, YO pull through 2 loops] 3 times, YO pull through all loops on hook. Stitch made.

This post contains affiliate links, which I may be compensated for when you make a purchase. That means if you click on any link and buy from the linked websites, I will receive a small percentage of the value of your order. The amount you pay is not changed. Thank you for all your support in clicking the links in my blog!! You all are so amazing!! ~Nadia

The yarn provided for this pattern is courtesy of Lion Brand Yarn and Herrschner’s (Willow Yarns)

FREE Written Crochet Pattern: Rainbow Summer Shorts

FREE Written Crochet Pattern: Rainbow Summer Shorts
June is Pride Month, and in honor of this annual occasion, I have created Rainbow Shorts!! This pair of shorts is perfect for wearing as a swimsuit bottom cover-up or cute plain shorts paired with a summer top. I have seen increased crochet trends, and one of the most fun patterns I have seen is crocheted shorts. These shorts follow a simple pattern to create this rainbow look. You can apply this same pattern to your favorite colors and create stripes in whatever fits your vibe. You can also use one solid color which can also be fun!
I have provided patterns in sizes from adult children so you can make a “Mommy and Me” or “Daddy and Me” set! I used Worsted Weight (size 4 medium) scrap yarns to create these fabulous shorts, but you can use any yarn to make yours. These are quite versatile and very fashionable! Check out my written pattern and make sure to also follow the video tutorial to make your pair today! Be sure to post and tag me when you make yours! I cannot wait to see what everyone creates! We at YARNutopia are an ally and work to achieve a world where every person in our LGBTQ+ community can live freely and safely. Hatred and bigotry will not be tolerated. For us, Pride is every day.
My dad will continue to be the videographer, editor, and photographer for our videos when I move away.
Support YARNutopia today so we can continue to bring you clear, quality crochet tutorials even after I move into my new home!
There will be an added expense of more travel and hopefully this won’t deter our ability to provide consistent videos on a weekly basis.

Donate Button with Credit Cards
**You can always contact me via Facebook if you have any problems with the pattern. I am happy to help if you have any questions along the way.
***These patterns are copyright YARNutopia © so PLEASE DO NOT COPY, SHARE, ADJUST OR RESELL MY PATTERN. I wrote and tested this pattern myself, from beginning to end. It took a lot of time and work, and I would really like to have it remain “my pattern.”
***You can sell anything you make from my patterns, please just link back to my website YARNutopia.com. Thank you!Teacher: Nadia Fuad
Video and Editing: Fuad Azmat (My Daddy)
Share your work on Facebook!
Add me on Snapchat: YARNutopia
Follow me on Instagram
Visit My Ravelry Store and add this to your Favorites!
Follow me on Twitter: @YARNutopia
Enjoy this video and subscribe to my channel on YouTube for more tutorials on how to crochet!
Leave a comment, and share with your friends!

Designed by Nadia Fuad
You *may* sell items made from my pattern, but please reference my website YARNutopia.com.
Please do not copy, sell, and/or post this pattern and claim it as your own.

Materials you will need:
Get the supplies individually by clicking the links below
–Size 4 Medium Worsted Weight yarn (I used scrap yarns for this project)
Size H-5.00mm Crochet Hook
Yarn Needle
Scissors

NOTES:
-Use a smaller hook to make these smaller
-Use a bigger hook to make these bigger
-You can use any size 4 medium, worsted weight yarn for this project
-You can check out yarnsub.com to see yarn substitutions that are equal to the yarn I used in this project.
-The shorts I demonstrate in the video tutorial and what I’ve written the pattern for are for a US size 4 Toddler. The stitch counts don’t necessarily matter as long as you do measurements as you go.


Special stitches:
Ch(s): chain(s)
YO: Yarn Over
St(s): Stitch(es)
Sl st: slip stitch
SK: Skip
SC: Single Crochet
DC: Double Crochet
FPDC: Front Post Double Crochet
BPDC: Back Post Double Crochet


Pattern:

If you have any confusion or difficulty with reading this pattern, please watch the video tutorial that is linked above in this blog post to have visual instructions.

Shorts:

I changed color every row but you do not have to. I am not writing the pattern with the color changes.

Ch any EVEN number that measures around the hips and waist of the subject you are making these for
I chained 70 for the small toddler size and I chained 100 for the mommy size for myself.

Without twisting chain, sl st to first ch to form a large circle.

Rnd 1: (RS) Ch 2 (does not count as anything), DC in each Ch around, Sl st to first st. TURN (70)

Rnd 2: (WS) Ch 2, * FPDC on next st, BPDC on next st, repeat from * around, Sl st to first st. TURN

Rnd 3: Repeat Rnd 2

Rnd 4: Ch 2, DC in each st around, Sl st to first DC, TURN.

Rnd 5: Ch 2, 2 DC in first st, DC in each st until 1 st remains, 2 DC in last st, sl st to first st. TURN. (72)

Rnd 6-13 or however long you need to cover the backside (butt): Repeat Rnd 5 (increase repeating Rnd 5 until your piece comes to the base of the backside of your subject) for the Mommy size I made, I did 20 rnds of Rnd 5, for the Toddler size, I did 9 total increase rnds. Once your piece is as long as you want and you’re ready to make the leg holes, go onto Rnd 14 instructions.

First Leg Hole:

Rnd 14: Mark the halfway point from the back of your work to the front so you know where each leg hole goes (see video tutorial for visual instructions on location) Ch 12, Sl st to the st that the Stitch Marker is in, Ch 2, DC in each st around and in each Ch of the first leg hole, sl st to first st, TURN.

Rnd 15: Ch 2, DC in each st around leg hole, Sl st to first st. TURN.

Rnds 16-18: Repeat Rnd 15 for however long you want your leg to be.

Fasten off, weave in ends. Move onto 2nd Leg hole.

2nd Leg Hole

Rnd 14: Attach yarn to any st, Ch 2, DC in each st around and at the base of each foundation chain between leg holes (see video tutorial for visual instructions), Sl st to first st, TURN.

Rnd 15: Ch 2, DC in each st around leg hole, Sl st to first st. TURN.

Rnds 16-18: Repeat Rnd 15 for however long you want your leg to be.

Fasten off, weave in ends.

Drawstring:

Chain an amount that is DOUBLE your original chain length for the waistband of your shorts. Weave it in and out of Rnd 1.

Enjoy!

This post contains affiliate links, which I may be compensated for when you make a purchase. That means if you click on any link and buy from the linked websites, I will receive a small percentage of the value of your order. The amount you pay is not changed. Thank you for all your support in clicking the links in my blog!! You all are so amazing!! ~Nadia

The yarn provided for this pattern is courtesy of Lion Brand Yarn, WeCrochet, and Paintbox Yarns


FREE Crochet Video Tutorial: Rainbow Summer Shorts

FREE Crochet Video Tutorial: Rainbow Summer Shorts
June is Pride Month, and in honor of this annual occasion, I have created Rainbow Shorts!! This pair of shorts is perfect for wearing as a swimsuit bottom cover-up or cute plain shorts paired with a summer top. I have seen increased crochet trends, and one of the most fun patterns I have seen is crocheted shorts. These shorts follow a simple pattern to create this rainbow look. You can apply this same pattern to your favorite colors and create stripes in whatever fits your vibe. You can also use one solid color which can also be fun!
I have provided patterns in sizes from adult children so you can make a “Mommy and Me” or “Daddy and Me” set! I used Worsted Weight (size 4 medium) scrap yarns to create these fabulous shorts, but you can use any yarn to make yours. These are quite versatile and very fashionable! Check out my written pattern and make sure to also follow the video tutorial to make your pair today! Be sure to post and tag me when you make yours! I cannot wait to see what everyone creates! We at YARNutopia are an ally and work to achieve a world where every person in our LGBTQ+ community can live freely and safely. Hatred and bigotry will not be tolerated. For us, Pride is every day.


Follow along with this video tutorial to learn how to make these shorts:


My dad will continue to be the videographer, editor, and photographer for our videos even if we don’t live together.
Support YARNutopia today so we can continue to bring you clear, quality crochet tutorials even after I move into my new home!
There will be an added expense of more travel and hopefully this won’t deter our ability to provide consistent videos on a weekly basis.

Donate Button with Credit Cards

**You can always contact me via Facebook if you have any problems with the pattern. I am happy to help if you have any questions along the way.
***These patterns are copyright YARNutopia © so PLEASE DO NOT COPY, SHARE, ADJUST OR RESELL MY PATTERN. I wrote and tested this pattern myself, from beginning to end. It took a lot of time and work, and I would really like to have it remain “my pattern.”
***You can sell anything you make from my patterns, please just link back to my website YARNutopia.com. Thank you!

Teacher: Nadia Fuad
Video and Editing: Fuad Azmat (My Daddy)
Share your work on Facebook!
Add me on Snapchat: YARNutopia
Follow me on Instagram
Visit My Ravelry Store and add this to your Favorites!
Follow me on Twitter: @YARNutopia
Enjoy this video and subscribe to my channel on YouTube for more tutorials on how to crochet!
Leave a comment, and share with your friends!

Designed by Nadia Fuad
You *may* sell items made from my pattern, but please reference my website YARNutopia.com.
Please do not copy, sell, and/or post this pattern and claim it as your own.

Materials you will need:
Get the supplies individually by clicking the links below
–Size 4 Medium Worsted Weight yarn (I used scrap yarns for this project
-Stitch Marker
Size H-5.00mm Crochet Hook
Yarn Needle
Scissors

NOTES:
-Use a smaller hook to make these smaller
-Use a bigger hook to make these bigger
-You can use any size 4 medium, worsted weight yarn for this project
-You can check out yarnsub.com to see yarn substitutions that are equal to the yarn I used in this project.
-The shorts I demonstrate in the video tutorial and what I’ve written the pattern for are for a US size 4 Toddler. The stitch counts don’t necessarily matter as long as you do measurements as you go. Size 4 Toddler is 24 inches around hips/waist. Size XL Mommy size is about 40 inches around hips/waist

Special stitches:
Ch(s): chain(s)
YO: Yarn Over
St(s): Stitch(es)
Sl st: slip stitch
SK: Skip
SC: Single Crochet
DC: Double Crochet
FPDC: Front Post Double Crochet
BPDC: Back Post Double Crochet


This post contains affiliate links, which I may be compensated for when you make a purchase. That means if you click on any link and buy from the linked websites, I will receive a small percentage of the value of your order. The amount you pay is not changed. Thank you for all your support in clicking the links in my blog!! You all are so amazing!! ~Nadia

The yarn provided for this pattern is courtesy of Lion Brand Yarn, WeCrochet, and Paintbox Yarns


FREE Written Crochet Pattern: Hanging Planter Basket

FREE Written Crochet Pattern: Hanging Planter Basket

In the recent past, I have become quite the plant enthusiast.  In keeping with my new passion, I am always on the lookout for new plants and ways to showcase them. I saw these hanging baskets pop up on my plant pages, and I knew it would be something that I could make myself. This is the result of my “can I make this myself” discovery. So many of us crocheters catch ourselves saying that from time to time when we see projects like these. Below, find the written pattern to this hanging planter basket. I hope it is as easy to whip up as it was for me! Also, please note, you don’t have to be a plant enthusiast to enjoy these baskets. You can find so many uses for these around your home. Enjoy!


My dad will continue to be the videographer, editor, and photographer for our videos when I move away.

Support YARNutopia today so we can continue to bring you clear, quality crochet tutorials even after I move into my new home!
There will be an added expense of more travel and hopefully this won’t deter our ability to provide consistent videos on a weekly basis.

Donate Button with Credit Cards

**You can always contact me via Facebook if you have any problems with the pattern. I am happy to help if you have any questions along the way.
***These patterns are copyright YARNutopia © so PLEASE DO NOT COPY, SHARE, ADJUST OR RESELL MY PATTERN. I wrote and tested this pattern myself, from beginning to end. It took a lot of time and work, and I would really like to have it remain “my pattern.”
***You can sell anything you make from my patterns, please just link back to my website YARNutopia.com. Thank you!

Teacher: Nadia Fuad
Video and Editing: Fuad Azmat (My Daddy)
Share your work on Facebook!
Add me on Snapchat: YARNutopia
Follow me on Instagram
Visit My Ravelry Store and add this to your Favorites!
Follow me on Twitter: @YARNutopia
Enjoy this video and subscribe to my channel on YouTube for more tutorials on how to crochet!
Leave a comment, and share with your friends!

Designed by Nadia Fuad
You *may* sell items made from my pattern, but please reference my website YARNutopia.com.
Please do not copy, sell, and/or post this pattern and claim it as your own.

Materials you will need:

Get the supplies individually by clicking the links below
-Any cotton yarn (use 2 strands held together) or use 1 strand of bulky yarn
Size H-5.00mm Crochet Hook
Yarn Needle
Scissors

NOTES:
-Use a smaller hook to make these smaller
-Use a bigger hook to make these bigger
-You can use any size 4 medium, worsted weight yarn for this project (Use 2 strands held together to make it thicker, or use size 5 bulky yarn to make this basket)
-This basket is approximately 8 inches wide and deep.
-You can check out yarnsub.com to see yarn substitutions that are equal to the yarn I used in this project.

Special stitches:
Ch(s): chain(s)
YO: Yarn Over
St(s): Stitch(es)
Sl st: slip stitch
SC: Single Crochet
DC: Double Crochet

Pattern:

There is no video tutorial for this pattern.

Using 2 strands of yarn held together to make a bulky yarn, OR use bulky yarn

Start with ch 3, work in continuous rounds for the whole basket (no sl sts at the end of the rounds) and DO NOT turn your work.

Rnd 1: 10 DC in 3rd Ch from hook. (10)

Rnd 2: 2 DC in each st around. (20)

Rnd 3: [2 DC in next st, DC in next st] 10 times. (30)

Rnd 4: [2 DC in next st, DC in next 2 sts] 10 times. (40)

Rnd 5: [2 DC in next st, DC in next 3 sts] 10 times. (50)

Rnd 6: [2 DC in next st, DC in next 4 sts] 10 times. (60)

Rnd 7-9: [DC2TOG, DC in next 4 sts] 10 times. (50)

Rnd 8: [DC2TOG, DC in next 3 sts] 10 times. (40)

Rnd 9: [DC2TOG, DC in next 2 sts] 10 times. (30)

After Rnd 9, HDC in next st, SC in next st, Sl st in next st.

Loop for hanging: Ch 15 or 18, sl st back into the same st. Fasten off with LONG tail.
Wrap long tail around base of loop for extra support and good looks! Weave in the end.

Enjoy!

This post contains affiliate links, which I may be compensated for when you make a purchase. That means if you click on any link and buy from the linked websites, I will receive a small percentage of the value of your order. The amount you pay is not changed. Thank you for all your support in clicking the links in my blog!! You all are so amazing!! ~Nadia


How to Make: Pretzel Bites

Welcome to our family kitchen! Today’s recipe is going to be Pretzel Bites!

We are going to show you how to make these bites using only a few ingredients.
Now let’s get started!

Recipe for Pretzel Bites:
Ingredients:
1-Canned Bisquits such as Jumbo Grands or similar
1/4 c. Baking SODA
3-4 Tblsp of Butter Coarse salt – sea or kosher
Water for boiling

Directions:
Preheat oven to 400* F Line two cookie sheets with parchment paper set aside Open your canned bisquits and be ready to get a jump scare like I did! Cut each bisquit into 4-6 equal parts- I quartered mine to make 32 bites Once cut into pieces, lightly shape into round or cubed pieces (optional)
Fill a sauce pan half full of water and bring water to a boil Slowly add baking soda to water in increments as to not overflow Once your baking SODA is added, add your dough pieces into the boiling baking soda water Turn the pieces in the boiling water and remove.

DO NOT KEEP them in the water too long or they will turn mushy. Once removed, set the dough pieces on your parchment lined cookie sheets. Place cookie sheets with your dough pieces into your preheated 400*F oven and bake for 15-20 minutes depending on your oven. Mine went for 18 minutes and they were perfect!

When done, they should have a beautiful dark brown coloring like pretzels! Melt butter Remove sheets from your oven and brush bites with melted butter while still warm Sprinkle Pretzel Bites with salt and ENJOY!

Dip them in melted cheese or enjoy on their own!


Optional: Instead of sprinkling with salt, you can roll your warm buttered bites in a cinnamon sugar mixture for a sweeter version! Dip them in some frosting! Delicious! Join us each week for more fun and easy recipes! Be sure to like, comment, and subscribe to our channel!

Happy Hooking and Cooking!
~Fuad, Shannon, & Nadia!

FREE Crochet Video Tutorial: Seat Belt Shoulder Strap Cover

FREE Crochet Video Tutorial: Seat Belt Shoulder Strap Cover

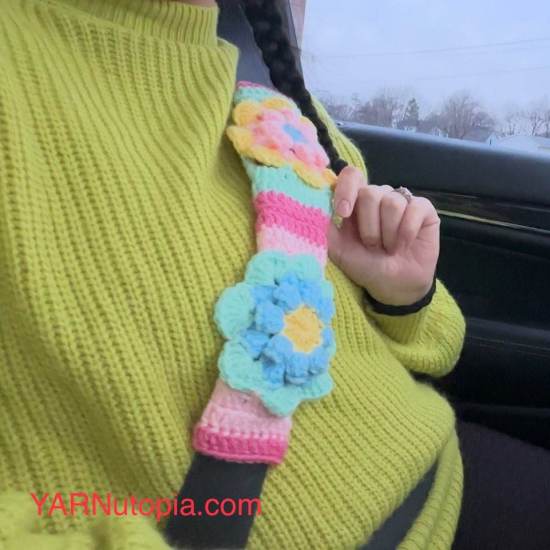
Drive down the road in style with this boho seat belt strap cover! It’s a perfect cheery looking accessory just in time for spring!! This was a great project to use up some scrap yarn from my stash. Don’t want to cover that seat belt strap!? Don’t worry! This video still offers you a 3D granny square design that would make a fantastic blanket!


Follow along with this video tutorial to learn how to make this seat belt strap cover:

My dad will continue to be the videographer, editor, and photographer for our videos even if we don’t live together.
Support YARNutopia today so we can continue to bring you clear, quality crochet tutorials even after I move into my new home!
There will be an added expense of more travel and hopefully this won’t deter our ability to provide consistent videos on a weekly basis.

Donate Button with Credit Cards

**You can always contact me via Facebook if you have any problems with the pattern. I am happy to help if you have any questions along the way.
***These patterns are copyright YARNutopia © so PLEASE DO NOT COPY, SHARE, ADJUST OR RESELL MY PATTERN. I wrote and tested this pattern myself, from beginning to end. It took a lot of time and work, and I would really like to have it remain “my pattern.”
***You can sell anything you make from my patterns, please just link back to my website YARNutopia.com. Thank you!

Teacher: Nadia Fuad
Video and Editing: Fuad Azmat (My Daddy)
Share your work on Facebook!
Add me on Snapchat: YARNutopia
Follow me on Instagram
Visit My Ravelry Store and add this to your Favorites!
Follow me on Twitter: @YARNutopia
Enjoy this video and subscribe to my channel on YouTube for more tutorials on how to crochet!
Leave a comment, and share with your friends!

Designed by Nadia Fuad
You *may* sell items made from my pattern, but please reference my website YARNutopia.com.
Please do not copy, sell, and/or post this pattern and claim it as your own.

Materials you will need:

Get the supplies individually by clicking the links below
-Any scrap yarn (I used worsted weight size 4 Medium yarn by various brands – Lion Brand, Red Heart Yarn, Brava-WeCrochet)
SizeG-4.25mm Crochet Hook
Yarn Needle
Scissors

NOTES:
-Use a smaller hook to make these smaller
-Use a bigger hook to make these bigger
-You can use any size 4 medium, worsted weight yarn for this project
-This square is 6 inches wide. A seatbelt is 2 inches across so this will fit perfectly around the strap when you tri-fold it.
-You can check out yarnsub.com to see yarn substitutions that are equal to the yarn I used in this project.


Special stitches:
Ch(s): chain(s)
YO: Yarn Over
BLO: Back Loop Only
St(s): Stitch(es)
Sl st: slip stitch
SK: Skip
SC: Single Crochet
DC: Double Crochet
Popcorn: 6 DC in same sp, remove hook from last dc, insert hook into 1st dc of grouping, put loop back onto hook, pull through, pull tight, popcorn made


This post contains affiliate links, which I may be compensated for when you make a purchase. That means if you click on any link and buy from the linked websites, I will receive a small percentage of the value of your order. The amount you pay is not changed. Thank you for all your support in clicking the links in my blog!! You all are so amazing!! ~Nadia

FREE Written Crochet Pattern: Seat Belt Shoulder Strap Cover

FREE Written Crochet Pattern: Seat Belt Shoulder Strap Cover

Drive down the road in style with this boho seat belt strap cover! It’s a perfect cheery looking accessory just in time for spring!! This was a great project to use up some scrap yarn from my stash. Don’t want to cover that seat belt strap!? Don’t worry! This video still offers you a 3D granny square design that would make a fantastic blanket!


My dad will continue to be the videographer, editor, and photographer for our videos when I move away.

Support YARNutopia today so we can continue to bring you clear, quality crochet tutorials even after I move into my new home!
There will be an added expense of more travel and hopefully this won’t deter our ability to provide consistent videos on a weekly basis.

Donate Button with Credit Cards

**You can always contact me via Facebook if you have any problems with the pattern. I am happy to help if you have any questions along the way.
***These patterns are copyright YARNutopia © so PLEASE DO NOT COPY, SHARE, ADJUST OR RESELL MY PATTERN. I wrote and tested this pattern myself, from beginning to end. It took a lot of time and work, and I would really like to have it remain “my pattern.”
***You can sell anything you make from my patterns, please just link back to my website YARNutopia.com. Thank you!

Teacher: Nadia Fuad
Video and Editing: Fuad Azmat (My Daddy)
Share your work on Facebook!
Add me on Snapchat: YARNutopia
Follow me on Instagram
Visit My Ravelry Store and add this to your Favorites!
Follow me on Twitter: @YARNutopia
Enjoy this video and subscribe to my channel on YouTube for more tutorials on how to crochet!
Leave a comment, and share with your friends!

Designed by Nadia Fuad
You *may* sell items made from my pattern, but please reference my website YARNutopia.com.
Please do not copy, sell, and/or post this pattern and claim it as your own.

Materials you will need:

Get the supplies individually by clicking the links below
-Any scrap yarn (I used worsted weight size 4 Medium yarn by various brands – Lion Brand, Red Heart Yarn, Brava-WeCrochet)
SizeG-4.25mm Crochet Hook
Yarn Needle
Scissors

NOTES:
-Use a smaller hook to make these smaller
-Use a bigger hook to make these bigger
-You can use any size 4 medium, worsted weight yarn for this project
-This square is 6 inches wide. A seatbelt is 2 inches across so this will fit perfectly around the strap when you tri-fold it.
-You can check out yarnsub.com to see yarn substitutions that are equal to the yarn I used in this project.


Special stitches:
Ch(s): chain(s)
YO: Yarn Over
BLO: Back Loop Only
St(s): Stitch(es)
Sl st: slip stitch
SK: Skip
SC: Single Crochet
DC: Double Crochet
Popcorn: 6 DC in same sp, remove hook from last dc, insert hook into 1st dc of grouping, put loop back onto hook, pull through, pull tight, popcorn made

Pattern:

If you have any confusion or difficulty with reading this pattern, please watch the video tutorial to have visual instructions.

Start with Magic Ring or ch 4 or 5 and sl st to beginning to form ring.

Rnd 1: ch 3, 15 DC in ring. sl st to beginning ch up 3. (16 sts)

Rnd 2: In any st, ch 3, Beg. Popcorn in same stitch, * Ch 2, sk next st, Popcorn in next st, repeat from * around, ch 2, sl st to beg. popcorn. (8 popcorns, 8 ch 2 sps)

Rnd 3: in any ch 2 sp, ch 3, work a 4 DC in same sp, * sc in popcorn, 5 DC in next sp, repeat from * around, sl st to beginning. (8 Shells)

Rnd 4: In any sc, ch 3, 6 DC in same st, *Sc in middle st of shell, 7 DC in next sc, repeat from * around, sl st to beginning ch up 3. (8 Shells)

Rnd 5: In any SC, ch 1, sc in same st, * Ch 5, sk shell, sc in next sc, repeat from * around, sl st to beginning sc. (8 ch 5 sps)

Rnd 6: Sl st into a ch 5 sp, Ch 3(counts as DC), put 4 more DC in same sp, Ch 2, 5DC in same sp (first corner made), *5 DC in next sp, [5 DC, Ch 2, 5 DC] in next ch 5 sp, repeat from * around ending with 5 DC in last ch 5 sp, sl st to ch 3 st. (60 sts around)

Rnd 7: Ch 3, DC in each st around putting [2 DC, ch 2, 2 DC] in each corner sp, Sl st to beginning ch 3 st. (76 sts around)

Rnd 8: repeat Rnd 7. (92 sts around)

Fasten off. Weave in all ends.

Make 2 squares, then sew them together on one side. Add buttons or velcro to close the piece and fit around your seatbelt. (see video tutorial for visual instructions)

Enjoy!

This post contains affiliate links, which I may be compensated for when you make a purchase. That means if you click on any link and buy from the linked websites, I will receive a small percentage of the value of your order. The amount you pay is not changed. Thank you for all your support in clicking the links in my blog!! You all are so amazing!! ~Nadia


How to Make: Rice Crispy Peep Treats

How to Make: Rice Crispy Peep Treats

It’s that time of year when those Peep Treats appear on the store shelves. They brightly shine among the Easter candy. Yes, they are festive. Yes, they remind us of a certain holiday. Yes, they are almost an Easter Basket staple. But, ARE THEY a fan favorite? Peeps get a bit of a bad rap. Here is a great way to use them in a fun and festive sweet treat! They never will go to waste again!

Recipe:

Approximately 20-24 Peeps of any color
6 -7 cups of Crispy Rice Cereal
6-8 tblsps of butter

Preheat oven to 400*F

Butter a 9×13 cake pan
Line up your Peeps Marshmello treats in rows

Completely cover Peeps with your Crispy Rice Cereal. Let those Peep heads slightly peek out! LOL

Add pats of butter across the top of the cereal

Place pan in the oven for 8-10 minutes. Check after 6 minutes since each oven is differnt. Peeps will begin to puff up and the tops will appear toasted.

Butter should be melted. Remove from oven and stir all ingredients together.

Press firmly into pan and cool. Cut into squares and serve!  SO oooey goooey and delicious!

Optional: Sprinkle topping – sugars, confetti treats, m&ms, etc…

This is perfect for satisfying your sweet tooth!
Guaranteed Delicious!! Enjoy and be sure to share your treats on facebook and/or instagram and tag YARNutopia! Be sure to LIKE, SUBSCRIBE, AND SHARE OUR OTHER CHANNEL HERE! 

Happy Hooking and Cooking!

~Fuad, Shannon, & Nadia

This post contains affiliate links, which I may be compensated for when you make a purchase. That means if you click on any link and buy from the linked websites, I will receive a small percentage of the value of your order. The amount you pay is not changed. Thank you for all your support in clicking the links in my blog!! You all are so amazing!! ~Nadia

Mandarin Duck Sighting on Milwaukee Lakeshore, WI

Mandarin Duck Sighting on Milwaukee Lakeshore, WI

I was hearing about sightings of a rare Mandarin Duck that was making his appearance on Milwaukee’s lakeshore. Chatter of various sightings were coming from many of my birding and wildlife groups. Could it be true? Soon, photos started to pop up in those same groups and I knew we needed to head down to Milwaukee and see for ourselves.

We took the three hour trip hoping to catch a glimpse and this guy did NOT disappoint! Our son, daughter-in-law, and grandkids joined us. It was an exciting event for all of us. Mainly because many photographers had made numerous attempts to see this little guy, and we lucked out on our first visit! We did make a couple stops along Lake Michigan before spotting him on the South Shore.

When we arrived there were a couple of photographers already camped out but soon after more started showing up. Word travels fast! Here is a short video of this fascinating duck. How did it get here? How did it end up in Wisconsin hanging out with a flock of Mallards? Was it an escapee from a zoo? Was it someones exotic pet that was released into the wild? Or was it a confused migration flight that brought this guy all the way here from the far east of China or Japan? Your guess is as good as mine! I have always loved a good mystery. I am just not sure this is one that we will ever know the answer to how he landed here. Enjoy my video and share your thoughts.

Happy Hooking…and Birding!!

Fuad & Shannon
(and Nadia!)


How to: Cook Crockpot Creamy Chicken Spaghetti

I prepared a family favorite that is not only easy to make, but is a meal that can stretch the dollar! I love making meals on a shoestring and this one cost just around $10USD and can feed the ENTIRE family! With a family our size, recipes like these come in handy!

Creamy Chicken Spaghetti

Tips; You can substitue low fat, low sodium ingredients (soup, sour cream, cheese) without compromising flavor. You can also substitute a variety of cheeses and still get rich creamy/cheesy results. Use what you like. You can also substitute 2-3 chicken breasts with 4-6 boneless skinless thighs. The beauty of a recipe like this is, it is very versatile and still produces GREAT results.

Crockpot Creamy Chicken Spaghetti Recipe:
Serves 8

2 10.75 oz. cans of cream of chicken soup
1 10 oz. can of diced tomato w/ green chili (Rotel)-you do not need to drain
2-3 chicken breasts
1/4 c. sour cream
1 c. of shredded cheese (I used mild white cheddar but you can your preference)
1 lb. of spaghetti noodles (cooked)
1 tsp garlic powder
1 tsp. paprika(optional)
1/2 tsp. salt
1/2 tsp pepper

Start by placing your chicken breasts in the crockpot. No prep necessary. Add both cans of cream of chicken soup and can of tomatoes with chilis. “Frost” the tops of your chicken breast and cover crockpot. Set on high for 3-4 hours or low for 6-7 hours.

Once your chicken has been cooked, remove from crockpot and cut into bite size pieces. Add your seasonings-salt, pepper, garlic powder and paprika to your crockpot. Add your cheese and sour cream. Mix well. Add your chicken bites back into sauce. Mix well and put back on high for 3o minutes.

While your chicken finishes the last stage in the crockpot, prepare your spaghetti noodles as per direction on package. Cook al dente.

Once your noodles are cooked, add them to your crockpot chicken and mix in well. The noodles will blend with your rich creamy sauce making a mouth-watering dinner guaranteed to please some of the most picky eaters! Let sit until sauce thickens.

Serve alone, with a side dish, or garlic toast and Enjoy!

Ready to eat!


Happy hooking…and cooking!

Fuad, Shannon, and Nadia

FREE Written Crochet Pattern: Winter Fur Snood

FREE Written Crochet Pattern: Winter Fur Snood

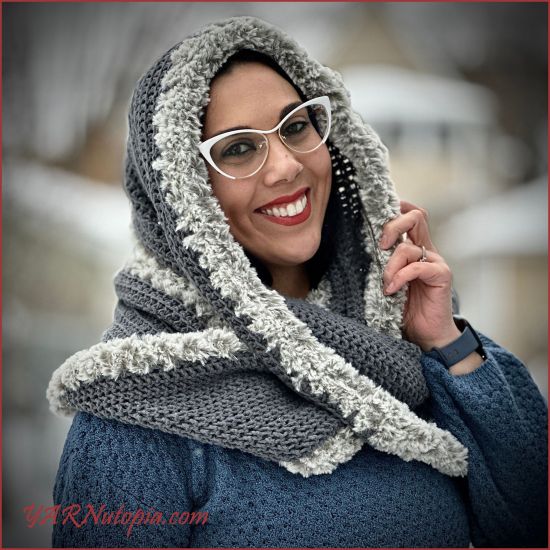
Grab your hook and your Lion Brand Yarns “Feels Like Butta” and “Go for Faux.” Now you have everything you need to make my winter fur snood!

‘Tis the season for cold temps, snow days, and crisp winds. What better way to stay warm and cozy than a fashionable snood? What is a snood you ask? It is a scarf + hood= snood!! It’s the perfect winter statement! It’s all the rave at this time and you can make your very own by following along to my easy pattern and video tutorial. Don’t like the idea of a snood? Don’t worry! This doubles as a VERY beautiful neck cowl!

No matter which way you choose to wear it, you will love it! Versatile, fashionable, and comfortable! It’s a perfect trifecta for you!


My dad will continue to be the videographer, editor, and photographer for our videos when I move away.
Support YARNutopia today so we can continue to bring you clear, quality crochet tutorials even after I move into my new home!
There will be an added expense of more travel and hopefully this won’t deter our ability to provide consistent videos on a weekly basis.

Donate Button with Credit Cards

**You can always contact me via Facebook if you have any problems with the pattern. I am happy to help if you have any questions along the way.
***These patterns are copyright YARNutopia © so PLEASE DO NOT COPY, SHARE, ADJUST OR RESELL MY PATTERN. I wrote and tested this pattern myself, from beginning to end. It took a lot of time and work, and I would really like to have it remain “my pattern.”
***You can sell anything you make from my patterns, please just link back to my website YARNutopia.com. Thank you!

Teacher: Nadia Fuad
Video and Editing: Fuad Azmat (My Daddy)
Share your work on Facebook!
Add me on Snapchat: YARNutopia
Follow me on Instagram
Visit My Ravelry Store and add this to your Favorites!
Follow me on Twitter: @YARNutopia
Enjoy this video and subscribe to my channel on YouTube for more tutorials on how to crochet!
Leave a comment, and share with your friends!

Designed by Nadia Fuad
You *may* sell items made from my pattern, but please reference my website YARNutopia.com.
Please do not copy, sell, and/or post this pattern and claim it as your own.

Materials you will need:

Get the supplies individually by clicking the links below
Lion Brand Feels Like Butta Yarn in Charcoal (654 yards)
Lion Brand Go For Faux Thick & Quick in Husky (72 yards)
SizeI-5.50mm Crochet Hook
Yarn Needle
Scissors

NOTES:
-Use a smaller hook to make these smaller
-Use a bigger hook to make these bigger
-You can use any size 4 medium, worsted weight yarn for this project
-This cowl is 80 inches around (you could make it longer or shorter based off your foundation chain)
-You can check out yarnsub.com to see yarn substitutions that are equal to the yarn I used in this project.


Special stitches:
Ch(s): chain(s)
YO: Yarn Over
BLO: Back Loop Only
St(s): Stitch(es)
Sl st: slip stitch
SK: Skip
SC: Single Crochet
DC: Double Crochet

Pattern:

If you have any confusion or difficulty with reading this pattern, please watch the video tutorial that is linked above in this blog post to have visual instructions.

Cowl:

Work in BLO for the whole cowl

Rnd 1: FDC 230 and sl st to first st without twisting foundation row. Or you can Ch 230 or 232 (as I say in the video tutorial) and Sl st to first ch, Ch 2, DC in each Ch around, sl st to first st, Do not turn. (230)

Rnd 2: Ch 2 (does not count as st), Work in BLO, DC in each st around, Sl st to first st, do not turn.

Rnds 3-18: repeat Rnd 2 (you can continue and make yours wider if you want!)

Fasten off, Weave in all ends.

Add a DC round of Faux Fur around each edge working between the posts of the stitches on the outer rows of your work. (See video tutorial for visual instructions)

Fasten off. Weave in all ends.

Enjoy!

This post contains affiliate links, which I may be compensated for when you make a purchase. That means if you click on any link and buy from the linked websites, I will receive a small percentage of the value of your order. The amount you pay is not changed. Thank you for all your support in clicking the links in my blog!! You all are so amazing!! ~Nadia

The yarn provided for this pattern is courtesy of Lion Brand Yarn


FREE Crochet Video Tutorial: Winter Fur Snood

FREE Crochet Video Tutorial: Winter Fur Snood

Grab your hook and your Lion Brand Yarns “Feels Like Butta” and “Go for Faux.” Now you have everything you need to make my winter fur snood!

‘Tis the season for cold temps, snow days, and crisp winds. What better way to stay warm and cozy than a fashionable snood? What is a snood you ask? It is a scarf + hood= snood!! It’s the perfect winter statement! It’s all the rave at this time and you can make your very own by following along to my easy pattern and video tutorial. Don’t like the idea of a snood? Don’t worry! This doubles as a VERY beautiful neck cowl!

No matter which way you choose to wear it, you will love it! Versatile, fashionable, and comfortable! It’s a perfect trifecta for you!


Follow along with this video tutorial to learn how to make this snood:

My dad will continue to be the videographer, editor, and photographer for our videos even if we don’t live together.
Support YARNutopia today so we can continue to bring you clear, quality crochet tutorials even after I move into my new home!
There will be an added expense of more travel and hopefully this won’t deter our ability to provide consistent videos on a weekly basis.

Donate Button with Credit Cards

**You can always contact me via Facebook if you have any problems with the pattern. I am happy to help if you have any questions along the way.
***These patterns are copyright YARNutopia © so PLEASE DO NOT COPY, SHARE, ADJUST OR RESELL MY PATTERN. I wrote and tested this pattern myself, from beginning to end. It took a lot of time and work, and I would really like to have it remain “my pattern.”
***You can sell anything you make from my patterns, please just link back to my website YARNutopia.com. Thank you!

Teacher: Nadia Fuad
Video and Editing: Fuad Azmat (My Daddy)
Share your work on Facebook!
Add me on Snapchat: YARNutopia
Follow me on Instagram
Visit My Ravelry Store and add this to your Favorites!
Follow me on Twitter: @YARNutopia
Enjoy this video and subscribe to my channel on YouTube for more tutorials on how to crochet!
Leave a comment, and share with your friends!

Designed by Nadia Fuad
You *may* sell items made from my pattern, but please reference my website YARNutopia.com.
Please do not copy, sell, and/or post this pattern and claim it as your own.

Materials you will need:

Get the supplies individually by clicking the links below
Lion Brand Feels Like Butta Yarn in Charcoal (654 yards)
Lion Brand Go For Faux Thick & Quick in Husky (72 yards)
SizeI-5.50mm Crochet Hook
Yarn Needle
Scissors

NOTES:
-Use a smaller hook to make these smaller
-Use a bigger hook to make these bigger
-You can use any size 4 medium, worsted weight yarn for this project
-This cowl is 80 inches around (you could make it longer or shorter based off your foundation chain)
-You can check out yarnsub.com to see yarn substitutions that are equal to the yarn I used in this project.

Special stitches:
Ch(s): chain(s)
YO: Yarn Over
BLO: Back Loop Only
St(s): Stitch(es)
Sl st: slip stitch
SK: Skip
SC: Single Crochet
DC: Double Crochet


This post contains affiliate links, which I may be compensated for when you make a purchase. That means if you click on any link and buy from the linked websites, I will receive a small percentage of the value of your order. The amount you pay is not changed. Thank you for all your support in clicking the links in my blog!! You all are so amazing!! ~Nadia

The yarn provided for this pattern is courtesy of Lion Brand Yarn

How to make: 4-ingredient no-knead artisan bread in cast iron Dutch oven

How to make: 4-ingredient no-knead artisan bread in cast iron Dutch oven

Here is a simple step-by-step recipe that is sure to wow your guests at any dinner party or satisfy the most insatiable craving for homemade bread you have EVER had! Trust me when I say, when you make your very own loaf, you won’t want to stop at just one! You will be a bread making aficianado before you know it! Follow my recipe below and watch my step by step video to guide you through this easy process! By this afternoon, your house will smell like rich homemade bread and your meals will be next level with this fantastic recipe!

finished loaf of artisan bread

Recipe AND Video Below:


We made a quick artisan bread loaf using only four (4) ingredients! No kneading! No mess! Easy step by step tutorial to help you achieve the greatest results proving that you don’t need to exhaust yourself to make fancy, delicious bread!!

Easy to Bake 4-ingredient, no-knead artisan bread

3 cups all purpose flour
2 tsp quick rise instant yeast
2 tsp kosher or cooking salt

1 1/2 cups warm water (Not hot! Luke warm 130*F or 55*C)

(You will need parchment paper)

Mix all ingredients in one bowl. Dough will be sticky. Let sit for 1-3 hours until dough doubles in size. (A perfect time to work on your crochet projects!)  Preheat oven to 450*F (232*C) and set empty cast iron Dutch oven inside with lid on while oven preheats. Heat empty Dutch oven for 30 minutes. NOTE: This bread dough can be kept in refrigerator for up to three days and made later. The time in the fridge can even enhance flavor!

While oven/Dutch oven preheats, sprinkle a little flour on clean surface. Roll your dough onto floured surface and fold each ‘side’ into itself. I do 6-8 folds until dough forms nice round ball. Place dough on parchment paper and transfer dough ball into clean bowl. Using sifter, sprinkle a small amount of flour onto dough ball top surface. Using a lame or sharp knife cut design onto top. Let sit for duration of time it takes to preheat oven and heat up Dutch oven.

a slice down the middle, fresh from the oven!

AFTER 20-30 minutes, using oven mitts, remove HOT Dutch oven from preheated oven and carefully remove lid. Your cast iron pot is going to be EXTREMELY hot!! Use caution. Place parchment with dough ball into the hot pan and replace lid. Place back in oven and bake with LID ON for 30 minutes. AFTER 30 MINUTES, Remove the lid from your Dutch oven pot and bake bread uncovered for an additional 15 minutes or until you have a nice and toasty brown crust! Guaranteed your house will smell amazing! Carefully remove bread from pan and let cool for 10-15 minutes on cooling rack. Slice and serve! It tastes incredible with fresh butter melting on warm bread!! Mmm mmm mmm!!! Be sure to share with us how your finished loaves turn out!!!

a beautiful slice of warm, fresh made bread slathered in butter!

If you like easy to follow recipes and a variety of more fantastic videos, be sure to follow our SECOND channel Fuad Azmat/Ambient Sounds WE HOPE TO SEE YOU THERE!!

“The more you know, the more you can create. There’s no end to imagination in the kitchen.” ~Julia Child

Happy Hooking…and Baking!
~Fuad, Shannon, & Nadia


FREE Crochet Video Tutorial: Evergreen Ski Hat

FREE Crochet Video Tutorial: Evergreen Ski Hat

Nasir has been growing and changing SO MUCH! Therapy has been working wonders, and in the past several months, he has found so many new words and skills.

The holidays went pretty well, and he had a lot of fun participating in all the activities. Because of his high energy, we decided to outfit him with some snowboarding gear, and Nate took him out for a trial run. He loves it!

It was the inspiration for the Evergreen Ski Hat. I’m so excited for my guys to be matching up both in fashion and in fun!! I used Brava Yarn in Dublin green. The perfect color for my Irish husband! You can make this for anyone! The design is both feminine and masculine and adding a pom or different color can make this customizable for you or someone you love. It’s a great beanie design that I know you will want to make now! Here’s my free pattern!


Follow along with this video tutorial to learn how to make this Hat:


My dad will continue to be the videographer, editor, and photographer for our videos even if we don’t live together.
Support YARNutopia today so we can continue to bring you clear, quality crochet tutorials even after I move into my new home!
There will be an added expense of more travel and hopefully this won’t deter our ability to provide consistent videos on a weekly basis.

Donate Button with Credit Cards

**You can always contact me via Facebook if you have any problems with the pattern. I am happy to help if you have any questions along the way.
***These patterns are copyright YARNutopia © so PLEASE DO NOT COPY, SHARE, ADJUST OR RESELL MY PATTERN. I wrote and tested this pattern myself, from beginning to end. It took a lot of time and work, and I would really like to have it remain “my pattern.”
***You can sell anything you make from my patterns, please just link back to my website YARNutopia.com. Thank you!

Teacher: Nadia Fuad
Video and Editing: Fuad Azmat (My Daddy)
Share your work on Facebook!
Add me on Snapchat: YARNutopia
Follow me on Instagram
Visit My Ravelry Store and add this to your Favorites!
Follow me on Twitter: @YARNutopia
Enjoy this video and subscribe to my channel on YouTube for more tutorials on how to crochet!
Leave a comment, and share with your friends!

Designed by Nadia Fuad
You *may* sell items made from my pattern, but please reference my website YARNutopia.com.
Please do not copy, sell, and/or post this pattern and claim it as your own.

Materials you will need:
Get the supplies individually by clicking the links below
Brava Yarn in Dublin Green (or any color you want!) 200 Yards
SizeH-5.00mm Crochet Hook
Yarn Needle
Scissors

NOTES:
-Use a smaller hook to make these smaller
-Use a bigger hook to make these bigger
-You can use any size 4 medium, worsted weight yarn for this project
-You can check out yarnsub.com to see yarn substitutions that are equal to the yarn I used in this project.


Special stitches:
Ch(s): chain(s)
YO: Yarn Over
St(s): Stitch(es)
Sl st: slip stitch
SK: Skip
SC: Single Crochet
DC: Double Crochet
FPDC: Front Post Double Crochet
BPDC: Back Post Double Crochet


This post contains affiliate links, which I may be compensated for when you make a purchase. That means if you click on any link and buy from the linked websites, I will receive a small percentage of the value of your order. The amount you pay is not changed. Thank you for all your support in clicking the links in my blog!! You all are so amazing!! ~Nadia

The yarn provided for this pattern is courtesy of WeCrochet

FREE Written Crochet Pattern: Evergreen Ski Hat

FREE Written Crochet Pattern: Evergreen Ski Hat

Nasir has been growing and changing SO MUCH! Therapy has been working wonders, and in the past several months, he has found so many new words and skills.

The holidays went pretty well, and he had a lot of fun participating in all the activities. Because of his high energy, we decided to outfit him with some snowboarding gear, and Nate took him out for a trial run. He loves it!

It was the inspiration for the Evergreen Ski Hat. I’m so excited for my guys to be matching up both in fashion and in fun!! I used Brava Yarn in Dublin green. The perfect color for my Irish husband! You can make this for anyone! The design is both feminine and masculine and adding a pom or different color can make this customizable for you or someone you love. It’s a great beanie design that I know you will want to make now! Here’s my free pattern!


My dad will continue to be the videographer, editor, and photographer for our videos when I move away.
Support YARNutopia today so we can continue to bring you clear, quality crochet tutorials even after I move into my new home!
There will be an added expense of more travel and hopefully this won’t deter our ability to provide consistent videos on a weekly basis.

Donate Button with Credit Cards

**You can always contact me via Facebook if you have any problems with the pattern. I am happy to help if you have any questions along the way.
***These patterns are copyright YARNutopia © so PLEASE DO NOT COPY, SHARE, ADJUST OR RESELL MY PATTERN. I wrote and tested this pattern myself, from beginning to end. It took a lot of time and work, and I would really like to have it remain “my pattern.”
***You can sell anything you make from my patterns, please just link back to my website YARNutopia.com. Thank you!

Teacher: Nadia Fuad
Video and Editing: Fuad Azmat (My Daddy)
Share your work on Facebook!
Add me on Snapchat: YARNutopia
Follow me on Instagram
Visit My Ravelry Store and add this to your Favorites!
Follow me on Twitter: @YARNutopia
Enjoy this video and subscribe to my channel on YouTube for more tutorials on how to crochet!
Leave a comment, and share with your friends!

Designed by Nadia Fuad
You *may* sell items made from my pattern, but please reference my website YARNutopia.com.
Please do not copy, sell, and/or post this pattern and claim it as your own.

Materials you will need:

Get the supplies individually by clicking the links below
Brava Yarn in Dublin Green (or any color you want!) 200 Yards
SizeH-5.00mm Crochet Hook
Yarn Needle
Scissors

NOTES:
-Use a smaller hook to make these smaller
-Use a bigger hook to make these bigger
-You can use any size 4 medium, worsted weight yarn for this project
-You can check out yarnsub.com to see yarn substitutions that are equal to the yarn I used in this project.


Special stitches:
Ch(s): chain(s)
YO: Yarn Over
St(s): Stitch(es)
Sl st: slip stitch
SK: Skip
SC: Single Crochet
DC: Double Crochet
FPDC: Front Post Double Crochet
BPDC: Back Post Double Crochet


Pattern:

If you have any confusion or difficulty with reading this pattern, please watch the video tutorial that is linked above in this blog post to have visual instructions.

Hat:

Toddler/Child Size:

Ch 2

Rnd 1: 9 SC in 2nd Ch from hook, Sl st to 1st st, ch 1 (9)

Rnd 2: Work in the “V” of the stitch for all SC rows. 2 SC in each st around, Sl st to first st, Ch 1. (18)

Rnd 3: [2 SC in next st, SC in next st] 9 times, Sl st to first st, Ch 1. (27)

Rnd 4: [2 SC in next st, SC in next 2 sts] 9 times, Sl st to first st, Ch 1. (36)

Rnd 5: [2 SC in next st, SC in next 3 sts] 9 times, Sl st to first st, Ch 1. (45)

Rnd 6: [2 SC in next st, SC in next 4 sts] 9 times, Sl st to first st, Ch 1. (54)

Rnd 7-11: SC in each st around. Sl st to first st, Ch 1. (54)

Rnd 12: Ch 2 (instead of ch 1, does not count as stitch), DC in each st around. Sl st to first St, Ch 2. (54)

Rnd 13-16: FPDC on first st, *BPDC on next st, FPDC on next st, repeat from * around, Sl st to first st, Ch 2. (54)

Rnd 17: Ch 1 (instead of ch 2), SC in each st around, Sl st to first st, Ch 1. (54)

Rnds 18-26: SC into the V of each st around, Sl st to first st, Ch 1. (54)

Rnd 27: Repeat Round 12

Rnds 28-31: Repeat Rounds 13-16 alternating FPDC and BPDC.

Fasten off, weave in all ends. Add a pom if desired!


Child/Teen Size:

Ch 2

Rnd 1: 9 SC in 2nd Ch from hook, Sl st to 1st st, ch 1 (9)

Rnd 2: Work in the “V” of the stitch for all SC rows. 2 SC in each st around, Sl st to first st, Ch 1. (18)

Rnd 3: [2 SC in next st, SC in next st] 9 times, Sl st to first st, Ch 1. (27)

Rnd 4: [2 SC in next st, SC in next 2 sts] 9 times, Sl st to first st, Ch 1. (36)

Rnd 5: [2 SC in next st, SC in next 3 sts] 9 times, Sl st to first st, Ch 1. (45)

Rnd 6: [2 SC in next st, SC in next 4 sts] 9 times, Sl st to first st, Ch 1. (54)

Rnd 7: SC in each st around, Sl st to first st, Ch 1. (54)

Rnd 8: [2 SC in next st, SC in next 6 sts] 9 times, Sl st to first st, Ch 1. (60)

Rnds 9-11: SC in each st around, Sl st to first st, Ch 1. (60)

Rnd 12: Ch 2 (instead of ch 1, does not count as stitch), DC in each st around. Sl st to first St, Ch 2.

Rnd 13-16: FPDC on first st, *BPDC on next st, FPDC on next st, repeat from * around, Sl st to first st, Ch 2. (60)

Rnd 17: Ch 1 (instead of ch 2), SC in each st around, Sl st to first st, Ch 1. (60)

Rnds 18-26: SC into the V of each st around, Sl st to first st, Ch 1. (60)

Rnd 27: Repeat Round 12

Rnds 28-34: Repeat Rounds 13-16 alternating FPDC and BPDC

Fasten off, weave in all ends. Add a pom if desired!


Teen/Adult Size:

Ch 2

Rnd 1: 9 SC in 2nd Ch from hook, Sl st to 1st st, ch 1 (9)

Rnd 2: Work in the “V” of the stitch for all SC rows. 2 SC in each st around, Sl st to first st, Ch 1. (18)

Rnd 3: [2 SC in next st, SC in next st] 9 times, Sl st to first st, Ch 1. (27)

Rnd 4: [2 SC in next st, SC in next 2 sts] 9 times, Sl st to first st, Ch 1. (36)

Rnd 5: [2 SC in next st, SC in next 3 sts] 9 times, Sl st to first st, Ch 1. (45)

Rnd 6: [2 SC in next st, SC in next 4 sts] 9 times, Sl st to first st, Ch 1. (54)

Rnd 7: SC in each st around, Sl st to first st, Ch 1. (54)

Rnd 8: [2 SC in next st, SC in next 8 sts] 6 times, Sl st to first st, Ch 1. (60)

Rnd 9: [2 SC in next st, SC in next 9 sts] 6 times, Sl st to first st, Ch 1. (66)

Rnds 10-11: SC in each st around, Sl st to first st, Ch 1. (66)

Rnd 12: Ch 2 (instead of ch 1, does not count as stitch), DC in each st around. Sl st to first St, Ch 2.

Rnd 13-16: FPDC on first st, *BPDC on next st, FPDC on next st, repeat from * around, Sl st to first st, Ch 2. (66)

Rnd 17: Ch 1 (instead of ch 2), SC in each st around, Sl st to first st, Ch 1. (66)

Rnds 18-26: SC into the V of each st around, Sl st to first st, Ch 1. (66)

Rnd 27: Repeat Round 12

Rnds 28-36: Repeat Rounds 13-16 alternating FPDC and BPDC

Fasten off. Weave in all ends.

Enjoy!

This post contains affiliate links, which I may be compensated for when you make a purchase. That means if you click on any link and buy from the linked websites, I will receive a small percentage of the value of your order. The amount you pay is not changed. Thank you for all your support in clicking the links in my blog!! You all are so amazing!! ~Nadia

The yarn provided for this pattern is courtesy of WeCrochet


FREE Crochet Video Tutorial: Cuddle Up Baby Blanket

FREE Crochet Video Tutorial: Cuddle Up Baby Blanket

When a good friend is having a baby girl, one must use their skills and create a luxurious way to welcome her into the world. Join me as I share the free crochet pattern and video tutorial for The Cuddle Up Baby Blanket below. I used Vel-Luxe yarn by Lion Brand Yarn and I LOVE it. I want one for myself, it is so soft!


Follow along with this video tutorial to learn how to make this blanket:


My dad will continue to be the videographer, editor, and photographer for our videos even if we don’t live together.
Support YARNutopia today so we can continue to bring you clear, quality crochet tutorials even after I move into my new home!
There will be an added expense of more travel and hopefully this won’t deter our ability to provide consistent videos on a weekly basis.

Donate Button with Credit Cards

**You can always contact me via Facebook if you have any problems with the pattern. I am happy to help if you have any questions along the way.
***These patterns are copyright YARNutopia © so PLEASE DO NOT COPY, SHARE, ADJUST OR RESELL MY PATTERN. I wrote and tested this pattern myself, from beginning to end. It took a lot of time and work, and I would really like to have it remain “my pattern.”
***You can sell anything you make from my patterns, please just link back to my website YARNutopia.com. Thank you!

Teacher: Nadia Fuad
Video and Editing: Fuad Azmat (My Daddy)
Share your work on Facebook!
Add me on Snapchat: YARNutopia
Follow me on Instagram
Visit My Ravelry Store and add this to your Favorites!
Follow me on Twitter: @YARNutopia
Enjoy this video and subscribe to my channel on YouTube for more tutorials on how to crochet!
Leave a comment, and share with your friends!

Designed by Nadia Fuad
You *may* sell items made from my pattern, but please reference my website YARNutopia.com.
Please do not copy, sell, and/or post this pattern and claim it as your own.

Materials you will need:
Get the supplies individually by clicking the links below
Lion Brand Vel-Luxe Yarn in Dusty Pink (240 yards of this color) and Eggplant (492 yards of this color) (you can use 730-760 yards of any color of yarn)
SizeI-5.50mm Crochet Hook
Yarn Needle
Scissors

NOTES:
-Use a smaller hook to make these smaller
-Use a bigger hook to make these bigger
-You can use any size 4 medium, worsted weight yarn for this project. 2 contrasting colors look great together, but you can use 1 color or many colors if you’d like!
-You can check out yarnsub.com to see yarn substitutions that are equal to the yarn I used in this project.
-This blanket is a baby blanket size but you can use any multiple of 3 on your foundation chain to make this wider. Continue repeating the same row repeat to make it longer. My blanket measures 36 inches wide by 40 inches long.

Special stitches:
Ch(s): chain(s)
YO: Yarn Over
St(s): Stitch(es)
Sl st: slip stitch
SK: Skip
SC: Single Crochet
DC: Double Crochet


This post contains affiliate links, which I may be compensated for when you make a purchase. That means if you click on any link and buy from the linked websites, I will receive a small percentage of the value of your order. The amount you pay is not changed. Thank you for all your support in clicking the links in my blog!! You all are so amazing!! ~Nadia

The yarn provided for this pattern is courtesy of Lion Brand Yarn

FREE Written Crochet Pattern: Cuddle Up Baby Blanket

FREE Written Crochet Pattern: Cuddle Up Baby Blanket

When a good friend is having a baby girl, one must use their skills and create a luxurious way to welcome her into the world. Join me as I share the free crochet pattern and video tutorial for The Cuddle Up Baby Blanket below. I used Vel-Luxe yarn by Lion Brand Yarn and I LOVE it. I want one for myself, it is so soft!


My dad will continue to be the videographer, editor, and photographer for our videos when I move away.
Support YARNutopia today so we can continue to bring you clear, quality crochet tutorials even after I move into my new home!
There will be an added expense of more travel and hopefully this won’t deter our ability to provide consistent videos on a weekly basis.

Donate Button with Credit Cards

**You can always contact me via Facebook if you have any problems with the pattern. I am happy to help if you have any questions along the way.
***These patterns are copyright YARNutopia © so PLEASE DO NOT COPY, SHARE, ADJUST OR RESELL MY PATTERN. I wrote and tested this pattern myself, from beginning to end. It took a lot of time and work, and I would really like to have it remain “my pattern.”
***You can sell anything you make from my patterns, please just link back to my website YARNutopia.com. Thank you!

Teacher: Nadia Fuad
Video and Editing: Fuad Azmat (My Daddy)
Share your work on Facebook!
Add me on Snapchat: YARNutopia
Follow me on Instagram
Visit My Ravelry Store and add this to your Favorites!
Follow me on Twitter: @YARNutopia
Enjoy this video and subscribe to my channel on YouTube for more tutorials on how to crochet!
Leave a comment, and share with your friends!

Designed by Nadia Fuad
You *may* sell items made from my pattern, but please reference my website YARNutopia.com.
Please do not copy, sell, and/or post this pattern and claim it as your own.

Materials you will need:
Get the supplies individually by clicking the links below
Lion Brand Vel-Luxe Yarn in Dusty Pink (240 yards of this color) and Eggplant (492 yards of this color) (you can use 730-760 yards of any color of yarn)
SizeI-5.50mm Crochet Hook
Yarn Needle
Scissors

NOTES:
-Use a smaller hook to make these smaller
-Use a bigger hook to make these bigger
-You can use any size 4 medium, worsted weight yarn for this project. 2 contrasting colors look great together, but you can use 1 color or many colors if you’d like!
-You can check out yarnsub.com to see yarn substitutions that are equal to the yarn I used in this project.
-This blanket is a baby blanket size but you can use any multiple of 3 on your foundation chain to make this wider. Continue repeating the same row repeat to make it longer. My blanket measures 36 inches wide by 40 inches long.


Special stitches:
Ch(s): chain(s)
YO: Yarn Over
St(s): Stitch(es)
Sl st: slip stitch
SK: Skip
SC: Single Crochet
DC: Double Crochet


Pattern:

If you have any confusion or difficulty with reading this pattern, please watch the video tutorial that is linked above in this blog post to have visual instructions.

Blanket:

With Main Color (Eggplant)

Ch 78 or any multiple of 3

Row 1: 2 DC in 3rd Ch from hook, *Sk 2 Chs, [SC, 2 DC] in next ch, repeat from * across, ending with SC in last st, Ch 1, Turn.

Row 2: 2 DC in 1st st, *Sk next 2 DC sts, [SC, 2 DC] in next SC st, Repeat from * across ending with SC in last st, Ch 1, Turn.

Rows 3-7: Repeat Row 2

Rows 8-9: Change color to Dusty Pink, repeat Row 2

Rows 10-11: Change color to Eggplant, repeat Row 2

Rows 12-21: Change color to Dusty Pink, Repeat Row 2

Rows 22-23: Change Color to Eggplant, Repeat Row 2

Rows 24-25: Change color to Dusty Pink, Repeat Row 2

Rows 26-47: Change color to Eggplant, Repeat Row 2

Row 48-65: Repeat Rows 8-25

Rows 66-72: With Eggplant, repeat Row 2

Fasten off, weave in all ends.

Border:

Round 1: Attach to any corner of your work, Work between the groupings all around the blanket, Ch 1, SC in same corner, *Ch 3, SC in next gap between grouping of sts, repeat from * around. End with Ch 3, sl st to first SC. Do not turn.

Round 2: Sl st in next Ch 3 sp, Ch 1, SC in same sp, *7 DC in next Ch sp, SC in next ch sp, repeat from * around, sl st to first SC.

Fasten off

Weave in all ends. Enjoy!

This post contains affiliate links, which I may be compensated for when you make a purchase. That means if you click on any link and buy from the linked websites, I will receive a small percentage of the value of your order. The amount you pay is not changed. Thank you for all your support in clicking the links in my blog!! You all are so amazing!! ~Nadia

The yarn provided for this pattern is courtesy of Lion Brand Yarn


Happy Halloween 2022 from YARNutopia!

Happy Halloween 2022 from YARNutopia!

Our Annual Halloween Costume Reveal is here! This year, we have decided on some friendly monster costumes.

Nas loves his one-eyed green monster with horns! He was running around trying to catch pretend monsters and pretend he was one too! He’s such a little goofball!

Nasir’s costume consists of the crocheted green slip-on with a face. I paired that with the green leggings and turtleneck that I bought on Amazon. I used Lion Brand Yarn to create this ensemble.

Nate pulls off the big blue monster very well! For his costume, I created the fuzzy hat with horns. I purchased the furry costume from Amazon and voila it was the perfect match!

For my costume I just made a monster amigurumi doll and wore a pink and purple outfit to tie it all together.

In recent years, it has been difficult to find the time to make elaborate plans for costumes and not be able to get them done. I’ve scaled down quite a bit, but still like to make sure that I’ve included crochet in each costume. I hope you enjoy our monster costumes and keep coming back each year to see more!

If you’d like the crochet pattern for Nasir’s Monster Costume, you can find the written instructions here.

If you’d like the Hat Pattern that Nate is wearing, you can find the written instructions here.

If you’d like to make the little monster plushie I am holding in the photos, you can find the full written pattern here.


FREE Written Crochet Pattern: Toddler Monster Costume

FREE Written Crochet Pattern: Toddler Monster Costume

It’s that time of year again! Halloween is one of my favorite holidays. Every year, we try to create something unique and fun to share here on YARNutopia. This year is no exception, and we have decided on some friendly monster costumes.

Nas loves his one-eyed green monster with horns! He was running around trying to catch pretend monsters and pretend he was one too! He’s such a little goofball!

Nasir’s costume consists of the crocheted green slip-on with a face. I paired that with the green leggings and turtleneck that I bought on Amazon. I used Lion Brand Yarn to create this ensemble. The exact type of yarn and colors and amount is all listed below in the “Materials you will need” section.


My dad will continue to be the videographer, editor, and photographer for our videos when I move away.
Support YARNutopia today so we can continue to bring you clear, quality crochet tutorials even after I move into my new home!
There will be an added expense of more travel and hopefully this won’t deter our ability to provide consistent videos on a weekly basis.

Donate Button with Credit Cards

**You can always contact me via Facebook if you have any problems with the pattern. I am happy to help if you have any questions along the way.
***These patterns are copyright YARNutopia © so PLEASE DO NOT COPY, SHARE, ADJUST OR RESELL MY PATTERN. I wrote and tested this pattern myself, from beginning to end. It took a lot of time and work, and I would really like to have it remain “my pattern.”
***You can sell anything you make from my patterns, please just link back to my website YARNutopia.com. Thank you!

Teacher: Nadia Fuad
Video and Editing: Fuad Azmat (My Daddy)
Share your work on Facebook!
Add me on Snapchat: YARNutopia
Follow me on Instagram
Visit My Ravelry Store and add this to your Favorites!
Follow me on Twitter: @YARNutopia
Enjoy this video and subscribe to my channel on YouTube for more tutorials on how to crochet!
Leave a comment, and share with your friends!

Pattern:

Designed by Nadia Fuad
You *may* sell items made from my pattern, but please reference my website YARNutopia.com.
Please do not copy, sell, and/or post this pattern and claim it as your own.

Materials you will need:
Get the supplies individually by clicking the links below
Knit Picks Cotlin Yarn in Silver (less than 25 yards)
Lion Brand Yarn 24/7 Cotton in Lime, Black, and White. (4 balls of Lime (740 yards total needed), 1 ball of Black, and 1 ball of white)
SizeH-5.00mm Crochet Hook and F-3.75mm crochet hook for embellishments
Yarn Needle
Scissors

NOTES:
-Use a smaller hook to make these smaller
-Use a bigger hook to make these bigger
-The measurements of this costume are 16 inches long from shoulder to bottom and 18″ wide which is 36 inches around the waist.
-You can check out yarnsub.com to see yarn substitutions that are equal to the yarn I used in this project.
-Use 3 strands of yarn together for the BODY part of the costume only.
-The components to this pattern are: Body, Horns, Inner Eye, Outer Eye, Mouth, Teeth, and Eyelid
-This is worked from the top down and then each component is added after the body is made.

Special stitches:
Ch(s): chain(s)
YO: Yarn Over
St(s): Stitch(es)
Sl st: slip stitch
SK: Skip
SC: Single Crochet
DC: Double Crochet
DC2TOG: Double crochet decrease
DC3TOG: Double crochet 3 sts together

Pattern:

If you have any confusion or difficulty with reading this pattern, please watch the video tutorial that is linked above in this blog post to have visual instructions.

Body

With Lime Green
Use 3 strands of yarn at the same time
Use H-5.00mm crochet hook or I-5.5mm Crochet hook for this piece

Ch 54
Work in continuous rounds for this piece

Round 1: Without Twisting Foundation Chain, SC in 1st Ch to form a ring and continue to SC in each Ch around, work in continuous rounds. (54 SC)

Round 2: HDC in each st around. (54)

Rnd 3: [2 HDC in next st, HDC in next 8 sts] 6 times. (60)

Rnd 4: [2 HDC in next st, HDC in next 5 sts] 10 times. (70)

Rnd 5: [2 HDC in next st, HDC in next 6 sts] 10 times. (80)

Rnd 6: [2 HDC in next st, HDC in next 7 sts] 10 times. (90)

Rnd 7: [2 HDC in next st, HDC in next 8 sts] 10 times. (100)

Rnd 8: HDC in next 16 sts, Ch 10, Sk 10 sts, HDC in next 40 sts, Ch 10, Sk 10 sts, HDC in the last 24 sts. (80 sts and 2 ch 10 sps)

Rnd 9: HDC in each st putting 10 HDC in each of the Ch 10 sps. (100)

Rnds 10-34: HDC in each st around.
Fasten off after your piece is long enough.
Weave in ends.

Horns:

Make 2

With Gray yarn
Use 1 strand of yarn and 3.75mm crochet hook
Ch 2
Rnd 1: 4 SC in 2nd ch from hook (4)

Work in continuous rounds
Work in BLO

Rnd 2: 2 SC in next st, SC in the rest of the sts around. (5)

Rnds 3-10: repeat Round 2 (you should have 12 sts after Rnd 10 is complete

Rnd 11: SC in each st around. Fasten off with long tail for sewing.

Assembly Step:
Stuff Horns and sew them to each shoulder. Weave in ends.

Inner Eye:

With Black yarn and 3.75mm crochet hook

Ch 3

Rnd 1: 9 DC in 3rd ch from hook, sl st to first DC. Do not turn. (9)

Rnd 2: Ch 2 (does not count as st), 2 DC in each st around, sl st to first DC. (18)

Fasten off with long tail for sewing.

Outer Eye:

With White yarn and 3.75mm crochet hook

Ch 3

Rnd 1: 9 DC in 3rd Ch from hook, sl st to first DC, do not turn after each round. (9)

Rnd 2: Ch 2 (does not count as st), 2 DC in each st around, Sl st to first DC. (18)

Rnd 3: Ch 2, [2 DC in next st, DC in next st] 9 times, sl st to first DC. (27)

Rnd 4: Ch 2, [2 DC in next st, DC in next 2 sts] 9 times, sl st to first DC. (36)

Rnd 5: Ch 2, [2 DC in next st, DC in next 3 sts]9 times, sl st to first DC. (45)

Rnd 6: Ch 2. [2 DC in next st, DC in next 4 sts] 9 times, sl st to first DC. (54)

Rnd 7: Ch 2, [2 DC in next st, DC in next 5 sts] 9 times, sl st to first DC. (63)

Fasten off with long tail for sewing.

Assembly step:
Sew black circle inner eye to the center of the outer eye white piece. Add a fleck of white in the black piece for added effect. Sew White piece to the body of the costume. Weave in all ends.

Eyelid:

With Green and 3.75mm crochet hook
Use 1 strand of yarn

Ch 20

Row 1: DC in 3rd Ch and each ch across, Ch 1 turn.

Row 2: Sl st in first st, HDC in next 16 sts, sl st in last st. Fasten off with long tail for sewing.

Assembly step:

Sew the eyelid to the top of the outer eye white piece. I sewed mine with the HDC row on the top and the DC row on the bottom. I sewed only the top down, and the lid just sat over the eye (see photos for reference)

Mouth:

With Black and 3.75mm crochet hook
Use 1 strand of yarn

Ch 42

Row 1: DC in 3rd ch and in each ch across, Ch 2 turn. (40)

Row 2: [DC2TOG] 2 times, DC in each st across until 4 sts remain, [DC2TOG] 2 times, ch 2 turn. (36)

Row 3-5: repeat row 2
You should have 24 sts by the end of row 5
Continue to SC around entire piece to clean up edges.
Fasten off with long tail for sewing.

Teeth:

With White and 3.75mm crochet hook
use 1 strand of yarn

Ch 38

First tooth: Row 1: DC in 3rd ch from hook, DC in next 5 sts, Ch 2, turn. (6)

Row 2: [DC2TOG] 3 times, Ch 2, Turn. (3)

Row 3: DC3TOG, Continue to SL ST down the left side of the tooth back down to the foundation ch, sl st into the very next Ch on the foundation ch right next to the last tooth

*Next tooth: Row 1: Ch 2, DC in same st and in next 5 sts, Ch 2 turn. (6)

Row 2: [DC2TOG] 3 times, Ch 2, Turn. (3)

Row 3: DC3TOG, Continue to SL ST down the left side of the tooth back down to the foundation ch, sl st into the very next Ch on the foundation ch right next to the last tooth.

Repeat from * across, ending with sl sts down the left side of the last tooth. Fasten off with long tail for sewing.

Assembly Step:

Sew black part of mouth to the body under the eyeball, then sew the teeth to the top of the mouth piece.

Weave in all ends. Enjoy!


This post contains affiliate links, which I may be compensated for when you make a purchase. That means if you click on any link and buy from the linked websites, I will receive a small percentage of the value of your order. The amount you pay is not changed. Thank you for all your support in clicking the links in my blog!! You all are so amazing!! ~Nadia

The yarn provided for this pattern is courtesy of Lion Brand Yarn

How to: Create Decor Using Mod Podge

How to: Create Decor Using Mod Podge

Hi Yarnutopians!

I hope your month is off to a great start! I love this time of year and all the festivities it brings.

October in Wisconsin has such a wonderful feel to it. The days start to get a bit shorter, colors start to change, and there is a crispness in the air that you feel when those temperatures begin to drop.

This month also brings “spooky season” upon us. If you are like me, you love this month because of Halloween. I love to decorate my home with all the fun and fantastic decor of the season. That is a breeze when you use Mod Podge to add some festive details to your plain items. Below, follow along with us as we demonstrate in photos how to take an ordinary tray that we purchased from the Dollar Tree and change it into a lovely decorative item for the season in a few simple steps! Let’s get started using Mod Podge to decoupage this tray!

Supplies needed:

Tray
Mod Podge (we used satin finish found here)
Scissor
Decorative Napkin
Paint brush or sponge
Paper towels

We start out with a simple plain tray we bought at the local Dollar Tree. This one is a brass-looking plastic tray approximately 14″ x 7″ (outside dimension).

Here we apply the Mod Podge generously to the inside of the tray that we plan to add our detail.

Be sure to cover the area completely with a thick layer of your Mod Podge. It doesn’t matter if it looks messy! It will dry clear and you can clean up the edges later!

On our tray we are going to use the artwork from this napkin we also found at our Dollar Tree. We loved the color combination and how festive it looked!

We opened the napkin and separated the two layers. We only used the layer that has the artwork. We carefully cut the napkin to fit the INNER dimension of our tray. This piece of the napkin will fit perfectly in the bottom of our piece.

Once you have your napkin cut and ready to place, you must carefully place it in the center of the tray using great care to not have to move it around to get best placement. The napkin is very thin and can tear so be CAREFUL! Trust me, it’s worth it!

Once you have your napkin art carefully placed and centered, you can begin to gently apply a layer of Mod Podge over the top of the napkin.

Be generous with your Mod Podge as to create a nice layer over the top of the napkin. This WILL dry clear and give a nice finish to your final piece. Once you have applied a nice layer of Mod Podge, use a flat item to smooth the surface to eliminate any bubbling or rippling. We used a lid from a plastic jar. We glided it gently over the napkin’s surface.

Once the surface was smooth (there will be a few wrinkles but this will give a cool weathered look), be sure to take a paper towel and clean up any excess Mod Podge around the napkin. We also used a sharp knife to gently remove any excess fibers or messy edges.

Once the item is to your liking, let dry overnight.

The napkin no longer looks like a NAPKIN! Instead as you see in the photo, it looks as if it is part of this tray or painted on! The photo doesn’t do this justice! It is just lovely!

Once you have your tray finished and dried, you can use it to decorate your home for the season! This is perfect for any time of the year!

So now you know just how easy it can be to transform a simple item into a decorative piece fitting for any holiday! AND on a budget! Minus the Mod Podge, this project cost $2.50! You can’t beat that! Make yours today and be sure to tag us in your posts! We can’t wait to see what you create!
Until next time!

Happy Hooking & More!

Fuad, Shannon, & Nadia

This post contains affiliate links, which I may be compensated for when you make a purchase. That means if you click on any link and buy from the linked websites, I will receive a small percentage of the value of your order. The amount you pay is not changed. Thank you for all your support in clicking the links in my blog!! You all are so amazing!!

Taking A New Direction

Taking A New Direction

Hello Yarnutopians!

It has been no surprise that Nadia has had her hands full with Nasir and motherhood. She is extremely busy and has scaled back considerably on her crochet. She is still busy creating and sharing her work, just not at the level you have grown accustomed to. Understandably so. Nasir keeps her on her toes!!

We have a fantastic audience of creative individuals that check in daily to see what is new in our neck-of-the-woods. For that reason, our family has decided to take YARNutopia in a new direction. Crochet has, and always will be, the foundation for this platform. Nadia will continue to create and share her creations as often as time allows. Fuad will continue to film some of those creations as well. We know you have grown to love this combination of easy-to-follow patterns and clear, precise videos that allow the viewer to see everything in detail. That will still remain. However, we hope to grow this platform in new directions. It is for that reason, we have decided to add a few more elements to our website for you to enjoy.

What to expect

Many of you know Fuad as our cameraman. You have seen him on camera from time to time. He is also busy behind-the-scenes with us doing much more than working the camera. We hope to use YARNutopia to share some of those interests and make this more of a family/lifestyle blog. As Nadia’s parents, you may not see us as often in front of the camera but we stay quite busy in other contributing ways to this platform. We enjoy much more creative outlets in our spare time and together with Nadia, we want to share some of those with you. Things such as cooking, woodworking, DIY projects, and so much more. We will be changing our name to YARNutopia & More to encompass all that we hope to share with you!

We look forward to you staying around to see some of the new changes, as well as enjoying Nadia’s newest patterns. Keep those crochet hooks handy! You will need those! Her hands may be full but she still keeps them busy with crochet projects every day! We just plan to add some fun family and lifestyle blogs alongside her crochet projects! Don’t go anywhere, because there’s a lot of exciting content about to come your way. Stay Tuned!!

Happy Hooking & More!

Fuad, Shannon, & Nadia


This post contains affiliate links, which I may be compensated for when you make a purchase. That means if you click on any link and buy from the linked websites, I will receive a small percentage of the value of your order. The amount you pay is not changed. Thank you for all your support in clicking the links in my blog!! You all are so amazing!!

FREE Crochet Video Tutorial: Summer Mini Tote

FREE Crochet Video Tutorial: Summer Mini Tote

What a fantastic little tote in dual colors! It’s a great bag to end the summer on! It is a cute round handbag that can pack a lot inside. Add a cute button accessory and away you go! Large enough for all your favorite things!!


Follow along with this video tutorial to learn how to make this bag:


My dad will continue to be the videographer, editor, and photographer for our videos even if we don’t live together.
Support YARNutopia today so we can continue to bring you clear, quality crochet tutorials even after I move into my new home!
There will be an added expense of more travel and hopefully this won’t deter our ability to provide consistent videos on a weekly basis.

Donate Button with Credit Cards

**You can always contact me via Facebook if you have any problems with the pattern. I am happy to help if you have any questions along the way.
***These patterns are copyright YARNutopia © so PLEASE DO NOT COPY, SHARE, ADJUST OR RESELL MY PATTERN. I wrote and tested this pattern myself, from beginning to end. It took a lot of time and work, and I would really like to have it remain “my pattern.”
***You can sell anything you make from my patterns, please just link back to my website YARNutopia.com. Thank you!

Teacher: Nadia Fuad
Video and Editing: Fuad Azmat (My Daddy)
Share your work on Facebook!
Add me on Snapchat: YARNutopia
Follow me on Instagram
Visit My Ravelry Store and add this to your Favorites!
Follow me on Twitter: @YARNutopia
Enjoy this video and subscribe to my channel on YouTube for more tutorials on how to crochet!
Leave a comment, and share with your friends!

Designed by Nadia Fuad
You *may* sell items made from my pattern, but please reference my website YARNutopia.com.
Please do not copy, sell, and/or post this pattern and claim it as your own.

Materials you will need:
Get the supplies individually by clicking the links below
Lion Brand Yarn Basic Stitch Anti-Pilling yarn in Lemonade and Turquoise (Use 2 strands of yarn at the same time. I ordered 2 balls of each color)
SizeI-5.50mm Crochet Hook and a smaller crochet hook to fit through the base piece
Base Piece from Amazon
Button for closure
Yarn Needle
Scissors

NOTES:
-Use a smaller hook to make these smaller
-Use a bigger hook to make these bigger
-You can use any size 4 medium, worsted weight yarn for this project. 2 contrasting colors look great together, but you can use 1 color or many colors if you’d like!
-You can check out yarnsub.com to see yarn substitutions that are equal to the yarn I used in this project.


Special stitches:
Ch(s): chain(s)
YO: Yarn Over
St(s): Stitch(es)
Sl st: slip stitch
SK: Skip
SC: Single Crochet
DC: Double Crochet
Popcorn Stitch: 5 DC in same st, remove hook from loop, insert hook in 1st DC of grouping, put loop back on hook and pull through, folding all 5 sts in half creating a popcorn look.


This post contains affiliate links, which I may be compensated for when you make a purchase. That means if you click on any link and buy from the linked websites, I will receive a small percentage of the value of your order. The amount you pay is not changed. Thank you for all your support in clicking the links in my blog!! You all are so amazing!! ~Nadia

The yarn provided for this pattern is courtesy of Lion Brand Yarn

FREE Crochet Video Tutorial: Catchin’ Waves Crop Top

FREE Crochet Video Tutorial: Catchin’ Waves Crop Top

Warm weather, Beach Days, and the Catching Waves Crop Top are all you need for a fun in the sun summer!! This cute boho top gives all the vibes! Check out the video tutorial and written instructions below.


Follow along with this video tutorial to learn how to make this crop top:


My dad will continue to be the videographer, editor, and photographer for our videos even if we don’t live together.
Support YARNutopia today so we can continue to bring you clear, quality crochet tutorials even after I move into my new home!
There will be an added expense of more travel and hopefully this won’t deter our ability to provide consistent videos on a weekly basis.

Donate Button with Credit Cards

**You can always contact me via Facebook if you have any problems with the pattern. I am happy to help if you have any questions along the way.
***These patterns are copyright YARNutopia © so PLEASE DO NOT COPY, SHARE, ADJUST OR RESELL MY PATTERN. I wrote and tested this pattern myself, from beginning to end. It took a lot of time and work, and I would really like to have it remain “my pattern.”
***You can sell anything you make from my patterns, please just link back to my website YARNutopia.com. Thank you!

Teacher: Nadia Fuad
Video and Editing: Fuad Azmat (My Daddy)
Share your work on Facebook!
Add me on Snapchat: YARNutopia
Follow me on Instagram
Visit My Ravelry Store and add this to your Favorites!
Follow me on Twitter: @YARNutopia
Enjoy this video and subscribe to my channel on YouTube for more tutorials on how to crochet!
Leave a comment, and share with your friends!

Designed by Nadia Fuad
You *may* sell items made from my pattern, but please reference my website YARNutopia.com.
Please do not copy, sell, and/or post this pattern and claim it as your own.

Materials you will need:
Get the supplies individually by clicking the links below
Knitologie Wisp in Clay Pot (472 yards – 2 balls of yarn)
SizeH-5.00mm Crochet Hook
Yarn Needle
Scissors

NOTES:
-Use a smaller hook to make these smaller
-Use a bigger hook to make these bigger
-The measurements of this top are: Bust: 38 inches around, Waist: 38 inches around, Length: 18 inches from shoulder to bottom, but you can make this as big as you want by continuing the repeat.
-You can check out yarnsub.com to see yarn substitutions that are equal to the yarn I used in this project.

Special stitches:
Ch(s): chain(s)
YO: Yarn Over
St(s): Stitch(es)
Sl st: slip stitch
SK: Skip
SC: Single Crochet
DC: Double Crochet


This post contains affiliate links, which I may be compensated for when you make a purchase. That means if you click on any link and buy from the linked websites, I will receive a small percentage of the value of your order. The amount you pay is not changed. Thank you for all your support in clicking the links in my blog!! You all are so amazing!! ~Nadia

The yarn provided for this pattern is courtesy of KnitCrate Yarn

FREE Written Crochet Pattern: Catchin’ Waves Crop Top

FREE Written Crochet Pattern: Catchin’ Waves Crop Top

Warm weather, Beach Days, and the Catching Waves Crop Top are all you need for a fun in the sun summer!! This cute boho top gives all the vibes! Check out the video tutorial and written instructions below.


My dad will continue to be the videographer, editor, and photographer for our videos when I move away.
Support YARNutopia today so we can continue to bring you clear, quality crochet tutorials even after I move into my new home!
There will be an added expense of more travel and hopefully this won’t deter our ability to provide consistent videos on a weekly basis.

Donate Button with Credit Cards

**You can always contact me via Facebook if you have any problems with the pattern. I am happy to help if you have any questions along the way.
***These patterns are copyright YARNutopia © so PLEASE DO NOT COPY, SHARE, ADJUST OR RESELL MY PATTERN. I wrote and tested this pattern myself, from beginning to end. It took a lot of time and work, and I would really like to have it remain “my pattern.”
***You can sell anything you make from my patterns, please just link back to my website YARNutopia.com. Thank you!

Teacher: Nadia Fuad
Video and Editing: Fuad Azmat (My Daddy)
Share your work on Facebook!
Add me on Snapchat: YARNutopia
Follow me on Instagram
Visit My Ravelry Store and add this to your Favorites!
Follow me on Twitter: @YARNutopia
Enjoy this video and subscribe to my channel on YouTube for more tutorials on how to crochet!
Leave a comment, and share with your friends!

Pattern:

Designed by Nadia Fuad
You *may* sell items made from my pattern, but please reference my website YARNutopia.com.
Please do not copy, sell, and/or post this pattern and claim it as your own.

Materials you will need:
Get the supplies individually by clicking the links below
Knitologie Wisp in Clay Pot (472 yards – 2 balls of yarn)
SizeH-5.00mm Crochet Hook
Yarn Needle
Scissors

NOTES:
-Use a smaller hook to make these smaller
-Use a bigger hook to make these bigger
-The measurements of this top are: Bust: 38 inches around, Waist: 38 inches around, Length: 18 inches from shoulder to bottom, but you can make this as big as you want by continuing the repeat.
-You can check out yarnsub.com to see yarn substitutions that are equal to the yarn I used in this project.


Special stitches:
Ch(s): chain(s)
YO: Yarn Over
St(s): Stitch(es)
Sl st: slip stitch
SK: Skip
SC: Single Crochet
DC: Double Crochet


Pattern:

If you have any confusion or difficulty with reading this pattern, please watch the video tutorial that is linked above in this blog post to have visual instructions.

Crop Top:

Ch 111 or any multiple of 12+3

Row 1: 2 DC in 3rd Ch from hook, *DC in next 5 chs, Sk 1 ch, DC in next 5 chs, 3 DC in next ch, repeat from * across, ending with 2 DC in last st. Ch 2, Turn.

Row 2: 2 DC in first st, *DC in next 5 sts, Sk 2 sts, DC in next 5 sts, 3 DC in next st (this should be in the middle st of the 3 dc grouping), repeat from * across, ending with 2 DC in last st, Ch 2, Turn.

Row 3: 2 DC in first st, *DC in next 5 sts, Sk 2 sts, DC in next 5 sts, 3 DC in next st, repeat from * across, ending with 2 DC in last st, Ch 2, Turn.

Row 4 to 16: Repeat Row 3 (make it wider if half of your chest is not covered) See video tutorial for placement.

Make 2 panels like this.

Assembly step:
Sew the center seam together up the middle and in the middle of the back as well

Bottom band:

Attach your yarn at the corner of the panels that you sewed together. DC along the edge of the front side, then Continue DC stitches along the side of the Back edge to make it attached as a circle to wrap around the mid section. (See video tutorial for visual instructions). Sl st to first st and then ch 2 and continue onto next row.

I did 6 rounds total of 128 sts all around for each row.

You can continue to do more rows to make your shirt longer if you’d like.

Assembly step:

Sew up the sides to make the arm holes smaller if you’d like! Leave it open for a more free feel!

Weave in all ends. Enjoy!


This post contains affiliate links, which I may be compensated for when you make a purchase. That means if you click on any link and buy from the linked websites, I will receive a small percentage of the value of your order. The amount you pay is not changed. Thank you for all your support in clicking the links in my blog!! You all are so amazing!! ~Nadia

The yarn provided for this pattern is courtesy of KnitCrate Yarn


FREE Written Crochet Pattern: Snuggle Me Up Baby Blanket

FREE Written Crochet Pattern: Snuggle Me Up Baby Blanket

A very close friend of mine recently had her second baby and I wanted to make something special for her. The simplicity of the granny square is given a little remix in this pattern because I use cluster stitches in the corners to make this unique design. I hope you enjoy this pattern. Follow along


My dad will continue to be the videographer, editor, and photographer for our videos when I move away.
Support YARNutopia today so we can continue to bring you clear, quality crochet tutorials even after I move into my new home!
There will be an added expense of more travel and hopefully this won’t deter our ability to provide consistent videos on a weekly basis.

Donate Button with Credit Cards

**You can always contact me via Facebook if you have any problems with the pattern. I am happy to help if you have any questions along the way.
***These patterns are copyright YARNutopia © so PLEASE DO NOT COPY, SHARE, ADJUST OR RESELL MY PATTERN. I wrote and tested this pattern myself, from beginning to end. It took a lot of time and work, and I would really like to have it remain “my pattern.”
***You can sell anything you make from my patterns, please just link back to my website YARNutopia.com. Thank you!

Teacher: Nadia Fuad
Video and Editing: Fuad Azmat (My Daddy)
Share your work on Facebook!
Add me on Snapchat: YARNutopia
Follow me on Instagram
Visit My Ravelry Store and add this to your Favorites!
Follow me on Twitter: @YARNutopia
Enjoy this video and subscribe to my channel on YouTube for more tutorials on how to crochet!
Leave a comment, and share with your friends!

Pattern:

Designed by Nadia Fuad
You *may* sell items made from my pattern, but please reference my website YARNutopia.com.
Please do not copy, sell, and/or post this pattern and claim it as your own.

Materials you will need:
Get the supplies individually by clicking the links below
Circulo Yarns Charme (4 balls total)
SizeH-5.00mm Crochet Hook
Yarn Needle
Scissors

NOTES:
-Use a smaller hook to make these smaller
-Use a bigger hook to make these bigger
-The measurements of this blanket are 36 inches wide but you can make this as big as you want by continuing the repeat.


Special stitches:
Ch(s): chain(s)
YO: Yarn Over
St(s): Stitch(es)
Sl st: slip stitch
SK: Skip
SC: Single Crochet
DC: Double Crochet
4DCCluster: [YO, Insert Hook into st, YO, Pull through, YO, Pull through 2 loops] 4 times, YO pull through all 5 loops on your hook. Cluster made.

Pattern:

If you have any confusion or difficulty with reading this pattern, please watch the video tutorial that is linked above in this blog post to have visual instructions.

Blanket:

Use 2 strands of fingering weight yarn together at the same time, or use one strand of a thicker yarn to create this.

Ch 3

Round 1: 3 DC in 3rd ch from hook, Ch 4, *3 more DC in same Ch as first 3 DC, Ch 4, repeat from * 2 more times, Sl st to first st, Ch 2, Turn.

Rnd 2: In the corner Ch 4 sp: DC in corner, 4 DC Cluster in same corner, Ch 4, 4 DC Cluster in same corner, DC in same corner, *DC in each st until you get to the next corner, [DC, 4DCCluster, Ch 4, 4DCCluster, DC] in corner, Repeat from * around ending with DC in last st, Sl st to first st, Ch 2, Turn.

Rnd 3: *DC in each st until you get to the corner, [DC, 4DCCluster, Ch 4, 4DCCluster, DC] in corner, Repeat from * around ending with DC in last st, Sl st to first st, Ch 2, Turn.

Rnds 4-30: Repeat Round 3.

You can continue to make your blanket larger if you’d like! Just continue the repeat pattern!

Fasten off, Weave in all ends.

This post contains affiliate links, which I may be compensated for when you make a purchase. That means if you click on any link and buy from the linked websites, I will receive a small percentage of the value of your order. The amount you pay is not changed. Thank you for all your support in clicking the links in my blog!! You all are so amazing!! ~Nadia

The yarn provided for this pattern is courtesy of Circulo Yarns


FREE Crochet Video Tutorial: Snuggle Me Up Baby Blanket

FREE Crochet Video Tutorial: Snuggle Me Up Baby Blanket

A very close friend of mine recently had her second baby and I wanted to make something special for her. The simplicity of the granny square is given a little remix in this pattern because I use cluster stitches in the corners to make this unique design. I hope you enjoy this pattern. Follow along


Follow along with this video tutorial to learn how to make this blanket:


My dad will continue to be the videographer, editor, and photographer for our videos even if we don’t live together.
Support YARNutopia today so we can continue to bring you clear, quality crochet tutorials even after I move into my new home!
There will be an added expense of more travel and hopefully this won’t deter our ability to provide consistent videos on a weekly basis.

Donate Button with Credit Cards

**You can always contact me via Facebook if you have any problems with the pattern. I am happy to help if you have any questions along the way.
***These patterns are copyright YARNutopia © so PLEASE DO NOT COPY, SHARE, ADJUST OR RESELL MY PATTERN. I wrote and tested this pattern myself, from beginning to end. It took a lot of time and work, and I would really like to have it remain “my pattern.”
***You can sell anything you make from my patterns, please just link back to my website YARNutopia.com. Thank you!

Teacher: Nadia Fuad
Video and Editing: Fuad Azmat (My Daddy)
Share your work on Facebook!
Add me on Snapchat: YARNutopia
Follow me on Instagram
Visit My Ravelry Store and add this to your Favorites!
Follow me on Twitter: @YARNutopia
Enjoy this video and subscribe to my channel on YouTube for more tutorials on how to crochet!
Leave a comment, and share with your friends!

Designed by Nadia Fuad
You *may* sell items made from my pattern, but please reference my website YARNutopia.com.
Please do not copy, sell, and/or post this pattern and claim it as your own.


Materials you will need:
Get the supplies individually by clicking the links below
Circulo Yarns Charme (4 balls total)
SizeH-5.00mm Crochet Hook
Yarn Needle
Scissors

NOTES:
-Use a smaller hook to make these smaller
-Use a bigger hook to make these bigger
-The measurements of this blanket are 36 inches wide but you can make this as big as you want by continuing the repeat.
-You can check out yarnsub.com to see yarn substitutions that are equal to the Lion Brand yarn I used in this project.

Special stitches:
Ch(s): chain(s)
YO: Yarn Over
St(s): Stitch(es)
Sl st: slip stitch
SK: Skip
SC: Single Crochet
DC: Double Crochet
4DCCluster: [YO, Insert Hook into st, YO, Pull through, YO, Pull through 2 loops] 4 times, YO pull through all 5 loops on your hook. Cluster made.


This post contains affiliate links, which I may be compensated for when you make a purchase. That means if you click on any link and buy from the linked websites, I will receive a small percentage of the value of your order. The amount you pay is not changed. Thank you for all your support in clicking the links in my blog!! You all are so amazing!! ~Nadia

The yarn provided for this pattern is courtesy of Circulo Yarns

FREE Crochet Video Tutorial: Day & Night Mesh Sweater

FREE Crochet Video Tutorial: Day & Night Mesh Sweater

This beautiful Day & Night Mesh Sweater is the newest pattern Hot Off the Hook!! It is super easy and fun to make. I used Lion Brand Yarn Hometown to create this stylish design. I love it so much!!


Follow along with this video tutorial to learn how to make this sweater:


My dad will continue to be the videographer, editor, and photographer for our videos even if we don’t live together.
Support YARNutopia today so we can continue to bring you clear, quality crochet tutorials even after I move into my new home!
There will be an added expense of more travel and hopefully this won’t deter our ability to provide consistent videos on a weekly basis.

Donate Button with Credit Cards

**You can always contact me via Facebook if you have any problems with the pattern. I am happy to help if you have any questions along the way.
***These patterns are copyright YARNutopia © so PLEASE DO NOT COPY, SHARE, ADJUST OR RESELL MY PATTERN. I wrote and tested this pattern myself, from beginning to end. It took a lot of time and work, and I would really like to have it remain “my pattern.”
***You can sell anything you make from my patterns, please just link back to my website YARNutopia.com. Thank you!

Teacher: Nadia Fuad
Video and Editing: Fuad Azmat (My Daddy)
Share your work on Facebook!
Add me on Snapchat: YARNutopia
Follow me on Instagram
Visit My Ravelry Store and add this to your Favorites!
Follow me on Twitter: @YARNutopia
Enjoy this video and subscribe to my channel on YouTube for more tutorials on how to crochet!
Leave a comment, and share with your friends!

Designed by Nadia Fuad
You *may* sell items made from my pattern, but please reference my website YARNutopia.com.
Please do not copy, sell, and/or post this pattern and claim it as your own.

Materials you will need:
Get the supplies individually by clicking the links below
Lion Brand Hometown Yarn in colors New York White and Chicago Charcoal (4 balls white, 3 balls gray) total 600 yards of yarn
Size -Q-15.25mm Crochet Hook
Yarn Needle
Scissors

NOTES:

-Use a smaller hook to make this smaller
-Use a bigger hook to make this bigger
-This is written in US terms
-This took about 1 week to make but I did not work on it continuously.
-You can check out yarnsub.com to see yarn substitutions that are equal to the Lion Brand yarn I used in this project.

Special stitches:
Ch(s): chain(s)
YO: Yarn Over
St(s): Stitch(es)
Sl st: slip stitch
SK: Skip
FSC: Foundation Single Crochet
FDC: Foundation Double Crochet
SC: Single Crochet
Shell: 5 DC in same stitch
DC: Double Crochet
Stacked DC: This is a starting stitch, 2 SC’s stacked on top of each other or you can substitute a chain 3 as the first stitch if that’s more comfortable.


This post contains affiliate links, which I may be compensated for when you make a purchase. That means if you click on any link and buy from the linked websites, I will receive a small percentage of the value of your order. The amount you pay is not changed. Thank you for all your support in clicking the links in my blog!! You all are so amazing!! ~Nadia

The yarn provided for this pattern is courtesy of Lion Brand Yarn

FREE Written Crochet Pattern: Day & Night Mesh Sweater

FREE Written Crochet Pattern: Day & Night Mesh Sweater

This beautiful Day & Night Mesh Sweater is the newest pattern Hot Off the Hook!! It is super easy and fun to make. I used Lion Brand Yarn Hometown to create this stylish design. I love it so much!!


My dad will continue to be the videographer, editor, and photographer for our videos even if we don’t live together.
Support YARNutopia today so we can continue to bring you clear, quality crochet tutorials even after I move into my new home!
There will be an added expense of more travel and hopefully this won’t deter our ability to provide consistent videos on a weekly basis.

Donate Button with Credit Cards

**You can always contact me via Facebook if you have any problems with the pattern. I am happy to help if you have any questions along the way.
***These patterns are copyright YARNutopia © so PLEASE DO NOT COPY, SHARE, ADJUST OR RESELL MY PATTERN. I wrote and tested this pattern myself, from beginning to end. It took a lot of time and work, and I would really like to have it remain “my pattern.”
***You can sell anything you make from my patterns, please just link back to my website YARNutopia.com. Thank you!

Teacher: Nadia Fuad
Video and Editing: Fuad Azmat (My Daddy)
Share your work on Facebook!
Add me on Snapchat: YARNutopia
Follow me on Instagram
Visit My Ravelry Store and add this to your Favorites!
Follow me on Twitter: @YARNutopia
Enjoy this video and subscribe to my channel on YouTube for more tutorials on how to crochet!
Leave a comment, and share with your friends!

Designed by Nadia Fuad
You *may* sell items made from my pattern, but please reference my website YARNutopia.com.
Please do not copy, sell, and/or post this pattern and claim it as your own.

Materials you will need:
Get the supplies individually by clicking the links below
Lion Brand Hometown Yarn in colors New York White and Chicago Charcoal (4 balls white, 3 balls gray) total 600 yards of yarn
Size -Q-15.25mm Crochet Hook
Yarn Needle
Scissors

NOTES:

-Use a smaller hook to make this smaller
-Use a bigger hook to make this bigger
-This is written in US terms
-This took about 1 week to make but I did not work on it continuously.
-You can check out yarnsub.com to see yarn substitutions that are equal to the Lion Brand yarn I used in this project.

Special stitches:
Ch(s): chain(s)
YO: Yarn Over
St(s): Stitch(es)
Sl st: slip stitch
SK: Skip
FSC: Foundation Single Crochet
FDC: Foundation Double Crochet
SC: Single Crochet
Shell: 5 DC in same stitch
DC: Double Crochet
Stacked DC: This is a starting stitch, 2 SC’s stacked on top of each other or you can substitute a chain 3 as the first stitch if that’s more comfortable.


Pattern:

Front and Back Panel (The pattern is the same for both pieces but you need to make 2 panels so you can sew them together)

Row 1: Ch 26, DC in 3rd Ch and in each Ch across, OR FDC 24, Ch 2, Turn. (if you need to make it wider, make more chains or stitches. The video tutorial explains sizing and how to make it bigger or smaller)

Rows 2-20: DC BETWEEN each st, DC in last stitch (if necessary), Make sure you have 24 sts on each row.
Change color after every 5th row.

After row 20, Fasten off.
Once you have 2 panels for the front and back of the shirt, sew them together on each shoulder and down the sides (leaving holes for the arms available).

Weave in your ends.

You are sewing it together inside out.

Sleeves: Make 2

Row 1: Ch 18, sl st to first ch to form a ring, Ch 2, DC in each ch around. OR FDC 18, Sl st to first St to form a ring Ch 2, TURN (then sew the base of the stitches together to clean up the edge of the sleeve – you can see how to do this in the video tutorial.)

Rows 2-16: Ch 2, DC BETWEEN each st, make sure you have 18 sts around for each round. Sl st to first st, Ch 2, TURN.

Change color after every 4th row.

Fasten off after row 16. Sew to the sleeve holes on the shirt.

Weave in all ends.

Enjoy!!

This post contains affiliate links, which I may be compensated for when you make a purchase. That means if you click on any link and buy from the linked websites, I will receive a small percentage of the value of your order. The amount you pay is not changed. Thank you for all your support in clicking the links in my blog!! You all are so amazing!! ~Nadia

The yarn provided for this pattern is courtesy of Lion Brand Yarn


FREE Crochet Video Tutorial: Painted Gray Scarf

FREE Crochet Video Tutorial: Painted Gray Scarf

I know that it has been a while since I’ve posted a video tutorial and new pattern. So, I’m taking small steps back to filming to share my Painted Gray Scarf.

The Painted Gray Scarf is the newest pattern Hot Off the Hook!! It is super easy and fun to make. I used Lion Brand Yarn Scarfie to create this stylish design. Here’s the best part: this combination of stitches are a nice repeat and would make a lovely throw, baby blanket, afghan, or shawl. It’s THAT EASY! With a few adaptations of your own, the sky’s the limit.

For me, it’s subzero temps in Wisconsin, I needed a warm scarf. This one was perfect!


Follow along with this video tutorial to learn how to make this scarf:


My dad will continue to be the videographer, editor, and photographer for our videos even if we don’t live together.
Support YARNutopia today so we can continue to bring you clear, quality crochet tutorials even after I move into my new home!
There will be an added expense of more travel and hopefully this won’t deter our ability to provide consistent videos on a weekly basis.

Donate Button with Credit Cards

**You can always contact me via Facebook if you have any problems with the pattern. I am happy to help if you have any questions along the way.
***These patterns are copyright YARNutopia © so PLEASE DO NOT COPY, SHARE, ADJUST OR RESELL MY PATTERN. I wrote and tested this pattern myself, from beginning to end. It took a lot of time and work, and I would really like to have it remain “my pattern.”
***You can sell anything you make from my patterns, please just link back to my website YARNutopia.com. Thank you!

Teacher: Nadia Fuad
Video and Editing: Fuad Azmat (My Daddy)
Share your work on Facebook!
Add me on Snapchat: YARNutopia
Follow me on Instagram
Visit My Ravelry Store and add this to your Favorites!
Follow me on Twitter: @YARNutopia
Enjoy this video and subscribe to my channel on YouTube for more tutorials on how to crochet!
Leave a comment, and share with your friends!

Designed by Nadia Fuad
You *may* sell items made from my pattern, but please reference my website YARNutopia.com.
Please do not copy, sell, and/or post this pattern and claim it as your own.

Materials you will need:
Get the supplies individually by clicking the links below
Lion Brand Yarn Scarfie in Color: Cream/Black
Size -K-6.50mm Crochet Hook
Yarn Needle
Scissors

NOTES:

-Use a smaller hook to make this smaller
-Use a bigger hook to make this bigger
-This is written in US terms
-This took about 1 week to make but I did not work on it continuously.
-You can check out yarnsub.com to see yarn substitutions that are equal to the Lion Brand yarn I used in this project.

Special stitches:
Ch(s): chain(s)
YO: Yarn Over
St(s): Stitch(es)
Sl st: slip stitch
SK: Skip
FSC: Foundation Single Crochet
FDC: Foundation Double Crochet
SC: Single Crochet
Shell: 5 DC in same stitch
DC: Double Crochet
Stacked DC: This is a starting stitch, 2 SC’s stacked on top of each other or you can substitute a chain 3 as the first stitch if that’s more comfortable.


This post contains affiliate links, which I may be compensated for when you make a purchase. That means if you click on any link and buy from the linked websites, I will receive a small percentage of the value of your order. The amount you pay is not changed. Thank you for all your support in clicking the links in my blog!! You all are so amazing!! ~Nadia

The yarn provided for this pattern is courtesy of Lion Brand Yarn

FREE Written Crochet Pattern: Winter Cat Hat

FREE Written Crochet Pattern: Winter Cat Hat

Christmas may be behind us, but the New Year is just ahead, or, if you live in a climate like mine, it really doesn’t matter what time of the year it is, my Winter Cat Hat is all you need to get through those cold and snowy days!!

This luxuriously cozy hat is not only functional, it is SO CUTE! You will be in style on the slopes or on the go with this fun and furry hat!!

There is no video tutorial to this pattern yet.

My dad will continue to be the videographer, editor, and photographer for our videos even if we don’t live together.
Support YARNutopia today so we can continue to bring you clear, quality crochet tutorials even after I move into my new home!
There will be an added expense of more travel and hopefully this won’t deter our ability to provide consistent videos on a weekly basis.

Donate Button with Credit Cards

**You can always contact me via Facebook if you have any problems with the pattern. I am happy to help if you have any questions along the way.
***These patterns are copyright YARNutopia © so PLEASE DO NOT COPY, SHARE, ADJUST OR RESELL MY PATTERN. I wrote and tested this pattern myself, from beginning to end. It took a lot of time and work, and I would really like to have it remain “my pattern.”
***You can sell anything you make from my patterns, please just link back to my website YARNutopia.com. Thank you!

Teacher: Nadia Fuad
Video and Editing: Fuad Azmat (My Daddy)
Share your work on Facebook!
Add me on Snapchat: YARNutopia
Follow me on Instagram
Visit My Ravelry Store and add this to your Favorites!
Follow me on Twitter: @YARNutopia
Enjoy this video and subscribe to my channel on YouTube for more tutorials on how to crochet!
Leave a comment, and share with your friends!

Designed by Nadia Fuad
You *may* sell items made from my pattern, but please reference my website YARNutopia.com.
Please do not copy, sell, and/or post this pattern and claim it as your own.

Materials you will need:
Get the supplies individually by clicking the links below
Hometown Yarn by Lion Brand in Catskills Corner (1 ball)
Go For Faux Yarn by Lion Brand Yarn in the color Blond Elk
Size -L-8.00mm Crochet Hook
Yarn Needle
Scissors

NOTES:

-Use a smaller hook to make this smaller
-Use a bigger hook to make this bigger
-This is written in US terms
-This took about 2 hours to make.
-You can check out yarnsub.com to see yarn substitutions that are equal to the Lion Brand yarn I used in this project.
-This pattern shows the measurement as an adult sized hat

Special stitches:
Ch(s): chain(s)
YO: Yarn Over
St(s): Stitch(es)
Sl st: slip stitch
SK: Skip
SC: Single Crochet
DC: Double Crochet

Pattern:

Ch 23
Work in continuous rounds

Rnd 1: SC in 2nd ch from hook and across putting 3 SC in last ch, continue working on opposite side of foundation chain, SC in each st across, putting 2 SC in last st, sl st to first st, Ch 1, turn. (44)

Rnd 2-15: 1 SC in each st around, sl st to first st, Ch 1, TURN. (44)

Fasten off Hometown Yarn.

Row 16: determine where the center back of your hat is and free up or mark 6 stitches to be free and unworked. Then attach your FUR yarn to the left stitch of that and start this row in that stitch. Ch 2, DC in each st until the marked stitch, Turn (use photo for reference)


Rows 17-19: Ch 2, DC BETWEEN each st across, Turn.

Fasten off.

Weave in all ends.

Assembly Step: Use extra yarn to shape 2 ears in the top corners of the hat.  I just sewed a piece of yarn to make pointed ears and tied it off and wove in the ends.
Add 2 braids to the corners where the fur and regular yarn meet. See photos for reference.

Enjoy!!

This post contains affiliate links, which I may be compensated for when you make a purchase. That means if you click on any link and buy from the linked websites, I will receive a small percentage of the value of your order. The amount you pay is not changed. Thank you for all your support in clicking the links in my blog!! You all are so amazing!! ~Nadia

The yarn provided for this pattern is courtesy of Lion Brand Yarn

Happy Halloween 2021

Happy Halloween 2021

Our Annual Halloween Costume Reveal is here! Nate is a Rainbow to my Pot of Gold and Nas is our lucky leprechaun!

We had a heck of a time trying to decide on a costume that could be worn by our trio. It was such a challenge to find something that didn’t require a huge commitment and large amount of hours. Lately, our days are spent with Nasir doing occupational therapy and speech therapies for his autism.

This change has left me with only pockets of time in a day to work, so it has been quite challenging to pull this years costume together.

We managed this crazy ensemble. Not as thrilling as years past, but still fun and colorful like our family. AND we managed to get Nas to sit still and give us a couple smiles. He melts my heart. He is our true gold.

I hope you enjoy our trio and until next year…Happy Halloween!


If you are interested in making the hats Nate and I are wearing, you can find the crochet pattern and video tutorial here.

If you are interested in making the scarf Nate is wearing, you can find the crochet pattern and video tutorial here.

FREE Written Crochet Pattern: Rainbow Pom Hat

FREE Written Crochet Pattern: Rainbow Pom Hat

I am obsessed with bright colors and anything rainbow!! I created this hat to match the Rainbow Pom Scarf! Check that pattern out and make the full set! This year for Halloween, we are doing a Rainbow Theme so I wanted to create a hat and scarf to go together. You can use any colors you like with this easy tutorial using Lion Brand Yarn in the Hometown Line. I hope you enjoy this tutorial and pattern!!


My dad will continue to be the videographer, editor, and photographer for our videos even if we don’t live together.
Support YARNutopia today so we can continue to bring you clear, quality crochet tutorials even after I move into my new home!
There will be an added expense of more travel and hopefully this won’t deter our ability to provide consistent videos on a weekly basis.

Donate Button with Credit Cards

**You can always contact me via Facebook if you have any problems with the pattern. I am happy to help if you have any questions along the way.
***These patterns are copyright YARNutopia © so PLEASE DO NOT COPY, SHARE, ADJUST OR RESELL MY PATTERN. I wrote and tested this pattern myself, from beginning to end. It took a lot of time and work, and I would really like to have it remain “my pattern.”
***You can sell anything you make from my patterns, please just link back to my website YARNutopia.com. Thank you!

Teacher: Nadia Fuad
Video and Editing: Fuad Azmat (My Daddy)
Share your work on Facebook!
Add me on Snapchat: YARNutopia
Follow me on Instagram
Visit My Ravelry Store and add this to your Favorites!
Follow me on Twitter: @YARNutopia
Enjoy this video and subscribe to my channel on YouTube for more tutorials on how to crochet!
Leave a comment, and share with your friends!

Designed by Nadia Fuad
You *may* sell items made from my pattern, but please reference my website YARNutopia.com.
Please do not copy, sell, and/or post this pattern and claim it as your own.

Materials you will need:
Get the supplies individually by clicking the links below
Lion Brand Yarn Hometown in all the colors of the rainbow
Size -N-10.00mm Crochet Hook
-Measuring Tape
-Pom Maker
Yarn Needle
Scissors

NOTES:

-Use a smaller hook to make this smaller
-Use a bigger hook to make this bigger
-This is written in US terms
-This took about 2 hours to make.
-You can check out yarnsub.com to see yarn substitutions that are equal to the Lion Brand yarn I used in this project.
-This pattern with video tutorial shows the measurement as an adult sized hat

Special stitches:
Ch(s): chain(s)
YO: Yarn Over
BLO: Back Loop Only
St(s): Stitch(es)
Sl st: slip stitch
SK: Skip
FSC: Foundation Single Crochet
FDC: Foundation Double Crochet
SC: Single Crochet
HDC: Half Double Crochet
DC: Double Crochet


Pattern:

Ch 21

Row 1: SC in 2nd ch from hook, DC in next 10 chs, HDC in last 5 chs, Change color on last st, Ch 1, Turn

Row 2: With new color, WORK IN BLO, HDC in 5 sts, DC in next 10 sts, SC in last 5 sts, Change color on last st, Ch 1, Turn.

Row 3: With new color, WORK IN BLO, SC in 5 sts, DC in next 10 sts, HDC in last 5 sts, Change color on last st, Ch 1, Turn.

Rows 4-21: Repeat Rows 2 and 3 until your hat is wide enough to fit around the head (I did 21 rows total, but you might need to do more or less rows)

Fasten off with long tail on your last stitch (use it for sewing)

Assembly Step:
Sew up the seam and sew up the top to cinch it closed. Make a pom and attach it to the top of the hat.

Weave in all ends.

Enjoy!!

This post contains affiliate links, which I may be compensated for when you make a purchase. That means if you click on any link and buy from the linked websites, I will receive a small percentage of the value of your order. The amount you pay is not changed. Thank you for all your support in clicking the links in my blog!! You all are so amazing!! ~Nadia

The yarn provided for this pattern is courtesy of Lion Brand Yarn


FREE Crochet Video Tutorial: Rainbow Pom Hat

FREE Crochet Video Tutorial: Rainbow Pom Hat

I am obsessed with bright colors and anything rainbow!! I created this hat to match the Rainbow Pom Scarf! Check that pattern out and make the full set! This year for Halloween, we are doing a Rainbow Theme so I wanted to create a hat and scarf to go together. You can use any colors you like with this easy tutorial using Lion Brand Yarn in the Hometown Line. I hope you enjoy this tutorial and pattern!!


Follow along with this video tutorial to learn how to make this hat:

My dad will continue to be the videographer, editor, and photographer for our videos even if we don’t live together.
Support YARNutopia today so we can continue to bring you clear, quality crochet tutorials even after I move into my new home!
There will be an added expense of more travel and hopefully this won’t deter our ability to provide consistent videos on a weekly basis.

Donate Button with Credit Cards

**You can always contact me via Facebook if you have any problems with the pattern. I am happy to help if you have any questions along the way.
***These patterns are copyright YARNutopia © so PLEASE DO NOT COPY, SHARE, ADJUST OR RESELL MY PATTERN. I wrote and tested this pattern myself, from beginning to end. It took a lot of time and work, and I would really like to have it remain “my pattern.”
***You can sell anything you make from my patterns, please just link back to my website YARNutopia.com. Thank you!

Teacher: Nadia Fuad
Video and Editing: Fuad Azmat (My Daddy)
Share your work on Facebook!
Add me on Snapchat: YARNutopia
Follow me on Instagram
Visit My Ravelry Store and add this to your Favorites!
Follow me on Twitter: @YARNutopia
Enjoy this video and subscribe to my channel on YouTube for more tutorials on how to crochet!
Leave a comment, and share with your friends!

Designed by Nadia Fuad
You *may* sell items made from my pattern, but please reference my website YARNutopia.com.
Please do not copy, sell, and/or post this pattern and claim it as your own.

Materials you will need:
Get the supplies individually by clicking the links below
Lion Brand Yarn Hometown in all the colors of the rainbow
Size -N-10.00mm Crochet Hook
-Measuring Tape
-Pom Maker
Yarn Needle
Scissors

NOTES:

-Use a smaller hook to make this smaller
-Use a bigger hook to make this bigger
-This is written in US terms
-This took about 2 hours to make.
-You can check out yarnsub.com to see yarn substitutions that are equal to the Lion Brand yarn I used in this project.
-This pattern with video tutorial shows the measurement as an adult sized hat

Special stitches:
Ch(s): chain(s)
YO: Yarn Over
St(s): Stitch(es)
Sl st: slip stitch
SK: Skip
SC: Single Crochet
HDC: Half Double Crochet
DC: Double Crochet


This post contains affiliate links, which I may be compensated for when you make a purchase. That means if you click on any link and buy from the linked websites, I will receive a small percentage of the value of your order. The amount you pay is not changed. Thank you for all your support in clicking the links in my blog!! You all are so amazing!! ~Nadia

The yarn provided for this pattern is courtesy of Lion Brand Yarn

FREE Written Crochet Pattern: Ruffled Trim Sweater Vest

FREE Written Crochet Pattern: Ruffled Trim Sweater Vest

I decided to get back into fashion pieces. I have been taking time to ease back into filming following Nasir’s diagnosis and felt it was time to dip my hook back into the fashion pool with my Ruffle Trim Sweater Vest. I used Lion Brand Comfy Cotton Blend Yarn on this piece and am SO PLEASED! This is so cute over a long sleeve t-shirt or blouse, but can also pair nicely with a tank top for a warmer weather look. If you are so inclined, you can also wear nothing under it and just use a little boob tape to hold it in place (or wear it over a sexy bra). You can adjust the length to make it a crop top or a little longer for a full vest look. This can be entirely flexible to your taste. Add bows to the front (check my vid here) or adorn with floral appliques! You can make the same pattern multiple ways for a new look every time! This would also make a great gift!!


My dad will continue to be the videographer, editor, and photographer for our videos even if we don’t live together.
Support YARNutopia today so we can continue to bring you clear, quality crochet tutorials even after I move into my new home!
There will be an added expense of more travel and hopefully this won’t deter our ability to provide consistent videos on a weekly basis.

Donate Button with Credit Cards

**You can always contact me via Facebook if you have any problems with the pattern. I am happy to help if you have any questions along the way.
***These patterns are copyright YARNutopia © so PLEASE DO NOT COPY, SHARE, ADJUST OR RESELL MY PATTERN. I wrote and tested this pattern myself, from beginning to end. It took a lot of time and work, and I would really like to have it remain “my pattern.”
***You can sell anything you make from my patterns, please just link back to my website YARNutopia.com. Thank you!

Teacher: Nadia Fuad
Video and Editing: Fuad Azmat (My Daddy)
Share your work on Facebook!
Add me on Snapchat: YARNutopia
Follow me on Instagram
Visit My Ravelry Store and add this to your Favorites!
Follow me on Twitter: @YARNutopia
Enjoy this video and subscribe to my channel on YouTube for more tutorials on how to crochet!
Leave a comment, and share with your friends!

Designed by Nadia Fuad
You *may* sell items made from my pattern, but please reference my website YARNutopia.com.
Please do not copy, sell, and/or post this pattern and claim it as your own.

Materials you will need:
Get the supplies individually by clicking the links below
Lion Brand Yarn Comfy Cotton Blend (1100 yards or 3 cakes of this specific yarn)
Size -H-5.00mm Crochet Hook
-Measuring Tape
Yarn Needle
Scissors

NOTES:

-Use a smaller hook to make this smaller
-Use a bigger hook to make this bigger
-This is written in US terms
-This took about 1 week to make but I did not work on it continuously.
-You can check out yarnsub.com to see yarn substitutions that are equal to the Lion Brand yarn I used in this project.
-This pattern with video tutorial shows the measurement as 40 inch bust, 40 inch waist, 20 inch length
-For Panel 1 and 2, measure from your armpit to the center of your chest and that is how many ROWS you will make. To measure the foundation chain of these panels, you need to measure from your navel, up around your shoulder to the back where your navel would hit on your back, that measurement needs to be the WIDTH of your panel or the length of the foundation chain. (See video tutorial for more visual instructions)
-For the bottom waist piece, you need to make the foundation chain the whole measurement of your waist and the length of it can be as long as you want to make the shirt.

Special stitches:
Ch(s): chain(s)
YO: Yarn Over
St(s): Stitch(es)
Sl st: slip stitch
SK: Skip
FSC: Foundation Single Crochet
FDC: Foundation Double Crochet
SC: Single Crochet
HDC: Half Double Crochet
DC: Double Crochet


Pattern:

Panel 1 and 2 (Left and Right)

Ch 101 (or FSC 100) (yours might be longer or shorter depending on your measurement–see NOTES section)

Row 1: SC in 2nd Ch from hook and across, Ch 1, Turn. (100)

Row 2: SC in each st across, Ch 1, Turn.

Rows 3-28: Repeat Row 2

Row 29: SC across and also continue to crochet around entire piece putting 3 SC in corners.
Sl st to first st and fasten off with long tail for sewing later.
If this is not wide enough or too wide, make more or less rows (See NOTES section for how to measure)
(Be sure to make 2 panels before going onto the bottom piece)

Ruffles:

On outside of each panel attach yarn to corner and only work along ONE SIDE of the panel.
Row 1: Ch 2, 2 DC in each st across, Ch 2, Turn

Row 2: *2 DC in next st, DC in next st, Repeat from * across. Fasten off, weave in ends.

Bottom Waistband Piece:

Ch 120 (or any amount that measures your waist measurement when the foundation chain is semi-stetched)

Row 1: Sl st to first Ch to form a large ring, Ch 1, SC in each Ch around, sl st to first st, Ch 1, TURN.

Row 2: SC in each st around, Sl st to first st, Ch 1, TURN.

Rows 3-24: Repeat Row 2
If you want this piece shorter or longer, feel free to make more or less rows.

Assembly Step:
overlap your panels across the front and back and line them up with the bottom of your shirt. Sew across the front, then across the back. Be sure that your “Seam” on the waistband part is on the back side of your piece when you’re sewing. (See video tutorial for visual instructions on how to line everything up together) I used the whip stitch to sew it all together. Weave in all your ends when finished.

Ties:

Chain 150 (or more) and fasten off (make 2)
Weave them in and out of the waist piece across the front for one and across the back for the other, then cinch it and tie into bows.

Weave in all ends.

Enjoy!!

This post contains affiliate links, which I may be compensated for when you make a purchase. That means if you click on any link and buy from the linked websites, I will receive a small percentage of the value of your order. The amount you pay is not changed. Thank you for all your support in clicking the links in my blog!! You all are so amazing!! ~Nadia

The yarn provided for this pattern is courtesy of Lion Brand Yarn


FREE Crochet Video Tutorial: Ruffled Trim Sweater Vest

FREE Crochet Video Tutorial: Ruffled Trim Sweater Vest

I decided to get back into fashion pieces. I have been taking time to ease back into filming following Nasir’s diagnosis and felt it was time to dip my hook back into the fashion pool with my Ruffle Trim Sweater Vest. I used Lion Brand Comfy Cotton Blend Yarn on this piece and am SO PLEASED! This is so cute over a long sleeve t-shirt or blouse, but can also pair nicely with a tank top for a warmer weather look. If you are so inclined, you can also wear nothing under it and just use a little boob tape to hold it in place (or wear it over a sexy bra). You can adjust the length to make it a crop top or a little longer for a full vest look. This can be entirely flexible to your taste. Add bows to the front (check my vid here) or adorn with floral appliques! You can make the same pattern multiple ways for a new look every time! This would also make a great gift!!


Follow along with this video tutorial to learn how to make this top:

My dad will continue to be the videographer, editor, and photographer for our videos even if we don’t live together.
Support YARNutopia today so we can continue to bring you clear, quality crochet tutorials even after I move into my new home!
There will be an added expense of more travel and hopefully this won’t deter our ability to provide consistent videos on a weekly basis.

Donate Button with Credit Cards

**You can always contact me via Facebook if you have any problems with the pattern. I am happy to help if you have any questions along the way.
***These patterns are copyright YARNutopia © so PLEASE DO NOT COPY, SHARE, ADJUST OR RESELL MY PATTERN. I wrote and tested this pattern myself, from beginning to end. It took a lot of time and work, and I would really like to have it remain “my pattern.”
***You can sell anything you make from my patterns, please just link back to my website YARNutopia.com. Thank you!

Teacher: Nadia Fuad
Video and Editing: Fuad Azmat (My Daddy)
Share your work on Facebook!
Add me on Snapchat: YARNutopia
Follow me on Instagram
Visit My Ravelry Store and add this to your Favorites!
Follow me on Twitter: @YARNutopia
Enjoy this video and subscribe to my channel on YouTube for more tutorials on how to crochet!
Leave a comment, and share with your friends!

Designed by Nadia Fuad
You *may* sell items made from my pattern, but please reference my website YARNutopia.com.
Please do not copy, sell, and/or post this pattern and claim it as your own.

Materials you will need:
Get the supplies individually by clicking the links below
Lion Brand Yarn Comfy Cotton Blend (1100 yards or 3 cakes of this specific yarn)
Size -H-5.00mm Crochet Hook
-Measuring Tape
Yarn Needle
Scissors

NOTES:

-Use a smaller hook to make this smaller
-Use a bigger hook to make this bigger
-This is written in US terms
-This took about 1 week to make but I did not work on it continuously.
-You can check out yarnsub.com to see yarn substitutions that are equal to the Lion Brand yarn I used in this project.
-This pattern with video tutorial shows the measurement as 40 inch bust, 40 inch waist, 20 inch length
-For Panel 1 and 2, measure from your armpit to the center of your chest and that is how many ROWS you will make. To measure the foundation chain of these panels, you need to measure from your navel, up around your shoulder to the back where your navel would hit on your back, that measurement needs to be the WIDTH of your panel or the length of the foundation chain. (See video tutorial for more visual instructions)
-For the bottom waist piece, you need to make the foundation chain the whole measurement of your waist and the length of it can be as long as you want to make the shirt.

Special stitches:
Ch(s): chain(s)
YO: Yarn Over
St(s): Stitch(es)
Sl st: slip stitch
SK: Skip
FSC: Foundation Single Crochet
FDC: Foundation Double Crochet
SC: Single Crochet
HDC: Half Double Crochet
DC: Double Crochet


This post contains affiliate links, which I may be compensated for when you make a purchase. That means if you click on any link and buy from the linked websites, I will receive a small percentage of the value of your order. The amount you pay is not changed. Thank you for all your support in clicking the links in my blog!! You all are so amazing!! ~Nadia

The yarn provided for this pattern is courtesy of Lion Brand Yarn

FREE Written Crochet Pattern: Chunky Rainbow Pom Scarf

FREE Written Crochet Pattern: Chunky Rainbow Pom Scarf

As I work my way back to filming regular crochet tutorials, I am also thinking ahead to our annual Halloween costumes. Here is the first of several pieces that will lead up to our big reveal. This is my Chunky Rainbow Pom Scarf. Perfect for the cool weather we are starting to experience here in Wisconsin.  The time for warm weather apparel is going to be here before we know it and we need to be prepared! My Rainbow 🌈 scarf can be made exactly how I made it but use your imagination and find your own color combination to match your look! There are many possibilities! These make great gifts for anyone. You can always make it with or without poms to change the look! Now that is versatility!! I used Hometown yarn by Lion Brand Yarn. You will want to grab yours too because the softness is divine!


My dad will continue to be the videographer, editor, and photographer for our videos even if we don’t live together.
Support YARNutopia today so we can continue to bring you clear, quality crochet tutorials even after I move into my new home!
There will be an added expense of more travel and hopefully this won’t deter our ability to provide consistent videos on a weekly basis.

Donate Button with Credit Cards

**You can always contact me via Facebook if you have any problems with the pattern. I am happy to help if you have any questions along the way.
***These patterns are copyright YARNutopia © so PLEASE DO NOT COPY, SHARE, ADJUST OR RESELL MY PATTERN. I wrote and tested this pattern myself, from beginning to end. It took a lot of time and work, and I would really like to have it remain “my pattern.”
***You can sell anything you make from my patterns, please just link back to my website YARNutopia.com. Thank you!

Teacher: Nadia Fuad
Video and Editing: Fuad Azmat (My Daddy)
Share your work on Facebook!
Add me on Snapchat: YARNutopia
Follow me on Instagram
Visit My Ravelry Store and add this to your Favorites!
Follow me on Twitter: @YARNutopia
Enjoy this video and subscribe to my channel on YouTube for more tutorials on how to crochet!
Leave a comment, and share with your friends!

Pattern:

Designed by Nadia Fuad
You *may* sell items made from my pattern, but please reference my website YARNutopia.com.
Please do not copy, sell, and/or post this pattern and claim it as your own.

Materials you will need:
Get the supplies individually by clicking the links below
Lion Brand Yarn Hometown Yarn in the colors of the rainbow (I used 1 ball each of the colors and then 2 balls of white)
-Pom Maker (I used a simple cardboard cutout)
Size -N-10.00mm Crochet Hook
Yarn Needle
Scissors

NOTES:

-Use a smaller hook to make this smaller
-Use a bigger hook to make this bigger
-This is written in US terms
-This took about 4 hours to make but I did not work on it continuously.
-You can check out yarnsub.com to see yarn substitutions that are equal to the Lion Brand yarn I used in this project.
-This pattern with video tutorial shows the measurement as 6 feet long and 12 inches wide, but you can make it wider by continuing the repeat pattern.

Special stitches:
Ch(s): chain(s)
YO: Yarn Over
St(s): Stitch(es)
Sl st: slip stitch
SK: Skip
SC: Single Crochet
HDC: Half Double Crochet
DC: Double Crochet
FDC: Foundation Double Crochet

Pattern:

Row 1: FDC 200 or chain 202 and DC in 3rd ch from hook and across.. (200)

Change color on last stitch (see video tutorial on how to change color)

Row 2: Ch 2 with new color and DC BETWEEN the posts across, Change color on last stitch, Turn.

Rows 3-7: Repeat Row 2 until you’ve used all 7 colors.

Fasten off, weave in all ends.

Assembly Step:
Make 4 poms in White and sew them to each corner of the scarf.

Weave in all ends.

Enjoy!!

This post contains affiliate links, which I may be compensated for when you make a purchase. That means if you click on any link and buy from the linked websites, I will receive a small percentage of the value of your order. The amount you pay is not changed. Thank you for all your support in clicking the links in my blog!! You all are so amazing!! ~Nadia

The yarn provided for this pattern is courtesy of Lion Brand Yarn


FREE Crochet Video Tutorial: Chunky Rainbow Pom Scarf

FREE Crochet Video Tutorial: Chunky Rainbow Pom Scarf

As I work my way back to filming regular crochet tutorials, I am also thinking ahead to our annual Halloween costumes. Here is the first of several pieces that will lead up to our big reveal. This is my Chunky Rainbow Pom Scarf. Perfect for the cool weather we are starting to experience here in Wisconsin.  The time for warm weather apparel is going to be here before we know it and we need to be prepared! My Rainbow 🌈 scarf can be made exactly how I made it but use your imagination and find your own color combination to match your look! There are many possibilities! These make great gifts for anyone. You can always make it with or without poms to change the look! Now that is versatility!! I used Hometown yarn by Lion Brand Yarn. You will want to grab yours too because the softness is divine!


Follow along with this video tutorial to learn how to make this scarf:


My dad will continue to be the videographer, editor, and photographer for our videos even if we don’t live together.
Support YARNutopia today so we can continue to bring you clear, quality crochet tutorials even after I move into my new home!
There will be an added expense of more travel and hopefully this won’t deter our ability to provide consistent videos on a weekly basis.

Donate Button with Credit Cards

**You can always contact me via Facebook if you have any problems with the pattern. I am happy to help if you have any questions along the way.
***These patterns are copyright YARNutopia © so PLEASE DO NOT COPY, SHARE, ADJUST OR RESELL MY PATTERN. I wrote and tested this pattern myself, from beginning to end. It took a lot of time and work, and I would really like to have it remain “my pattern.”
***You can sell anything you make from my patterns, please just link back to my website YARNutopia.com. Thank you!

Teacher: Nadia Fuad
Video and Editing: Fuad Azmat (My Daddy)
Share your work on Facebook!
Add me on Snapchat: YARNutopia
Follow me on Instagram
Visit My Ravelry Store and add this to your Favorites!
Follow me on Twitter: @YARNutopia
Enjoy this video and subscribe to my channel on YouTube for more tutorials on how to crochet!
Leave a comment, and share with your friends!

Designed by Nadia Fuad
You *may* sell items made from my pattern, but please reference my website YARNutopia.com.
Please do not copy, sell, and/or post this pattern and claim it as your own.

Materials you will need:
Get the supplies individually by clicking the links below
Lion Brand Yarn Hometown Yarn in the colors of the rainbow (I used 1 ball each of the colors and then 2 balls of white)
-Pom Maker (I used a simple cardboard cutout)
Size -N-10.00mm Crochet Hook
Yarn Needle
Scissors

NOTES:

-Use a smaller hook to make this smaller
-Use a bigger hook to make this bigger
-This is written in US terms
-This took about 4 hours to make but I did not work on it continuously.
-You can check out yarnsub.com to see yarn substitutions that are equal to the Lion Brand yarn I used in this project.
-This pattern with video tutorial shows the measurement as 6 feet long and 12 inches wide, but you can make it wider by continuing the repeat pattern.

Special stitches:
Ch(s): chain(s)
YO: Yarn Over
St(s): Stitch(es)
Sl st: slip stitch
SK: Skip
SC: Single Crochet
HDC: Half Double Crochet
DC: Double Crochet
FDC: Foundation Double Crochet


This post contains affiliate links, which I may be compensated for when you make a purchase. That means if you click on any link and buy from the linked websites, I will receive a small percentage of the value of your order. The amount you pay is not changed. Thank you for all your support in clicking the links in my blog!! You all are so amazing!! ~Nadia

The yarn provided for this pattern is courtesy of Lion Brand Yarn

FREE Written Crochet Pattern: Aspen Baby Blanket

FREE Written Crochet Pattern: Aspen Baby Blanket

There many different reasons to be inspired. The Aspen Baby Blanket was inspired by friends celebrating the birth of their baby. The Aspen tree was the foundation for this piece. Created using series of front and back post stitches, it creates a repeat texture leaf pattern.  The striking three dimensional profile of this project took my breath away. When you look at this overall piece you would never guess that it is easier than you think! I used Basic Stitch Anti-Pilling yarn by Lion Brand Yarn and it was THE most luxurious fiber giving this blanket the absolute softest feel. Follow my video tutorial or written pattern and get your started today! 


My dad will continue to be the videographer, editor, and photographer for our videos even if we don’t live together.
Support YARNutopia today so we can continue to bring you clear, quality crochet tutorials even after I move into my new home!
There will be an added expense of more travel and hopefully this won’t deter our ability to provide consistent videos on a weekly basis.

Donate Button with Credit Cards

**You can always contact me via Facebook if you have any problems with the pattern. I am happy to help if you have any questions along the way.
***These patterns are copyright YARNutopia © so PLEASE DO NOT COPY, SHARE, ADJUST OR RESELL MY PATTERN. I wrote and tested this pattern myself, from beginning to end. It took a lot of time and work, and I would really like to have it remain “my pattern.”
***You can sell anything you make from my patterns, please just link back to my website YARNutopia.com. Thank you!

Teacher: Nadia Fuad
Video and Editing: Fuad Azmat (My Daddy)
Share your work on Facebook!
Add me on Snapchat: YARNutopia
Follow me on Instagram
Visit My Ravelry Store and add this to your Favorites!
Follow me on Twitter: @YARNutopia
Enjoy this video and subscribe to my channel on YouTube for more tutorials on how to crochet!
Leave a comment, and share with your friends!

Pattern:

Designed by Nadia Fuad
You *may* sell items made from my pattern, but please reference my website YARNutopia.com.
Please do not copy, sell, and/or post this pattern and claim it as your own.

Materials you will need:
Get the supplies individually by clicking the links below
Lion Brand Yarn Basic Stitch in Frost and Ecru (6 balls of Frost, 2 balls of Ecru or 1100 yards of Frost, and 300 yards of Ecru)
Size H-5.00mm Crochet Hook
Yarn Needle
Scissors

NOTES:

-Use a smaller hook to make this smaller
-Use a bigger hook to make this bigger
-This is written in US terms
-This took about 2 weeks to make but I did not work on it continuously.
-You can check out yarnsub.com to see yarn substitutions that are equal to the Lion Brand yarn I used in this project.
-This pattern with video tutorial shows the measurement as 35 inches by 35 inches, but you can make it longer by continuing the repeat pattern.
-If you do not want to do a stacked Single Crochet in the first stitch of every row, you can do a half double crochet and that will suffice.

Special stitches:
Ch(s): chain(s)
YO: Yarn Over
St(s): Stitch(es)
Sl st: slip stitch
SK: Skip
SC: Single Crochet
HDC: Half Double Crochet
DC: Double Crochet
V-St aka V-Stitch: (DC, ch 1, DC) in same space
BPDC2TOG: Double Crochet 2 sts together
FPDC2TOG: Double Crochet 3 sts together
BPV-St: Back Post V-Stitch
FPV-St: Front Post V-Stitch

Pattern:

Row 1: FDC 203 or Ch 205, DC in 3rd Ch and each ch across (you need 203 sts for row 1)

Row 2: Stacked SC in 1st st, FPDC in next 2 sts, *BPDC on next 10 sts, FPDC on next 7 sts, repeat from * across until 3 sts remain, FPDC on next 2 sts, HDC in last st, Ch 1, Turn.

Row 3: Stacked SC in 1st st, BPDC on next 2 sts, *FPDC2TOG, FPDC on next 6 sts, FPDC2TOG, BPDC on next 7 sts, repeat from * across, ending with BPDC on next 2 sts, HDC in last st, ch 1, turn.

Row 4: Stacked SC in 1st st, FPDC on next 2 sts *BPDC2TOG, BPDC on next 4 sts, BPDC2TOG, FPDC on next 7 sts, repeat from * across until 3 sts remain, ending with FPDC on next 2 sts, HDC in last st, Ch 1, turn.

Row 5: Stacked SC in 1st st, BPDC on next 2 sts, *FPDC2TOG, FPDC on next 2 sts, FPDC2TOG, BPDC on next 7 sts, repeat from * across until 3 sts remain, ending with BPDC on next 2 sts, HDC in last st, Ch 1, turn.

Row 6: Stacked SC in 1st st, FPDC on next 2 sts, *[BPDC2TOG] twice, FPDC on next 3 sts, BPDC on next st, FPDC on next 3 sts, repeat from * across until 3 sts remain, ending with FPDC on next 2 sts, HDC in last st, Ch 1, turn.

Row 7: Stacked SC in 1st st, BPDC on next 2 sts, *FPDC2TOG, BPDC on next 3 sts, FPDC on next st, BPDC on next 3 sts, repeat from * across until 3 sts remain, ending with BPDC on next 2 sts, HDC in last st, Ch 1, Turn.

Row 8: Stacked SC in 1st st, FPDC on next 6 sts, *BPV-St on next st, FPDC on next 7 sts, repeat from * across until 7 sts remain, ending with FPDC on 6 sts, HDC in last st, Ch 1, Turn.

Row 9: Stacked SC in 1st st, BPDC on next 6 sts, *FPDC on next st, V-St in Ch sp, FDC on next st, BPDC on next 7 sts, repeat from * across until 7 sts remain, ending with BPDC on 6 sts, HDC in last st, Ch 1, turn.

Row 10: Stacked SC in 1st st, FPDC on next 6 sts, *BPDC on next 2 sts, V-st in Ch sp, BPDC on next 2 sts, FPDC on next 7 sts, repeat from * across until 7 sts remain, ending with FPDC on 6 sts, HDC in last st, Ch 1, Turn.

Row 11: Stacked SC in 1st st, BPDC on next 6 sts, *FPDC on next 3 sts, V-st in Ch sp, FPDC on next 3 sts, BPDC on next 7 sts, Repeat from * across until 7 sts remain, ending with BPDC on 6 sts, HDC in last st, Ch 1, Turn.

Row 12: Stacked SC in 1st st, FPDC on next 6 sts, *BPDC on next 4 sts, 2 DC in ch sp, BPDC on next 4 sts, FPDC on next 7 sts, repeat from * across until 7 sts remain, ending with FPDC on next 6 sts, HDC in last st, Ch 1, Turn.

Row 13: Stacked SC in 1st st, BPDC on next 6 sts, *FPDC2TOG, FPDC on next 6 sts, FPDC2TOG, BPDC on next 7 sts, repeat from * across until 7 sts remain, ending with BPDC on next 6 sts, HDC in last st, Ch 1, Turn.

Row 14: Stacked SC in 1st st, FPDC on next 6 sts, *BPDC2TOG, BPDC on next 4 sts, BPDC2TOG, FPDC on next 7 sts, repeat from * across until 7 sts remain, ending with FPDC on next 6 sts, HDC in last st, Ch 1, Turn.

Row 15: Stacked SC in 1st st, BPDC on next 6 sts, *FPDC2TOG, FPDC on next 2 sts, FPDC2TOG, BPDC on next 7 sts, repeat from * across until 7 sts remain, ending with BPDC on next 6 sts, HDC in last st, Ch 1, Turn.

Row 16: Stacked SC in 1st st, FPDC on next 2 sts, *BPDC on next st, FPDC on next 3 sts, [BPDC2TOG] twice, FPDC on next 3 sts, repeat from * across until 7 sts remain, ending with FPDC on next 3 sts, BPDC on next st, FPDC on next 2 sts, HDC in last st, Ch 1, Turn.

Row 17: Stacked SC in 1st st, BPDC on next 2 sts, *FPDC on next st, BPDC on next 3 sts, FPDC2TOG, BPDC on next 3 sts, repeat from * across until 7 sts remain, ending with BPDC on next 3 sts, FPDC on next st, BPDC on next 2 sts, HDC in last st, Ch 1, Turn.

Row 18: Stacked SC in 1st st, FPDC on next 2 sts, *BPV-St on next st, FPDC on next 7 sts, repeat from * across, ending with FPDC on 2 sts before last, HDC in last st, Ch 1, Turn.

Row 19: Stacked SC in 1st st, BPDC on next 2 sts, *FPDC on next st, V-St in Ch sp, FPDC on next st, BPDC on next 7 sts, repeat from * across until 3 sts remain, ending with BPDC on next 2 sts, HDC in last st, Ch 1, turn.

Row 20: Stacked SC in 1st st, FPDC on next 2 sts, *BPDC on next 2 sts, V-St in Ch sp, BPDC on next 2 sts, FPDC on next 7 sts, repeat from * across until 3 sts remain, ending with FPDC on next 2 sts, HDC in last st, Ch 1, Turn.

Row 21: Stacked SC in 1st st, BPDC on next 2 sts, *FPDC on next 3 sts, V-St in Ch sp, FPDC on next 3 sts, BPDC on next 7 sts, repeat from * across until 3 sts remain, ending with BPDC on next 2 sts, HDC in last st, Ch 1, Turn.

Row 22: Stacked SC in 1st st, FPDC on next 2 sts, *BPDC on next 4 sts, 2 DC in Ch sp, BPDC on next 4 sts, FPDC on next 7 sts, Repeat from * across until 3 sts remain, ending with FPDC on next 2 sts, HDC in last st, Ch 1, Turn.

Rows 23-42: Repeat Rows 3-22

Rows 43-62: Repeat Rows 3 to 22

Rows 63-82: Repeat Rows 3-22

Rows 83-92: Repeat Rows 3-12
End on a repeat of Row 12 before fastening off. (SEE video tutorial for visual instructions on ending/fastening off)

Border:

Attach Yarn in a corner

Round 1: Ch 2, DC in each st around and in each row on the side, put 3 DC in corners (See video tutorial for visual instructions), sl st to first st, Ch 2, DO NOT TURN.

Round 2: DC in each st around putting 3 DC in the middle DC of each corner, sl st to first st, Fasten off.

Fasten off, weave in all ends.

Enjoy!!

This post contains affiliate links, which I may be compensated for when you make a purchase. That means if you click on any link and buy from the linked websites, I will receive a small percentage of the value of your order. The amount you pay is not changed. Thank you for all your support in clicking the links in my blog!! You all are so amazing!! ~Nadia

The yarn provided for this pattern is courtesy of Lion Brand Yarn


FREE Crochet Video Tutorial: Summer Breeze Triangle Shawl

FREE Crochet Video Tutorial: Summer Breeze Triangle Shawl

I’m springing into summer with a new pattern and lots of new changes. My Summer Breeze Shawl is just what you need on your empty hook! Perfect for weddings, cool summer evenings or wrap around sarong! Made with Lion Brand Mandala Baby yarn in Pixie Hollow is extraordinary as it creates this beautiful colorway in this triangular shawl. It’s a ten row repeat pattern and uses many different stitches making it more of an intermediate pattern but with the video tutorial anyone can do it! Give it a try today!!


Follow along with this video tutorial to learn how to make this shawl:


My dad will continue to be the videographer, editor, and photographer for our videos even if we don’t live together.
Support YARNutopia today so we can continue to bring you clear, quality crochet tutorials even after I move into my new home!
There will be an added expense of more travel and hopefully this won’t deter our ability to provide consistent videos on a weekly basis.

Donate Button with Credit Cards

**You can always contact me via Facebook if you have any problems with the pattern. I am happy to help if you have any questions along the way.
***These patterns are copyright YARNutopia © so PLEASE DO NOT COPY, SHARE, ADJUST OR RESELL MY PATTERN. I wrote and tested this pattern myself, from beginning to end. It took a lot of time and work, and I would really like to have it remain “my pattern.”
***You can sell anything you make from my patterns, please just link back to my website YARNutopia.com. Thank you!

Teacher: Nadia Fuad
Video and Editing: Fuad Azmat (My Daddy)
Share your work on Facebook!
Add me on Snapchat: YARNutopia
Follow me on Instagram
Visit My Ravelry Store and add this to your Favorites!
Follow me on Twitter: @YARNutopia
Enjoy this video and subscribe to my channel on YouTube for more tutorials on how to crochet!
Leave a comment, and share with your friends!


Designed by Nadia Fuad
You *may* sell items made from my pattern, but please reference my website YARNutopia.com.
Please do not copy, sell, and/or post this pattern and claim it as your own.

Materials you will need:
Get the supplies individually by clicking the links below
Lion Brand Yarn Mandala Baby in the color Pixie Hollow (see video tutorial for other suggestions on yarn to use)
Size H-5.00mm Crochet Hook
Yarn Needle
Scissors

NOTES:

-Use a smaller hook to make this smaller
-Use a bigger hook to make this bigger
-This is written in US terms
-This took about a week to make but I did not work on it continuously.
-You can check out yarnsub.com to see yarn substitutions that are equal to the Lion Brand yarn I used in this project.
-This pattern with video tutorial shows the long side being 70 inches (177cm) and the short sides being 36 inches (92cm) but you can make it longer by continuing the repeat pattern.

Special stitches:
Ch(s): chain(s)
YO: Yarn Over
St(s): Stitch(es)
Sl st: slip stitch
SK: Skip
SC: Single Crochet
HDC: Half Double Crochet
DC: Double Crochet
V-Stitch: (DC, ch 1, DC) in same space
TR: Treble Crochet
DC2TOG: Double Crochet 2 sts together
DC3TOG: Double Crochet 3 sts together
3DCcluster: 3 Double Crochet Cluster Stitch
2DCcluster: 2 Double Crochet Cluster Stitch


This post contains affiliate links, which I may be compensated for when you make a purchase. That means if you click on any link and buy from the linked websites, I will receive a small percentage of the value of your order. The amount you pay is not changed. Thank you for all your support in clicking the links in my blog!! You all are so amazing!! ~Nadia

The yarn provided for this pattern is courtesy of Lion Brand Yarn

FREE Written Crochet Pattern: Summer Breeze Triangle Shawl

FREE Written Crochet Pattern: Summer Breeze Triangle Shawl

I’m springing into summer with a new pattern and lots of new changes. My Summer Breeze Shawl is just what you need on your empty hook! Perfect for weddings, cool summer evenings or wrap around sarong! Made with Lion Brand Mandala Baby yarn in Pixie Hollow is extraordinary as it creates this beautiful colorway in this triangular shawl. It’s a ten row repeat pattern and uses many different stitches making it more of an intermediate pattern but with the video tutorial anyone can do it! Give it a try today!!


My dad will continue to be the videographer, editor, and photographer for our videos even if we don’t live together.
Support YARNutopia today so we can continue to bring you clear, quality crochet tutorials even after I move into my new home!
There will be an added expense of more travel and hopefully this won’t deter our ability to provide consistent videos on a weekly basis.

Donate Button with Credit Cards

**You can always contact me via Facebook if you have any problems with the pattern. I am happy to help if you have any questions along the way.
***These patterns are copyright YARNutopia © so PLEASE DO NOT COPY, SHARE, ADJUST OR RESELL MY PATTERN. I wrote and tested this pattern myself, from beginning to end. It took a lot of time and work, and I would really like to have it remain “my pattern.”
***You can sell anything you make from my patterns, please just link back to my website YARNutopia.com. Thank you!

Teacher: Nadia Fuad
Video and Editing: Fuad Azmat (My Daddy)
Share your work on Facebook!
Add me on Snapchat: YARNutopia
Follow me on Instagram
Visit My Ravelry Store and add this to your Favorites!
Follow me on Twitter: @YARNutopia
Enjoy this video and subscribe to my channel on YouTube for more tutorials on how to crochet!
Leave a comment, and share with your friends!

Pattern:

Designed by Nadia Fuad
You *may* sell items made from my pattern, but please reference my website YARNutopia.com.
Please do not copy, sell, and/or post this pattern and claim it as your own.

Materials you will need:
Get the supplies individually by clicking the links below
Lion Brand Yarn Mandala Baby in the color Pixie Hollow (see video tutorial for other suggestions on yarn to use)
Size H-5.00mm Crochet Hook
Yarn Needle
Scissors

NOTES:

-Use a smaller hook to make this smaller
-Use a bigger hook to make this bigger
-This is written in US terms
-This took about a week to make but I did not work on it continuously.
-You can check out yarnsub.com to see yarn substitutions that are equal to the Lion Brand yarn I used in this project.
-This pattern with video tutorial shows the long side being 70 inches (177cm) and the short sides being 36 inches (92cm) but you can make it longer by continuing the repeat pattern.

Special stitches:
Ch(s): chain(s)
YO: Yarn Over
St(s): Stitch(es)
Sl st: slip stitch
SK: Skip
SC: Single Crochet
HDC: Half Double Crochet
DC: Double Crochet
V-Stitch: (DC, ch 1, DC) in same space
TR: Treble Crochet
DC2TOG: Double Crochet 2 sts together
DC3TOG: Double Crochet 3 sts together
3DCcluster: 3 Double Crochet Cluster Stitch
2DCcluster: 2 Double Crochet Cluster Stitch

Pattern:

Start with a magic ring or Ch 4, sl st to first ch to form a ring

Row 1: Ch 4 (counts as DC+Ch 1 sp here and throughout), 3 DC in ring, Ch 2, 3 DC in ring, Ch 1, DC in ring. Turn. (8 sts)

Row 2: Ch 4, DC in same first st, Ch 1, Sk Ch 1 sp, DC in next DC, Ch 1, Sk next st, DC in next st, Ch 1, [DC, Ch 1, DC] in corner Ch 2 sp, Ch 1, DC in next st, Ch 1, Sk 1, DC in next st, Ch 1, Sk next Ch 1 sp, [DC, Ch 1, DC] in last st, Turn.

Row 3: Ch 4, DC in same 1st st, DC in each ch sp and in each st until corner, [2 DC, Ch 2, 2 DC in corner, DC in each ch sp and each st until 1 st remains, [DC, Ch 1, DC] in last st, Turn.

Row 4: Ch 4, DC in same 1st st, Ch 1, sk ch 1 sp & next st, V-Stitch in next st, Ch 1, Sk 3 sts, V-Stitch in next st, Ch 1, Sk 3 sts, V-Stitch in next st, [DC, Ch 1, 2 DC, Ch 1, DC] in corner ch sp, Sk next st, V-Stitch in next st, Ch 1, Sk 3 sts, V-Stitch in next st, Ch 1, Sk 3 sts, V-Stitch in next st, Ch 1 Sk next st & ch 1 sp, [DC, Ch 1, DC] in last st, Turn.

Row 5: Ch 4, DC in same first st, Ch 2, Sk Ch 1 sp & next st, 2 DC cluster in next Ch 1 sp (between V-Stitches), Ch 3, Sk V-Stitch, 2 DC cluster in next Ch 1 sp, Ch 3, 2DCcluster in next Ch 1 sp between V-Stitches, Ch 3, Sk V-stitch, DC2TOG in next st and ch 1 sp together, Ch 3, TR2TOG on middle 2 sts of corner, Ch 3, DC2tog in Ch 1 sp and next st together, Ch 3 Sk V-Stitch, 2 DC cluster in next Ch 1 sp, Ch 3, 2DCcluster between V-Stitches, Ch 3, 2DCcluster between V-sts, Ch 2, [DC, Ch 1, DC] in last st. Turn.

Row 6: Ch 4, 3 DC in same first st, Ch 3, Sk next Ch sp+DC st+Ch 2 sp+DC2TOG st, *[3DC Ch 3, 3DC] in next Ch 3 sp, Ch 3, Sk next Ch 3 sp, Repeat from * until corner, [3 DC, Ch 4, 3 DC] in corner, **Ch 3, Sk next Ch 3 sp, [3DC Ch 3, 3DC] in next Ch 3 sp, repeat from ** until end, [3DC, Ch 1, DC] in last st. Turn.

Row 7: Ch 6 (counts as DC+Ch 3sp), [3DCcluster, Ch 2, 3DCcluster] in next Ch 1 sp, *2TR in ch sp from 2 prev. rows working around the ch sp from last row, [3DCcluster, Ch 2, 3DCcluster, Ch 2, 3DCcluster] in next Ch 3 sp, ** Repeat from * to ** until corner, [3DCcluster, Ch 2, 3DCcluster, Ch 2, 3DCcluster, Ch2, 3DCcluster] in corner, repeat from * to ** until end, Ch 3 and DC in last st.

Row 8: Ch 6, DC in same first st, DC3TOG over Ch sp and next 2 clusters, * Between the two TR sts put [3 DC, Ch 3, 3 DC], DC3ToG working in each of the next 3 cluster sts, ** Repeat from * to ** until corner, DC2TOG on 1st two clusters of corner, [3 DC, Ch 3, 3 DC] in corner, DC2TOG on next 2 clusters after corner, repeat from * to ** until end. [DC, Ch 3, DC] in last st, Turn.

Row 9: Ch 4, DC in same 1st st, * 3 SC in Ch 3 sp, [TR, Ch 1, TR, Ch 1, TR] in DC3TOG st, Repeat from * until corner, [2 SC, Ch 3, 2 SC] in corner, [TR, Ch 1, TR, Ch 1, TR] in next DC2TOG st, **3 SC in next Ch sp, [TR, Ch 1, TR, Ch 1, TR] in next DC3TOG st, Repeat from ** to end, [DC Ch 1, DC] in last st. Turn.

Row 10: Ch 4, 2 DC in 1st st, DC in Ch 1 sp, * Sk next 3 sts, DC in TR, 2 DC in Ch 1 sp, DC in next TR, 2 DC in next ch 1 sp, DC in next TR, repeat from * until corner. Sk 2 SC before corner, [3 DC, Ch 2, 3 DC] in corner, ** DC in next TR, 2 DC in next Ch 1 sp, DC in next TR, 2 DC in next Ch 1 sp, DC in next TR, Sk next 3 SC sts, repeat from ** until end, [2DC, Ch 1, DC] in last st. Turn.

Rows 11-46: Repeat Rows 2 thru 10 as many times as you’d like! (See video tutorial on how to do the repeat)

Fasten off, weave in all ends.

Enjoy!!

This post contains affiliate links, which I may be compensated for when you make a purchase. That means if you click on any link and buy from the linked websites, I will receive a small percentage of the value of your order. The amount you pay is not changed. Thank you for all your support in clicking the links in my blog!! You all are so amazing!! ~Nadia

The yarn provided for this pattern is courtesy of Lion Brand Yarn


[

Free Pattern Round-Up: Father’s Day Crochet Projects

Free Pattern Round-Up: Father’s Day Crochet Projects

With Father’s Day right around the corner, here a a few great projects to show that special person in your life how much they mean to you! There are many who fill the role of “dad” and these crochet gifts will mean so much to them. Homemade gifts made with love are truly cherished.

This collection of free patterns cover a variety of items with varying skill levels. Pick yours today and get started now!

Check out patterns from many great designers!


Dad’s Soap on a Rope

Designed by Through the Loop Yarn Craft

Earl Grey Cup Cozy

By Rich Textures Crochet


Viking Gnome Towel Topper

By Nana’s Crafty Home


Crochet Scarf for Men

By Golden Lucy Crafts


Simple Crochet Treat Basket

By Jen Hayes Creations


Da Boss Hat

By ACCROchet
This is a Paid Pattern, but totally worth it!! I love it!


DC Dice Bag and Tray

By Green Fox Farms Designs


I Heart Dad Can Cozy

By Jo to the World


Remote Holder

By Jo to the World


Geometric Arrow Coasters

By YARNutopia


Blaze Orange Woodsman Hat

By YARNutopia


Adult Men’s Chunky Slippers

By YARNutopia


The Uptown Blanket Scarf

By YARNutopia


Sharp Dressed Man Vest

By YARNutopia

FREE Written Crochet Pattern: Hair Scrunchies

FREE Written Crochet Pattern: Hair Scrunchies

It’s time for a messy bun and getting stuff done! Tie your hair up with one of my easy-to-make hair scrunchies!

Scrunchies are back, and they’re all the rave! You can make an assortment of them in every color and size using my pattern. Here, I show you how to take the same pattern using a few adjustments and changes gives you different sizes and looks! You can never have too many scrunchies!! So step aside hair ties, scrunchies are taking over! Never underestimate the power of a good scrunchie and start making some today! #scrunchielife


My dad will continue to be the videographer, editor, and photographer for our videos even if we don’t live together.
Support YARNutopia today so we can continue to bring you clear, quality crochet tutorials even after I move into my new home!
There will be an added expense of more travel and hopefully this won’t deter our ability to provide consistent videos on a weekly basis.

Donate Button with Credit Cards

**You can always contact me via Facebook if you have any problems with the pattern. I am happy to help if you have any questions along the way.
***These patterns are copyright YARNutopia © so PLEASE DO NOT COPY, SHARE, ADJUST OR RESELL MY PATTERN. I wrote and tested this pattern myself, from beginning to end. It took a lot of time and work, and I would really like to have it remain “my pattern.”
***You can sell anything you make from my patterns, please just link back to my website YARNutopia.com. Thank you!

Teacher: Nadia Fuad
Video and Editing: Fuad Azmat (My Daddy)
Share your work on Facebook!
Add me on Snapchat: YARNutopia
Follow me on Instagram
Visit My Ravelry Store and add this to your Favorites!
Follow me on Twitter: @YARNutopia
Enjoy this video and subscribe to my channel on YouTube for more tutorials on how to crochet!
Leave a comment, and share with your friends!

Pattern:

Designed by Nadia Fuad
You *may* sell items made from my pattern, but please reference my website YARNutopia.com.
Please do not copy, sell, and/or post this pattern and claim it as your own.

Materials you will need:
Get the supplies individually by clicking the links below
-Any Size 4 Medium, Worsted Weight Yarn (I Used Lion Brand Yarns Vel-Luxe yarn, or you could use Lily’s Sugar and Creme, or Lion Brand Vanna’s Choice. You could also use Brava yarn by WeCrochet)
Hair Ties or Rubber Bands
Size H-5.00mm Crochet Hook
Yarn Needle
Scissors

NOTES:

-Use a smaller hook to make this smaller
-Use a bigger hook to make this bigger
-This is written in US terms
-This took about 4 hours to make but I did not work on it continuously.
-You can check out yarnsub.com to see yarn substitutions that are equal to the Lion Brand yarn I used in this project.
-This pattern is for leg warmers that measures: 10 inch ankle, up to 18 inch calf, and they are 13 inches long They will fit most adults.

Special stitches:
Ch(s): chain(s)
YO: Yarn Over
St(s): Stitch(es)
Sl st: slip stitch
SK: Skip
SC: Single Crochet
HDC: Half Double Crochet
DC: Double Crochet

Pattern:

Make a slip knot and add the loop to your hook

Insert hook into the center opening of the hair tie and wrap your working yarn around the band. Slip stitch to attach your yarn.

Round 1: HDC 48 sts working AROUND the hair tie, Sl st to first st to close round, scoot the stitches around to cover the whole band.

Round 2: Ch 2 (does not count as anything), [2DC in next st, DC in next 2 sts] 16 times, sl st to first DC. Fasten off, weave in all ends.
This creates a ruffle and a fabulous scrunchie look!

Assembly:

There’s no assembly, just fun! Make as many of these as you’d like, in alllll the colors!!

Enjoy!!

This post contains affiliate links, which I may be compensated for when you make a purchase. That means if you click on any link and buy from the linked websites, I will receive a small percentage of the value of your order. The amount you pay is not changed. Thank you for all your support in clicking the links in my blog!! You all are so amazing!! ~Nadia

The yarn provided for this pattern is courtesy of Lion Brand Yarn

Stitch Gallery & Glossary Episode #25: Thermal Stitch (Single Crochet)

Stitch Gallery & Glossary Episode #25: Thermal Stitch (Single Crochet)

This is an easy comprehensive video tutorial on how to do a Single Crochet Thermal Stitch. In this crochet tutorial, I teach how to create this basic stitch called the Thermal stitch. You can use any hook and any yarn. Follow along and make something with the Thermal stitch following my video!


Follow along with this video tutorial to learn how to make this stitch:

Pattern:

Chain a multiple of 2

Row 1: Working in back loops only, 1 sc in 2nd ch from hook, 1 sc in each ch across row, turn.

Row 2: Ch 1,  *insert hook into FRONT loop of next stitch and through front loop of beginning chain, pick up a long loop, yo, draw through both loops to complete a sc, rep from * across, turn.

Row 3: Ch 1, *insert hook into front loop of next sc and into skipped loop of previous row, pick up a long loop, YO, and through both loops to complete a sc, rep from * across, turn.

Repeat row 3 for pattern.
Last row: SC Across last row to even out the top of your work.

See video tutorial for visual instructions.


Support YARNutopia today so we can continue to bring you clear, quality crochet tutorials


Donate Button with Credit Cards

This post contains affiliate links, which I may be compensated for when you make a purchase. That means if you click on any link and buy from the linked websites, I will receive a small percentage of the value of your order. The amount you pay is not changed. Thank you for all your support in clicking the links in my blog!! You all are so amazing!! ~Nadia


FREE Written Crochet Pattern: Happy Heart Stitch Leg Warmers

FREE Written Crochet Pattern: Happy Heart Stitch Leg Warmers

We are still in the month of LOVE and what better way to commemorate this month than with a pattern that teaches you the heart stitch!! The Happy Heart Stitch Leg Warmers are the perfect accessory to keep your legs warm and comfy with a fun fashion spin! Perfect for working out or wearing out! No matter what you choose to do with these leg warmers, it will be a huge hit!!


My dad will continue to be the videographer, editor, and photographer for our videos even if we don’t live together.
Support YARNutopia today so we can continue to bring you clear, quality crochet tutorials even after I move into my new home!
There will be an added expense of more travel and hopefully this won’t deter our ability to provide consistent videos on a weekly basis.

Donate Button with Credit Cards

**You can always contact me via Facebook if you have any problems with the pattern. I am happy to help if you have any questions along the way.
***These patterns are copyright YARNutopia © so PLEASE DO NOT COPY, SHARE, ADJUST OR RESELL MY PATTERN. I wrote and tested this pattern myself, from beginning to end. It took a lot of time and work, and I would really like to have it remain “my pattern.”
***You can sell anything you make from my patterns, please just link back to my website YARNutopia.com. Thank you!

Teacher: Nadia Fuad
Video and Editing: Fuad Azmat (My Daddy)
Share your work on Facebook!
Add me on Snapchat: YARNutopia
Follow me on Instagram
Visit My Ravelry Store and add this to your Favorites!
Follow me on Twitter: @YARNutopia
Enjoy this video and subscribe to my channel on YouTube for more tutorials on how to crochet!
Leave a comment, and share with your friends!

Pattern:

Designed by Nadia Fuad
You *may* sell items made from my pattern, but please reference my website YARNutopia.com.
Please do not copy, sell, and/or post this pattern and claim it as your own.

Materials you will need:
Get the supplies individually by clicking the links below
Vanna’s Choice by Lion Brand yarn in the colors White and Cranberry
Size I-5.50mm Crochet Hook
Yarn Needle
Scissors

NOTES:

-Use a smaller hook to make this smaller
-Use a bigger hook to make this bigger
-This is written in US terms
-This took about 4 hours to make but I did not work on it continuously.
-You can check out yarnsub.com to see yarn substitutions that are equal to the Lion Brand yarn I used in this project.
-This pattern is for leg warmers that measures: 10 inch ankle, up to 18 inch calf, and they are 13 inches long They will fit most adults.

Special stitches:
Ch(s): chain(s)
YO: Yarn Over
St(s): Stitch(es)
Sl st: slip stitch
SK: Skip
SC: Single Crochet
HDC: Half Double Crochet
DC: Double Crochet
TR: Treble Crochet
Beg: Beginning
Beg Cluster: Ch 2, [YO, Insert Hook, YO, Pull Through, YO, pull through 2 loops] twice, YO, pull through all the loops on your hook. Beginning cluster created.
Cluster: [YO, Insert Hook, YO, Pull Through, YO, pull through 2 loops] 3 times, YO, pull through all the loops on your hook. Cluster created.

Pattern:

Make 2 Leg Warmers total.

Bottom Cuff:
Ch 9
Row 1: SC in 2nd Ch and in each ch across, Ch 1, Turn.
Work in BLO for the whole cuff

Rows 2-28: SC in each st across, Ch 1, Turn.
(If this does not fit around your ankle, do more or less rows but make sure it’s in a multiple of 7–28 rows is in a multiple of 7)

Connect the cuff by Slip stitching along the first row and last row to connect them into making a cuff. Ch 1

Leg Warmer:
Row 1: SC 28 sts evenly around the cuff working an SC into the side of each row from the cuff. Sl st to first st, Fasten off Red. (if you did more or less rows, just be sure this row has a multiple of 7 sts)

Attach White to any stitch

Rows 2-5: Ch 2 (does not count as a stitch), DC in each st around, Sl st to first DC, Ch 2. (28)

Row 6: [2 DC in next st, DC in next 3 sts] 7 times, sl st to first DC, Ch 2. (35) (if you have a different amount of sts, just increase equally by 7 sts for this round)

Rows 7-10: Repeat what you did for Rows 2-5

Row 11: [2 DC in next st, DC in next 4 sts] 7 times, sl st to first DC, Ch 2. (42)

Fasten off white, change to red

Row 12: Ch 2, Beg. Cluster in first st, Ch 2, Cluster in same st, *Ch 2, Sk 5 sts, [Cluster, Ch 2, Cluster] in next st, repeat from * around ending with Ch2, sl st to first cluster. Fasten off red, Change to White.

Row 13: Attach White to the Ch 2 sp in a heart stitch, Ch 1, SC in the Ch 2 sp to create heart shape, *Ch 2, HDC in the middle 3 sts of the 5 sk’d sts from Row 11 while working AROUND the red Ch 2 from Row 12, Ch 2, SC in the center of the next heart st, repeat from * around ending with Ch 2, Sl st to first SC, Ch 2.

Row 14: DC in first SC, *DC in next Ch 2 sp, DC in next 3 sts, DC in next Ch 2 sp, DC in next SC, repeat from * around ending with DC in last Ch 2 sp, Sl st to first DC, Fasten off white, Change to Red.

Row 15: repeat Row 12

Row 16: repeat row 13

Row 17: repeat row 14

Row 18: repeat Row 12

Row 19: Repeat Row 13

Row 20: Repeat Row 14

Check your work: Make sure your hearts are on top of each other stacked

Fasten off, weave in ends.

Top Cuff:

Separately, with Red

Ch 9
Row 1: SC in 2nd Ch and in each ch across, Ch 1, Turn.
Work in BLO for the whole cuff

Rows 2-40: SC in each st across, Ch 1, Turn.
(If this does not fit around your calf, do more or less rows)

Connect the cuff by Slip stitching along the first row and last row to connect them into making a cuff. Ch 1, fasten off with long tail for sewing.

Assembly:

Turn leg warmer and top cuff inside out, Sew the top cuff to the leg warmer using the long strand you cut. I used the mattress stitch, but you can whip stitch it if you’d like. Weave in all ends then put it right side out! You’re done!

Enjoy!!

This post contains affiliate links, which I may be compensated for when you make a purchase. That means if you click on any link and buy from the linked websites, I will receive a small percentage of the value of your order. The amount you pay is not changed. Thank you for all your support in clicking the links in my blog!! You all are so amazing!! ~Nadia

The yarn provided for this pattern is courtesy of Lion Brand Yarn


FREE Written Crochet Pattern: Winter Stripes Scarf

FREE Written Crochet Pattern: Winter Stripes Scarf


This Winter Stripes Scarf is a wonderful way to use up your scrap yarn. Using a multitude of color, this scarf adds a fantastic pop of color to your winter wardrobe. I used the Crunch Stitch throughout this project to create texture for this piece. I love that the added fringe gives this scarf an overall boho feel.


My dad will continue to be the videographer, editor, and photographer for our videos even if we don’t live together.
Support YARNutopia today so we can continue to bring you clear, quality crochet tutorials even after I move into my new home!
There will be an added expense of more travel and hopefully this won’t deter our ability to provide consistent videos on a weekly basis.

Donate Button with Credit Cards

**You can always contact me via Facebook if you have any problems with the pattern. I am happy to help if you have any questions along the way.
***These patterns are copyright YARNutopia © so PLEASE DO NOT COPY, SHARE, ADJUST OR RESELL MY PATTERN. I wrote and tested this pattern myself, from beginning to end. It took a lot of time and work, and I would really like to have it remain “my pattern.”
***You can sell anything you make from my patterns, please just link back to my website YARNutopia.com. Thank you!

Teacher: Nadia Fuad
Video and Editing: Fuad Azmat (My Daddy)
Share your work on Facebook!
Add me on Snapchat: YARNutopia
Follow me on Instagram
Visit My Ravelry Store and add this to your Favorites!
Follow me on Twitter: @YARNutopia
Enjoy this video and subscribe to my channel on YouTube for more tutorials on how to crochet!
Leave a comment, and share with your friends!

Pattern:

Designed by Nadia Fuad
You *may* sell items made from my pattern, but please reference my website YARNutopia.com.
Please do not copy, sell, and/or post this pattern and claim it as your own.

Materials you will need:
Get the supplies individually by clicking the links below
Vanna’s Choice by Lion Brand yarn in the colors Honey, White, Chrysanthemum, Lemon Pepper, Orion Blue, Charcoal Gray, Kelly Green, Pink Grapefruit, Mustard, and Rust
Size J-6.00mm Crochet Hook
Yarn Needle
Scissors

NOTES:

-Use a smaller hook to make this smaller
-Use a bigger hook to make this bigger
-This is written in US terms
-This took about q week to make but I did not work on it continuously.
-You can check out yarnsub.com to see yarn substitutions that are equal to the Lion Brand yarn I used in this project.
-This pattern with video tutorial is made for a 6 foot long scarf that is 12 inches wide. You can make yours as long as you want.

Special stitches:
Ch(s): chain(s)
YO: Yarn Over
St(s): Stitch(es)
Sl st: slip stitch
SK: Skip
SC: Single Crochet
HDC: Half Double Crochet

Pattern:

Chain 36 or any even number that is 12 inches wide

Row 1: HDC in 2nd Ch from hook, * Sl st in next ch, HDC in next ch, repeat from * across ending with HDC in last ch, Ch 1, Turn. (35 sts)

Row 2: Sl st in first st, * HDC in next st, Sl st in next st, repeat from * across ending with Sl st in last st, Ch 1, Turn.

Row 3: HDC in first st, * Sl st in next st, HDC in next st, repeat from * across ending with HDC in last st, Ch 1, Turn.

Rows 4-205: Repeat Rows 2 and 3

Change color every 5 rows.
You can do more than 205 rows, to make yours longer.

Fasten off, weave in all ends.

Assembly:

Add fringe to both ends of the scarf. (See video tutorial for visual instructions)

Enjoy!!

This post contains affiliate links, which I may be compensated for when you make a purchase. That means if you click on any link and buy from the linked websites, I will receive a small percentage of the value of your order. The amount you pay is not changed. Thank you for all your support in clicking the links in my blog!! You all are so amazing!! ~Nadia

The yarn provided for this pattern is courtesy of Lion Brand Yarn


FREE Crochet Video Tutorial: Winter Stripes Scarf

FREE Crochet Video Tutorial: Winter Stripes Scarf

This Winter Stripes Scarf is a wonderful way to use up your scrap yarn. Using a multitude of color, this scarf adds a fantastic pop of color to your winter wardrobe. I used the Crunch Stitch throughout this project to create texture for this piece. I love that the added fringe gives this scarf an overall boho feel.


Follow along with this video tutorial to learn how to make this scarf:


My dad will continue to be the videographer, editor, and photographer for our videos even if we don’t live together.
Support YARNutopia today so we can continue to bring you clear, quality crochet tutorials even after I move into my new home!
There will be an added expense of more travel and hopefully this won’t deter our ability to provide consistent videos on a weekly basis.

Donate Button with Credit Cards

**You can always contact me via Facebook if you have any problems with the pattern. I am happy to help if you have any questions along the way.
***These patterns are copyright YARNutopia © so PLEASE DO NOT COPY, SHARE, ADJUST OR RESELL MY PATTERN. I wrote and tested this pattern myself, from beginning to end. It took a lot of time and work, and I would really like to have it remain “my pattern.”
***You can sell anything you make from my patterns, please just link back to my website YARNutopia.com. Thank you!

Teacher: Nadia Fuad
Video and Editing: Fuad Azmat (My Daddy)
Share your work on Facebook!
Add me on Snapchat: YARNutopia
Follow me on Instagram
Visit My Ravelry Store and add this to your Favorites!
Follow me on Twitter: @YARNutopia
Enjoy this video and subscribe to my channel on YouTube for more tutorials on how to crochet!
Leave a comment, and share with your friends!

Pattern:

Designed by Nadia Fuad
You *may* sell items made from my pattern, but please reference my website YARNutopia.com.
Please do not copy, sell, and/or post this pattern and claim it as your own.

Materials you will need:
Get the supplies individually by clicking the links below
Vanna’s Choice by Lion Brand yarn in the colors Honey, White, Chrysanthemum, Lemon Pepper, Orion Blue, Charcoal Gray, Kelly Green, Pink Grapefruit, Mustard, and Rust
Size J-6.00mm Crochet Hook
Yarn Needle
Scissors

NOTES:

-Use a smaller hook to make this smaller
-Use a bigger hook to make this bigger
-This is written in US terms
-This took about q week to make but I did not work on it continuously.
-You can check out yarnsub.com to see yarn substitutions that are equal to the Lion Brand yarn I used in this project.
-This pattern with video tutorial is made for a 6 foot long scarf that is 12 inches wide. You can make yours as long as you want.

Special stitches:
Ch(s): chain(s)
YO: Yarn Over
St(s): Stitch(es)
Sl st: slip stitch
SK: Skip
SC: Single Crochet
HDC: Half Double Crochet


This post contains affiliate links, which I may be compensated for when you make a purchase. That means if you click on any link and buy from the linked websites, I will receive a small percentage of the value of your order. The amount you pay is not changed. Thank you for all your support in clicking the links in my blog!! You all are so amazing!! ~Nadia

The yarn provided for this pattern is courtesy of Lion Brand Yarn

Valentine’s Day Crochet Patterns

Valentine’s Day Crochet Patterns

Here is a gallery of Valentine’s Day related crochet patterns that are FREE for you to try out!! They are simple, quick projects that you can make for your Valentine this year!


Don’t have a Valentine to give anything to? No problem! Make these for yourself!!!


Click on the image or the title of the project to take you to its FREE crochet pattern and follow along!

Which one’s your favorite?!?


String of Hearts Cup Cozy by YARNutopia

Tunisian Heart Free Crochet Pattern by With Alex


Anatomical Heart by YARNutopia

C2C Valentine’s Washcloth – Free Crochet Pattern by EyeLoveKnots

Amigurumi Love Heart Crochet Pattern by Heart Hook Home

Alpine Stitch Mittens by YARNutopia


Velvetine’s Head Wrap – Free Crochet Pattern by Through the Loop Yarn Craft


Gnome Amigurumi by YARNutopia


Love Is Love Shawl, Free Beginner Crochet Pattern by No Hooks Given


Love Bunny Amigurumi by YARNutopia


Sweetheart Bobble Bag (Free Pattern) by Sweet Bee Crochet


Heart Bookmark by YARNutopia

You’ll be in my Heart Coasters by L’amas de laine


Key to My Heart Crochet Applique by Golden Lucy Crafts


Have a Heart Flip Flops by YARNutopia

Heart and Sole Slippers by Myhobbyiscrochet


Hearts Aflutter Scarf Free Crochet Pattern by Nana’s Crafty Home


Crochet a Romantic Hedgehog Amigurumi ~ Cutest Valentine’s Gift by RaffamusaDesigns


Crochet Heart Pillow by Jen Hayes Creations


“Two Hearts that beat as One” C2C Square – Free Crochet Pattern + Graph (Wedding Blanket CAL!) + Video Tutorial by Myhobbyiscrochet

FREE Written Crochet Pattern: New Year, New Me Chunky Hat

FREE Written Crochet Pattern: New Year, New Me Chunky Hat

I took a little time off for the holiday. Sorry for being missing from my YARNutopia platforms lately. I’m ending the year with a NEW pattern and I hope you really like it! It features Lion Brand Yarn Hometown in Tampa Spice and Aspen Tweed. Plus, a FUR POM!! I hope you all have a safe and healthy New Year! Cheers to 2021!!


There is no video tutorial for this pattern.

**You can always contact me via Facebook if you have any problems with the pattern. I am happy to help if you have any questions along the way.
***These patterns are copyright YARNutopia © so PLEASE DO NOT COPY, SHARE, ADJUST OR RESELL MY PATTERN. I wrote and tested this pattern myself, from beginning to end. It took a lot of time and work, and I would really like to have it remain “my pattern.”
***You can sell anything you make from my patterns, please just link back to my website YARNutopia.com. Thank you!

Teacher: Nadia Fuad
Video and Editing: Fuad Azmat (My Daddy)
Share your work on Facebook!
Add me on Snapchat: YARNutopia
Follow me on Instagram
Visit My Ravelry Store and add this to your Favorites!
Follow me on Twitter: @YARNutopia
Enjoy this video and subscribe to my channel on YouTube for more tutorials on how to crochet!
Leave a comment, and share with your friends!


Designed by Nadia Fuad
You *may* sell items made from my pattern, but please reference my website YARNutopia.com.
Please do not copy, sell, and/or post this pattern and claim it as your own.

Materials you will need:
Get the supplies individually by clicking the links below
Lion Brand Yarn Hometown in Aspen Tweed and Tampa Spice
Size Q-15mm Crochet Hook
Yarn Needle
-Faux Fur Pom
Scissors

NOTES:

-Use a smaller hook to make these smaller
-Use a bigger hook to make these bigger
-This is written in US terms
-This hat will fit any adult
-I do not have stitch counts for smaller or bigger sizes.
-This took about 3 hours for me to create.
-You can check out yarnsub.com to see yarn substitutions that are equal to the Lion Brand yarn I used in this project.

Special stitches:
Ch(s): chain(s)
YO: Yarn Over
St(s): Stitch(es)
Sl st: slip stitch
SK: Skip
BLO: Back Loop Only
FLO: Front Loop Only
SC: Single Crochet


Pattern:


Work into the center of the stitches (See this video tutorial for visual instructions on how to do the waistcoat stitch)


Rnd 1: With Tampa Red, Ch 2, 6 SC in 2nd ch from hook, work in continuous rounds.

Rnd 2: 2 SC in each st around (work INTO the center of the stitch, not the top of the stitch) (12)

Rnd 3: [2 SC in next st, SC in next st] 6 times. (18)

Rnd 4: [2 SC in next st, SC in next 2 sts] 6 times. (24)

Rnd 5: [2 SC in next st, SC in next 3 sts] 6 times. (30)

Rnd 6: [2 SC in next st, SC in next 4 sts] 6 times. (36)

Rnd 7: [2 SC in next st, SC in next 5 sts] 6 times. (42)

Rnds 8-18: SC in each st around. (42) (Change color to the ASPEN TWEED after Round 8)

Fasten off, weave in ends.

Sew a fur pom at the top of the hat.


Enjoy!!


This post contains affiliate links, which I may be compensated for when you make a purchase. That means if you click on any link and buy from the linked websites, I will receive a small percentage of the value of your order. The amount you pay is not changed. Thank you for all your support in clicking the links in my blog!! You all are so amazing!! ~Nadia

The yarn provided for this pattern is courtesy of Lion Brand Yarn


12 Days of Christmas: Festive Holiday JOY Wall Hanging (Photo Tutorial)

12 Days of Christmas: Festive Holiday JOY Wall Hanging (Photo Tutorial)

Bring a bit of *Joy* to your holiday home this season. Using a little yarn-art, you can create this door/wall hanging in a few short minutes using my step-by-step instructions. This lovely homemade, home town decor piece is sure to bring joy and happiness to any home it graces.

Disclaimer: this project requires the use of a hot glue gun. Please be careful using any type of heated tool as these can cause burns. Please supervise children when attempting this project.
I used the following supplies listed below to complete this project

To make the feather, I used the feather crochet tutorial I found on YouTube by Claudetta Crochet and you can view it HERE.

The feather is NOT my own design, but I found the video tutorial extremely helpful in making the one I attached to the wreath in this project.

Supplies needed:
Click on the links to shop online for these same products.

J and Y wooden letters

Mini Wreath (8 inches)

Holly Berries

Hometown Yarn in off white color

Wool Ease yarn in red

Basic Stitch yarn in Green

Hot Glue Gun

Hot Glue Sticks

Red Ribbon

G-4.25mm crochet hook

Scissors

Yarn Needle


I first wrapped the letters in the chunky yarn and used hot glue to keep it attached

Next, I glued the J and Y to the wreath using hot glue, and I also attached the ribbon on the back of the letter J with hot glue as well


Next, I crocheted the feather using this video tutorial as a guide


Then I attached the feather and the holly berries to the wreath with hot glue


This is how it all turned out!! I LOVE IT!!


This post contains affiliate links, which I may be compensated for when you make a purchase. That means if you click on any link and buy from the linked websites, I will receive a small percentage of the value of your order. The amount you pay is not changed. Thank you for all your support in clicking the links in my blog!! You all are so amazing!! ~Nadia

The yarn provided for this pattern is courtesy of Lion Brand Yarn


**You can always contact me via Facebook if you have any problems with the pattern. I am happy to help if you have any questions along the way.
***These patterns are copyright YARNutopia © so PLEASE DO NOT COPY, SHARE, ADJUST OR RESELL MY PATTERN. I wrote and tested this pattern myself, from beginning to end. It took a lot of time and work, and I would really like to have it remain “my pattern.”
***You can sell anything you make from my patterns, please just link back to my website YARNutopia.com. Thank you!

Teacher: Nadia Fuad
Video and Editing: Fuad Azmat (My Daddy)
Share your work on Facebook!
Add me on Snapchat: YARNutopia
Follow me on Instagram
Visit My Ravelry Store and add this to your Favorites!
Follow me on Twitter: @YARNutopia
Enjoy this video and subscribe to my channel on YouTube for more tutorials on how to crochet!
Leave a comment, and share with your friends!