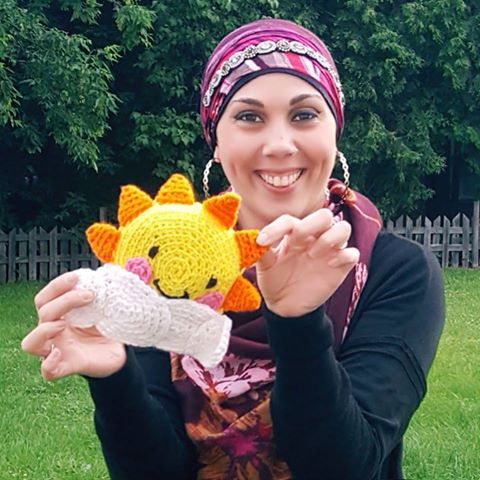
An Open Letter to the Yarn Community

An Open Letter to the Yarn Community

Dear Creators,

As a BIPOC creator and maker, it is a powerful time in history to watch as so many companies and corporations take a stand in support of Black lives and stand against racial injustice. That is how it should be. I stand on my platforms to support Black Lives and BIPOC (Black, Indigenous, People of Color) creators because they have long been overlooked. There is SO much talent in this community and BIPOC need more recognition and elevation. Our world is full of color and diversity. More companies have to stand for their diverse audience and understand their needs. Not turn a blind eye. Makers of color deserve recognition. Many of the fiber companies have taken a stand. Yet, some have not.

Many of you know that I was a Joy Creator for Red Heart Yarns which was bought out by Yarnspirations/Spinrite. I continued to use and promote their product in nearly all my video tutorials and projects. I stood behind their product. I was not a paid spokesperson nor was I paid money for my videos. I was given yarn support and like all makers, we do generate a small stipend from using affiliate links that generate a sale from time to time. I was always transparent about that. It is one way we can provide free patterns while still generating a small avenue of income to bring you our patterns.

In the face of recent events, the company I had been representing as a stitch ambassador and Joy Creator has not made a public statement nor taken a stance in support of the Black Lives Matter movement or to denounce the killings of black men and women. There has been no statement against racial injustice that we all witness all too often. There has not been a show of support for the community of makers of color in this industry. With that weighing heavily on my mind and my heart, I reached out in a private email and asked them to remove me from their platform and asked them to stop using my likeness on their website.

I decided it was time to move on to a company I felt better represented people of color and community as a whole. I sent Yarnspirations an email with a knot in my gut and a prayer in my heart. I waited. I did not receive a reply. I kept waiting, refreshing my inbox, checking over and over. Nearly a week had passed when none of my requests were acknowledged nor was there anyone from the company who reached out to me at any time to say anything encouraging – not even a one liner. Their silence spoke volumes. It was apparent to me that my voice was not worthy of a reply.

I decided to raise my voice then, in a more public fashion today. It was only in that route did a round-about apology come forth, yet no stand has been taken publicly on any forum. After taking things to the next level in a series of group emails and on a private blogger group did I receive this apology.

It should not be the job of the BIPOC community or BIPOC ambassadors/makers to handhold companies and tell them how to represent their community of color/diversity OR to tell the company to take a stand. The company should already know that the time has come to stand up to racial injustice and discrimination and speak for their customers and creators of color. We need to be seen. People of color have done enough for them by working for free. The company should have been doing this work LONG before now. They should have come with a BOLD and POWERFUL statement in the beginning that made everyone, ESPECIALLY Black makers and creators and creators of color feel elevated and supported.

We should not have to plea with anyone to make a stand. A statement for BIPOC creators and customers should have been the FIRST step of action and then further action could be taken going forward. That is Anti-Racism in action. A company that stands with their creative artists of color and with the nation to say their community of BIPOC matter. That would have gone so far in quelling the fears and anxieties that many of us feel. Those of us that are here as representatives of color, NEED to HEAR that companies like Yarnspirations/Spinrite stand with Black lives and other people of color as a community.

I have decided to use my voice on my platform because, like me, it is compiled of a large percentage of people of color across the entire globe. Many use their product. I used Red Heart Yarns/Yarnspirations products. I shout it out on every video tutorial on every crochet project. Yet they stay silent on my behalf and on behalf of millions of voices. That is unacceptable. The fact that there was no reply and my request for communication about this matter was ignored in my personal email was an eye-opening revelation.

My blog and YouTube channel reach over 150 countries and my nearly half-million followers on all platforms make up only 18% of my actual viewers.  I use it to speak my truth as a creator of color, as a woman, and as a PROUD young mother of a child of color – and if that truth and Yarnspirations’ stand do not align, then it is imperative for me to move on and to let others know my intentions and why. This wasn’t a hard decision, just painful to recognize that this company has taken a no stand approach and continues to take no stand other than an obscure Equal Opportunity statement.

Silence is complicit and silence is ALWAYS the voice of the oppressor. ALWAYS.

I am moving on and divorcing myself from this company that has not seen the importance of lending their voice to Black lives or makers of color, nor the enormity of what that could mean financially from me or others, walking away. If a company wants to be anti-racist then TRULY be anti-racist.  There is no tiptoeing around and waiting for the “right time.” The time was long before today.

~Nadia


Quick follow-up edit:

I hear and see ALL the comments on this post. Don’t worry, I AM listening. For those of you trying to call me out or say this is political-understand this – this is about human rights and human rights are NOT political. Let’s get that straight. Or those who are asking now that I posted this where am I? I am right here. Same place I am everyday – working to bring you more of this craft because that is what I do and love and I am also taking care of Nasir. Just because I am not commenting back to every comment, that doesn’t mean I have gone into hiding. This is my platform, and I do have the right to stand where I stand just as every person on this feed has the right to say and feel the way they do. I have no objections to any of that. This is about being heard in a place that has not lent more voices to this important racial matter and over the injustices that continue to be ignored or passified in this industry.

It seems like some are ok with this being ignored, that it will be swept under the rug and forgotten and everything will go back to being “comfortable” again. Do you know who stands behind the camera in every video tutorial I post? It’s my dad. Even if you don’t know him or see his face on here or he is not as vocal on this platform, he is still a HUGE part of YARNutopia. He is a HUGE part of ME! I stand for Black makers and makers of color in this industry, and I stand for my father and many people who are unseen but still have a voice that is not being heard-Don’t you get it?? My dad always says to me, “Anything worth fighting for is not going to be comfortable or easy, Nadia.” This, right here, is not comfortable, but it is NECESSARY! It is only when we feel uncomfortable that big changes can come and my hope and prayer is that change truly does come. He also tells me that sometimes you have to lose to win. Not win in monetary ways or in fame, but win in a way that you can sleep at night and wake up the next day and look at yourself in the mirror. For anyone who truly knows me, knows where I stand when it comes to racial injustice and how I feel about the Black Lives Matter movement. They know this was the right thing for ME to do. You don’t have to agree and despite all the negative things some may say, I do respect and see everyone’s comments and I am not afraid or hiding from any of it nor does it change the way I feel. Thank you.

A Personal Debate: Mainstays Basic Yarn vs. Red Heart Super Saver Yarn

A Personal Debate: Mainstays Basic Yarn vs. Red Heart Super Saver Yarn

Recently, I was informed that Wal-Mart stores have started selling their own brand of fiber called Mainstays Basic Yarn. At the time I was notified of this new brand on the shelves, I was eager to check it out for myself. Unfortunately, I live in a somewhat rural community and the skeins had not made their way to my local Wal-Mart quite yet.

A short time later, I was able to get my hands on a skein of the Mainstays yarn and decided to do a comparison between Red Heart Super Saver and this new brand by Wal-Mart! This blog is entirely my own opinion, based on my personal observations debating two similar products.

Less money, less quality?

First observation, once I was able to find the product in the store, was the price. A skein of Red Heart Super Saver is $2.88 and the price of the Mainstays Basic Yarn is $1.97, so the obvious difference is the financial aspect. You are saving $0.91 per skein on the basic colors with the Mainstays brand. For those looking at the economic factor, this is a no-brainer. The Mainstays IS obviously less expensive. However, we all know that price is not always reflective of quality, and we all know the saying, “you get what you pay for.” Low prices can mean lower quality products. Keep that in mind when basing your comparison solely on economics – and yes, I do understand the importance of finances as a crafter on a budget, but one must consider other details as well.

Next, the volume of the skeins is equal – Each one weighing 7 oz. However, Red Heart Super Saver has 364 yards and Mainstays Basic Yarn has 397 yards. When we look at another obvious comparison, you get more for your money with Mainstays. I would like to insert a personal observation here: The Mainstays Basic Yarns are definitely a thinner fiber. Although you are getting “more” length in the skein, it actually feels “less.” You can even see when lined side by side, there is a fair amount of difference in how they compare next to one another. Having worked with Red Heart Yarns so frequently, it is hard to explain this, but their fiber has weight and thickness and feels somewhat sturdier versus the Mainstays Basic Yarn, which has a much thinner strand and feels lighter and less substantial. With Red Heart Super Saver, there is ample feel to my piece. The Mainstays yarn has a bit less volume and does not feel as abundant or as sturdy. I hope that makes sense. Both are 100% acrylic.

 
Shop Now


(Photographed above: Red Heart Super Saver on the Left, Mainstays Yarn on the Right)


Soft but Found

The Mainstays definitely has a soft touch, but, like I mentioned earlier, it tends to lack that feeling of volume when you want something thick and warm or heavy such as a nice blanket, a winter hat, or a scarf, but it has decent softness nonetheless.

I found Mainstays Basic Yarns located ONLY in the Wal-Mart stores. Red Heart Yarns are available in, not only Wal-Mart, but several other craft stores, AND conveniently able to be ordered online. This is important for many who love the ease of online shopping or are unable to get to stores or choose not to shop at large retail shops such as Wal-Mart.

Another fact that I find important point to bring up, is that all Mainstays yarn products are made in China whereas the Red Heart Yarns are ALWAYS made in the USA. To many, this is a VERY important detail to consider when purchasing.

Shrinking options

I made two swatches out of both brands of yarn. I washed each swatch and noticed a slight bit of shrinking in the Mainstays yarn. You will need to keep that in mind when using this brand in sizing your projects. You may get more in a skein yet you may need to use more length in certain projects to adjust for shrinkage. I observed that both fibers have the same amount of stretch to them. I also noticed quite a bit of pilling with the Mainstays Basic Yarn with fuzziness as compared to the Red Heart Super Saver swatch. The Red Heart Super Saver block was also softer after one wash.

(Photo was taken after washed)

(Photo was taken after washed)

It took a while, but my local Wal-Mart recently started stocking this Mainstays yarn product on their shelves this past week; I noticed they are offering an assortment of basic solids in a rainbow of colors. The colors run similar to some of the Red Heart Super Saver yarn hues. Red Heart Yarns offers a MUCH larger selection of color, as well as a variety of other types of yarns and products, whereas the Mainstays offer this one type of yarn. Red Heart Super Saver yarn is not dye lotted which keeps color consistent with each skein of yarn you use.  So if you buy a skein of yarn, and 2 months later need the same exact color, you won’t have to worry about it being a different shade. I do not have information if Mainstays yarn does the same thing or not.

I hope this blog helps you as you explore the similarities and differences between these two products. Because of the limitation of the Mainstays yarn, I still find myself preferring the Red Heart Super Saver when choosing an economic and quality yarn product. Have you tried these two products? Leave your thoughts in the comment section!

~Nadia


This post contains affiliate links, which I may be compensated for when you make a purchase. That means if you click on any link and buy from the linked websites, I will receive a small percentage of the value of your order. The amount you pay is not changed. Thank you for all your support in clicking the links in my blog!! You all are so amazing!! ~Nadia

Support YARNutopia today so we can continue to bring you clear, quality crochet tutorials and blog posts!

Donate Button with Credit Cards

YARNutopia 30 Day Photo Challenge

YARNutopia 30 Day Photo Challenge

On June 1st, 2017, YARNutopia will launch the summer season by beginning a 30 Day Photo Challenge and invite all crochet, knit, and yarn lovers to join in on this fun and exciting one month photography adventure.

On each day in June, you will find a daily topic that you, the audience, can use for inspiration. Be creative, think outside the box, there is no right or wrong answer!

Simply, take a photo pertaining to the daily topic and post it on Facebook in the comments section after I post my Photo of the Day, and then share your photo on Instagram with the hashtag #YARNutopia30DayChallenge.

You can participate on your own personal photo journey and share privately with your own friends and family or use our Facebook page or go to Instagram to post your photos and see what others are sharing as well!

This blog provides 30 inspirational guidelines as shown in our info-graphic. I will be posting my very own Photo of the Day to also help inspire you! This activity is a fun way to share our love of that yarn life in a new creative outlet!

This is NOT a competition so there’s NO PRESSURE to finish or participate. There’s NO PRIZE (other than the memories you’re going to make in this month of creativity!) There is NO OBLIGATION. Join in for one day or the entire month! This is purely for enjoyment and entertainment! There are NO RULES other than the *obvious* and it goes without saying, but I will say it anyway, inappropriate content will NOT be acknowledged and will be deleted. I am sure we won’t need to worry about that because this community is THE BEST.

This is just a way for our community to have a month of craft/yarn filled fun and share this fun in another creative way, through PHOTOS! One photo, each day, for 30 days of JUNE!

***Share this blog, join along, share your photos, hashtag #YARNutopia30DayChallenge and lets challenge ourselves to get even more creative than we already are!***

So, to Recap:
• Bookmark this page (or follow us on Facebook or Instagram to see the daily photo).
• Check YARNutopia.com each day in June or follow along on our social media accounts from June 1st to 30th for the daily topic.
• Complete the daily challenge (feel free to join in for a day, a few days, or the entire month) following our topic inspiration take a photo that is inspired by that day’s topic (we hope each day brings fun, happiness, and creativity to your day! I can’t wait to see what you all come up with!).
• Post pictures of the day for everyone to see using the hashtag #YARNutopia30DayChallenge

This 30 Day Photo Challenge is starting on June 1st, 2017. The theme of this 30 Day Challenge is all related to the yarn and crochet life. The topics cover a variety of inspirational

30 Day Challenge List

Day 1: Favorite Yarn

Post a photo your favorite skein of yarn, or your favorite yarn used in a project. Share the name of your favorite yarn!

Without a doubt, Red Heart Treasures has always been my favorite. Just looking at this photo makes me happy! Imagine how bummed I was to learn this is no longer available, but I have been on a search for a similar replacement. In the meantime, my last few skeins are waiting for the perfect project!!

Day 2: Can’t Live Without

A tool, yarn, or item you use or need every day.

This is my Crochet Survival Kit! How can we limit to just one thing? If I had to, it would be my H-5.00mm crochet hook, but in an ideal situation I would grab these essentials! What is your “Can’t Live Without” item? What would be in your “Crochet Survival Kit?”

Day 3: My Stash

Where you store and keep your yarn stash.

In truth, I have yarn stashed all over my house, but this honeycomb shelf unit is where most of my yarn has found a color-coded home. Haha! My rainbow collection!

Day 4: In My Bag

Take a photo of what is in your bag right now.

Presently, my bag is full of wedding preparation supplies including my wedding planner, my patterns notebook, and Aunt Lydia’s Thread for the flowers I am crocheting for my bouquets (future video tutorial) Oh, and my headphones!

Day 5: Current Project/WIP

Show a recent project or current work in progress.

My crochet flowers for my wedding are what’s on my hook at the moment. I have a little more than 9 months to crochet all the bouquets, boutonnieres, corsages, and centerpiece flowers. And YES, I plan on doing some video tutorials along the way. My bridal palette is jewel tones. All the flowers are a reflection of those colors! I’m excited to share this part of my journey with you!

Day 6: The First Letter of Your First Name

Photograph something related to your craft that starts with the first letter of **your** first name. In my case, something starting with the letter N for Nadia.

For me, it’s the letter N. Here are my pattern NOTES full of my stitch NUMBERS!! The latter N was hard to find words related to crochet! Anyone else have luck with the first letter of YOUR name??

Day 7: In the Home

Show something in your home associated with crochet/knit: an afghan over a chair, a blanket on a bed, your yarn pile next to a chair or anything that shows your work at home. The possibilities are endless!

This is my studio space. Here is where all the crochet magic happens. If I’m not curled up crocheting on my couch, this is where you will find me in my home.

Day 8: In the Moment

Take a photo of a moment in your day that crochet is involved. Examples: Crocheting or knitting outside, having coffee while enjoying your craft, your pet tangled in yarn, just a moment captured.

Selfie time!!!! This is me right now working on a new project! Hello from Wisconsin!

Day 9: Something Old

An older item you made, or an antique piece passed on from generations, something you’ve had for years.

I found a stack of vintage crochet books at a thrift sale for 25 cents each. I seriously squealed with delight, did a happy dance, and grabbed an entire stack! It felt like I discovered gold! #crochetgold

Day 10: Something New

A new item you just bought or inherited, a new tool, new yarn, anything brand new you want to share.

This delightful Red Heart Yarns Super Saver Ombré yarn is just waiting for me to sink my hook into it! I’m loving this new yarn! #yarnpyramid

Day 11: Favorite Hook/Needles

A photo of your go-to hook or needle, a favorite hook or set of needles that you find yourself always reaching for.

My favorite crochet hook is this great ergonomic hook made by the Etsy Shop WoodBeFancy. I have arthritic hands, and it helps to have a thick handle to grip. It relieves my hand stress. This gives me longer crocheting times and less stiffness when I take a break and uncurl my fingers. Find the same hook here.

Day 12: Variegated

Variegated yarn that you love, a piece made from variegated yarn, anything that is associated that has gradual or sharp color changes.

Variegated meaning: Having streaks, marks, or patches of a different color or colors; variety.

A while ago, I purchased this Red Heart Boutique Unforgettable Yarn in the color Winery, and while driving home, I saw the sky just before sunset. The changes in the colorway of this beautiful yarn had the same streaks of color variation as the sky! I thought it was pretty remarkable, so I took this side by side shot.

Day 13: Wearable

Something wearable you made, want to make, someone has made for you. If you share someone else’s pattern or photo, be sure to credit the designer!

I’m having a lazy start to my Tuesday morning. Feet up, chai in my mug, yarn on my hook, and my Tutti Frutti Crochet Slippers keeping me comfy. Follow this link to find these slippers on my blog.

Day 14: Amigurumi

A stuffed amigurumi toy you made, want to make or someone has made for you. If you share someone else’s pattern or photo, be sure to credit the designer!

Summer is here in the USA and Shenanigans wastes no time to find his way to the pool! This old photo is a perfect reminder to kick back and seize the day! #carpediem Many have asked about this sheep amigurumi. You can find the written pattern here designed by Harugurumi.

Day 15: Favorite Color

Your favorite color of yarn, or a crocheted/knit item made in your favorite color.

Green. Need I say more? I just love the variations in this color. It’s very refreshing!

Day 16: My Happy Place

Somewhere you love to crochet or knit. Examples: In the car on a long ride, in a favorite chair or bed, on your porch, in your backyard, at a park. Anywhere you love to zone out and enjoy your craft.

My Happy Place is being surrounded by Yarn! Yesterday I stopped by the warehouse sale at Herrschners Retail Store for some deals, and I was overcome by delight!! I want ALL THE YARN! Not much can make me this giddy, but the words Yarn and Sale combined in one fantastic place can pretty much guarantee to make me happy!!

Day 17: Scraps

Share a picture of your scrap yarn. What do you do with your scraps? Where do your scraps end up? Share scraps that turn up in unexpected places.

Found all over the house. On tables, on the floor, in the car, and even embedded in my cheek when I doze off working on a project. Where do you keep/find your scraps?

Day 18: Hands

Share a photo of your hands involved in your craft, holding your hook or project.

Happiness is handmade. Our hands create the things we once thought impossible by bringing our yarn and hook together.

Day 19: Texture

Share a close-up photo of stitches and their texture. Zoom in and show a neat close-up of a project, a fun stitch, anything showcasing different texture.

I love playing with yarn to create the richest textures. I love the look of this Woven Stitch pattern. It begs you to reach out and touch it! This is a close-up photo of the Woven Dreams Baby Blanket. Find the full photo here

Day 20: Black and White

Anything you want to share related to our craft in black and white.

Candid Crochet Moment. A typical rainy day. You will find me in pajamas curled up on the couch, hook in hand, working on my next new thing. This is my world. #reallife #candidcrochetmoments

Day 21: Stitches

Show your project and name the stitches you are working on.

Here’s an array of stitches on a past project. Using an eclectic mix of colors and a blend of crochet artistry, you can create this fantastic project! The stitches include Single Crochet (SC), Half Double Crochet (HDC), Double Crochet (DC), and Criss-Cross stitches! Like what you see? Find the free written pattern and video tutorial here.

Day 22: Motivates Me

What gets you motivated? Music? a TV show? A sunny day? comfy clothes? a cup of coffee or tea? a day off? crochet with a friend? Showcase your motivation in a creative photo!

I love Pinterest! I love all the ideas and inspiration I can find all in one place! This website is filled with motivation!

Day 23: Where I Stand

When you sit down to crochet, what does your crochet “spot” look like? Take a photo of where you stand and what your point of view is.

This is my point of view. I’m in the studio right now. Staring down at our next new project. This one has me going “in circles!”

Day 24: Lines

Share a photo of anything that has lines. Lines at the craft store, the yarn aisle and shelves of yarn lined up, lines in a crochet/knit pattern.

Yarn Lines! Everything about this photo makes me happy! The shelves and shelves of yarn LINED up so neatly in rows have me feeling like a kid in a candy store the moment this sight greets my eyes ANDDD that line on my face turns into a big bright smile!!

Day 25: Make it Bright

Bright colored fibers, bright colored project, bright colored yarn bag, a bright sunny day to crochet or knit, a bright idea!

Nothing is brighter than the sun! This is part of a great pattern I found on Ravelry. I hope this brings a ray of sunshine to your day and brightens it right up!

Day 26: Words to Live By

A funny meme, a great quote, a piece of advice from someone,a graphic tee-shirt or yarn bag, a sale sign at the yarn shop

This passage has helped me through some of the most difficult times in my life.

Day 27: Soft

A soft item, yarn, a plushie, a stuffed toy, a baby, a pet, anything soft and cuddly.

Fresh soft, warm blankets straight from the dryer are the bed of choice for our pup Reub today. I guess that afghan will get another washing after Reuben’s nap.

Day 28: Pastel

Soft pastel yarn, a pastel project, crochet at sunset with pastel sky, anything pastel!

I discovered this morning that I don’t have a lot of pastel yarn in my stash. I did have these 2 past projects that I’ve used pastel Soft Essentials yarn in Minty, Jungle Stripes, Purple Reign and Sugar Plum.

Find the written pattern and video tutorial for the Woven Dreams Baby Blanket here.
Find the written pattern and video tutorial for the Patchwork Medley Baby Blanket here.

Day 29: My Wish List

Showcase the item you WISH you had. Find a photo of it and share it. Examples: A dream craft room, a book, a hook, a bag, a ball of yarn.

My Wish List is to have a dream craft room. Nate and I are buying a house soon! I will have my own space to create my wish come true! I have a blank canvas to design the perfect work space. Here are a few photos that inspire me!

Day 30: Love Is…

Share something that that describes how much you LOVE your craft.

Love is…
doing what you love, with who you love, using tools you love, EVERY. SINGLE. DAY. Thank you for sharing in this 30 Day Challenge. I enjoyed all the participation across social media! Thank you for all the love and support you always show. Being able to do this brings so much joy to my heart!

Crochet Tutorial: Sharp Dressed Man Vest

Crochet Tutorial: Sharp Dressed Man Vest

Over the course of the week, I designed and created this Sharp Dressed Man Vest. This semi-formal fashion piece for men can be paired with a shirt and tie or worn over a plain jersey shirt. A versatile piece that would be perfect for the man in your life. A collection of stitches provide rich texture and great elements of design in this two-toned sweater vest.

sharp3

I want to give a special shout out to Nate for waking up early and braving the freezing cold weather to model this piece. He wears it so well! I really go crazy over this Sharp Dressed Man!

sharp

The best thing about this Sharp Dressed Man vest is that with a bit of basic math, the stitch calculations can be adjusted for any size!! From infant to adult this design can be modified for anyone!

Although I didn’t make this design with pockets, adding that detail would be an easy adjustment for an entirely new look.

sharp4
sharp2

Watch this video tutorial to learn how to make this vest:

My dad will continue to be the videographer, editor, and photographer for our videos when I move away.
Support YARNutopia today so we can continue to bring you clear, quality crochet tutorials even after I move into my new home!
There will be an added expense of more travel and hopefully this won’t deter our ability to provide consistent videos on a weekly basis.

Donate Button with Credit Cards

**You can always contact me via Facebook if you have any problems with the pattern. I am happy to help if you have any questions along the way.
***These patterns are copyright YARNutopia © so PLEASE DO NOT COPY, SHARE, ADJUST OR RESELL MY PATTERN. I wrote and tested this pattern myself, from beginning to end. It took a lot of time and work, and I would really like to have it remain “my pattern.”
***You can sell anything you make from my patterns, please just link back to my website YARNutopia.com. Thank you!
Teacher: Nadia Fuad
Video and Editing: Fuad Azmat (My Daddy)
Share your work on Facebook!
Add me on Snapchat: YARNutopia
Shop my other patterns here!!
Follow me on Instagram
Visit My Ravelry Store and add this to your Favorites!
Follow me on Twitter: @YARNutopia
Enjoy this video and subscribe to my channel on YouTube for more tutorials on how to crochet!
Leave a comment, and share with your friends!

Pattern:

Designed by Nadia Fuad
You *may* sell items made from my pattern, but please reference my website YARNutopia.com.
Please do not copy, sell, and/or post this pattern and claim it as your own.

Online Crochet Class

Materials:

**Click here to get the full kit of supplies to make this vest!!**

Red Heart Yarns Soft in Charcoal
Red Heart Yarns Soft in Mid Blue
(~1,020 Yards of yarn total)

818 yards of Charcoal and 200 yards of Mid Blue
-G-4.25mm Crochet Hook (Find the hook I used in my video tutorial here!)
Buttons
Yarn Needle
Stitch Markers
Scissors


NOTES:
-Use a smaller hook to make these smaller
-Use a bigger hook to make these bigger
-Watch the FULL introduction of the video tutorial for frequently asked questions and watch the full video for tips on how to make these smaller or bigger.
-You can adjust the size for measurements but this measures 44 inches around and 22 inches long.
-The one I made is 44 inches around, 11 inches on the left and right front panels and 22 inches on the back panel. See video tutorial intro for all measurements.

Special stitches:
Ch(s): chain(s)
YO: Yarn Over
St(s): Stitch(es)
Sl st: slip stitch
SK: Skip
BLO: Back Loop Only
FLO: Front Loop Only
SC: Single Crochet
HDC: Half Double Crochet
DC: Double Crochet
FPHDC: Front Post Half Double Crochet
BPHDC: Back Post Half Double Crochet

Pattern:


Shop Red Heart, America's Favorite Yarn

If you have any confusion or difficulty with reading this pattern, please watch the video tutorial to have visual instructions.


Back panel

Ch 82 or any even number that measures half of your chest measurement
Row 1: SC in 2nd ch from hook, *DC in next, SC in next, repeat from across. ch 1, turn. (81)

Row 2: DC in 1st st, *SC in next, DC in next, Repeat from * across. Ch 1, turn. (81)

Row 3: SC in 1st st, *DC in next, SC in next, repeat from * across. Ch 1, turn. (81)

Rows 4-39: Repeat rows 2 and 3 until your piece is as long as you need to fit under the armpit (see video tutorial), Mine is approx. 12 inches long. End on a repeat of Row 3.
When your piece is as long as you need, go on to instructions for Row 40

Row 40: DC2TOG, DC in next, SC in next, Repeat from * across until 2 sts remain, DC2TOG over last 2 sts, Ch 1, turn. (79)

Row 41: SC2TOG, *DC in next, SC, in next, repeat from * across until 2 sts remain, SC2TOG, Ch 1, Turn. (77)

**When repeating rows, just be sure to do your decrease in the beginning and end of the rows, be sure to put a SC in a DC stitch, and put a DC in a SC stitch when working across the rows. **

Row 42: Repeat Row 40 (75)

Row 43: Repeat Row 41 (73)

Row 44: Repeat Row 40 (71)

Row 45: Repeat Row 41 (69)

Row 46: Repeat Row 40 (67)

Row 47: Repeat Row 41 (65)

See video tutorial to learn how to make this smaller for other sizes

Row 48: Repeat Row 2 (65)

Row 49: Repeat Row 3

Row 50-65: Repeat Rows 2 and 3
Fasten off with a long tail for sewing.

macys.com

Front Right Panel:
Ch 36 or any multiple of 7 + 1
Row 1: HDC in 2nd ch from hook and across, ch 1, turn. (35)

Row 2: *HDC in 3 sts, FPHDC in next, Repeat from * across. Ch 1, Turn. (35)

Row 3: *HDC in 3 sts, BPHDC in next, repeat from * across. Ch 1, turn. (35)

Rows 4-35: Repeat Rows 2 and 3 until piece measures 12 inches or until you are to the point where you need to decrease around arm. (See video tutorial)

Row 36: HDC2TOG, HDC in next, FPHDC in next, *HDC in next 3, FPHDC on next, Repeat from * Until 2 sts remain, HDC2TOG on last 2 sts. Ch 1, Turn. (33)

Row 37: HDC2TOG, *BPHDC on next st, HDC in next 3, repeat from * across until 2 sts remain, HDC2TOG, ch 1 turn. (31)

Row 38: HDC in 1st st, FPHDC on next st, HDC2TOG, HDC in next, *FPHDC on next st, HDC in next 3 sts, repeat from * across until 5 sts remaining, HDC in next, HDC2TOG, FPHDC on next st, HDC in last st. (29)

Row 39: HDC2TOG, HDC in next 2 sts, BPHDC on next, *HDC in next 3 sts, BPHDC in next, repeat from * across ending with HDC, HDC2TOG. Ch 1, Turn. (27)

Row 40: *HDC in 3 sts, FPHDC in next, repeat from * until 2 sts remain, HDC2TOG, ch 1, turn. (26)

Row 41: HDC2TOG, BPHDC on next st, *HDC in next 3 sts, BPHDC on next, Repeat from * across. Ch 1, turn. (25)

Row 42: *HDC in 3 sts, FPHDC on next st, repeat from * across until last 4 sts, HDC2TOG, FPHDC, HDC in last st. Ch 1, Turn. (24)

Row 43: HDC2TOG, HDC in next 2 sts, *BPHDC in next st, HDC in next 3 sts repeat from * across. Ch 1, Turn. (23)

Row 44-58: Repeat Rows 2 and 3
Fasten off weave in ends.

Front Left Panel:
Ch 36 or same as Right Panel
Rows 1-39: Repeat as same as Right Panel

Row 40: HDC2TOG, HDC in next st, *FPHDC in next st, HDC in next 3 sts, repeat from * across, ch 1, Turn. (26)

Row 41: *HDC in 3 sts, BPHDC on next st, Repeat from * across until 3 sts remain, BPHDC, HDC2TOG. Ch 1, Turn. (25)

Row 42: HDC in 1st st, FPHDC in next st, HDC2TOG, HDC in next st, *FPHDC on next st, HDC in next 3 sts, Repeat from * across, ch 1, turn. (24)

Row 43: HDC in 3 sts, BPHDC in next, repeat from * across, until 4 sts remain, BPHDC, HDC in next 2, HDC2TOG on last 2 sts. (23)

Row 44-58: Repeat Rows 2 and 3
Fasten off with long tail for sewing.

Assembly steps:
Sew all pieces together
See video tutorial for edging

**With Mid Blue for edging:


Shop Red Heart, America's Favorite Yarn

Sleeves:
Single crochet 4 rows around each sleeve

Edging:
Single crochet across front right panel and around neck and down left side panel, ch 1, turn
Single crochet across, ch 1, turn, Make button holes when you get on the left side panel (See video tutorial),
Make 4 rows in total for single crochet edging.

Bottom edging:
HDC across bottom, ch 1, turn
Row 2: *FPHDC, BPHDC, repeat from * across
Row 3: *BPHDC, FPHDC, repeat from * across
(See video tutorial to add button hole)
Repeat rows 2 and 3 until you have 6 rows total, or more if you want to make this longer.

Assembly step:
Sew buttons to right side panel edging
See video tutorial.

Weave in all ends

Enjoy!!

This post contains affiliate links, which I may be compensated for when you make a purchase. That means if you click on any link and buy from the linked websites, I will receive a small percentage of the value of your order. The amount you pay is not changed. Thank you for all your support in clicking the links in my blog!! You all are so amazing!! ~Nadia

The yarn provided for this pattern is courtesy of Red Heart Yarns

Like this vest? Try the Gentleman’s Scarf!!


Saving Bundle - Hand Bended Silk Yarn


CLICK.BUY. CREATE. Shop Michaels.com today!


Hand Beaded Silk Yarn - 7 Pack

Darn Good Yarn: Online Yarn Store | Ethical Yarn


Logo - 300x250

Logo - Busy - 300 x 250

Shop the costume tee collection at DesignByHumans.com.

Happy Halloween!

This blog is compiled to show the costumes I made for Nate and myself. You can find them all in one place rather than navigating through my blog to find each individual pattern. Here, I have them all in one spot for your convenience. You can click the links in the paragraphs before the photos or you can simply click the photos to view the video tutorials and written patterns for each individual piece for these costumes.

We start with the Beast Hat. It’s perfect not only for a costume (although, I will warn you, it is very warm, and won’t last long in a crowd of people), but also for cold days! It’s an easily adaptable and versatile pattern by changing colors and embellishments to make any animal-istic creature that you fancy!

beautyandthebeast6


Second, you will find the Beast Gloves here. With some simple modifications, you can take these very scary beast gloves and turn them into an easy pair of hand-warmers, just by omitting the finger portion of the pattern. These were made to enhance the crochet costume. Have fun with it!

beast4

Next up, by making a very simple chain, I was able to create this embroidery embellishment detail that I sewed onto the costume jacket. I first traced out the design in a chalk pencil, chained the length needed for each scroll design and sewed it on using a yarn needle. I added some lace and just pinned it inside the sleeves and on the collar.

beastcoat

Lastly, I made these simple foot coverings. These are a very basic flat panel using double crochet with an ankle cuff that wraps around the bottom of the leg. Once complete, I sewed fur through the stitches to give it a paw-like look that can be worn over shoes. (These do not have a written pattern or a video tutorial)

beautyandthebeast7

For the Princess costume, I created the shirt here. This is one of two pieces for the dress ensemble. I added tulle and embellished the outfit with medium sized flower roses that I used in my Floral Dream Crown tutorial.

bellecostume8

The Princess Costume Skirt was the second piece I crocheted for this ensemble. As you will see in the pattern, you can make this as big or as small as you want it to be. This can modified to be made in a variety of princess dresses by changing colors or adding different embellishments.

bellecostume

Shop Red Heart, America's Favorite Yarn

Lastly, I added the Enchanted Rose Cape that can be found here as a finishing touch to this princess costume. This cape can also be modified into a poncho or a bridal cape.

bellecostume2


Here are the photos of us together in our costumes! Photos do not lead to any patterns.

beautyandthebeast8
beautyandthebeast5

beautyandthebeast3

beautyandthebeast2

beautyandthebeast4


Shop Red Heart, America's Favorite Yarn

Crochet Tutorial: Knee-High Socks

Crochet Tutorial: Knee-High Socks

Sometimes I see a photo and consider what it would take to design something into a crochet pattern based on just that-a photo. That is what inspired these floral pastel knee-socks. I was sent the same photo of a pair of knit socks numerous times, and realized that once again, I would need to challenge myself to see what I could do by taking that knit sock concept from a single picture and translate it into crochet. I have to admit this was not an easy task.

First, socks are not easy to begin with. That alone had me hesitating, but knowing myself and how, once faced with a challenge, I don’t back down. I decided to just forge ahead and see where this took me and I was not disappointed.

As the socks took shape, the more excited I became. It took a total of two full days and a lot of long hours of designing and filming to bring you this tutorial. To be honest, I will say that at one point I saw double and almost pulled my hair out trying to troubleshoot how to make this work, but hopefully I have ironed out all the wrinkles to bring you another tutorial that is easy to follow.

I used pastel colors in my pattern but the ideas are endless when it comes to color combinations. I am excited to see your creators choices when making your own pair. These are exceptionally comfortable and fun to wear. In my photos, I have them over a pair of creme color leggings, but around the house these would be so nice to wear with your favorite night shirt or shorts and t-shirt! Have fun creating this fabulous pair of knee-socks!

Below you will see a couple photos of my finished work and then the video tutorial. Below the video shows the written pattern for these socks. Happy Hookin’!

Knee-high SocksCLICK.BUY. CREATE. Shop Michaels.com today!
Knee High Socks
Watch this video tutorial to learn how to make these socks:

My dad will continue to be the videographer, editor, and photographer for our videos when I move away.
Support YARNutopia today so we can continue to bring you clear, quality crochet tutorials even after I move into my new home!
There will be an added expense of more travel and hopefully this won’t deter our ability to provide consistent videos on a weekly basis.

Donate Button with Credit Cards

Pattern:

Designed by Nadia Fuad
Questions? Leave a Comment!
You may sell items made from my pattern, but please reference my website YARNutopia.com.
Please do not copy, sell, and/or post this pattern and claim it as your own.

MorpheMe October Collection 2017

Materials:

**Get the full kit of supplies by clicking here!!**

-Less than 90.5 Yards/82 Meters Of EACH color.
Bernat Softee Baby in Mint
Bernat Softee Baby in Lemon
Bernat Softee Baby in Pink
Bernat Softee Baby in White
Bernat Softee Baby in Blue
Caron Simply Soft in Grey Heather
Size G6-4.25mm Crochet Hook
Yarn Needle
Scissors

NOTES:
-These socks are worked from the top down.
-These socks will fit a size 6-9 American Woman’s Shoe Size foot. The video tutorial explains how to make these larger or smaller with very few simple steps. Please watch the entire video tutorial to learn how to do this for other sizes.
-To make these smaller or larger, just measure the calf muscle of leg and chain and amount that is a multiple of 6.
-The CH 2 or CH 1 at the beginning of each round does NOT count as a stitch. Sl st to the beginning stitch of that round to go onto the next round.
-SEW IN YOUR LOOSE ENDS AS YOU GO! YOU WILL THANK YOURSELF LATER.

Saving Bundle - Hand Bended Silk Yarn

Ch: chain
St(s): Stitch(es)
Sl st: slip stitch
SC: Single Crochet
HDC: Half-Double Crochet
DC: Double Crochet
FPHDC: Front Post Half-Double Crochet
BPHDC: Back Post Half-Double Crochet
SC2TOG: Single Crochet Decrease
HDC2TOG: Half-Double Crochet Decrease
Puff Stitch (PS): Y/O, insert hook into directed stitch, Y/O, pull through, Y/O, Insert hook back into the same stitch, Y/O, Pull through, Y/O, Insert Hook back into same st, Y/O, pull through. (you should have 7 loops on your hook at this point.) Y/O and pull through all loops on hook. Puff stitch made.
Cable Stitches: Skip 2 sts, FPDC in next st, FPDC in next st, FPDC in each skipped stitch. (Cables should be worked in this order: 3rd, 4th, 1st, 2nd) Please watch video tutorial to learn how to do the cable stitch.
LSC: Long Single Crochet


Socks  Make 2

Ch 54, sl st to 1st ch to form ring. ch 2
Rnd 1: HDC in each ch around, sl st to beginning, ch 2 (54 HDC)
Rnd 2: HDC in 1st 2 sts, *Cable Stitches over next 4 sts, HDC in next 2 sts, repeat from * around, ending w/ cable sts. Sl st to beginning. Ch up 2. (9 cables, 18 HDC)
Rnd 3: HDC in 1st 2 sts, *FPDC over next 4 sts, HDC in next 2 sts, Repeat from * around. Sl st to beginning. Ch up 2 (36 FPDC, 18 HDC)
Rnd 4: Repeat Round 3
Rnd 5: Repeat Rnd 2
Rnd 6: Repeat Rnd 3
Rnd 7: Repeat Rnd 3
(Continue Cable pattern for however long you want if you are making different sizes, then go onto round 8)
Change to Yellow after Rnd 7
Rnd 8: HDC around, Sl st to beginning, ch up 1 (54 HDC) Change to White after Rnd 8
Rnd 9: SC in each st around, sl st to beginning, ch up 1 (54 sc)
Rnd 10: SC around, sl st to beginning, ch up 1 (54 sc)
Rnd 11: SC in 1st 5 sts, LSC in net st working in st from Rnd 9, *SC in next 5 sts, LSC in next, repeat from * around. Sl st to beginning, ch up 1. (9 LSC, 45 SC)
Rnd 12: Repeat Rnd 10
Rnd 13: Repeat Rnd 11 working LSC’s in LSC’s from Rnd 11. Change to pink after this round.
Rnd 14: Repeat Round 10
Rnd 15: *SC2TOG, SC in next 7 sts, Repeat from * around, sl st to beginning, change to white at the end of this round (48 SC)
Rnd 16: SC in 1st 4 sts, LSC into LSC from Rnd 13, SC in net 4 sts, LSC, SC in next 5 sts, LSC, SC in next 4 sts, LSC, SC in next 4 sts, LSC, SC in next 5 sts, LSC, SC in next 5 sts, LSC, SC in next 4 sts, LSC, SC in next 4 sts, LSC, sl st to beginning. (48 sts)
Change to Pink after Round 16
Rnds 17-18: Repeat Round 10, Change to White after round 18
Rnd 19: Repeat Round 16, working LSC’s in LSC’s from round 16. Change to Blue after round 19.
Rnds 20-21: Repeat Round 10, Change to White after round 21.
Rnd 22: Repeat Rnd 16 working LSC’s in LSC’s from Rnd 19. Change to Green after round 22.
Rnds 23-24: Repeat Round 10, Change to White after Round 24
Rnd 25: Repeat Round 16 working LSC’s in LSC’s from Rnd 22.
Rnds 26-27: Repeat Round 10
Rnd 28: Repeat Round 16 working LSC’s in LSC’s from Rnd 25.
Rnds 29-30: Repeat Round 10
Rnd 31: Repeat Round 16, working LSC’s in LSC’s from Rnd 28. Sl st to beginning st, ch up 2, change color to Gray after round 31.
Rnd 32: HDC in each st around, sl st to beginning, Ch up 2. (48 HDC)
Rnd 33: *HDC2TOG, HDC in next 6 sts, repeat from * around, sl st to beginning. Ch up 2. (42 HDC)
Rnd 34-35: Repeat Rnd 32. Change to white after round 35.
Rnd 36: Repeat Rnd 32, change to Yellow after round 36.
Rnd 37: *HDC in 6 sts, PS in next st, Repeat from * around, Sl st to beginning. Change to white. Ch 1.
Rnd 38: Repeat Round 10. Change to Yellow after this round. Ch up 2
Rnd 39: Repeat Rnd 37, Change to White after this round. Ch up 1
Rnd 40: Repeat Round 10, Change to Gray after this round. Ch up 2
Rnd 41: Repeat Rnd 32, change to pink after this round, ch up 1
Rnd 42-44: Repeat Rnd 10. Change to Green after rnd 44, , ch up 2
Rnd 45-48: Repeat Rnd 32, Change to Yellow after rnd 48. ch up 1
Rnd 49: Repeat Rnd 10. Change to Pink after this round. Ch up 2
Rnd 50: Repeat Rnd 32
Rnd 51-54: *BPHDC in next 2 sts, FPHDC in next 2 sts, repeat from * around. Change to white after round 54, ch up 1.
Rnd 55: Repeat Rnd 10. Change to Gray after this round
Rnd 56-59: Repeat Rnd 32. Change to Blue after rnd 59.

Shaping the Heel:
Rnd 60: SC around
*You will be working in rows for the next few steps. Watch the video tutorial to learn how to shape the heel.
Row 61: SC in 21 sts leaving the rest unworked. Ch 1, turn
Row 62: SC across, Ch 1, turn (21 sc)
Row 63-71: SC across, ch 1, turn (or make as many rows that measure about 2 inches, End on a row that the outside of the sock is facing you)
Row 72: SC in next 12 sts (or halfway through your 21 sts), [SC2TOG] 2x, ch 1, turn
Row 73: SC in next 3 sts [SC2TOG] 2x, ch 1, turn
Row 74: SC in next 5 sts [sc2tog] 2x, ch 1, turn
Row 75: SC in next 7 sts [sc2tog]2x, ch 1, turn
Row 76-?: Repeat Row 75 until all sts on row 71 are worked

We will be working in rounds now:
Next Rounds are as follows:
Rnd 77: With the outside of the sock facing you, ch 1, work 13 sc down left side of heel. Place st marker, sc in next 21 sts, place st marker, work 13 sc up right side of heel, 1 sc in each st across heel. sl st to beginning sc.
Rnd 78: Ch 1, sc in each st until 2 sc before marker, sc2tog, sc until next marker, sc2tog, sc in the rest of the sts on round, sl st to beginning.
Rnds 79-84: Repeat Rnd 78 until there are 42 sts left. Change to Yellow after Rnd 84.

Foot part: You can make this next part however long you want if you have smaller or longer feet.
Rnds 85-88: Repeat Rnd 10, ch up 2 after round 88 (42 sc)
Rnd 89: HDC around, change to Pink after round 89, ch up 2 (42 HDC)
Rnd 90: *[FPHDC in next 2 sts, BPHDC in next 2 sts] 8x, HDC in the rest of the sts around, sl st to beginning. Ch up 2.
Rnds 91-94: Repeat Rnd 90. Change to Blue after rnd 94
Rnd 95-98: Repeat Rnd 90. Change to Yellow after Rnd 98
Rnd 99-100: Repeat Rnd 90. Change to Gray after Rnd 100
Rnd 101: SC in each st around. Add st marker to each side (watch Video tutorial to learn where exactly to place your stitch markers.
Rnd 102: SC to first st marker [SC2TOG] 2x, SC to next st marker [SC2TOG] 2x, SC in the rest of the sts around.
Rnds 103-107: Repeat Rnd 102 until you have 18 sts left. Fasten off with long tail.

**Turn your work inside out, Sew toe part closed.

Flowers:
You can embellish with your own flowers or bows
With Yellow,
Ch 2,
Rnd 1: SC 20 in 2nd ch from hook, sl st to beginning sc.
Fasten OFF

OR
In Magic Ring, SC 20, Sl st to beginning sc.
Fasten off

Rnd 2: With Any Color, Attach to any SC around. Ch 3, 5 DC in same st, *Sk 1 st, Sl st in next st, Sk 1 st, 6 DC in next st, Repeat from * Around. Sl st to beginning. Fasten off with long tail for sewing. (5 petals made)

Make as many flowers as you’d like and sew them to your socks. (See video tutorial for placement)

Leaves:
Ch 9
SC in 2nd ch from hook, HDC in next, DC in next 3 ch’s, HDC in next, SC in next, Sl st in next. Fasten off with long tail for sewing.
Make as many leaves as you want.
Sew leaves next to flower on sock.

Enjoy!

***You can always contact me via Facebook if you have any problems with the pattern. I am happy to help if you have any questions along the way.

***These patterns are copyright YARNutopia © so PLEASE DO NOT COPY, SHARE, ADJUST OR RESELL MY PATTERN. I wrote and tested this pattern myself, from beginning to end. It took a lot of time and work, and I would really like to have it remain “my pattern.”

***You can sell anything you make from my patterns, please just link back to my website YARNutopia.com. Thank you!

Teacher: Nadia Fuad
Video and Editing: Fuad Azmat (My Daddy)

Share your work on Facebook!

Shop Here

Add me on Snapchat: YARNutopia

Follow me on Instagram

Visit My Ravelry Store and add this to your Favorites!

Follow me on Twitter: @YARNutopia

Enjoy this video and subscribe to my channel on YouTube for more tutorials on how to crochet!
Leave a comment, and share with your friends!

This post contains affiliate links, which means if you click on the link and buy from the linked websites, I will receive a small percentage of the value of your order. The amount you pay is not changed.

Like these socks? Try making the Harlequin Leg Warmers!


This post contains affiliate links, which I may be compensated for when you make a purchase. That means if you click on any link and buy from the linked websites, I will receive a small percentage of the value of your order. The amount you pay is not changed. Thank you for all your support in clicking the links in my blog!! You all are so amazing!! ~Nadia


Wal-Mart.com USA, LLC


Online Crochet Class


Hand Beaded Silk Yarn - 7 Pack


Summer Clothing at Darn Good Yarn


Logo - Busy - 300 x 250