12 Days of Christmas: Argyle Cup Cozy – FREE Written Crochet Pattern

12 Days of Christmas: Argyle Cup Cozy – FREE Written Crochet Pattern

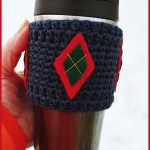
On the 6th Day of Christmas, give a little holiday cheer in a cup! Here is the Argyle Cup Cozy made for the coffee drinker in your life! Cup cozies are one of the easiest and most appreciated hand-made gifts you can give this season. Pair this with a travel mug and a gift card to the local coffee shop for the perfect teacher gift, gift for coach, or anyone else that deserves something special! This awesome gift can be made in any favorite color combination and will be so well received this holiday. Who doesn’t like the gift of a warm beverage during the coldest season? Make yours today and start checking off some of those gifts.


My dad will continue to be the videographer, editor, and photographer for our videos when I move away.
Support YARNutopia today so we can continue to bring you clear, quality crochet tutorials even after I move into my new home!
There will be an added expense of more travel and hopefully this won’t deter our ability to provide consistent videos on a weekly basis.

Donate Button with Credit Cards

**You can always contact me via Facebook if you have any problems with the pattern. I am happy to help if you have any questions along the way.
***These patterns are copyright YARNutopia © so PLEASE DO NOT COPY, SHARE, ADJUST OR RESELL MY PATTERN. I wrote and tested this pattern myself, from beginning to end. It took a lot of time and work, and I would really like to have it remain “my pattern.”
***You can sell anything you make from my patterns, please just link back to my website YARNutopia.com. Thank you!

Teacher: Nadia Fuad
Video and Editing: Fuad Azmat (My Daddy)
Share your work on Facebook!
Add me on Snapchat: YARNutopia
Follow me on Marly Bird’s Chic Sheep yarn
Visit My Ravelry Store and add this to your Favorites!
Follow me on Twitter: @YARNutopia
Enjoy this video and subscribe to my channel on YouTube for more tutorials on how to crochet!
Leave a comment, and share with your friends!

Pattern:

Designed by Nadia Fuad
You *may* sell items made from my pattern, but please reference my website YARNutopia.com.
Please do not copy, sell, and/or post this pattern and claim it as your own.

Materials you will need:
Get the supplies individually by clicking the links below
Bernat Handicrafter Yarn in Indigo
Felt
-H-5.00mm crochet hook
Yarn Needle
Scissors

NOTES:
-Use a smaller hook to make these smaller
-Use a bigger hook to make these bigger


Special stitches:
Ch(s): chain(s)
YO: Yarn Over
BLO: Back Loop Only
FLO: Front Loop Only
St(s): Stitch(es)
Sl st: slip stitch
SK: Skip
SC: Single Crochet
HDC: Half Double Crochet


Pattern:

If you have any confusion or difficulty with reading this pattern, please watch the video tutorial that is linked above in this blog post to have visual instructions.


Mug Cozy:

Ch 30, sl st to first ch to form a circle, ch 1
Rnd 1: HDC in each ch around, sl st to first HDC.

Rnd 2: Ch 1, HDC in each st around. Sl st to first HDC.

Rnds 3-9: Ch 1, SC in each st around, Sl st to first SC.

Rnd 10: Ch 1, HDC in each st around, Sl st to first HDC.

Rnd 11: Repeat Round 10.
Fasten off, weave in all ends.

Assembly step:
Cut 4 large diamonds, and 4 small diamonds out of Felt and sew them onto your mug cozy using the video tutorial or photos to guide you using metallic yarn.

Enjoy!!

This post contains affiliate links, which I may be compensated for when you make a purchase. That means if you click on any link and buy from the linked websites, I will receive a small percentage of the value of your order. The amount you pay is not changed. Thank you for all your support in clicking the links in my blog!! You all are so amazing!! ~Nadia

The yarn provided for this pattern is courtesy of Yarnspirations


Crochet Tutorial: Open Heart Cup Cozy

Crochet Tutorial: Open Heart Cup Cozy

Oh, it’s after 8am! Sorry I just had a little *hic-cup* this morning, but here’s today’s pun! Better *latte* than never! So we are halfway through our Valentine’s Day puns! *Cool Beans* you guys! Words can’t *espresso* how much it *beans* to me to share this *creativi-tea* with all of you! I *mug* continue to be motivated and finish out this stretch! Today’s project is an exercise in *simplici-tea*–here’s my Open Heart Cup Cozy. I had a different idea when I started (I frogged it) but I always say “if at first you don’t succeed, *chai, chai* again.” This project is great way to tell teachers, colleagues, and friends how *tea-riffic* they are! Add some special *blends* and give the gift of *tranquili-tea* to someone you care about! Not sure if you want to try this? I say go ahead and *brew* it! The Open Heart Cup Cozy will be on the blog later today. Now I think I might go crochet and listen to some Fleetwood *Mac-chiato*. Ok, too far…😂😂 *Cough-ee* #sorrynotsorry Doing this for y’all is like living la vida *mocha*. Seriously, I’m done now.


Follow along with this video tutorial to learn how to make this project:

My dad will continue to be the videographer, editor, and photographer for our videos when I move away.
Support YARNutopia today so we can continue to bring you clear, quality crochet tutorials even after I move into my new home!
There will be an added expense of more travel and hopefully this won’t deter our ability to provide consistent videos on a weekly basis.

Donate Button with Credit Cards

**You can always contact me via Facebook if you have any problems with the pattern. I am happy to help if you have any questions along the way.
***These patterns are copyright YARNutopia © so PLEASE DO NOT COPY, SHARE, ADJUST OR RESELL MY PATTERN. I wrote and tested this pattern myself, from beginning to end. It took a lot of time and work, and I would really like to have it remain “my pattern.”
***You can sell anything you make from my patterns, please just link back to my website YARNutopia.com. Thank you!

Teacher: Nadia Fuad
Video and Editing: Fuad Azmat (My Daddy)
Share your work on Facebook!
Add me on Snapchat: YARNutopia
Follow me on Instagram
Visit My Ravelry Store and add this to your Favorites!
Follow me on Twitter: @YARNutopia
Enjoy this video and subscribe to my channel on YouTube for more tutorials on how to crochet!
Leave a comment, and share with your friends!

Pattern:

Designed by Nadia Fuad
You *may* sell items made from my pattern, but please reference my website YARNutopia.com.
Please do not copy, sell, and/or post this pattern and claim it as your own.

Materials you will need:
Get the supplies individually by clicking the links below
Red Heart With Love Metallic in Red
Red Heart Super Saver in White

G-4.25mm Crochet Hook
Polyfil
Yarn Needle
Scissors

NOTES:
-Use a smaller hook to make these smaller
-Use a bigger hook to make these bigger

Craftsy Unlimited FREE 7 day trial at Craftsy.com

Special stitches:
Ch(s): chain(s)
YO: Yarn Over
BLO: Back Loop Only
St(s): Stitch(es)
Sl st: slip stitch
SK: Skip
SC: Single Crochet
SC2TOG: Single Crochet Decrease
HDC: Half Double Crochet
DC: Double Crochet

Pattern:

If you have any confusion or difficulty with reading this pattern, please watch the video tutorial to have visual instructions.

Cup Cozy

Ch 34 or any even number
Rnd 1: SC in 1st ch to form a ring, *Ch 1, Sk 1 ch, SC in next ch, repeat from * around.
Rnd 2: * SC in ch 1 sp, Ch 1 Sk st, repeat from * around.
Rnds 3-14: Repeat Round 2
Fasten off, weave in ends.

Heart:
With With Love Metallic in Fuchsia
Ch 24, sl st to first ch to form a ring
Rnd 1: Ch up 1, HDC in same ch, [DC, ch 2, DC] in next ch, HDC in next, SC in next 4 chs, 2HDC in next ch, 2 DC in each of the next 3 chs, 2HDC in next ch, SC3TOG, 2 HDC in next ch, 2 DC in next 3 chs, 2 HDC in next ch, SC in next 4 chs, Sl st to first HDC
Fasten off with long tail for sewing.

Assembly:
Sew heart to cup cozy

Enjoy!!

This post contains affiliate links, which I may be compensated for when you make a purchase. That means if you click on any link and buy from the linked websites, I will receive a small percentage of the value of your order. The amount you pay is not changed. Thank you for all your support in clicking the links in my blog!! You all are so amazing!! ~Nadia

The yarn provided for this pattern is courtesy of Red Heart Yarns


Flash Sale at Darn Good Yarn

50% Off Yarn Bowls

Crochet Tutorial: Nadia’s Wonderfully Warm Mittens

Crochet Tutorial: Nadia’s Wonderfully Warm Mittens

I am making the best out of these frigid temps this week as I finish yet another weather inspired pattern. With temperature well below zero and brutal wind chills, it is no wonder that my mind is always thinking of ways to stay as snug and cozy as I possibly can! Nadia’s Wonderfully Warm Mittens are my latest creation to come off my hook!

These cozy mitts are fantastic and definitely doing their job keeping my digits nice and toasty! Frigid air, don’t care, I got me a pair! Ok, that was silly, but these mittens are not! Using Red Heart Evermore Chunky Yarn, this pair works up fast and easy! I have noted how to make these a bit bigger if you want more room! Handmade mittens are inspired by days gone by when most of the winter worn items were homespun yet these will always stand the test of time. My Wonderfully Warm Mittens are functional and very stylish today and for generations to come! Make yourself a pair! These also make a great gift!

My dad will continue to be the videographer, editor, and photographer for our videos when I move away.
Support YARNutopia today so we can continue to bring you clear, quality crochet tutorials even after I move into my new home!
There will be an added expense of more travel and hopefully this won’t deter our ability to provide consistent videos on a weekly basis.

Donate Button with Credit Cards


Watch this video tutorial to learn how to make these mittens:

**You can always contact me via Facebook if you have any problems with the pattern. I am happy to help if you have any questions along the way.

***These patterns are copyright YARNutopia © so PLEASE DO NOT COPY, SHARE, ADJUST OR RESELL MY PATTERN. I wrote and tested this pattern myself, from beginning to end. It took a lot of time and work, and I would really like to have it remain “my pattern.”

***You can sell anything you make from my patterns, please just link back to my website YARNutopia.com. Thank you!

Teacher: Nadia Fuad
Video and Editing: Fuad Azmat (My Daddy)
Share your work on Facebook!
Add me on Snapchat: YARNutopia
Follow me on Instagram
Visit My Ravelry Store and add this to your Favorites!
Follow me on Twitter: @YARNutopia
Enjoy this video and subscribe to my channel on YouTube for more tutorials on how to crochet!
Leave a comment, and share with your friends!

Pattern:

Designed by Nadia Fuad
You *may* sell items made from my pattern, but please reference my website YARNutopia.com.
Please do not copy, sell, and/or post this pattern and claim it as your own.

Materials you will need:
Red Heart Yarns Evermore in Emerald Isle (2 skeins–170 yards of yarn)
K-6.50mm crochet hook
Yarn Needle
Scissors
Stitch Marker

NOTES:
-Use a smaller hook to make these smaller
-Use a bigger hook to make these bigger
-Use any chunky yarn to make these mittens
-For bigger sizes, see written pattern and view the video tutorial for tips
-These mittens measure 10.5 inches (26 cm) long and 3.5 inches wide (9 cm)

Special stitches:
Ch(s): chain(s)
YO: Yarn Over
St(s): Stitch(es)
Sl st: slip stitch
SK: Skip
SC: Single Crochet
DC: Double Crochet
FPDC: Front Post Double Crochet
BPDC: Back Post Double Crochet

Pattern: Make 2

If you have any confusion or difficulty with reading this pattern, please watch the video tutorial to have visual instructions.

Mitten:
Work in continuous rounds
Ch 2
Rnd 1: 6 SC in 2nd ch from hook. (6)

Rnd 2: 2 SC in each st around. (12)

Rnd 3: [2 SC in next st, SC in next st] 6 times. (18)

For bigger sizes the next round is: [2 SC in next st, SC in next 2 sts] 6 times. (24), now go onto instructions for round 4.

Rnd 4: SC in each st around. (18)
Sl st to next st.

Rnd 5: Ch up 2 (does not count as anything), DC in each st around, sl st to first DC. (18)

Rnd 6: Ch up 1 (does not count as anything), FPDC on first st, *BPDC on next st, FPDC on next st, repeat from * around ending with BPDC, sl st to first FPDC. (18)

Rnds 7-11: Repeat Round 6

For bigger sizes, continue to repeat Round 6 until you hit the thumb and your piece is long enough, then go onto the next round.

Rnd 12: Ch 1, SC in each st around, do not slip stitch to first st, continue to work in continuous rounds. (18)

Rnd 13: Creating Thumbhole: Ch 3, Sk first 3 sts, SC in the rest of the sts on the round. (15)

Rnd 14: SC in each ch of the ch 3 sp, SC in each st around. (18)

Rnd 15: [SC2TOG, SC in next 7 sts] 2 times. (16)

If you made larger size and have 24 sts on round 14, then Rnd 15 instructions will be as follows: [SC2TOG, SC in next 10 sts] 2 times. (22)

Rnd 16-17: SC in each st around. (16)

Rnd 18: [2 SC in next st, SC in next 7 sts] 2 times. (18)

If you made larger size and have 22 sts on round 17, then Rnd 18 instructions will be as follows: [2 SC in next st, SC in next 10 sts] 2 times. (24)

Rnd 19: Sl st in next st, Ch up 2 (does not count as anything), DC in each st around, sl st to first DC. (18)

Rnd 20: Ch up 1 (does not count as anything), FPDC on first st, *FPDC on next st, BPDC on next st, FPDC on next st, repeat from * around, sl st to first FPDC.

Rnds 21-23: Repeat Rnd 20.
Fasten off, weave in ends.

Thumb:
Work in continuous rounds
Ch 2
Rnd 1: Put 6 (or 7, or 8) SC in 2nd ch from hook

Rnds 2-8: SC in each st around.

Continue making more rounds if your thumb is not long enough.
See video tutorial for visual instructions.
Fasten off with long tail for sewing.

Assembly:
Sew thumb to glove with everything inside out.
Weave in all ends.

Enjoy!!
Shop Red Heart, America's Favorite Yarn

This post contains affiliate links, which I may be compensated for when you make a purchase. That means if you click on any link and buy from the linked websites, I will receive a small percentage of the value of your order. The amount you pay is not changed. Thank you for all your support in clicking the links in my blog!! You all are so amazing!! ~Nadia

The yarn provided for this pattern is courtesy of Red Heart Yarns


Shop Red Heart, America's Favorite Yarn


CLICK.BUY. CREATE. Shop Michaels.com today!


Michaels Knitting & Crochet


Shop Red Heart, America's Favorite Yarn

Crochet Tutorial: Geometric Arrow Coasters

Crochet Tutorial: Geometric Arrow Coasters

Need a creative yet quick and easy gift idea for Father’s Day? These Geometric Arrow Coasters are just the project for you!! Whip this set up in an afternoon. Perfectly paired with a great mug or any beverage glasses, these coasters are a nice way to show Dad how much you care. An accent for the home and a great way help protect the tabletop.

These coasters can be made for anyone, anytime! Make these for your own home or as a gift for anyone!! Change colors to match decor. They really are a nice touch to a dinner party or table setting!


Shop Red Heart, America's Favorite Yarn

Follow along with this video tutorial to make these coasters:


Support YARNutopia today so we can continue to bring you clear, quality crochet tutorials

Donate Button with Credit Cards

**You can always contact me via Facebook if you have any problems with the pattern. I am happy to help if you have any questions along the way.
***These patterns are copyright YARNutopia © so PLEASE DO NOT COPY, SHARE, ADJUST OR RESELL MY PATTERN. I wrote and tested this pattern myself, from beginning to end. It took a lot of time and work, and I would really like to have it remain “my pattern.”
***You can sell anything you make from my patterns, please just link back to my website YARNutopia.com. Thank you!Teacher: Nadia Fuad
Video and Editing: Fuad Azmat (My Daddy)
Share your work on Facebook!
Add me on Snapchat: YARNutopia
Follow me on Instagram
Visit My Ravelry Store and add this to your Favorites!
Follow me on Twitter: @YARNutopia
Enjoy this video and subscribe to my channel on YouTube for more tutorials on how to crochet!
Leave a comment, and share with your friends!


Shop Red Heart, America's Favorite Yarn

Please check out the new beginning graphic designed and developed by my brother Nabeel. He and his wife own and operate NFD Graphics. Please hop over to their Facebook page and show them some love! For all your graphic and video/logo design needs be sure to contact them today!
http://www.nfdgraphics.com

Pattern
:

“Designed by Nadia Fuad
You *may* sell items made from my pattern, but please reference my website YARNutopia.com.
Please do not copy, sell, and/or post this pattern and claim it as your own.

Materials:
***Click here to get the whole KIT!!***

Red Heart Super Saver Yarn in Buff
Red Heart Super Saver Yarn in Soft Navy
Red Heart Super Saver Yarn in Carrot
Red Heart Super Saver Yarn in Redwood
G6-4.25mm Crochet Hook
Yarn Needle
Scissors


Shop Red Heart, America's Favorite Yarn

You can buy any of the items in this kit. Buy all or buy one item. Check it out to see the supplies you can get online to make this project!

NOTES:

-This project uses less than 40 yards of yarn.
-Use a smaller hook to make these smaller
-Use a bigger hook to make these bigger
-Watch the FULL video tutorial for visual instructions for each row and tips on how to make this smaller and bigger.
-Weave in all the ends as you go so you don’t have to weave them all in at the very end.
-If the instructions above are confusing, please message me on Facebook, and I will answer any questions you may have. Please be specific in your questions. Thank you!!
-The measurements for these coasters are 4 inches
-Use this awesome guide to learn Graph Pattern Designs
-This pattern does not have a graph available. I just have the written instructions
-I recommend to drop the yarn in the back and not trail it under your stitches when changing color, you won’t see it under your stitches then. (See video tutorial for visual instructions)

Special stitches:
Ch(s): chain(s)
YO: Yarn Over
St(s): Stitch(es)
BLO: Back Loops Only
prev.: Previous
Sl st: slip stitch
SC: Single Crochet
SC2TOG: Single crochet decrease
HDC: Half Double Crochet

Pattern:

If you have any confusion or difficulty with reading this pattern, please watch the video tutorial to have visual instructions.

Coaster:

Ch 2
Row 1: With Blue, SC in 2nd Ch from hook, ch 1, turn. (1)

Row 2: With Blue, 3SC in 1st st, ch 1, turn. (3)

Row 3: With Blue, 2SC in 1st st, 1 SC in next st, 2 SC in last st, ch 1, turn. (5)

Row 4: With Blue, SC in 2 sts, Change to Redwood, SC in next st, Change to Blue, SC in last 2 sts, ch 1, turn. (5)

Row 5: With Blue, SC in 2 sts, Change to Redwood, 3 SC in next st, Change to Blue, SC in last 2 sts, Ch 1, turn. (7)

Row 6: With Blue, SC in 2 sts, Change to Redwood, 2 SC in next st, SC in next st, 2 SC in next st, Change to Blue, SC in last 2 sts, ch 1, turn. (9)

Row 7: With Blue, SC in 2 sts, Change to Redwood, SC in next 5 sts, Change to Blue, SC in last 2 sts, ch 1, turn. (9)

Row 8: With Blue, SC in 2 sts, Change to Redwood, SC in 2 sts, Change to Carrot, SC in next st, Change to Redwood, SC in 2 sts, Change to Blue, SC in last 2 sts, ch 1, turn. (9)

Row 9: With Blue, SC in 2 sts, Change to Redwood, SC in 2 sts, Change to Carrot, 3 SC in next st, Change to Redwood, SC in 2 sts, Change to Blue, SC in last 2 sts, ch 1, turn. (11)

Row 10: With Blue, SC in 2 sts, Change to Redwood, SC in 2 sts, Change to Carrot, 2 SC in next st, SC in next st, 2 SC in next st, Change to Redwood, SC in 2 sts, Change to Blue, SC in last 2 sts, ch 1, turn. (13)

Row 11: With Blue, SC in 2 sts, Change to Redwood, SC in 2 sts, Change to Carrot, SC in next 5 sts, Change to Redwood, SC in 2 sts, Change to Blue, SC in last 2 sts, ch 1, turn. (13)

Row 12: With Blue, SC in 2 sts, Change to Redwood, SC in 2 sts, Change to Carrot, 2 SC in next st, SC in next 3 st, 2 SC in next st, Change to Redwood, SC in 2 sts, Change to Blue, SC in last 2 sts, ch 1, turn. (15)
Continue to SC Down Side of Triangle Shape with Blue, and up the other side of the Triangle. (See video tutorial for visual instructions)
Fasten off, weave in all ends.

With Buff Working down the side of the triangle
Row 1: SC in 13 sts, Ch 1, turn. (13)
Row 2: SC2TOG, SC in each st until 2 sts remain, SC2TOG, ch 1, turn. (11)
Row 3-4 Repeat Row 2 until you have 7 sts left. Pull up loop and work the other side of the triangle with a new ball of yarn.

Other side of triangle:
Row 1: SC in 13 sts, Ch 1, turn. (13)
Row 2: SC2TOG, SC in each st until 2 sts remain, SC2TOG, ch 1, turn. (11)
Row 3-4 Repeat Row 2 until you have 7 sts left.
Fasten off, weave in ends.

Go back to other side and Continue to SC around entire coaster. Use Surface Crochet to outline each Triangular shape. (See video tutorial on how to do that)
Fasten off, weave in ends.

Enjoy!!
Shop Red Heart, America's Favorite Yarn

This post contains affiliate links, which I may be compensated for when you make a purchase. That means if you click on any link and buy from the linked websites, I will receive a small percentage of the value of your order. The amount you pay is not changed. Thank you for all your support in clicking the links in my blog!! You all are so amazing!! ~Nadia

The yarn provided for this pattern is courtesy of Red Heart Yarns


Wal-Mart.com USA, LLC


CLICK.BUY. CREATE. Shop Michaels.com today!

Crochet Tutorial: String of Hearts Cup Cozy

Crochet Tutorial: String of Hearts Cup Cozy

Rise and shine, it’s a “brew-tiful” day! Words can’t “espresso” how much you “bean” to me. You always stay “grounded” and work at “mocha” me happy. Even when I have a “latte” on my mind, you are there to give me your sweet “sugar.” Every day, you’re ready to face the daily “grind.” Even if each day feels like a “deja brew,” you never get “heated” and say “I don’t give a “frapp,”” or “What’s “Sumatra” with my life?” Instead, you’re always “perky” and “tea-riffic!” So, better “latte” than never, I want you to know that you’re more than an Average “Joe.” You’re just my “cup of tea.”

mugcozy

Follow along with this video tutorial to learn how to make this mug cozy:

**You can always contact me via Facebook if you have any problems with the pattern. I am happy to help if you have any questions along the way.
***These patterns are copyright YARNutopia © so PLEASE DO NOT COPY, SHARE, ADJUST OR RESELL MY PATTERN. I wrote and tested this pattern myself, from beginning to end. It took a lot of time and work, and I would really like to have it remain “my pattern.”
***You can sell anything you make from my patterns, please just link back to my website YARNutopia.com. Thank you!

Teacher: Nadia Fuad
Video and Editing: Fuad Azmat (My Daddy)
Share your work on Facebook!
Add me on Snapchat: YARNutopia
Follow me on Instagram
Visit My Ravelry Store and add this to your Favorites!
Follow me on Twitter: @YARNutopia
Enjoy this video and subscribe to my channel on YouTube for more tutorials on how to crochet!
Leave a comment, and share with your friends!

Pattern:

Designed by Nadia Fuad
You *may* sell items made from my pattern, but please reference my website YARNutopia.com.
Please do not copy, sell, and/or post this pattern and claim it as your own.


Materials:

**Click here to get the full supply kit to make this project**

Red Heart Super Saver in Cherry Red
Red Heart Super Saver Yarn in Perfect Pink
J-5.75mm Crochet Hook
Small button
Yarn Needle
Scissors

NOTES:
-Use a smaller hook to make these smaller
-Use a bigger hook to make these bigger

My dad will continue to be the videographer, editor, and photographer for our videos when I move away.
Support YARNutopia today so we can continue to bring you clear, quality crochet tutorials even after I move into my new home!
There will be an added expense of more travel and hopefully this won’t deter our ability to provide consistent videos on a weekly basis.

Donate Button with Credit Cards

Special stitches:
Ch(s): chain(s)
YO: Yarn Over
St(s): Stitch(es)
Sl st: slip stitch
SK: Skip
SC: Single Crochet

Pattern:

If you have any confusion or difficulty with reading this pattern, please watch the video tutorial to have visual instructions.

Heart: Make 4
Ch 3
Rnd 1: [3 TR, 3 DC, ch 1, TR, ch 1, 3 DC, 3 TR, ch 3, sl st] in 3rd ch from hook.
Rnd 2: Ch 3, [SC, DC] in 1st TR, 3 DC in next st, 2 DC in next st, DC in next 3 sts, DC in ch 1 sp, Ch 1, DC in TR, ch 1, DC in ch 1 sp, DC in next 3 sts, 2 DC in next st, 3 DC in next st, [DC, SC] in last st, ch 3, sl st in center.
Fasten off with long tail for sewing.

Button hole:
When finishing one heart, Ch 4 and sl st back into center.
See video tutorial for visual instructions.

 Assembly step:
Sew all the pieces together using video tutorial/photos as a guide.
Sew button on end. Wrap around mug.

Enjoy!!

This post contains affiliate links, which I may be compensated for when you make a purchase. That means if you click on any link and buy from the linked websites, I will receive a small percentage of the value of your order. The amount you pay is not changed. Thank you for all your support in clicking the links in my blog!! You all are so amazing!! ~Nadia

The yarn provided for this pattern is courtesy of Red Heart Yarns

Crochet Tutorial: Fallen Leaves Cup Cozy

Crochet Tutorial: Fallen Leaves Cup Cozy

Here is the Fallen Leaves Cup Cozy! One leaf applique doubles as a secret pocket which is perfect for a tea bag, some cash, or a gift card to a coffee shop. Mug cozies make great gifts for family, friends, neighbors, teachers, colleagues and many others on your gift giving list.

fallenleaves

Some suggested gift ideas: Mug or Travel mug + Cup Cozy + Hot Cocoa/Cash/Tea Bags/Specialty Coffee makes the perfect gift for that “hard to buy for” person on your list!

The handmade cup cozy adds a personal touch to an already awesome idea!

fallenleaves2

Online Crochet Class

fallen-leaves3

I have added a button to my cup cozy. You can get wooden buttons at the Etsy Shop Wood Be Fancy. You do not have to use a button, you could sew the seam up and have it slide on a travel mug.

fallen-leaves5

Follow along with this video tutorial to learn how to make this cup cozy: The instructions start at 6 Minutes, 50 Seconds.

My dad will continue to be the videographer, editor, and photographer for our videos when I move away.
Support YARNutopia today so we can continue to bring you clear, quality crochet tutorials even after I move into my new home!
There will be an added expense of more travel and hopefully this won’t deter our ability to provide consistent videos on a weekly basis.

Donate Button with Credit Cards

***You can always contact me if you have any problems with the pattern. I am happy to help if you have any questions along the way.
***These patterns are copyright YARNutopia © so PLEASE DO NOT COPY, SHARE, ADJUST OR RESELL MY PATTERN. I wrote and tested this pattern myself, from beginning to end. It took a lot of time and work, and I would really like to have it remain “my pattern.”
***You can sell anything you make from my patterns, please just link back to my website YARNutopia.com. Thank you!
Teacher: Nadia Fuad
Video and Editing: Fuad Azmat (My Daddy)


hobby lobby

Share your work on Facebook!

Shop Here

Add me on Snapchat: YARNutopia

Follow me on Instagram

Visit My Ravelry Store and add this to your Favorites!

Follow me on Twitter: @YARNutopia

Enjoy this video and subscribe to my channel on YouTube for more tutorials on how to crochet!
Leave a comment, and share with your friends!

Pattern:

Designed by Nadia Fuad
Questions? Leave a comment!
You may sell items made from my pattern, but please reference my name and Etsy Shop (YARNutopia).
Please do not copy and post this pattern and claim it as your own.

Materials:
Red Heart Super Saver Yarns in White, Gold, and Flamingo
G/6-4.25mm Crochet Hook
Yarn Needle
Scissors

50% Off Yarn Bowls

NOTES:

-This pattern is for a standard sized cup. You could make it smaller or bigger just making more rows on your backing portion.

-You can make this cup cozy with any yarn: Cotton, Acrylic, Polyester

-You can make this using a bigger crochet hook if your tension is tighter

-You do not have to add the appliques, you could just have a plain cup cozy sans the leaf design.

-You can make the backing of your cup cozy bigger by chaining any even number.

Special Stitches:
Ch: chain
St(s): Stitch(es)
Sl st: slip stitch
SC: Single Crochet
DC: Double Crochet
TR: Treble Crochet
Picot: Ch 2, sl st in same st

Backing of Cup Cozy

Ch 12 or any even number.
Row 1: HDC in 2nd ch from hook, *Sl st in next ch, HDC in next ch, repeat from * across. (11 sts)
Row 2: Ch 1, turn, Sl st in 1st st, *HDC in next st, Sl st in next st, repeat from * across. (11 sts)
Row 3: Ch 1, turn, HDC in 1st st, *Sl st in next st, HDC in next st, repeat from * across. (11 sts)
Rows 4-28: Repeat rows 2 and 3 ending on a repeat of Row 2.
Fasten off with long tail if you are sewing it closed.
Fasten off with short tail if you are not sewing it closed.
Weave in all ends if you are adding a button.


Shop Red Heart, America's Favorite Yarn

Leaf: Make 2

Ch 9
Round 1: Sl st in 2nd ch from hook, SC in next 2 Chs, HDC in next 2 Chs, DC in next, TR in next, 10 TR in last ch
Working on opposite side of foundation chain: TR in next, DC in next, HDC in next 2, SC in next 2, Sl st in last.

Round 2: [Sl st in next 2 sts, Picot] 5 times, sl st in next 3 sts, ch 5, sl st in 2nd ch from hook and next 3 chs, sl st back in the same st on round 1 of the leaf, sl st in next 3 sts, Picot, [sl st in next 2 sts, Picot] 5 times, sl st to beginning, Picot, Fasten off.

Assembly step:

Sew leaves and button to cup cozy. When sewing one leaf, be sure to keep it open as a pocket.
Chain a loop on the edge of the cup cozy for looping around the button.
See video tutorial for visual instructions on all the pieces and where they go.

Weave in all ends.

Enjoy!!

This post contains affiliate links, which I may be compensated for when you make a purchase. That means if you click on any link and buy from the linked websites, I will receive a small percentage of the value of your order. The amount you pay is not changed. Thank you for all your support in clicking the links in my blog!! You all are so amazing!! ~Nadia

Wal-Mart.com USA, LLC


Saving Bundle - Hand Bended Silk Yarn


CLICK.BUY. CREATE. Shop Michaels.com today!


Hand Beaded Silk Yarn - 7 Pack


Crochet Tutorial: Santa Cup Cozy

Ho, Ho, Ho! Many of you will need a lot of coffee this holiday season, for there are many hours of shopping, late nights of decorating, and finishing those crochet projects so they make it under the tree in time!! Why not whip up something for yourself with this great Kris Kringle cup cozy and add a little festive cheer to your own life!? These would also make great gift ideas, complete with the coffee mug stuffed with candies or gourmet coffees.

It’s a fun idea for teachers, friends, colleagues and neighbors! Have fun this holiday season as you bring joy to many with your craft!

Cup Cozy

Follow along with this video tutorial to make your Santa Cup Cozy:

Pattern:

Designed by Nadia Fuad
Questions? Leave a comment!
You may sell items made from my pattern, but please reference my name and Etsy Shop (YARNutopia).
Please do not copy and post this pattern and claim it as your own.

Materials:
-Red Heart Yarn (Any Scraps of Worsted Weight)
-H-5.00mm Crochet Hook
-Yarn Needle
-Scissors

NOTES:
There are no notes for this project. View Video tutorial for visual instructions

Ch: chain
St(s): Stitch(es)
Sl st: slip stitch
SC: Single Crochet
HDC: Half Double Crochet
DC: Double Crochet

Pattern
Ch 30, sl st to beginning ch to form circle. Ch 2

Rnd 1: HDC in each ch around, change to red, sl st to beginning HDC, Ch 2

Rnd 2-4: HDC around (After round 4, change to black, sl st to beginning hdc, ch 2)

Rnd 5: HDC around change to red, sl st to beginning HDC, ch 2

Rnd 6-8: HDC around (After round 8, change to white, sl st to beginning hdc, ch 2)

Rnd 9: HDC around. Fasten off, weave in all ends.

Finishing:
Embroider Belt Buckle (See video tutorial for visual instructions)

Enjoy!!

***You can always contact me if you have any problems with the pattern. I am happy to help if you have any questions along the way.

***These patterns are copyright YARNutopia © so PLEASE DO NOT COPY, SHARE, ADJUST OR RESELL MY PATTERN. I wrote and tested this pattern myself, from beginning to end. It took a lot of time and work, and I would really like to have it remain “my pattern.”

***You can sell anything you make from my patterns, please just link back to my website YARNutopia.com. Thank you!

Teacher: Nadia Fuad
Video and Editing: Fuad Azmat (My Daddy)

Share your work on Facebook!

Shop Here

Add me on Snapchat: YARNutopia

Follow me on Instagram

Visit My Ravelry Store and add this to your Favorites!

Follow me on Twitter: @YARNutopia

Enjoy this video and subscribe to my channel on YouTube for more tutorials on how to crochet!
Leave a comment, and share with your friends!

“T’was the night before Christmas, when all through the house, not a creature was stirring, not even a mouse.” ~Clement Clarke Moore

~Nadia