FREE Written Crochet Pattern: Book Sleeve

FREE Written Crochet Pattern: Book Sleeve

We are launching our One-Skein Weekend with this fantastic Book Sleeve! I love this so much, and any reader in your life (including yourself) will just love to have one of these for carrying their current book on the go! These pouches can be made to accommodate any size and you can change the pattern to make yours according to whatever size you want. Even if you don’t carry a book around, this would be a very nice sleeve for your iPad or tablet! This is a great idea for us crocheters on the go to take our digital patterns with us wherever we go! This stitch is the Waistcoat Stitch and although it is a crochet stitch it gives the appearance of a tight Knit Stitch. This is perfect for so many items that you can adapt from this one fun pattern! Enjoy the versatility of this great project, and I can’t wait to see all your creations!


My dad will continue to be the videographer, editor, and photographer for our videos when I move away.
Support YARNutopia today so we can continue to bring you clear, quality crochet tutorials even after I move into my new home!
There will be an added expense of more travel and hopefully this won’t deter our ability to provide consistent videos on a weekly basis.

Donate Button with Credit Cards

**You can always contact me via Facebook if you have any problems with the pattern. I am happy to help if you have any questions along the way.
***These patterns are copyright YARNutopia © so PLEASE DO NOT COPY, SHARE, ADJUST OR RESELL MY PATTERN. I wrote and tested this pattern myself, from beginning to end. It took a lot of time and work, and I would really like to have it remain “my pattern.”
***You can sell anything you make from my patterns, please just link back to my website YARNutopia.com. Thank you!

Teacher: Nadia Fuad
Video and Editing: Fuad Azmat (My Daddy)
Share your work on Facebook!
Add me on Snapchat: YARNutopia
Follow me on Instagram
Visit My Ravelry Store and add this to your Favorites!
Follow me on Twitter: @YARNutopia
Enjoy this video and subscribe to my channel on YouTube for more tutorials on how to crochet!
Leave a comment, and share with your friends!

Pattern:

Designed by Nadia Fuad
You *may* sell items made from my pattern, but please reference my website YARNutopia.com.
Please do not copy, sell, and/or post this pattern and claim it as your own.

Materials you will need:
Get the supplies individually by clicking the links below
Red Heart Yarns Hopscotch in Somersault (one ball of yarn)
Size H-5.00mm Crochet Hook

Yarn Needle
Scissors

NOTES:
-Use a smaller hook to make these smaller
-Use a bigger hook to make these bigger


Special stitches:
Ch(s): chain(s)
YO: Yarn Over
BLO: Back Loop Only
FLO: Front Loop Only
St(s): Stitch(es)
Sl st: slip stitch
SK: Skip
SC: Single Crochet
SC2TOG: Single Crochet Decrease
HDC: Half Double Crochet
DC: Double Crochet


Pattern:

If you have any confusion or difficulty with reading this pattern, please watch the video tutorial that is linked above in this blog post to have visual instructions.

Book Sleeve:

Work in continuous rounds and work your SC stitches INTO the stitch and not in the top loops (See video tutorial for visual instructions) (The location is in between the two vertical lines of the SC stitch)

Ch 26

Rnd 1: SC in 2nd Ch from hook and across, put 3 SC in last ch, continue to work on opposite side of foundation ch, SC across, put 2 SC in last st. (see video tutorial for visual instructions)

Rnd 2: SC into each st around (work INTO the stitch, not in the top loops), Work in continuous rounds.

Rnds 3-35: Repeat Round 2
You can make yours longer if you wish to, just continue making SC around working INTO the stitch.

Fasten off, weave in all ends.

Create a loop by attaching the yarn to the center back, chain 10, Sl st into next st. Fasten off, Weave in ends.

Assembly: Sew a button to the front so the loop can wrap around it. (See photos for visual instructions)
Weave in all ends.

Enjoy!!

This post contains affiliate links, which I may be compensated for when you make a purchase. That means if you click on any link and buy from the linked websites, I will receive a small percentage of the value of your order. The amount you pay is not changed. Thank you for all your support in clicking the links in my blog!! You all are so amazing!! ~Nadia

The yarn provided for this pattern is courtesy of Yarnspirations


FREE Crochet Video Tutorial: Book Sleeve

FREE Crochet Video Tutorial: Book Sleeve

We are launching our One-Skein Weekend with this fantastic Book Sleeve! I love this so much, and any reader in your life (including yourself) will just love to have one of these for carrying their current book on the go! These pouches can be made to accommodate any size and you can change the pattern to make yours according to whatever size you want. Even if you don’t carry a book around, this would be a very nice sleeve for your iPad or tablet! This is a great idea for us crocheters on the go to take our digital patterns with us wherever we go! This stitch is the Waistcoat Stitch and although it is a crochet stitch it gives the appearance of a tight Knit Stitch. This is perfect for so many items that you can adapt from this one fun pattern! Enjoy the versatility of this great project, and I can’t wait to see all your creations!


Follow along with this video tutorial to learn how to make this project:


My dad will continue to be the videographer, editor, and photographer for our videos when I move away.
Support YARNutopia today so we can continue to bring you clear, quality crochet tutorials even after I move into my new home!
There will be an added expense of more travel and hopefully this won’t deter our ability to provide consistent videos on a weekly basis.

Donate Button with Credit Cards

**You can always contact me via Facebook if you have any problems with the pattern. I am happy to help if you have any questions along the way.
***These patterns are copyright YARNutopia © so PLEASE DO NOT COPY, SHARE, ADJUST OR RESELL MY PATTERN. I wrote and tested this pattern myself, from beginning to end. It took a lot of time and work, and I would really like to have it remain “my pattern.”
***You can sell anything you make from my patterns, please just link back to my website YARNutopia.com. Thank you!

Teacher: Nadia Fuad
Video and Editing: Fuad Azmat (My Daddy)
Share your work on Facebook!
Add me on Snapchat: YARNutopia
Follow me on Instagram
Visit My Ravelry Store and add this to your Favorites!
Follow me on Twitter: @YARNutopia
Enjoy this video and subscribe to my channel on YouTube for more tutorials on how to crochet!
Leave a comment, and share with your friends!

Designed by Nadia Fuad
You *may* sell items made from my pattern, but please reference my website YARNutopia.com.
Please do not copy, sell, and/or post this pattern and claim it as your own.

Materials you will need:
Get the supplies individually by clicking the links below

Although I used Red Heart Yarns in this project, here is a great substitution of yarn that works great as well. Brava yarn by WeCrochet/Knit Picks

-Red Heart Yarns Hopscotch in Somersault (one ball of yarn)
Size H-5.00mm Crochet Hook

Yarn Needle
Scissors

NOTES:
-Use a smaller hook to make these smaller
-Use a bigger hook to make these bigger

12 Days of Christmas: Lace Shell Bookmark – FREE Crochet Video Tutorial

12 Days of Christmas: Lace Shell Bookmark – FREE Crochet Video Tutorial

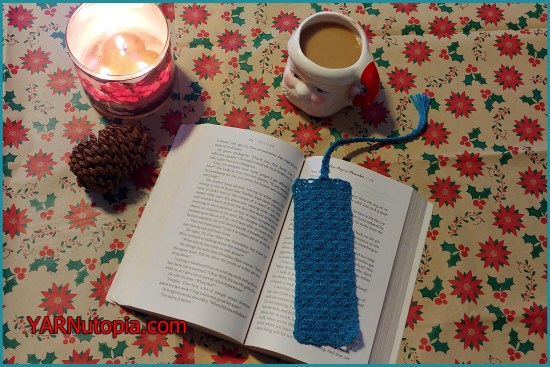
Is there a reader in your life who loves physical books and hasn’t moved to all digital methods when it comes to reading? Then I have the perfect gift for you! My Shell Stitch Lace Bookmark is so beautiful and so delicate, it is perfect in the pages of a favorite book. This bookmark is vintage inspired and will awe anyone on your gift giving list. Made with thread, this lacy look is stunning! Wrap this up with a favorite novel and you will win the heart of every reader you know!

Watch this video tutorial to learn how to make this project:


My dad will continue to be the videographer, editor, and photographer for our videos when I move away.
Support YARNutopia today so we can continue to bring you clear, quality crochet tutorials even after I move into my new home!
There will be an added expense of more travel and hopefully this won’t deter our ability to provide consistent videos on a weekly basis.

Donate Button with Credit Cards

**You can always contact me via Facebook if you have any problems with the pattern. I am happy to help if you have any questions along the way.
***These patterns are copyright YARNutopia © so PLEASE DO NOT COPY, SHARE, ADJUST OR RESELL MY PATTERN. I wrote and tested this pattern myself, from beginning to end. It took a lot of time and work, and I would really like to have it remain “my pattern.”
***You can sell anything you make from my patterns, please just link back to my website YARNutopia.com. Thank you!

Teacher: Nadia Fuad
Video and Editing: Fuad Azmat (My Daddy)
Share your work on Facebook!
Add me on Snapchat: YARNutopia
Follow me on Instagram
Visit My Ravelry Store and add this to your Favorites!
Follow me on Twitter: @YARNutopia
Enjoy this video and subscribe to my channel on YouTube for more tutorials on how to crochet!
Leave a comment, and share with your friends!

Pattern:

Designed by Nadia Fuad
You *may* sell items made from my pattern, but please reference my website YARNutopia.com.
Please do not copy, sell, and/or post this pattern and claim it as your own.

Materials you will need:
Get the supplies individually by clicking the links below
Aunt Lydia’s Crochet Thread
-1.00mm crochet hook

Yarn Needle
Scissors

NOTES:
-Use a smaller hook to make these smaller
-Use a bigger hook to make these bigger
-You can do as many rows of this pattern as you want to make it as long as you want.


FREE Crochet Video Tutorial: Sweet Dream Romper

FREE Crochet Video Tutorial: Sweet Dream Romper

This Sweet Dream Romper has been designed to be part of our Halloween costume. I am planning to release pieces of this ensemble from now through mid-October. Each piece will complete our three cosplay costumes that we designed for “Where The Wild Things Are,” a book by Maurice Sendak. Nasir is going to be Max. Here is the first installment to his costume. This one-piece romper , although made for this purpose, was actually designed with versatility in mind. I considered the other possibilities this could be used for. This could be added to a winter baby layette set. You could change the buttons or eliminate them, make it in any color, or sew on leather knee patches for when a baby crawls.

So many options in one piece! I have released the written pattern that you can find here. Below is the video tutorial for The Sweet Dream Romper. Enjoy!


FREE Written Crochet Pattern: Sweet Dream Romper

FREE Written Crochet Pattern: Sweet Dream Romper

Each year, we try to find a fun and exciting costumes for Halloween, and I love to take you on this journey with me. As each piece of the costume is released, I will update my blog to bring more and more pieces to life. Be sure to follow along to see all these updates!

The first installment of this year’s Halloween costume, is this Sweet Dream Romper. Although my intent is to use this outfit for Nasir’s cosplay costume as Max from the book “Where The Wild Things Are,” you will be able to follow through my video tutorial to create one of your own as part of a baby layette. You can change the colors, add knee patches, use smaller buttons or eliminate the buttons altogether. The creative ideas with this fall & winter pattern are endless! One thing I think we can all agree on is that Nas will be the perfect Max. 😍 He’s already happy about it!

Below is the release of my *FREE* written crochet pattern for those who prefer the written instructions. The video tutorial for this pattern can be found here!


My dad will continue to be the videographer, editor, and photographer for our videos when I move away.
Support YARNutopia today so we can continue to bring you clear, quality crochet tutorials even after I move into my new home!
There will be an added expense of more travel and hopefully this won’t deter our ability to provide consistent videos on a weekly basis.

Donate Button with Credit Cards


**You can always contact me via Facebook if you have any problems with the pattern. I am happy to help if you have any questions along the way.
***These patterns are copyright YARNutopia © so PLEASE DO NOT COPY, SHARE, ADJUST OR RESELL MY PATTERN. I wrote and tested this pattern myself, from beginning to end. It took a lot of time and work, and I would really like to have it remain “my pattern.”

***You can sell anything you make from my patterns, please just link back to my website YARNutopia.com. Thank you!

Teacher: Nadia Fuad
Video and Editing: Fuad Azmat (My Daddy)
Share your work on Facebook!
Add me on Snapchat: YARNutopia
Follow me on Instagram
Visit My Ravelry Store and add this to your Favorites!
Follow me on Twitter: @YARNutopia
Enjoy this video and subscribe to my channel on YouTube for more tutorials on how to crochet!
Leave a comment, and share with your friends!

Designed by Nadia Fuad
You may sell items made from my pattern, but please reference my website YARNutopia.com.
Please do not copy, sell, and/or post this pattern and claim it as your own.


Materials you will need:
Red Heart Yarns Super Saver (Aran)
Size H-5.00mm Crochet Hook
Yarn Needle
Scissors

NOTES:
-To make this smaller or bigger, use a smaller or bigger hook size
-This is made from the bottom up
-This romper will fit a 3-6 month old baby
-See the video tutorial for sizing information.

Special stitches:
Ch(s): chain(s)
St(s): Stitch(es)
Sk: Skip
Sl st: slip stitch
SC: Single Crochet
DC: Double Crochet
HDC: Half Double Crochet
HDC2TOG: Half Double Crochet Decrease
BLO: Back Loop Only
FLO: Front Loop Only

Pattern:

Legs:
Make 2
Ch 27, Sl st to first ch to form a ring

Rnd 1: Ch 1, HDC in each ch around, sl st to 1st st, turn. (27)

Rnds 2-15: Ch 1, HDC in each st around, Sl st to first st, turn. (27)

Fasten off Leg 1 with a long tail for sewing later, Do NOT fasten off Leg 2

Attaching the legs:

Making body

Rnd 16: Working on Leg 2, Ch 1, HDC in each st around, Ch 3, HDC in each st on Leg 1, Ch 3, Sl st to first st on Leg 2, Turn. (54 sts, 2 ch 3 sps)

Rnd 17: Ch 1, HDC in each st and each ch around, sl st to first st, turn. (60)

Rnds 18-46: Ch 1, HDC in each st around, sl st to first st, Turn. (60)
Do not fasten off, continue with the first strap

Left Back Strap:

Row 1: Sl st in next 4 sts, Ch 1, HDC in 10 sts, ch 1, turn. (10)

Row 2: HDC in each st across, ch 1, turn. (10)

Row 3: HDC2TOG, HDC in next 6 sts, HDC2TOG, ch 1, turn. (8)

Row 4: HDC in each st across, Ch 1, turn. (8)

Row 5: HDC2TOG, HDC in next 4 sts, HDC2TOG, ch 1, turn. (6)

Rows 6-9: HDC in each st across, Ch 1, Turn. (6)

Row 10: HDC in first 2 sts, Ch 2, Sk 2 sts HDC in last 2 sts, ch 1, turn.  (button hole made)

Row 11: HDC in each st and each ch across. (6)

Fasten off, weave in ends.

Left Front Strap:

Skip 6 sts on row 46 of body
Attach yarn to next st

Row 1: Ch 1, HDC in 10 sts, ch 1, turn. (10)

Row 2: HDC in each st across, ch 1, turn. (10)

Row 3: HDC2TOG, HDC in next 6 sts, HDC2TOG, ch 1, turn. (8)

Row 4: HDC in each st across, Ch 1, turn. (8)

Row 5: HDC2TOG, HDC in next 4 sts, HDC2TOG, ch 1, turn. (6)

Rows 6-9: HDC in each st across, Ch 1, Turn. (6)

Fasten off, weave in ends.

Right Front Strap:

Skip 4 sts on row 46 of body
Attach yarn to next st

Row 1: Ch 1, HDC in 10 sts, ch 1, turn. (10)

Row 2: HDC in each st across, ch 1, turn. (10)

Row 3: HDC2TOG, HDC in next 6 sts, HDC2TOG, ch 1, turn. (8)

Row 4: HDC in each st across, Ch 1, turn. (8)

Row 5: HDC2TOG, HDC in next 4 sts, HDC2TOG, ch 1, turn. (6)

Rows 6-9: HDC in each st across, Ch 1, Turn. (6)

Fasten off, weave in ends.

Right Back Strap:

Skip 6 sts on row 46 of body
Attach yarn to next st

Row 1: Sl st in next 4 sts, Ch 1, HDC in 10 sts, ch 1, turn. (10)

Row 2: HDC in each st across, ch 1, turn. (10)

Row 3: HDC2TOG, HDC in next 6 sts, HDC2TOG, ch 1, turn. (8)

Row 4: HDC in each st across, Ch 1, turn. (8)

Row 5: HDC2TOG, HDC in next 4 sts, HDC2TOG, ch 1, turn. (6)

Rows 6-9: HDC in each st across, Ch 1, Turn. (6)

Row 10: HDC in first 2 sts, Ch 2, Sk 2 sts HDC in last 2 sts, ch 1, turn. (button hole made)

Row 11: HDC in each st and each ch across. (6)

Fasten off, weave in ends.

Ankle Cuffs

Do the same thing for both legs

Mark 3 sts evenly around the ankle,
Attach yarn to any stitch on ankle
Rnd 1: Ch 1, HDC in each st around, put a HDC2TOG stitch on the stitches you marked to decrease, sl st to first st when you get back around, ch 1 (Do not turn) (24)

Rnd 2: FPHDC on next st, BPHDC on next st, repeat from * around, sl st to first st, ch 1. (24)

Rnds 3-5: FPHDC on FPHDC sts, BPHDC n BPHDC sts, all the way around, sl st to first st, ch 1. (24)
Fasten off, weave in all ends

**Add buttons to the top straps, add buttons to the front of romper.**

Enjoy!

~Nadia


This post contains affiliate links, which I may be compensated for when you make a purchase. That means if you click on any link and buy from the linked websites, I will receive a small percentage of the value of your order. The amount you pay is not changed. Thank you for all your support in clicking the links in my blog!! You all are so amazing!! ~Nadia

The yarn provided for this pattern is courtesy of Red Heart Yarns


Video Tutorial: Make Your Mark Bookmark

Video Tutorial: Make Your Mark Bookmark

My second installment of this series is the Make Your Mark Bookmark! This EASY BEGINNER project is THE perfect gift for the book lover in your life! Paired with a great novel, this handmade addition will make gift giving more special! I have the first Ribbon Bookmark installment here.

Watch this video tutorial to learn how to make this simple project:


My dad will continue to be the videographer, editor, and photographer for our videos when I move away.
Support YARNutopia today so we can continue to bring you clear, quality crochet tutorials even after I move into my new home!
There will be an added expense of more travel and hopefully this won’t deter our ability to provide consistent videos on a weekly basis.

Donate Button with Credit Cards

**You can always contact me via Facebook if you have any problems with the pattern. I am happy to help if you have any questions along the way.
***These patterns are copyright YARNutopia © so PLEASE DO NOT COPY, SHARE, ADJUST OR RESELL MY PATTERN. I wrote and tested this pattern myself, from beginning to end. It took a lot of time and work, and I would really like to have it remain “my pattern.”
***You can sell anything you make from my patterns, please just link back to my website YARNutopia.com. Thank you!

Teacher: Nadia Fuad
Video and Editing: Fuad Azmat (My Daddy)
Share your work on Facebook!
Add me on Snapchat: YARNutopia
Follow me on Instagram
Visit My Ravelry Store and add this to your Favorites!
Follow me on Twitter: @YARNutopia
Enjoy this video and subscribe to my channel on YouTube for more tutorials on how to crochet!
Leave a comment, and share with your friends!

Pattern:

Designed by Nadia Fuad
You *may* sell items made from my pattern, but please reference my website YARNutopia.com.
Please do not copy, sell, and/or post this pattern and claim it as your own.

Materials you will need:
Get the supplies individually by clicking the links below
Red Heart Scrubby Smoothie in any color
G-4.25mm Crochet Hook
Yarn Needle
Scissors

NOTES:
-Use a smaller hook to make these smaller
-Use a bigger hook to make these bigger

Special stitches:
Ch(s): chain(s)
YO: Yarn Over
BLO: Back Loop Only
St(s): Stitch(es)
Sl st: slip stitch
SK: Skip
SC: Single Crochet
DC: Double Crochet

Pattern:

If you have any confusion or difficulty with reading this pattern, please watch the video tutorial to have visual instructions.

Mini Squares: Make 5
Ch 4
Sl st to first ch to form ring
Rnd 1: Ch 1, [3 DC into Ring, Ch 2] 4 times. Sl st to first DC, fasten off with long tail for sewing.

Assembly: Sew all 5 squares together (See video tutorial for visual instructions)

Border Round 1: Attach yarn to corner ch 2 sp, Ch 1, **3 SC in corner, SC in next 3 sts, 3 SC in next corner, SC in next 3 sts, *SC in ch sp, Ch 1,  SC in next Ch sp, SC in next 3 sts, repeat from * until next corner, repeat from **  around, ending with SC in last 3 sts, Sl st to first st. Fasten off.

Border Round 2: Attach yarn to middle SC of any corner of a short side, Ch 1, [SC, Ch 2, SC] in same st, SC in next 3 sts, Picot, SC in next 2 sts, [SC, Ch 2, SC] in next corner st, SC in each st and each ch sp to next corner, [SC, ch 2, SC] in next corner, SC in each st to next corner, [SC, ch 2, SC] in next corner, SC in each st to next corner. Close round and fasten off.

Assembly:
Make a tassel and attach to the picot (See video tutorial on how to make a fancy tassel!

Enjoy!


This post contains affiliate links, which I may be compensated for when you make a purchase. That means if you click on any link and buy from the linked websites, I will receive a small percentage of the value of your order. The amount you pay is not changed. Thank you for all your support in clicking the links in my blog!! You all are so amazing!! ~Nadia

The yarn provided for this pattern is courtesy of Red Heart Yarns


Flash Sale at Darn Good Yarn

50% Off Yarn Bowls

Crochet Tutorial: Bookmark with a Ribbon

Crochet Tutorial: Bookmark with a Ribbon
My mom has a bookmark exchange in her book club and asked me to make a few bookmarks, everybody wins in this case because I made this bookmark and filmed a video tutorial with my dad! Mark your pages in elegant style with this bookmark. No more dog-eared pages, using an old receipt or torn piece of paper to save your spot in your favorite book. Every time you open your book get greeted with this lovely piece that helps find your page and makes reading more fun!


Watch this video tutorial to learn how to make this bookmark:

My dad will continue to be the videographer, editor, and photographer for our videos when I move away.
Support YARNutopia today so we can continue to bring you clear, quality crochet tutorials even after I move into my new home!
There will be an added expense of more travel and hopefully this won’t deter our ability to provide consistent videos on a weekly basis.

Donate Button with Credit Cards

**You can always contact me via Facebook if you have any problems with the pattern. I am happy to help if you have any questions along the way.
***These patterns are copyright YARNutopia © so PLEASE DO NOT COPY, SHARE, ADJUST OR RESELL MY PATTERN. I wrote and tested this pattern myself, from beginning to end. It took a lot of time and work, and I would really like to have it remain “my pattern.”
***You can sell anything you make from my patterns, please just link back to my website YARNutopia.com. Thank you!

Teacher: Nadia Fuad
Video and Editing: Fuad Azmat (My Daddy)
Share your work on Facebook!
Add me on Snapchat: YARNutopia
Follow me on Instagram
Visit My Ravelry Store and add this to your Favorites!
Follow me on Twitter: @YARNutopia
Enjoy this video and subscribe to my channel on YouTube for more tutorials on how to crochet!
Leave a comment, and share with your friends!

Pattern:

Designed by Nadia Fuad
You *may* sell items made from my pattern, but please reference my website YARNutopia.com.
Please do not copy, sell, and/or post this pattern and claim it as your own.

Materials you will need:
Get the supplies individually by clicking the links below
Red Heart Scrubby Smoothie in any color
G-4.25mm Crochet Hook
Ribbon
Yarn Needle
Scissors

NOTES:
-Use a smaller hook to make these smaller
-Use a bigger hook to make these bigger

Craftsy Unlimited FREE 7 day trial at Craftsy.com

Special stitches:
Ch(s): chain(s)
YO: Yarn Over
BLO: Back Loop Only
St(s): Stitch(es)
Sl st: slip stitch
SK: Skip
SC: Single Crochet
HDC: Half Double Crochet
DC: Double Crochet

Pattern:

If you have any confusion or difficulty with reading this pattern, please watch the video tutorial to have visual instructions.

Ch 12
Row 1: DC in 1st chain to form a ring, turn.
Row 2: Ch 7 (Counts as DC  Ch 4 space), Sk 4 chains, DC in next chain of previous row. Turn.
Row 3: Ch 7, Sk 4 chains, DC in next chain of previous row. Turn.
Rows 4-11: Repeat Row 3.
Turn work sideways and work in the spaces down the sides of the bookmark.

Border of bookmark:
SC around DC from row 11, * 5 DC in next sp, SC in next sp, repeat from * down the side of the bookmark until you get to the bottom, sl st in each ch of bottom row, continue working up the other side of the bookmark,
SC in first space of other side, * 5 DC in next sp, SC in next sp, repeat from * up the side of the bookmark until you get back to the top. Sl st in next st and fasten off.
Weave in all ends.

Assembly: Weave a ribbon through the ladder looking section of the bookmark. (See video tutorial for visual instructions)


This post contains affiliate links, which I may be compensated for when you make a purchase. That means if you click on any link and buy from the linked websites, I will receive a small percentage of the value of your order. The amount you pay is not changed. Thank you for all your support in clicking the links in my blog!! You all are so amazing!! ~Nadia

The yarn provided for this pattern is courtesy of Red Heart Yarns


Flash Sale at Darn Good Yarn

50% Off Yarn Bowls

Weekend WIP

Weekend WIP

I love receiving parcels in the mailbox! This week was particularly exciting when a close family friend sent clippings from a vintage Women’s Day Magazine dated in the early 1970s. Included in the clippings, and what had her thinking of us, was the vintage crochet patterns she had saved. I love this!

Here I am, as I often do, multitasking on a Saturday! I have a great new project on my hook. I have my wedding planner nearby adding our collected addresses, preparing to send out our Save-the-Dates, I have my rainy day cup of hot chai, and I am perusing these awesome vintage patterns and ads from these 1970s magazines. Some of the articles in these old periodicals have me experiencing quite a few interesting emotions. Things were quite different 40+ years ago, but crochet has remained a strong passion no matter what the decade! Share what’s on your hook and what this weekend has in store for you!

~Nadia

Like the Wedding Planner? Get it here!!

Like the Sheep Measure Tape?? Get it here!!!

Like the Fluffy Yarn? Get it here!!

Like the Crochet Hook?? Get it here!! 

Support YARNutopia today so we can continue to bring you clear, quality crochet tutorials

Donate Button with Credit Cards

This post contains affiliate links, which I may be compensated for when you make a purchase. That means if you click on any link and buy from the linked websites, I will receive a small percentage of the value of your order. The amount you pay is not changed. Thank you for all your support in clicking the links in my blog!! You all are so amazing!! ~Nadia


Shop at Michaels

Shop Now

Cricut Gives Your Ultimate Cutting Precision

GIVEAWAY ENDED: Yarn Pooling Made Easy Blog Tour & Book Review

GIVEAWAY ENDED: Yarn Pooling Made Easy Blog Tour & Book Review

This Giveaway has ended
Thank you to all who participated!
Congratulations to the winner Stephanie Parish Buser!!


If I were to start this blog post a year ago, you would have heard my howl of frustration across the globe as I spent most of my efforts attempting to Yarn Pool in utter failure. No joke. I can’t even begin to count how many times in the past year, as yarn pooling began to trend, that I have been making feeble tries to make a go of it. After a few failed attempts, I would give up. Many people here on YARNutopia would ask for my help or write to see a demonstration, and I had to honestly admit defeat. Yarn pooling was something I wrestled with and lost. I started to reconcile it was NOT for me.


A few weeks ago, I was invited to participate in a Yarn Pooling Blog Tour hosted by Marly Bird. She has a great book Yarn Pooling Made Easy. I was provided a copy of the book and asked to give one of the projects a try by combining her detailed instructions with her comprehensive video tutorials. This was my chance! My last-ditch effort to make it through and understand this incredible technique. So, I agreed. I WAS going to overcome this challenge! I was bound and determined THIS time I was going to succeed.


Crochet Yarn Pooling

The instructions say to use a variegated yarn with a repeated color way. I had my yarn Red Heart Super Saver in Platoon that I felt would be perfect for this. I decided to not over shoot my first attempt by getting over zealous taking on a huge pattern, so I decided on a scarf as my first project to try yarn pooling. I was ready. I was excited. I was optimistic. I was geared up to tackle something that previously tried to defeat me. This time I was NOT to be defeated!!!

However, things did not go as smooth as I had hoped in the beginning. Have you ever tried to do something and no matter how hard you try, something just doesn’t click? I lacked the coordination to understand some key elements and my first several attempts I had to frog my work. I was not going to let Marly Bird down! So, I kept going. I watched her video tutorials and read the instructions in her book very carefully. I started over and over. I put my headphones on, tuned out everything, and listened to each word of her videos. By the time I reached the end of her segment, I was sooooo inspired!! Marly, you inspire me so much!

Crochet Yarn Pooling

I began to work my yarn into to the right calculations and GUESS WHAT, it works!!!! It worked out for me!!! I started to see how the pooling effect created the argyle pattern, and boy, I did an epic happy dance all over my house!!!! How thrilling!! This has been the ONLY helpful guide for me to be able to succeed on something that I was about to give up on. I am typically NOT a quitter and thank goodness, because if I was, I would not have found my way to this great book and Marly’s fantastic videos and I would not be Yarn Pooling today! I am so thankful to have stuck it out and succeeded. Marly, thank you!


To make this even more exciting, I am giving ONE copy of this book away to ONE lucky follower here on YARNutopia!!!! NOW YOU TOO CAN HAVE THE KEY TO UNLOCK THE MYSTERY OF YARN POOLING OF YOUR VERY OWN!!
WOOT, WOOT!!

Congratulations to the winner Stephanie Parish Buser!!

Who Can Enter? Only open to those 18 years of age or older and US residents. (sorry…legal reasons prevent us from making this open worldwide)

My Giveaway will end on September 20th, 2018 at 11:59pm and the randomly chosen winner will be announced and contacted on September 21st. The winner then has until September 24th to claim their prize.

Here is a schedule of the blogs that will be sharing a review and doing a GIVEAWAY:

Date : Blogger

9/5/17 : Calleighs Clips and Crochet Creations

9/6/17 : ACCROchet

9/7/17 : The Stitchin Mommy

9/8/17 : Crochet Memories

9/11/17 : Pattern Paradise

9/12/17 : 5 Little Monsters

9/13/17 : YARNutopia

9/14/17 : Same DiNamics Crochet

9/15/17 : Nicki’s Homemade Crafts

9/18/17 : Looping with Love

9/19/17 : Underground Crafter

*NOTE: Winners will be chosen at the discretion of each blogger host, and by their rules. All winners will be notified within one week of the last tour date. All winners will need to respond to the host with their information by 9/24/17 or they will forfeit their prize. All books will be sent at the same time at the end of the tour, regardless of when the winner was chosen. Winner must have a US or Canadian address.

I can’t express the excitement it is as a seasoned crocheter to be able to find a way for this to make sense!  Now the opportunities are endless! If you are like me, struggling to understand this technique, this is a fabulous instruction manual and pattern book you won’t want to miss. Combine these great instructions from the book with Marly’s step by step video tutorials and you have yourself a winning combination!!

A few notes:

My persistence paid off in one day! From the moment I sat down to try this to reaching success, was only a few short hours.

My scarf using the pattern in her book took me a combined 4-5 total hours once I got the hang of yarn-pooling.

The book is titled ‘Yarn Pooling Made Easy’ and you can purchase your copy now.

This post contains affiliate links, which I may be compensated for when you make a purchase. That means if you click on any link and buy from the linked websites, I will receive a small percentage of the value of your order. The amount you pay is not changed. Thank you for all your support in clicking the links in my blog!! You all are so amazing!! ~Nadia


Donate Button with Credit Cards