Skip to content
YARNutopia & M0re
All things Yarn Related: Crochet, DIY, and Crafts
Blog
365 Days of Granny Squares
Stitch Gallery & Glossary
Crochet Video Tutorials
Frequently Asked Questions
Crochet Glossary: Learn the Lingo
Contact
Search
Search
Costume Items
YARNutoia & More
The Beholder & Cthulhu Hats for Halloween
Happy Halloween 2025
Happy Halloween 2024 – PLUS FREE Crochet Pattern
FREE Written Crochet Pattern: Ghost Hat
Happy Halloween 2022 from YARNutopia!
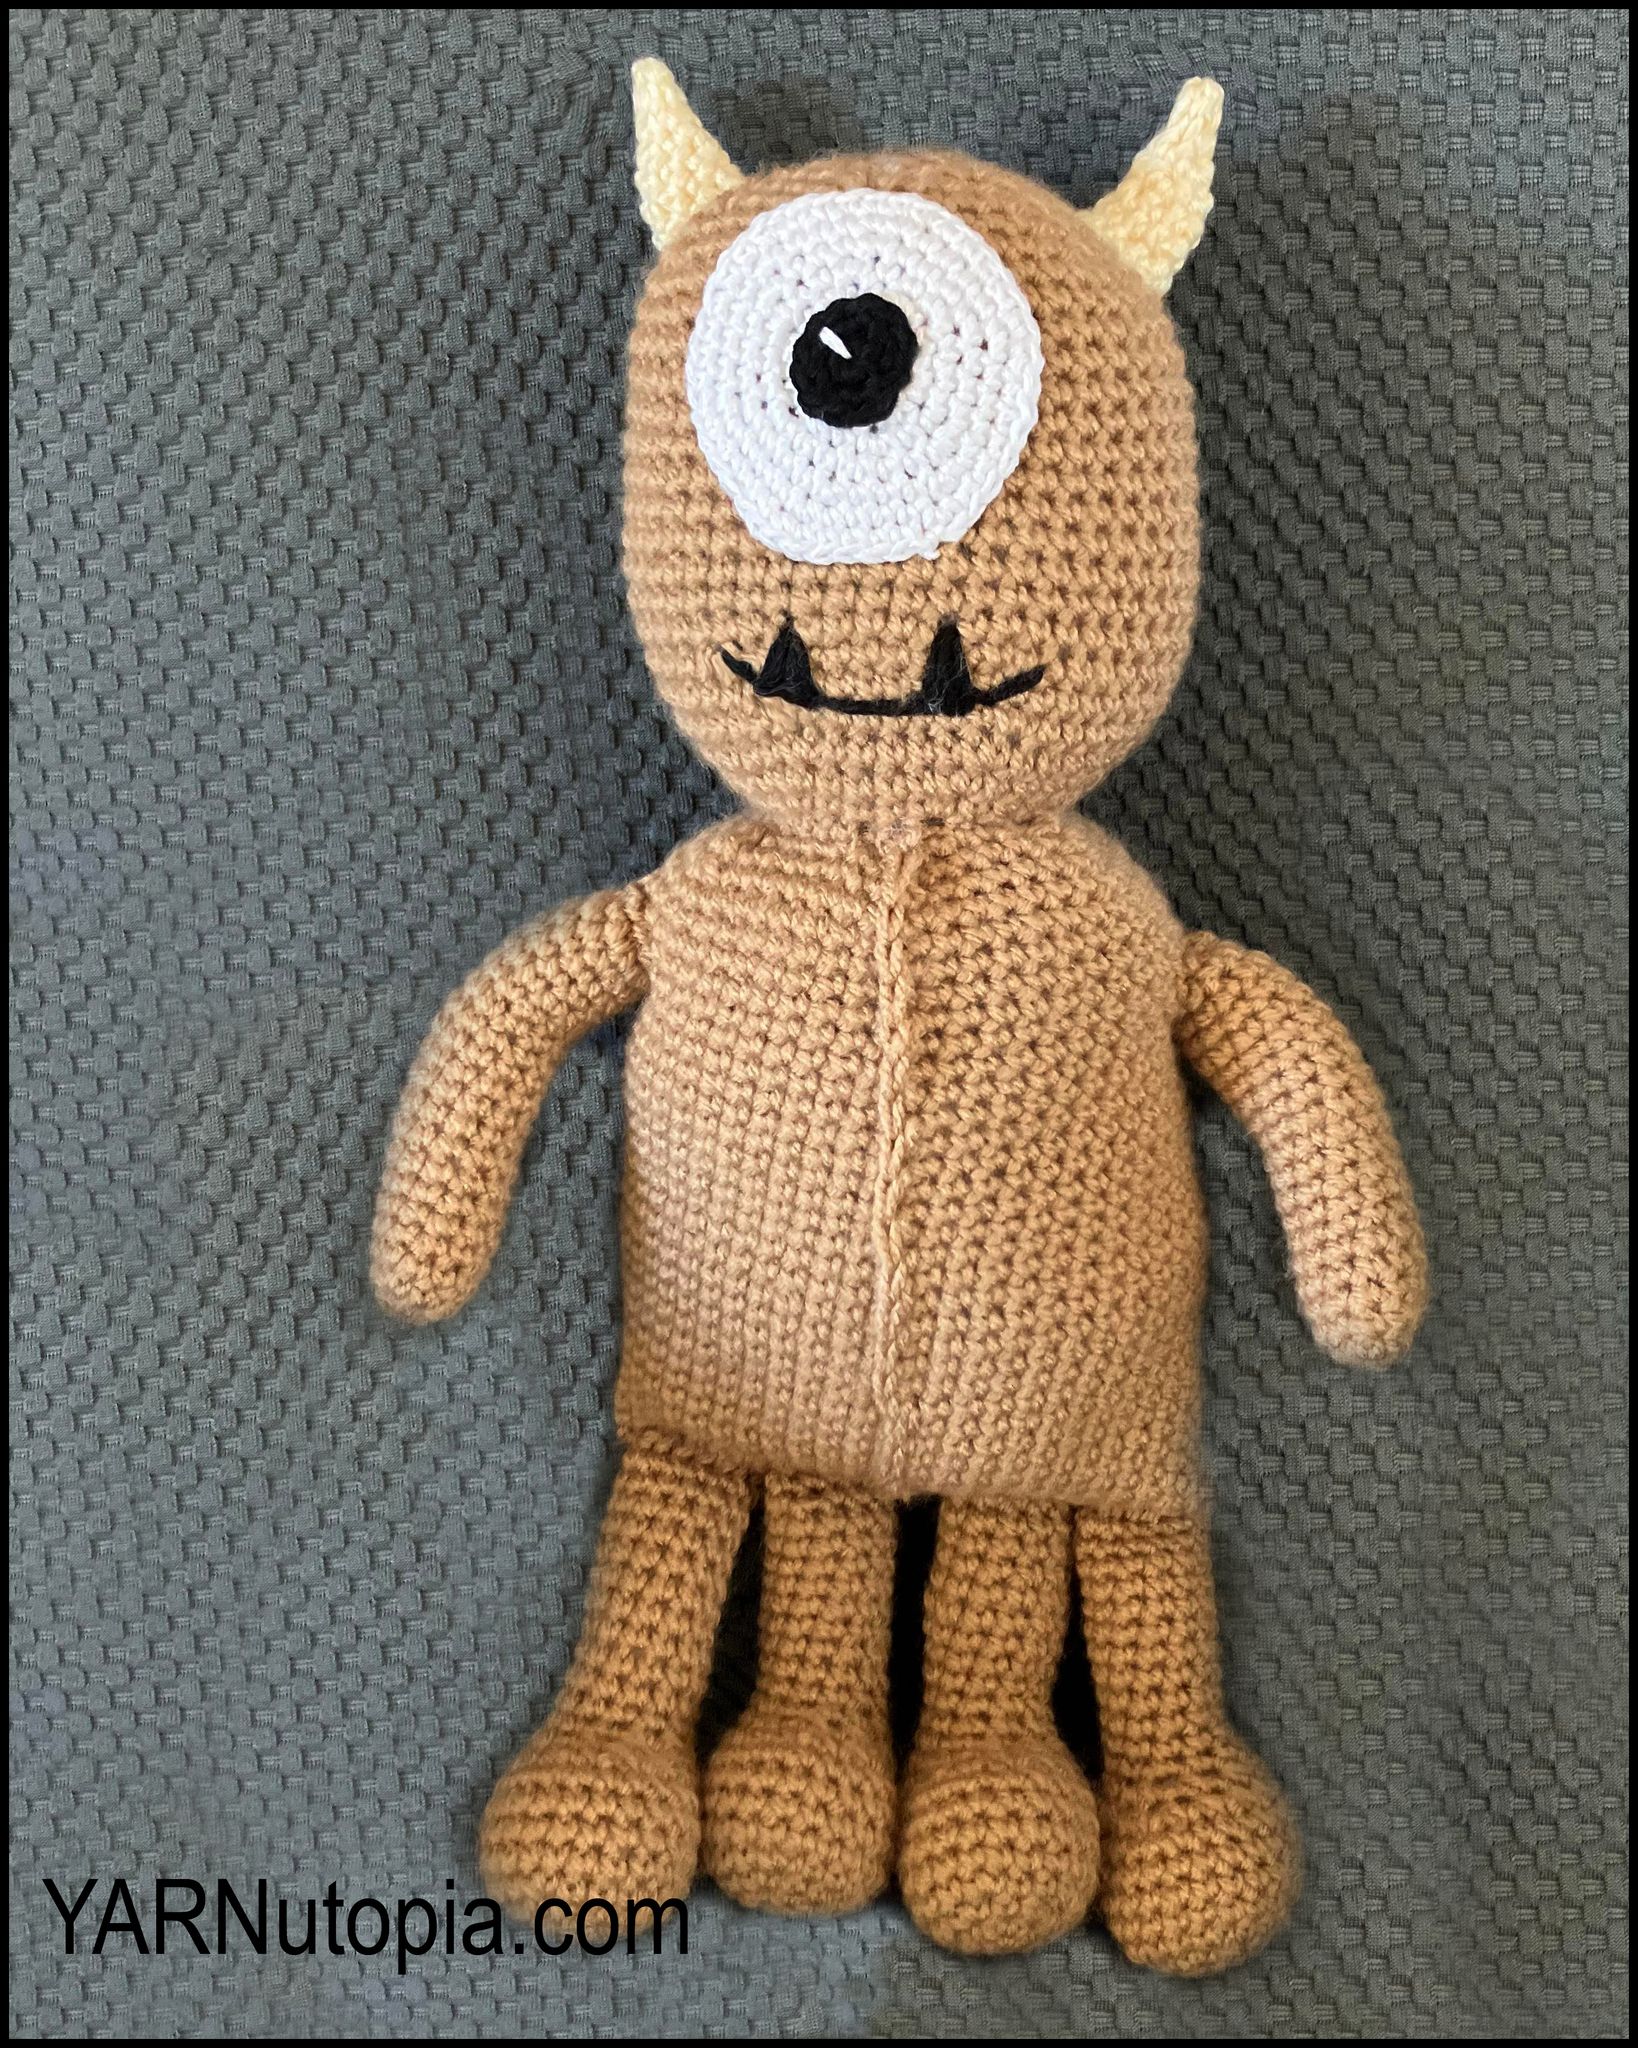
FREE Written Crochet Pattern: Monster/Alien Stuffed Toy Amigurumi
FREE Written Crochet Pattern: Toddler Monster Costume
FREE Written Crochet Pattern: Fuzzy Monster Hat with Horns
Happy Halloween 2021
Happy Halloween 2020
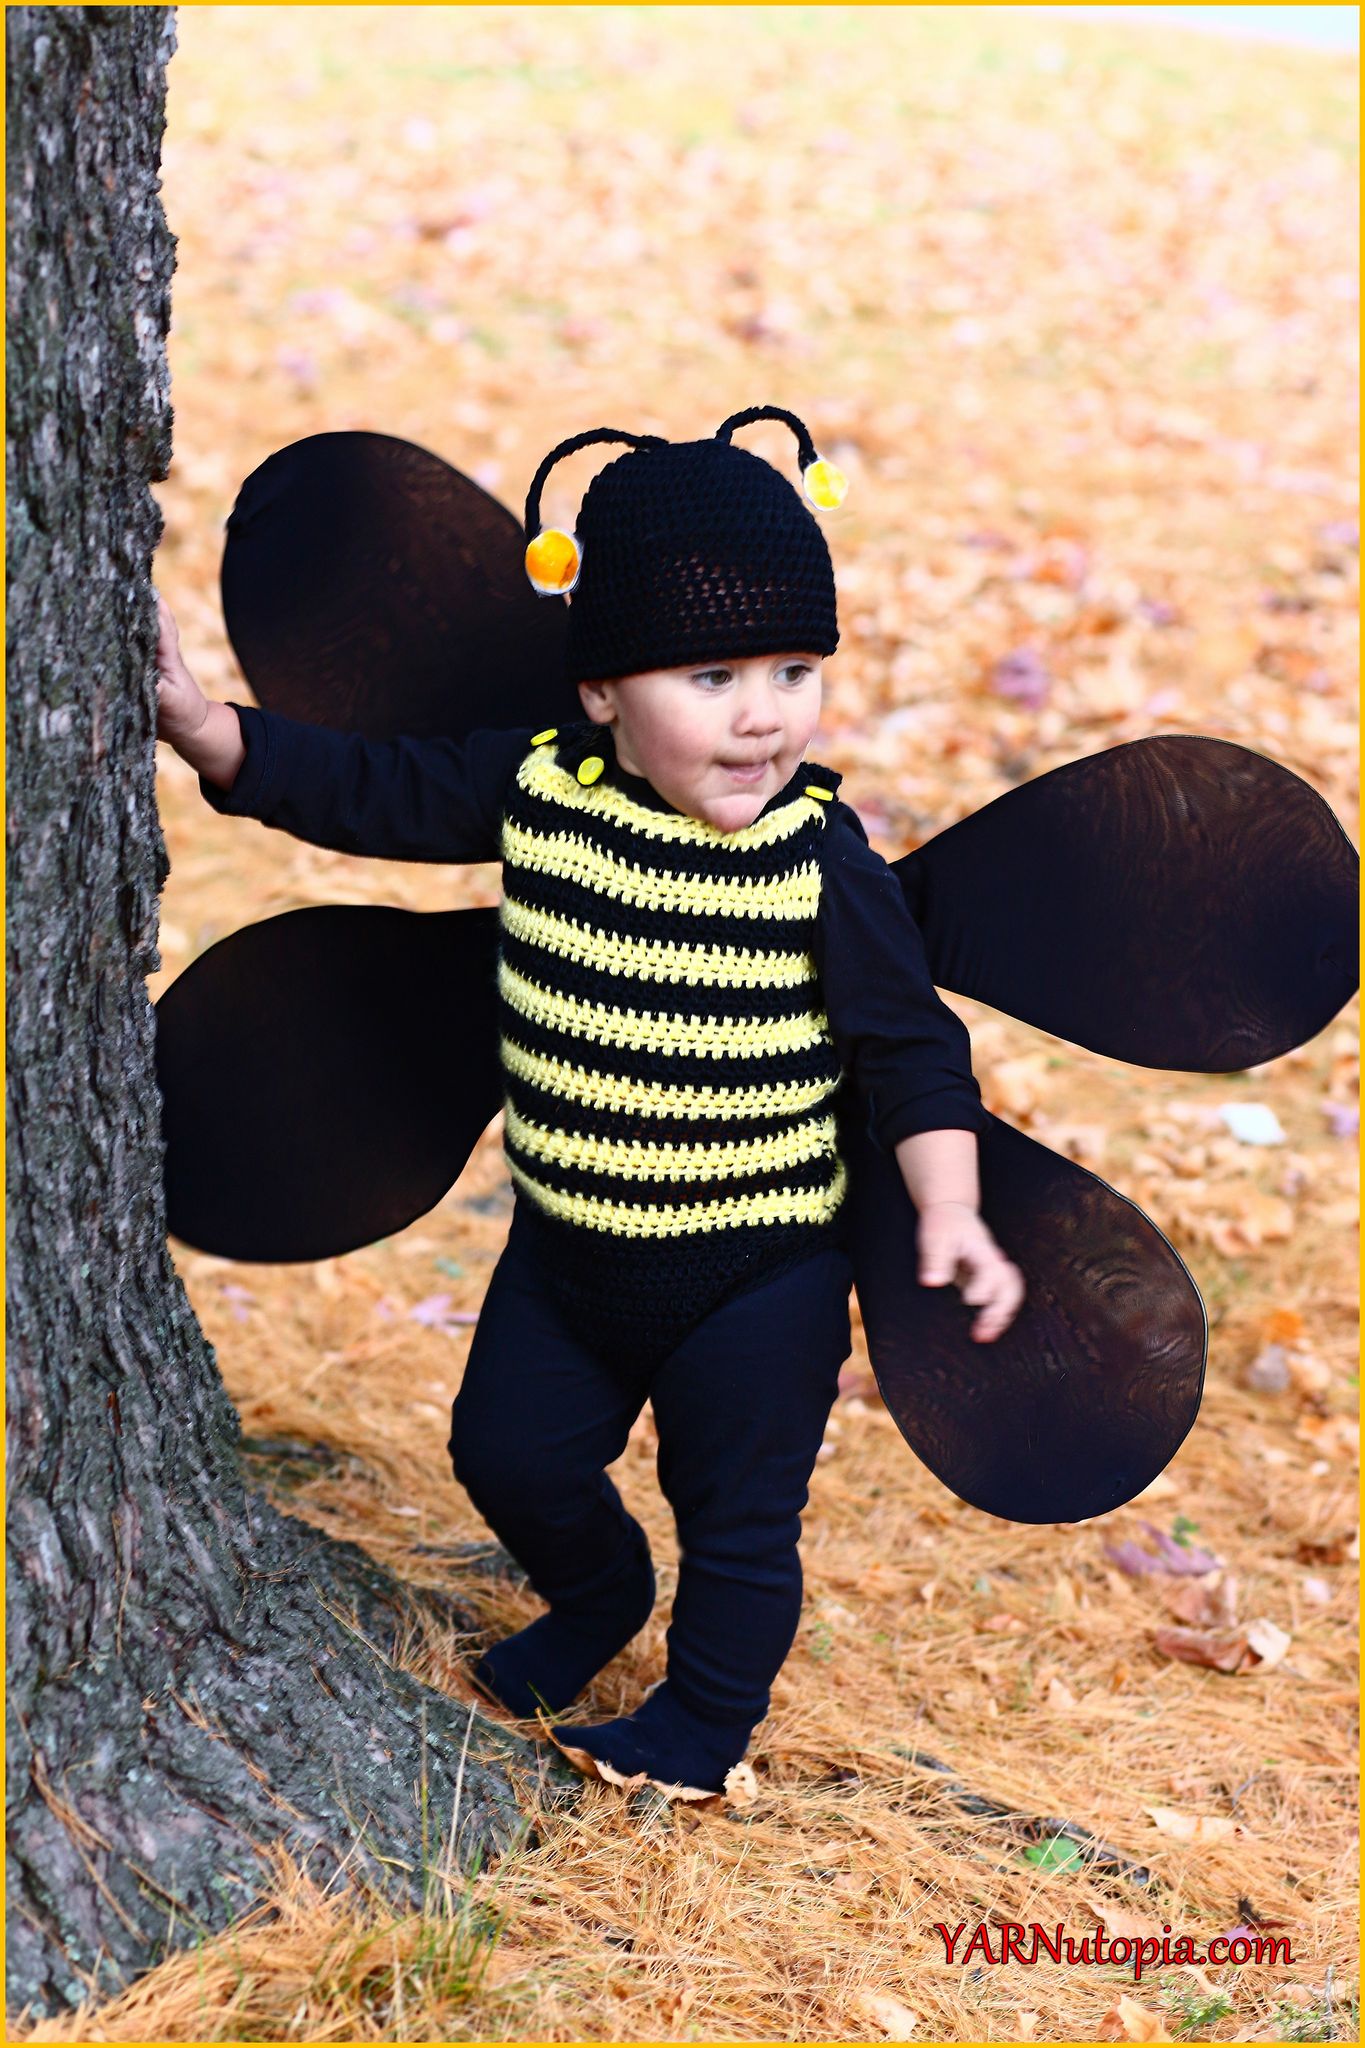
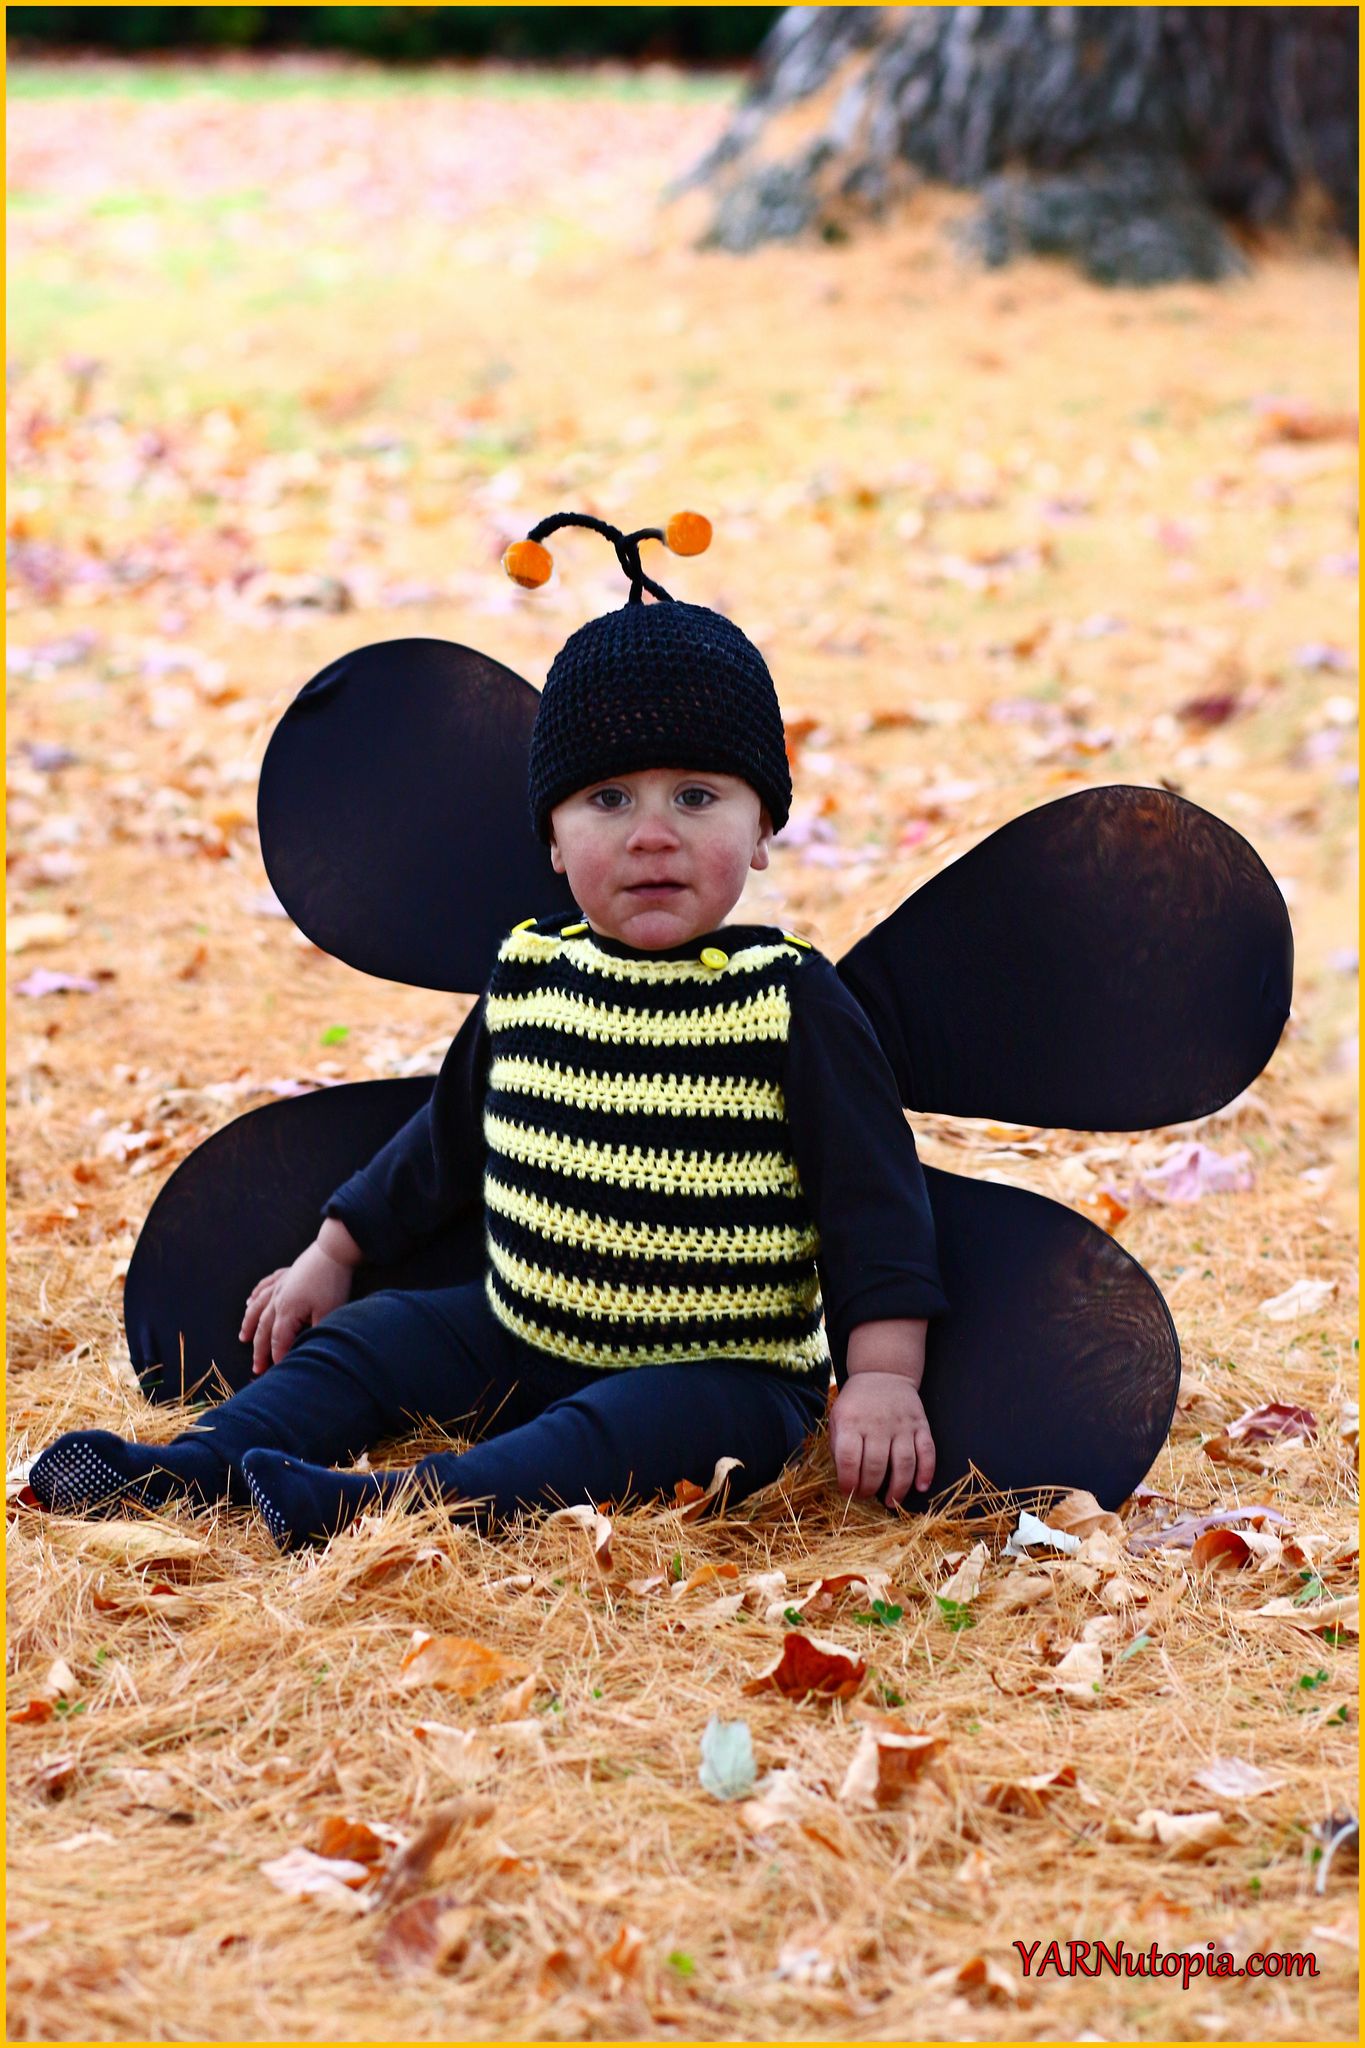
FREE Crochet Video Tutorial: Bumble Bee Romper and Beanie Costume
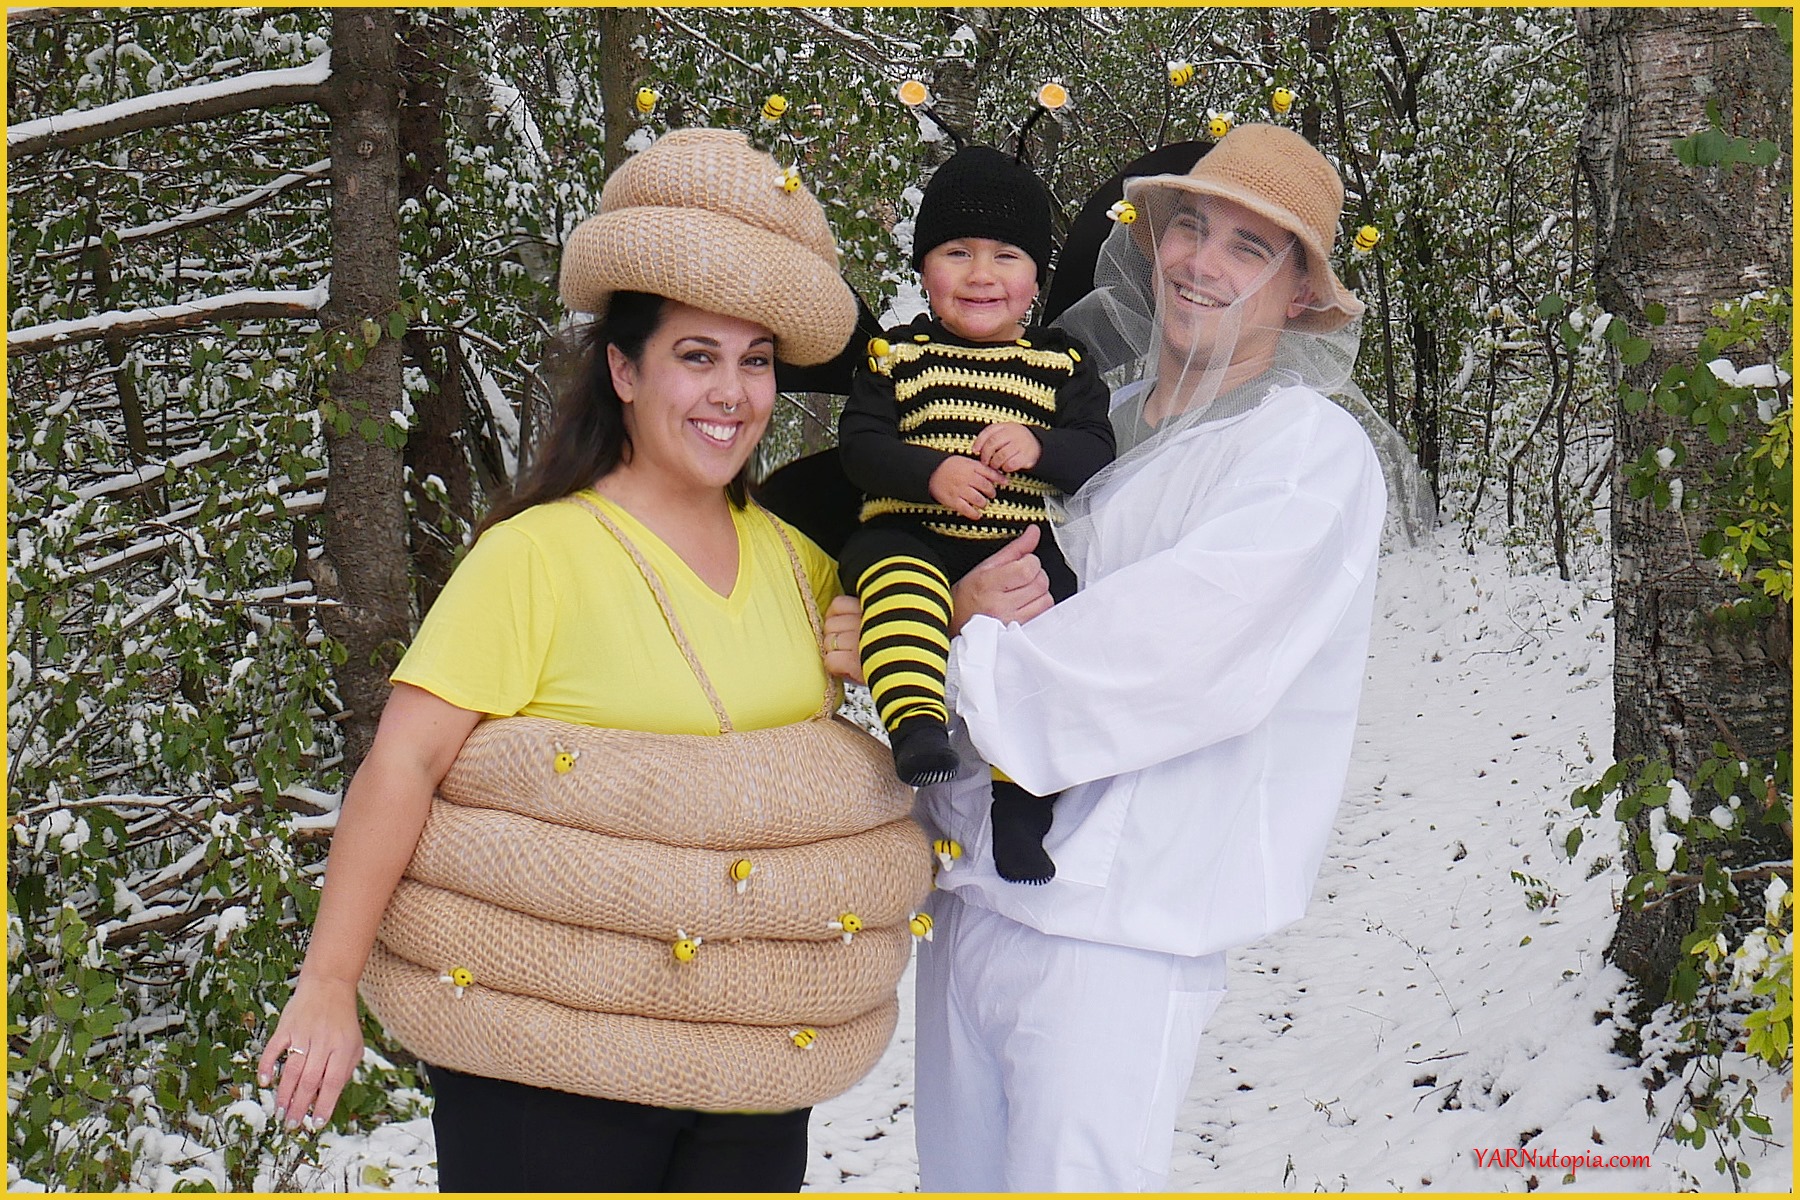
FREE Written Crochet Pattern: Bumble Bee Romper and Beanie Costume
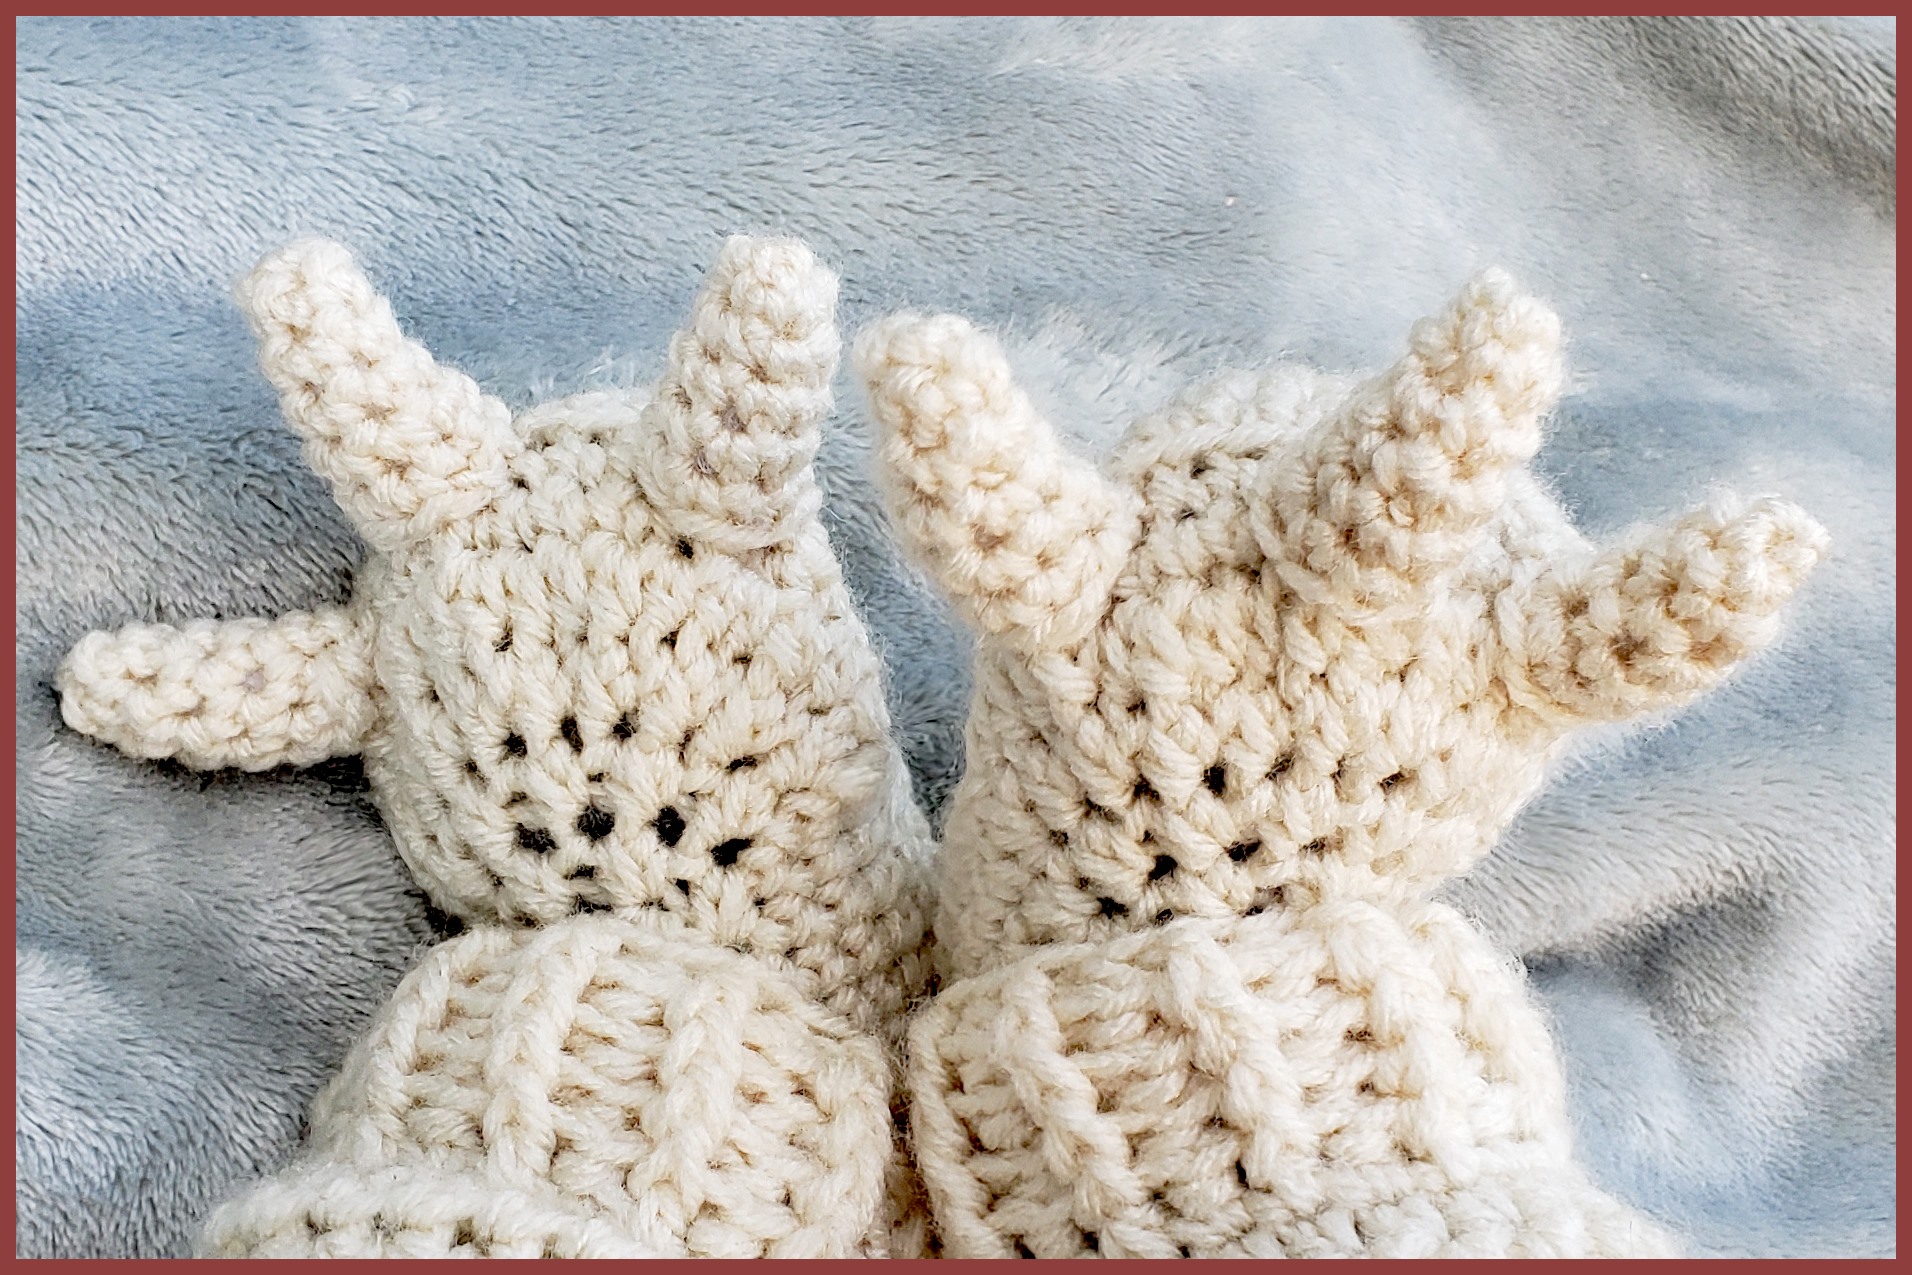
FREE Written Crochet Pattern: Monster Feet Baby Booties
FREE Written Crochet Pattern: King Crown
FREE Crochet Video Tutorial: King Crown
FREE Crochet Video Tutorial: The Sweet Dream Bonnet
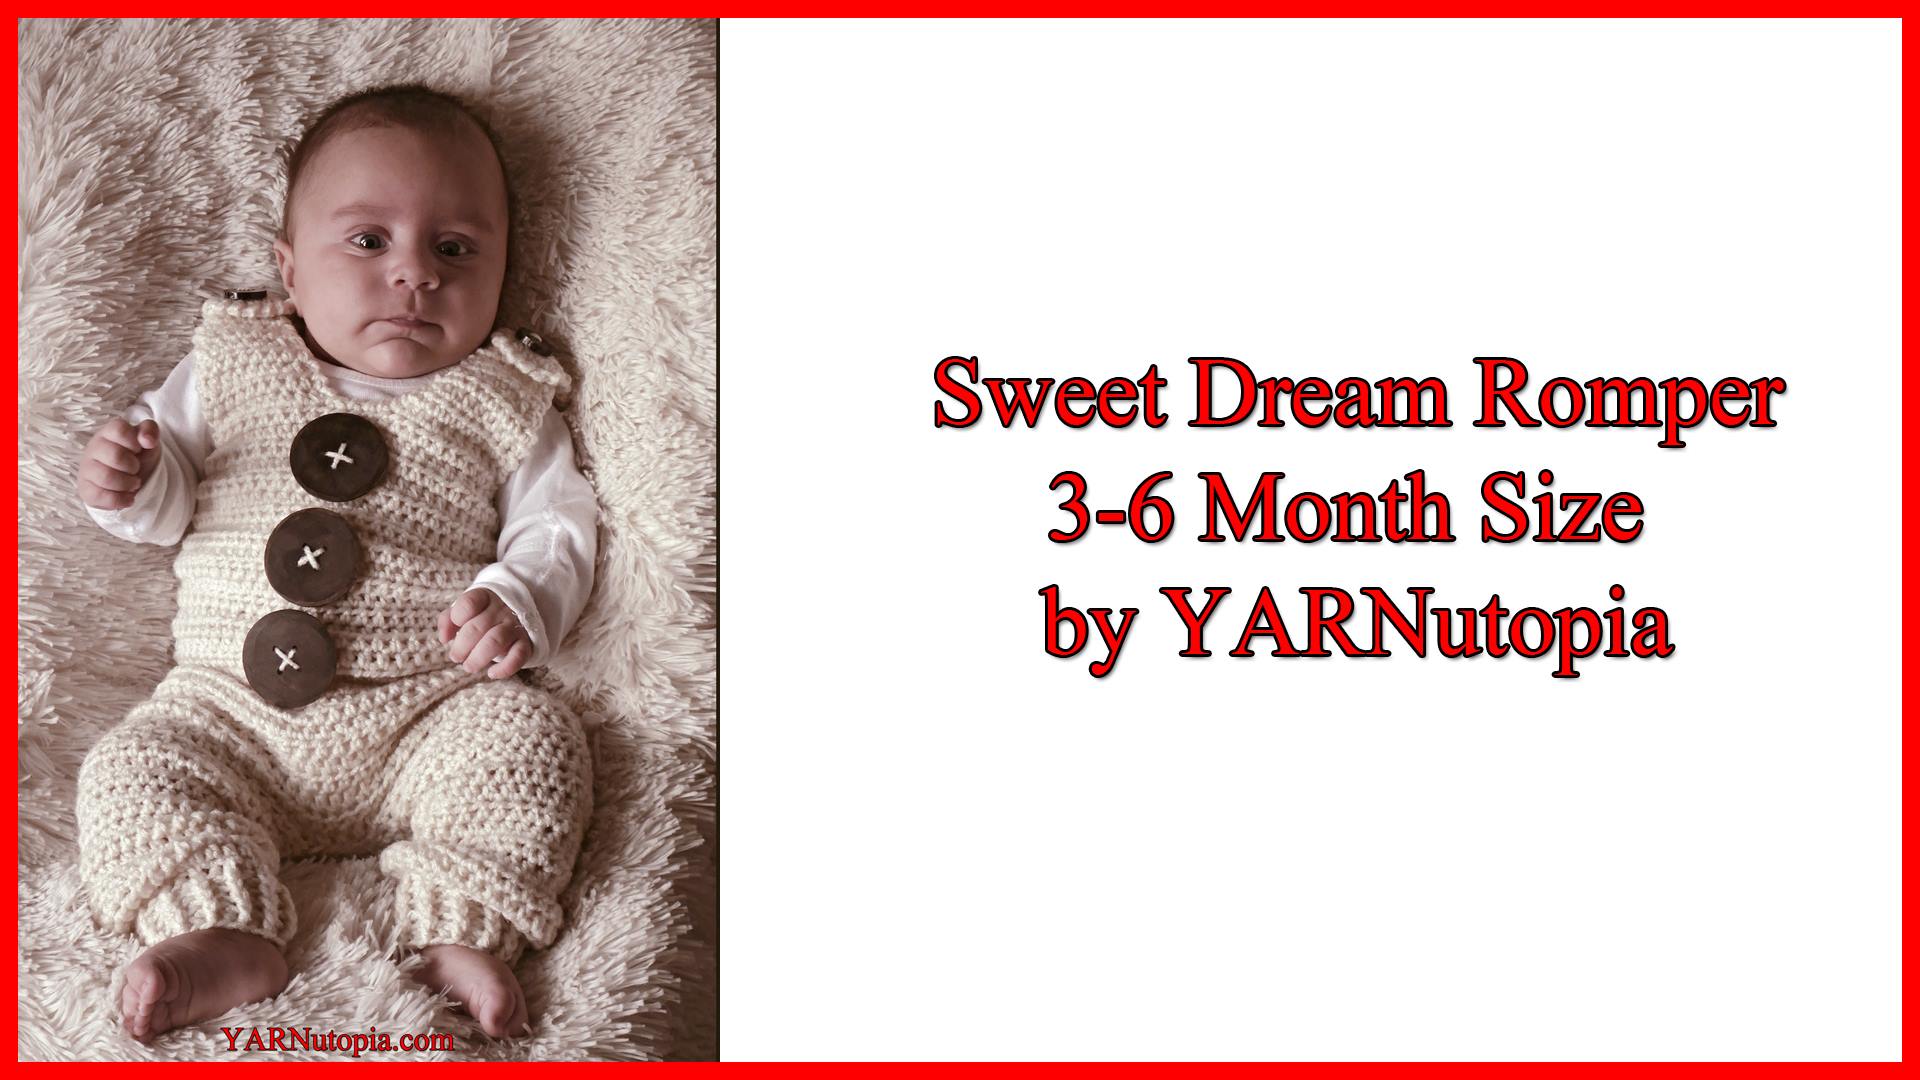
FREE Written Crochet Pattern: The Sweet Dream Bonnet
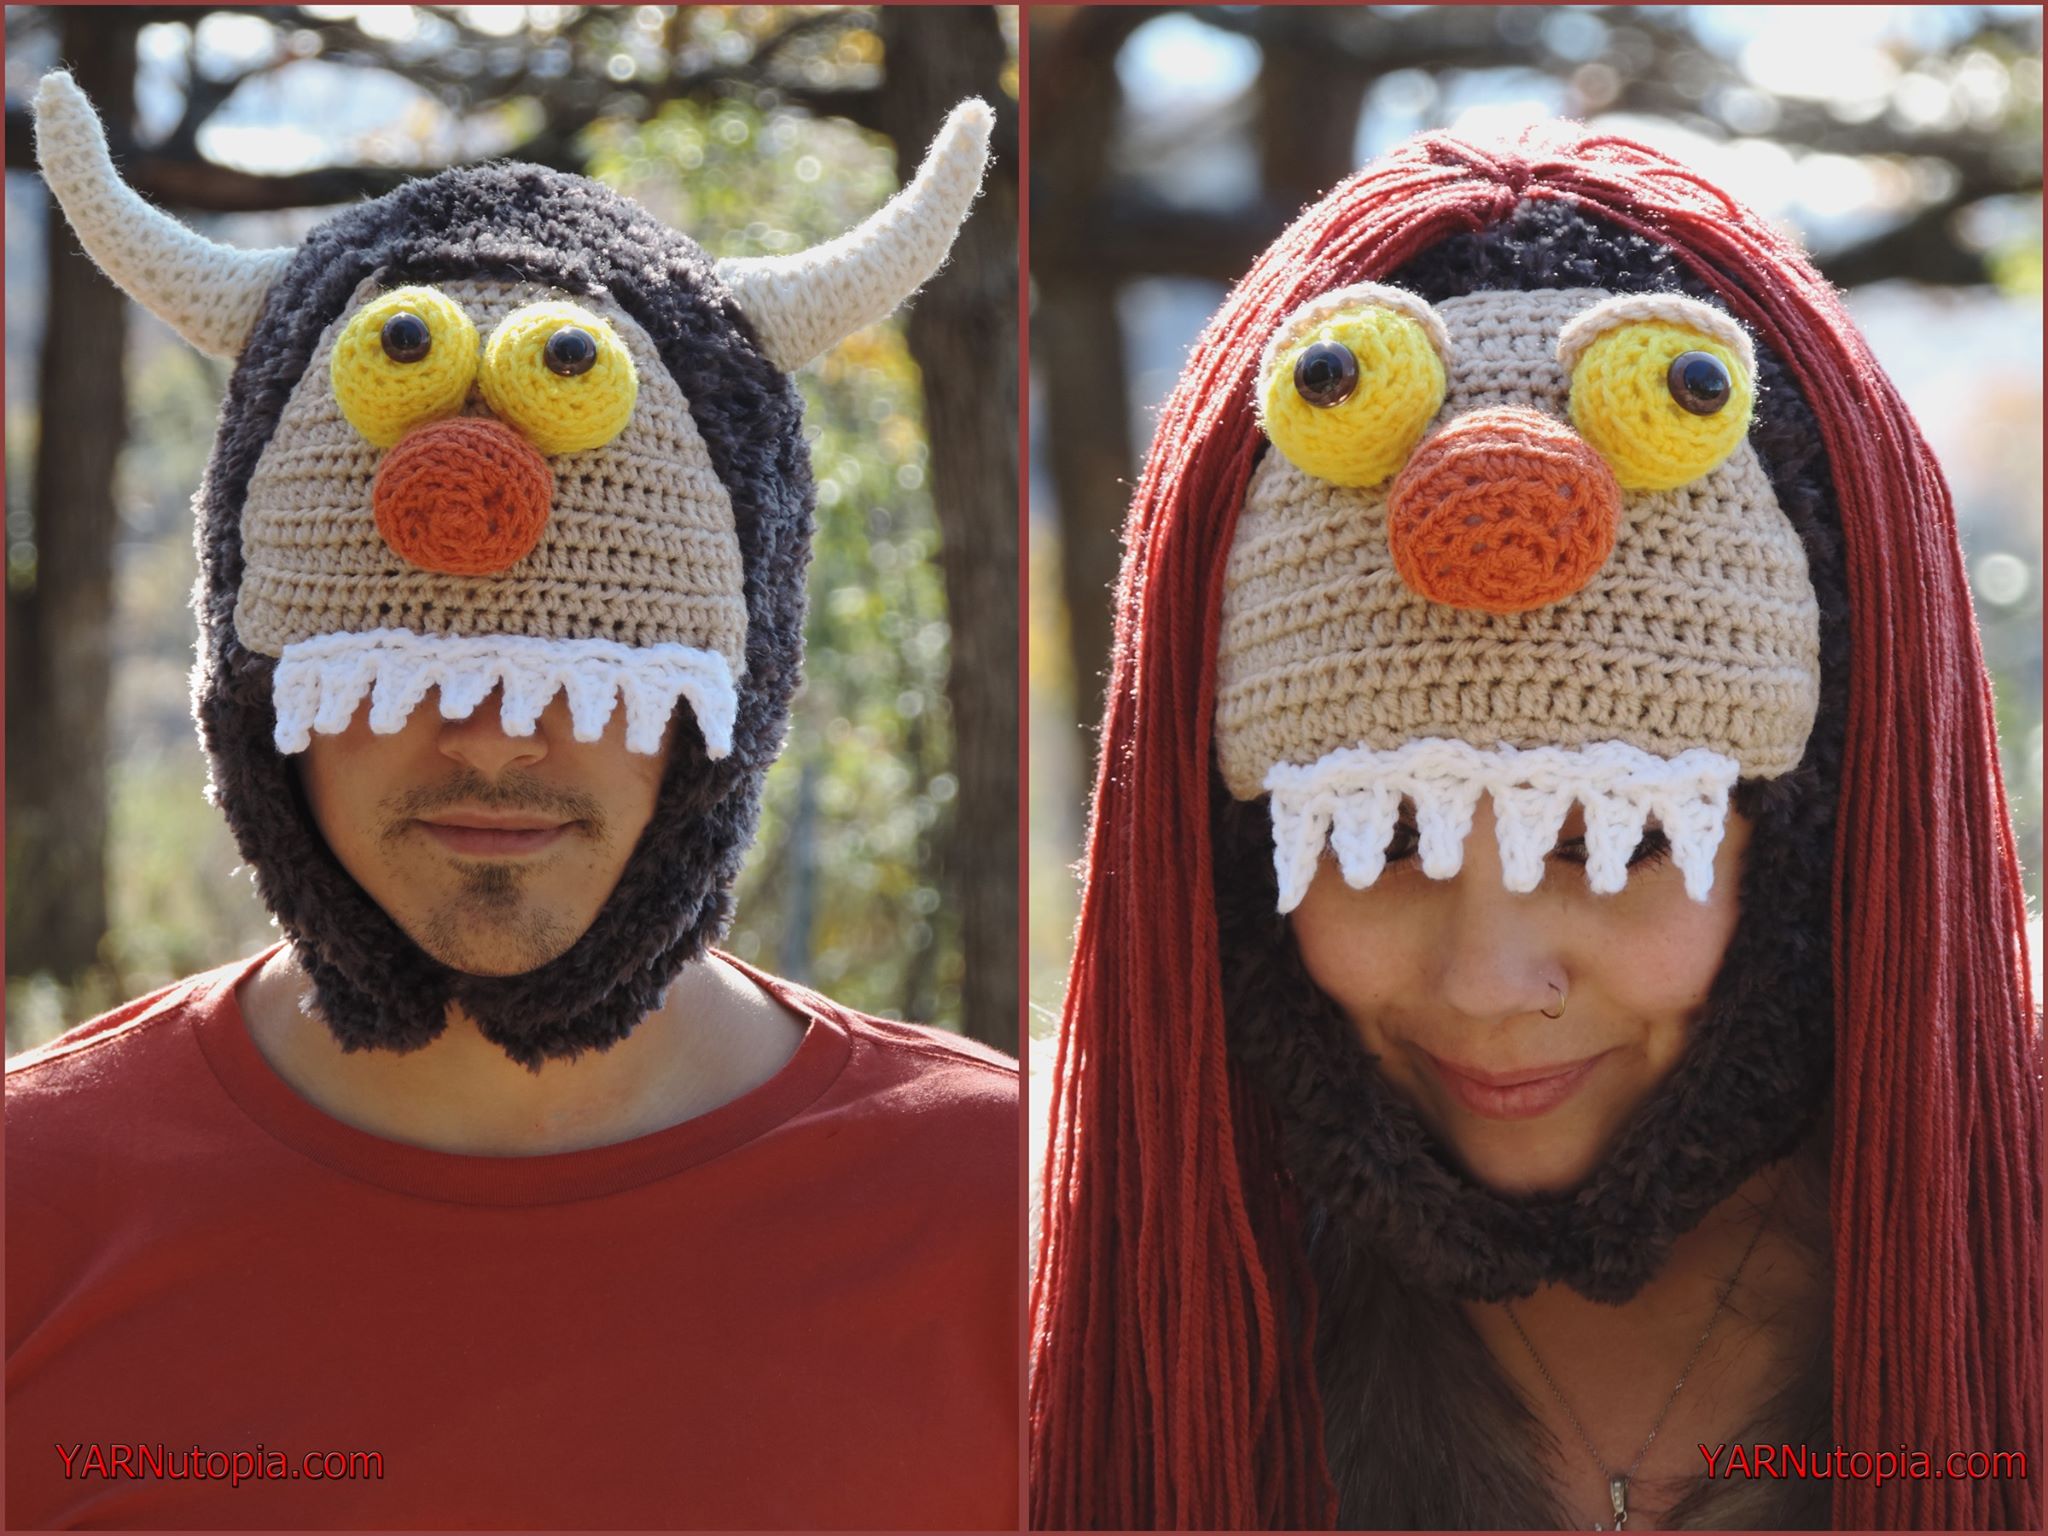
FREE Crochet Video Tutorial: Adult Sized Monster Hats (Male and Female Designs)
FREE Written Crochet Pattern: Adult Sized Monster Hats (Male and Female Designs)
FREE Crochet Video Tutorial: Sweet Dream Romper
How to Crochet Tutorial: Green Costume Wig
Happy Halloween 2018
How to Crochet Tutorial: Steampunk Cardigan
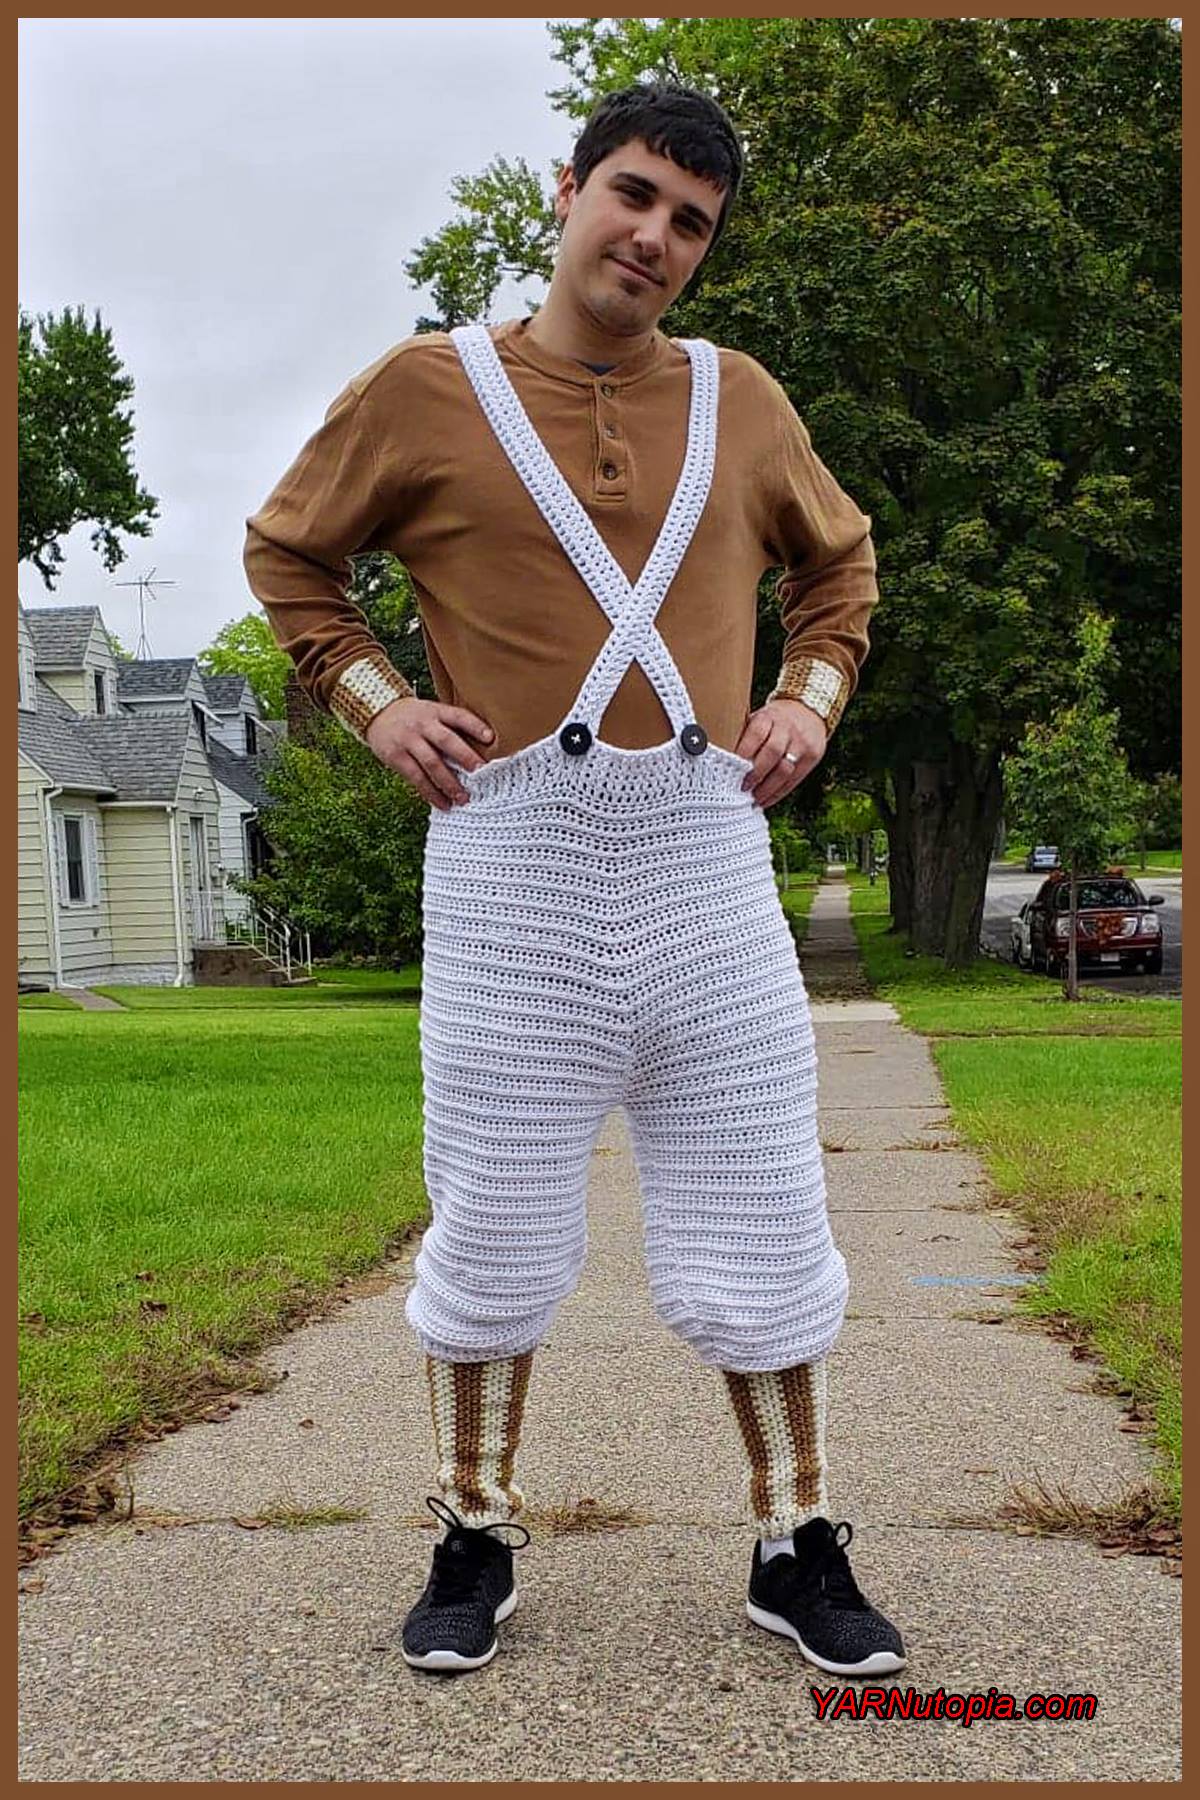
How to Crochet Tutorial: Adult Knickers Pants with Suspenders
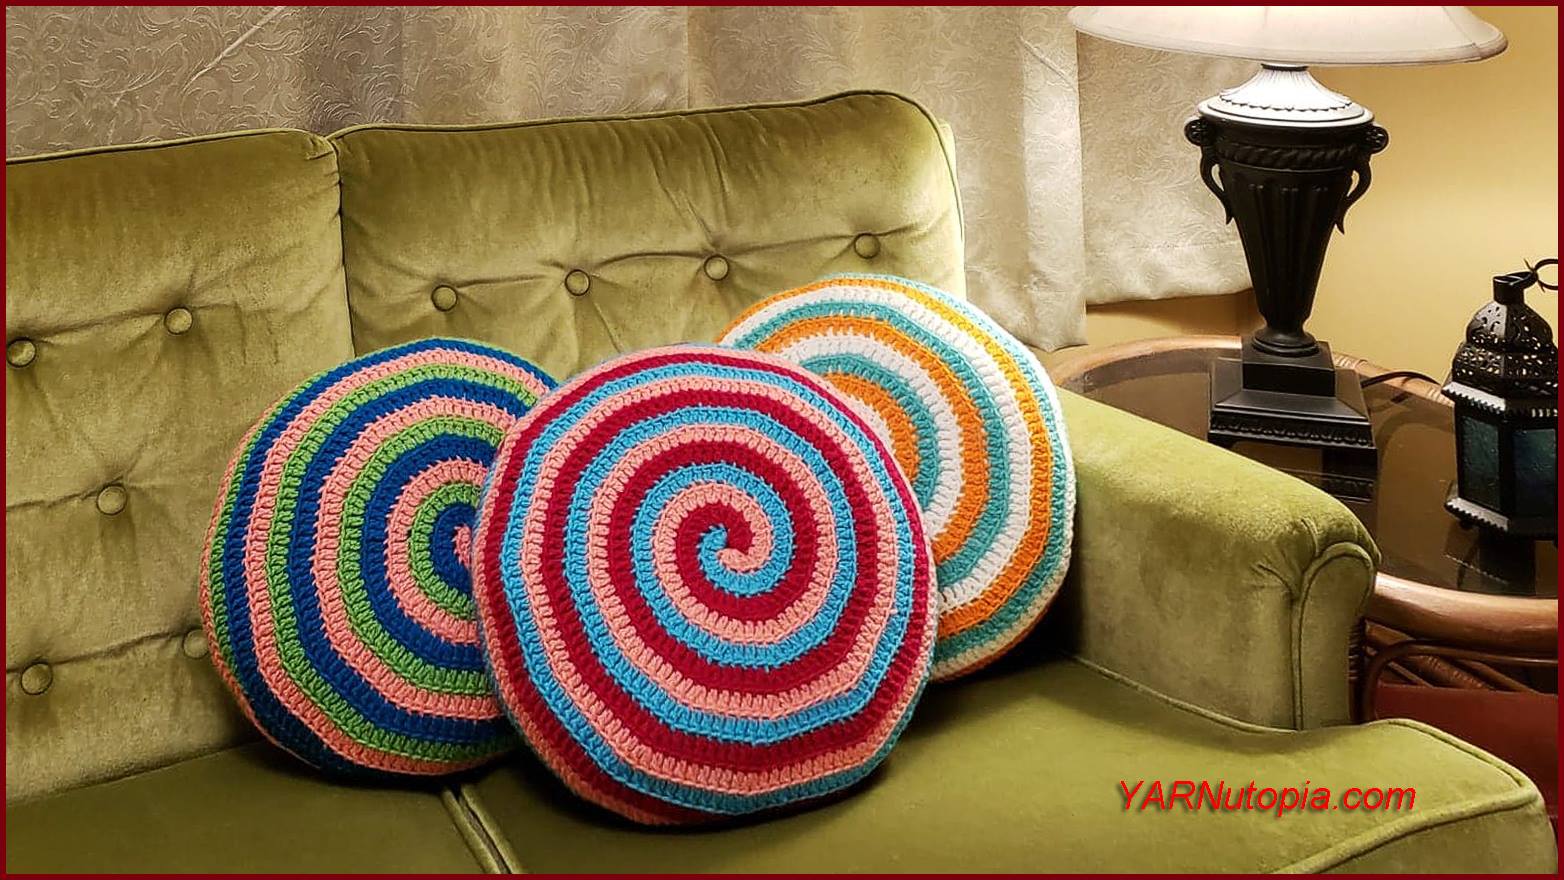
How to Crochet Tutorial: Candy Swirl Pillow
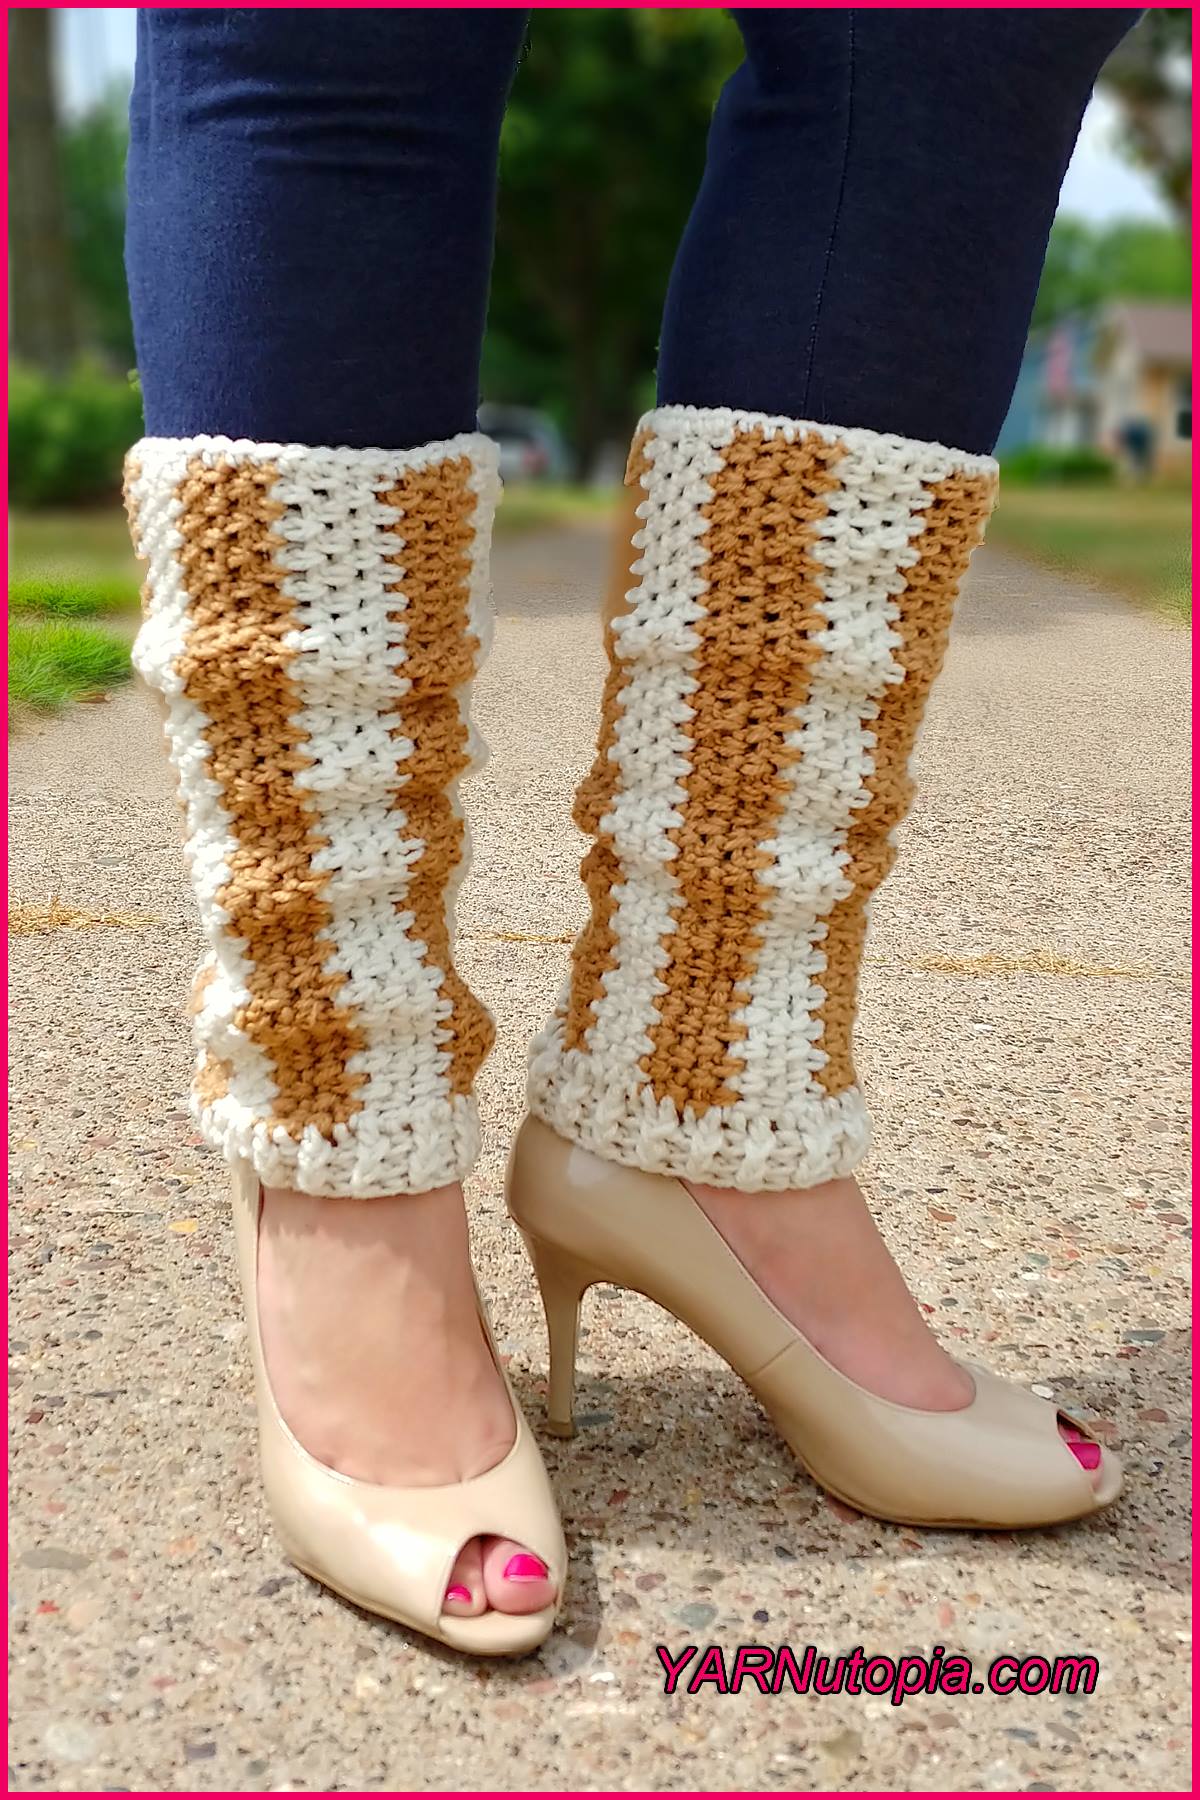
Crochet Tutorial: Vertical Striped Leg Warmers
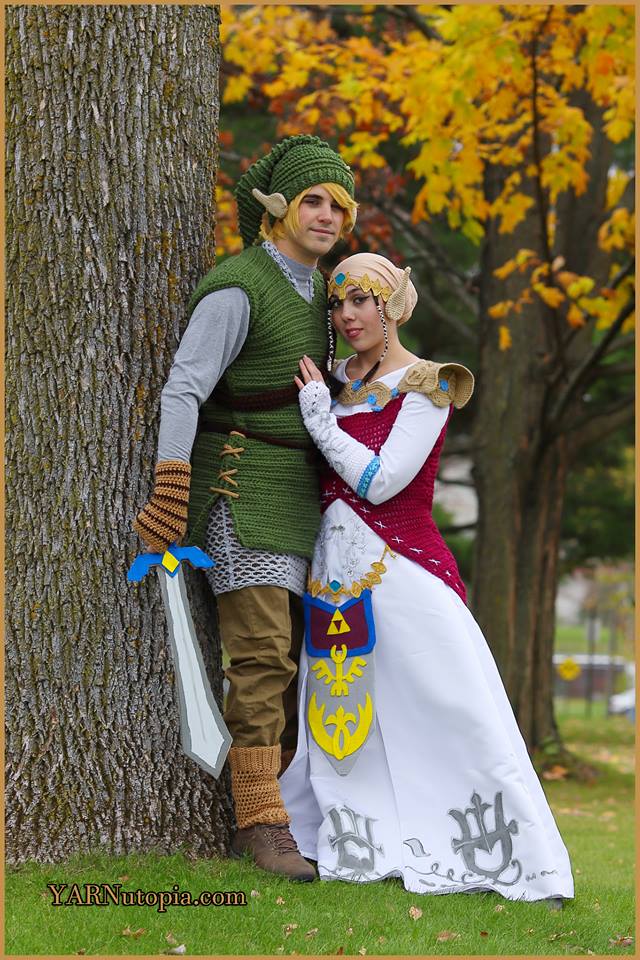
Happy Halloween from Link and Zelda!
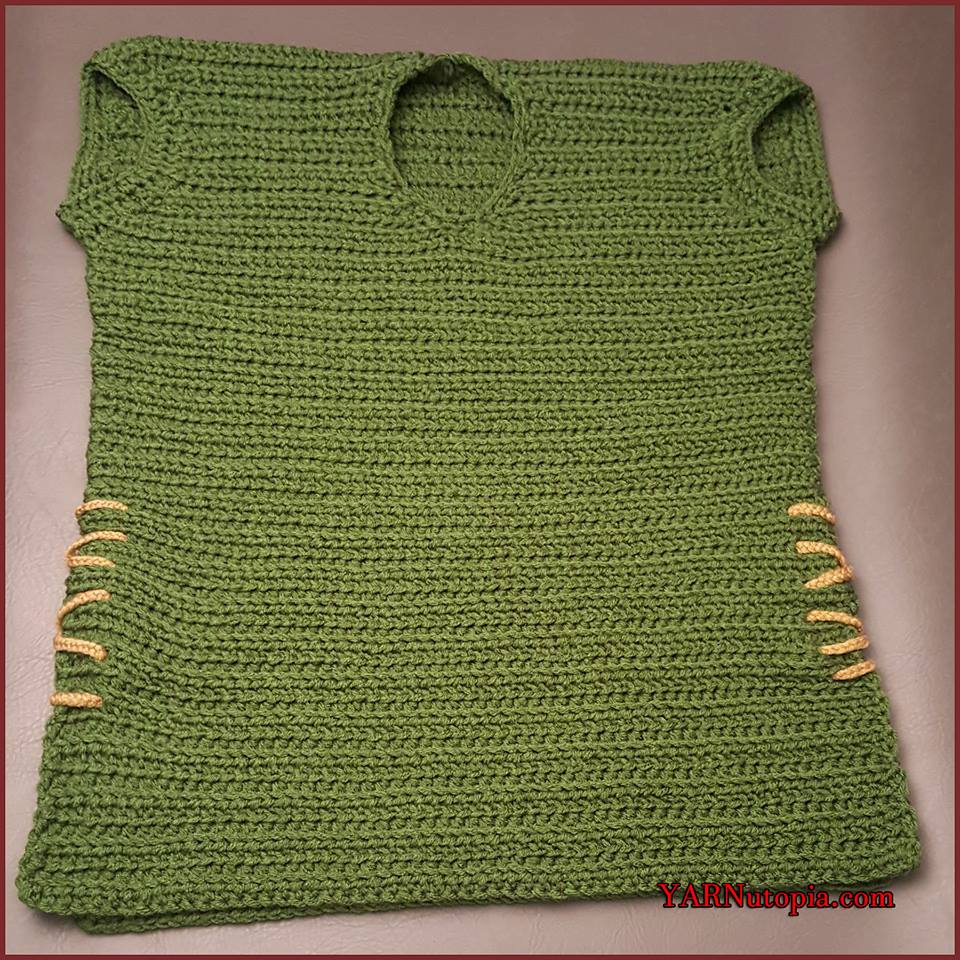
Crochet Tutorial: Link to the Past Pullover Sweater Vest
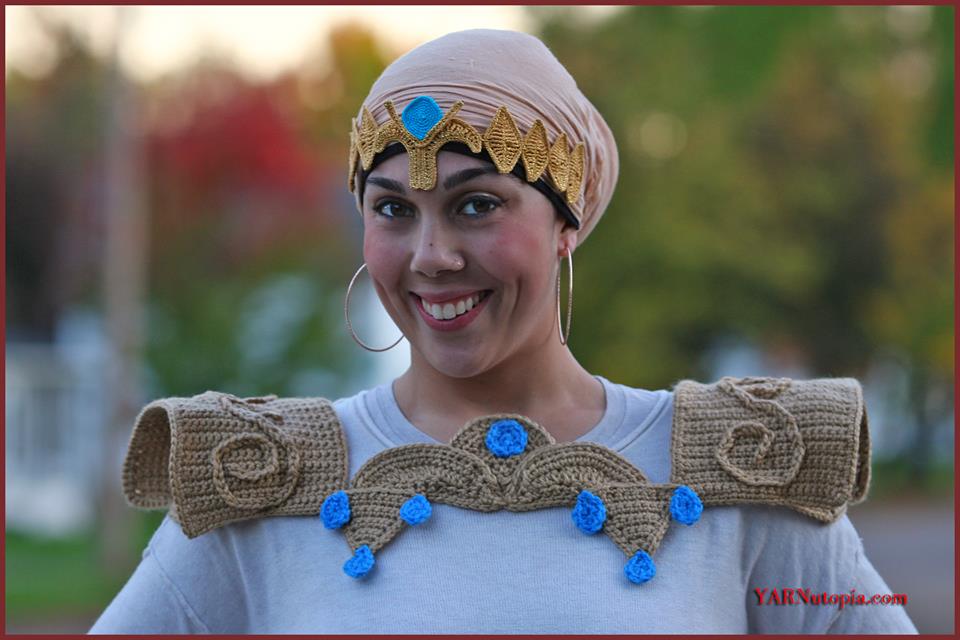
Crochet Tutorial: Princess Shoulder Armor
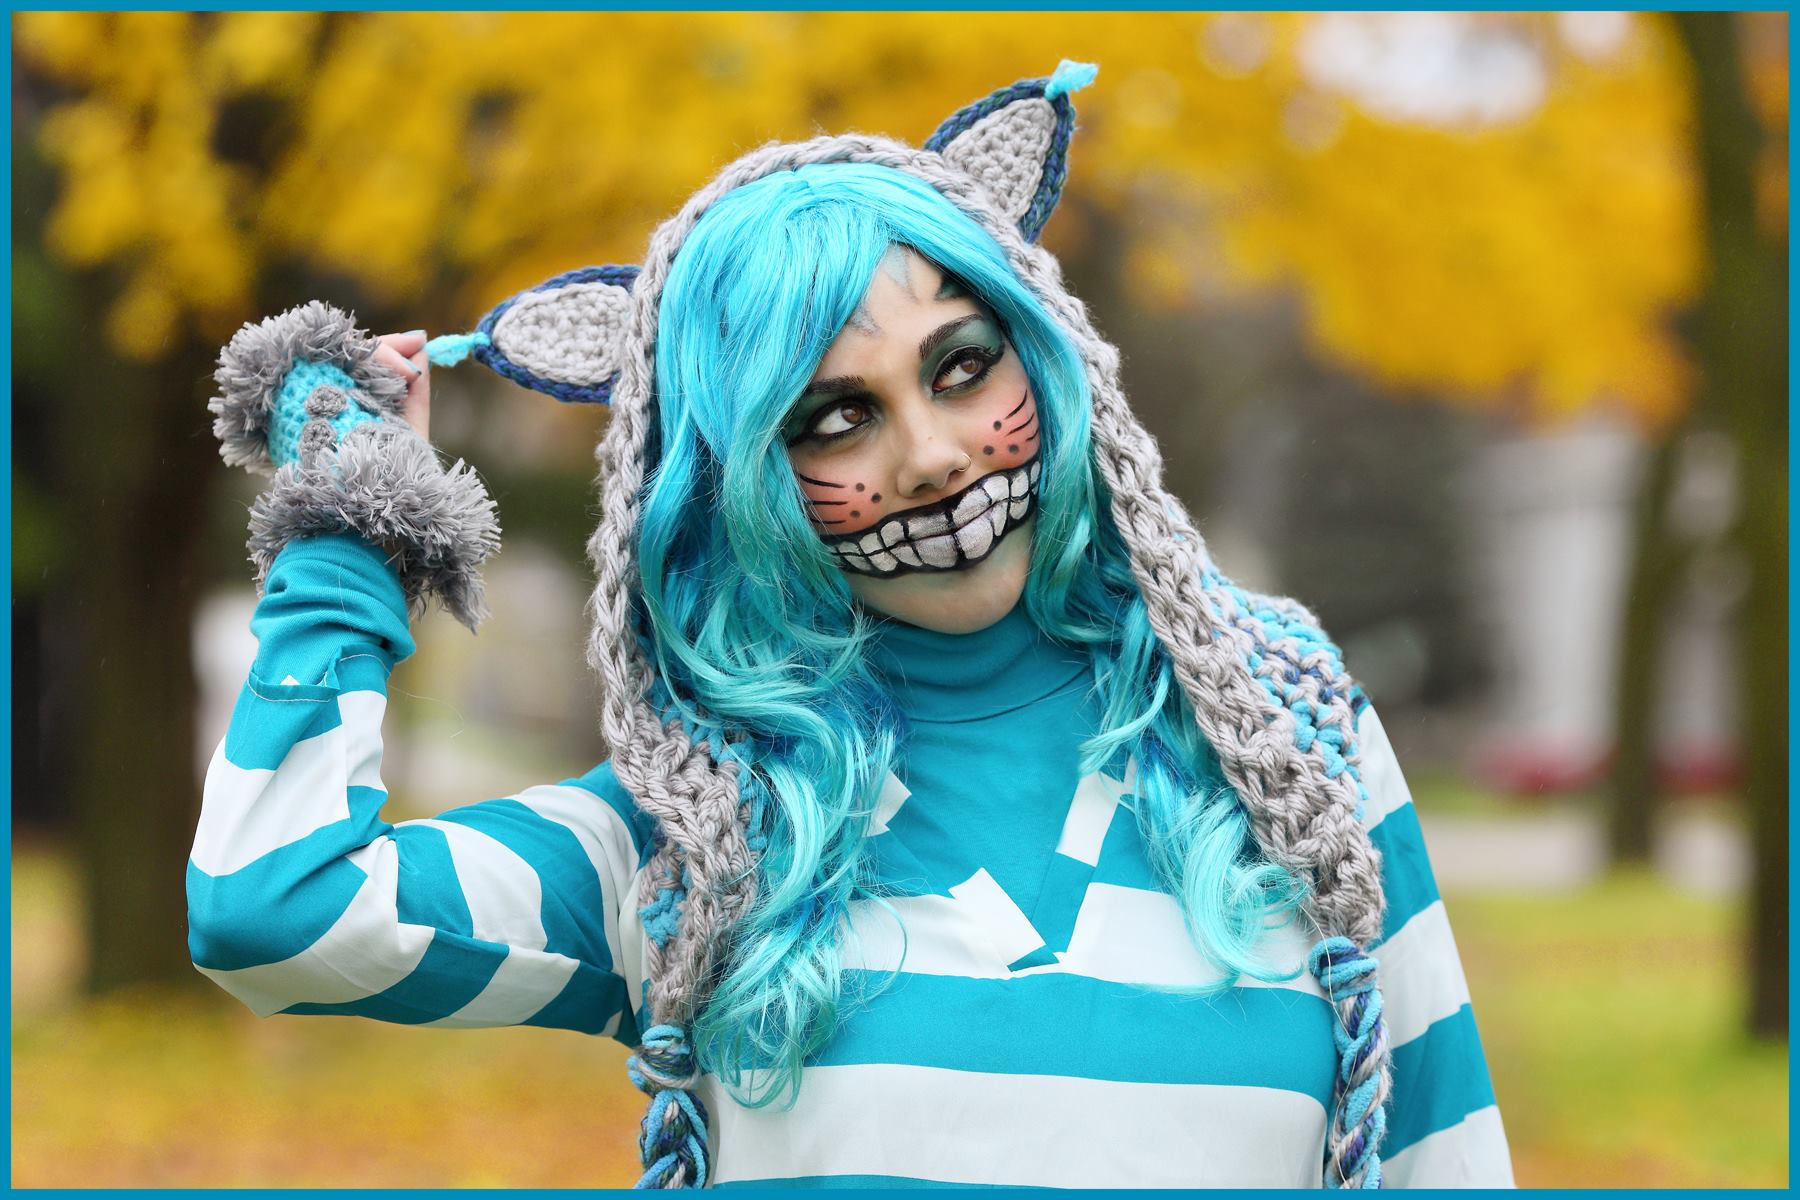
Crochet Tutorial: Cheshire Cat Hoodie
Loading Comments...
Write a Comment...
Email (Required)
Name (Required)
Website