I’ve been working on creating more engagement on my social media platforms. One way I have been doing this is to create more content that is fun and entertaining. One such way is to make content into interactive games. Below is one such example.
Play for fun!
Just for fun!
I’m posting here because not everyone is on social media. This is a good way for those who follow our blog to participate in some of the fun, too. It’s not often we can take a break and play a Crochet Game.
There are a variety of fiber textures that I used to create this eclectic boho-inspired poncho! I decided to create this free-flowing Patchouli Poncho that just begs you to get outdoors on a beautiful day and feel the sunshine pour down upon you! I used my Sublime Light Granny Square from the 365 Days of Granny Squares for the border design, and it was just the right touch for this avant-garde piece! This project is coming to you just in time for the holidays! Get ready to make one for yourself or for someone you love!
Watch this video tutorial to learn how to make this poncho:
Watch this video tutorial for the granny square used in this poncho pattern:
My dad will continue to be the videographer, editor, and photographer for our videos when I move away.
Support YARNutopia today so we can continue to bring you clear, quality crochet tutorials even after I move into my new home!
There will be an added expense of more travel and hopefully this won’t deter our ability to provide consistent videos on a weekly basis.
Teacher: Nadia Fuad
Video and Editing: Fuad Azmat (My Daddy)
Share your work on Facebook!
Add me on Snapchat: YARNutopia
Follow me on Instagram
Visit My Ravelry Store and add this to your Favorites!
Follow me on Twitter: @YARNutopia
Enjoy this video and subscribe to my channel on YouTube for more tutorials on how to crochet!
Leave a comment, and share with your friends!
Pattern:
Designed by Nadia Fuad You *may* sell items made from my pattern, but please reference my website YARNutopia.com.
Please do not copy, sell, and/or post this pattern and claim it as your own.
NOTES:
-Use a smaller hook to make this smaller
-Use a bigger hook to make this bigger
-This poncho is approximately 40 inches long
-This poncho takes approximately 1800 yards of yarn
-I used many different types of yarn and colors but you can use less or more if you want
-I used a size 4 medium yarn, you can use any worsted weight or DK yarn
-This poncho is worked from the top down
-I would recommend any type of yarn for this project.
Special stitches:
Ch(s): chain(s)
YO: Yarn Over
BLO: Back Loop Only
St(s): Stitch(es)
Sl st: slip stitch
SK: Skip
SC: Single Crochet
HDC: Half Double Crochet
DC: Double Crochet
Pattern:
If you have any confusion or difficulty with reading this pattern, please watch the video tutorial to have visual instructions.
With Colorscapes in the color Rome,
Ch 114 or any even number that will wrap around your neck loosely
Row 1: SC in 4th ch from hook, *Ch 1, Sk 1 Ch, SC in next ch, repeat from * across ending with SC in last ch, turn.
Row 2: Ch 2, SC in the next Ch 1 sp, *Ch 1, SC in the next ch 1 sp, repeat from * across, ending with SC in the ch sp at the start of Row 1, turn.
Rows 3- 35: Repeat Row 2
Row 36: Ch 2, SC in the next Ch 1 sp, *Ch 1, SC in the next ch 1 sp, repeat from * until you have 16 SC sts, leave the rest of the row unworked. Turn.
Rows 37-80: Repeat Row 2 on this shorter section. (This is creating the “over one shoulder” side)
After Row 80, fasten off with long tail for sewing.
Fold the piece as shown in the video tutorial here and continue to work on the opposite end of the foundation row working down the piece.
Attach Italian Story Ombra Yarn in the color Mare
Once your piece is folded and sewn together like a poncho, then Attach new yarn to the first stitch of your foundation row
Row 1 of New color: (if this gets confusing please watch the video tutorial at minute 22 into the video): Ch 2, SC in the next Ch 1 sp, *Ch 1, SC in the next ch 1 sp, repeat from * across, ending with SC in the ch sp at the start of previous row, turn. (continuing the Moss Stitch)
Rows 2-10: Ch 2, SC in the next Ch 1 sp, *Ch 1, SC in the next ch 1 sp, repeat from * across, ending with SC in the ch sp at the start of previous row, turn.
After Row 10, fasten off, weave in ends.
Change color to With Love in the color Mango
Rows 11-12: Ch 2, SC in the next Ch 1 sp, *Ch 1, SC in the next ch 1 sp, repeat from * across, ending with SC in the ch sp at the start of previous row, turn.
Change Color to Super Saver in the color Gold
Rows 13-14: Ch 2, SC in the next Ch 1 sp, *Ch 1, SC in the next ch 1 sp, repeat from * across, ending with SC in the ch sp at the start of previous row, turn.
Change color to With Love in the color Mango
Rows 15-16: Ch 2, SC in the next Ch 1 sp, *Ch 1, SC in the next ch 1 sp, repeat from * across, ending with SC in the ch sp at the start of previous row, turn.
Change Color to Super Saver in the color Gold
Rows 17-18: Ch 2, SC in the next Ch 1 sp, *Ch 1, SC in the next ch 1 sp, repeat from * across, ending with SC in the ch sp at the start of previous row, turn.
Change color to With Love in the color Mango
Rows 19-20: Ch 2, SC in the next Ch 1 sp, *Ch 1, SC in the next ch 1 sp, repeat from * across, ending with SC in the ch sp at the start of previous row1, turn.
Change Color to Super Saver in the color Gold
Rows 21-22: Ch 2, SC in the next Ch 1 sp, *Ch 1, SC in the next ch 1 sp, repeat from * across, ending with SC in the ch sp at the start of previous row, turn.
Change color to With Love in the color Mango
Rows 23-24: Ch 2, SC in the next Ch 1 sp, *Ch 1, SC in the next ch 1 sp, repeat from * across, ending with SC in the ch sp at the start of previous row, turn.
Change Color to Super Saver in the color Gold
Rows 25-26: Ch 2, SC in the next Ch 1 sp, *Ch 1, SC in the next ch 1 sp, repeat from * across, ending with SC in the ch sp at the start of previous row, turn.
Change color to With Love in the color Mango
Rows 27-28: Ch 2, SC in the next Ch 1 sp, *Ch 1, SC in the next ch 1 sp, repeat from * across, ending with SC in the ch sp at the start of previous row, turn.
After Row 28, fasten off and weave in ends.
Work on the side that has been unworked this whole time. (See video tutorial at time 31 minutes)
Row 1: Attach Italian Story Ombra in the color Mare to the corner, continue the moss stitch across which is Ch 2, SC in the next Ch 1 sp, *Ch 1, SC in the next ch 1 sp, repeat from * across, ending with SC in the ch sp at the start of previous row, turn.
Rows 2-14: Ch 2, SC in the next Ch 1 sp, *Ch 1, SC in the next ch 1 sp, repeat from * across, ending with SC in the ch sp at the start of previous row, turn.
After Row 14, fasten off
The next step you need to do is mark 28 stitches in from Row 14 of the last section you crocheted on both sides of the poncho. (See video tutorial at minute 36 if this is confusing)
Attach Colorscapes Yarn to the ch sp after the stitch marker
Row 1: Ch 2, SC in the next Ch 1 sp, *Ch 1, SC in the next ch 1 sp, repeat from * across, ending with SC in the ch sp at the start of previous row until you get to the stitch marker on the opposite side. Leave the rest of the stitches unworked. Turn.
Rows 2-14: Ch 2, SC in the next Ch 1 sp, *Ch 1, SC in the next ch 1 sp, repeat from * across, ending with SC in the ch sp at the start of previous row, turn.
After Row 14, Fasten off.
You will now work along the edge of the Colorscapes section you just crocheted.
If you need assistance in the video tutorial, this part is explained at 41 minutes into the video.
Attach Italian Story Ombra
Rows 1-10: Ch 2, SC in the next Ch 1 sp, *Ch 1, SC in the next ch 1 sp, repeat from * across, ending with SC in the ch sp at the start of previous row, turn.
Fasten off after Row 10
Change color to With Love in the color Mango
Rows 11-12: Ch 2, SC in the next Ch 1 sp, *Ch 1, SC in the next ch 1 sp, repeat from * across, ending with SC in the ch sp at the start of previous row, turn.
Change Color to Super Saver in the color Gold
Rows 13-14: Ch 2, SC in the next Ch 1 sp, *Ch 1, SC in the next ch 1 sp, repeat from * across, ending with SC in the ch sp at the start of previous row, turn.
Change color to With Love in the color Mango
Rows 15-16: Ch 2, SC in the next Ch 1 sp, *Ch 1, SC in the next ch 1 sp, repeat from * across, ending with SC in the ch sp at the start of previous row, turn.
Change Color to Super Saver in the color Gold
Rows 17-18: Ch 2, SC in the next Ch 1 sp, *Ch 1, SC in the next ch 1 sp, repeat from * across, ending with SC in the ch sp at the start of previous row, turn.
Change color to With Love in the color Mango
Rows 19-20: Ch 2, SC in the next Ch 1 sp, *Ch 1, SC in the next ch 1 sp, repeat from * across, ending with SC in the ch sp at the start of previous row1, turn.
Change Color to Super Saver in the color Gold
Rows 21-22: Ch 2, SC in the next Ch 1 sp, *Ch 1, SC in the next ch 1 sp, repeat from * across, ending with SC in the ch sp at the start of previous row, turn.
Change color to With Love in the color Mango
Rows 23-24: Ch 2, SC in the next Ch 1 sp, *Ch 1, SC in the next ch 1 sp, repeat from * across, ending with SC in the ch sp at the start of previous row, turn.
Change Color to Super Saver in the color Gold
Rows 25-26: Ch 2, SC in the next Ch 1 sp, *Ch 1, SC in the next ch 1 sp, repeat from * across, ending with SC in the ch sp at the start of previous row, turn.
Change color to With Love in the color Mango
Rows 27-28: Ch 2, SC in the next Ch 1 sp, *Ch 1, SC in the next ch 1 sp, repeat from * across, ending with SC in the ch sp at the start of previous row, turn.
After Row 28, fasten off and weave in ends.
**Assembly Step: Sew this little flap to the poncho and do the same thing for the opposite side of the poncho.**
Make your 14 Granny Squares and sew them to the border of your poncho. See video tutorial at 55 minutes in the video for visual instructions on sewing the granny squares together and to the poncho.
Neck of poncho:
Work in continuous rounds, attach Colorscape yarn to the back of the poncho along the neckline, Ch 2, SC in the next Ch 1 sp, *Ch 1, SC in the next ch 1 sp, repeat from * around
Round 2-10: Repeat the previous round.
Fasten off after round 10.
Weave in ends.
Assembly:
Weave in all ends.
Add fringe to the bottom of the poncho, add a long drawstring braid to the neck of your poncho.
Enjoy!!
This post contains affiliate links, which I may be compensated for when you make a purchase. That means if you click on any link and buy from the linked websites, I will receive a small percentage of the value of your order. The amount you pay is not changed. Thank you for all your support in clicking the links in my blog!! You all are so amazing!! ~Nadia
The yarn provided for this pattern is courtesy of Red Heart Yarns
When planning a wedding, one of the very first things you consider is the type of wedding you want and the budget to go along with your dream. It isn’t always easy to have those two things come together seamlessly unless you have all the resources available without the concern of finances. That’s why DIY (or do-it-yourself) is a great way to cut costs and bring some of those wedding expenses down – and dreams to life – using your own creativity. Be aware – there’s a cost to that too, just not always in dollars.
It Starts With YES!
When Nate proposed, we were in Amsterdam, Netherlands on a high – figuratively not literally. (read about it here) Excited from the thrill of getting engaged on this European trip, planning a wedding in that moment was not on the forefront of our minds. We hadn’t even chosen a date for our wedding until weeks following our engagement. I am such a planner, so I needed time to organize our wedding with guests from overseas, so we decided on March 17, 2018, St. Patrick’s Day. This was the perfect day to have our Pakistani/Irish fusion wedding. I wanted the Pakistani features and Nate is Irish, so he wanted to incorporate some Irish elements into our special day.
Looking a year ahead gave us much needed time to sort out details for this fusion wedding and put finances on paper. Thankfully, our parents were able to help, but how much would this all cost?
We visited vendors which was exciting and full of promise. Yet, when we started to talk dollars and cents, we began to realize that we needed to scale down considerably on some of our “wants.” Our budget was limited. One of the more shocking realizations was finding out that for flowers; personal flowers such as bouquets, boutonnieres, and corsages along with centerpiece arrangements and other floral décor, would cost over $2000 USD. As much as I LOVE fresh flowers, spending $2000 on that one detail was out of the question.
Famous Last Words
Ideas began to formulate. I knew I wanted to incorporate elements of crochet into my wedding, and the more I considered it, the more it made sense for me to make all of the flowers. I knew it would be a lofty goal. Hand crocheting 200+ flowers for all my floral elements, as well as 200 place card meal flowers, was no easy task. But spending $2000 on bouquets and arrangement fresh flowers, which will wilt and be discarded was hard to contemplate. I could save a huge chunk of money if I did these myself. So, it was decided almost a year ahead of time, I would crochet the flowers. I had plenty of time, right?
I think I remember vaguely in the fog of my over-zealous wedding-muddled mind, Nate saying to me,
“Are you sure you want to do that? I don’t want you to get too stressed out…..” Brides and stress? Phfft…
Oh, how prophetic that conversation would be.
My flip response was something on the lines of,
“No worries, I won’t get stressed. It’s a year away. I have plenty of time.” Eye-roll please…
The Best Laid Plans…
Eleven months in advance may seem like plenty of time to take on a project like this. That is if you have NOTHING to do BUT this. I started out pretty well. I decided on using Red Heart Yarns Aunt Lydia’s Thread in the colors of my bridesmaids’ dresses for their bouquets and a throw bouquet. I would pair the groomsmen’s boutonnieres in coordinating colors. My bouquet would be shades of red and Nate would have a matching flower to mine. I could get a jump start on place card flowers once I decided on the coinciding meal. I would crochet similar coordinating flowers to use for my table centerpieces. Easy peasy lemon squeezy. Puhll-eeaaazzze…I got this!
I mapped out the year. I could crochet three flowers a day which would put me on a course to finish in plenty of time for the wedding. It would give me an ample time-frame to make bouquets, plan those centerpieces, decide on any other arrangements, and color code all the seating place cards. The only thing is, I had to stay on task. One missed day meant the next day I had to make six flowers. One missed week meant making 21 flowers to catch up. Do you get my drift? Don’t even ask what it required to catch up on a lost month. There are no words…
(If you are looking for a tutorial on how to make these flowers, click here)
Fast forward to six weeks before the wedding and my fingers felt like they were falling off due to the insane flower making schedule I had going on. Every plan and deadline shot to hell. I even sliced my hand with that tiny 1mm crochet hook I was using! Haha! I remember at 2 a.m one morning, my eyes going crossed and mind delirious, thinking up curse words while miscounting my stitches, and repeating over and over that I will NEVER crochet with thread or make another flower in MY LIFE ever again. I must have asked myself a hundred times…WHY!? Why did I decide to do this?!
Honestly….This is why….
This Is What Dreams Are Made Of
I am such a detail person. It comes from my mama. And just like my mama, I believe those tiny details matter. Every single one of these details mattered to me. I would not have done it otherwise. Looking back, I know I complained, I may have even cried, but the results of all the hard work and late nights paid off. Each detail, each flower, each element came together in perfect harmony on our wedding day and it was so worth it! So, so worth it! Details, details, details….
The bouquets I designed consisted of 12-14 crochet flowers in the final assembly. I accented the burst of color using gold beads, gold tulle, gold ribbon, and gold jewels to wrap the handle of the bouquet holders I chose. I crocheted roses for my bridal bouquet and crocheted an assortment of handmade flowers for the bridesmaids and the throw bouquet. My sister-in-law/maid-of-honor and I still have the scars from the blisters burned on our hands from the hot glue! Bouquet assembly was not easy!
Each boutonniere consisted of a coordinating crocheted single flower attached to a stem and leaf. For Nate’s two younger brother’s, I created a trio of crocheted small flowers as an alternate look since they were our ushers and groomsmen! Even our little ring bearer had his own!
Each centerpiece was a combination of Moroccan Lanterns alternating with floating candles on opposite tables. Small votive candlesaccented each table, along with the gold framed table number we added Salal Lemon Leaf and Evergreen Huckleberry for a splash of deep green on our black table cloth linens. I accented the leaves with a combination of three crochet flowers on one side and an accent flower on the opposite side of the arrangement for a splash of crochet color and balance.
For the last table detail, we added small place card holders that were tiny replicas of brass oil lamps. Each name card was paired with a tiny crochet flower detail indicating the meal choice of each guest and inserted into the place card holder. I had four meal options, and each option had a color coordinated flower that matched the meal choice of each guest. Each place card was printed with our guests’ names, and I attached a tiny flower on the end with a gold brad using a paper hole-punch. This tiny, but impressive, element was a huge hit with our guests!
It Doesn’t Stop There
Aside from the details that adorned our tables, we had a couple other crochet specifics that I incorporated into our wedding day. Since it was a Pakistani/Irish Fusion wedding a few live flower arrangements had elements of plants indigenous to Ireland. Bells of Ireland mixed with Fringe Cups, Burdock, Thistle, Ladies Mantle, Clover and an assortment of other greens decorated our reception room. I decided to add crochet Calla Lilies to this greenery mix! I found an amazing pattern by Happy Patty and purchased it from her Etsy Shop! I fell in love with these Irish fused greenery arrangements even more with this added detail. Bittersweet Florist was fun to work with and loved the idea of adding crochet Callas. They had never seen crochet lilies before!
It may seem like an overwhelming amount of crochet flowers and crochet elements added to the wedding day. I did not want it to look like too many crocheted components pulled together, hoping it appeared as attractive as imagined when I started on this project. When we put it all together, it wasn’t at all over the top or too much. It was just the right amount. I even added the Henna Inspired Mandala as a table top cover in our reception area. I used it under some Huckleberry leaves to accent our seating chart table. Subtle yet lovely…a tiny splash of crochet color made it just the perfect element to add in this one spot.
It’s All in the Details
It took a lot of planning, but that’s my thing. I love planning, and details can make all the difference. Like I mentioned, I am a detail oriented person and being a bride didn’t change any of this. In fact, it amped it up! Just be careful not to get caught up in too many little things. It can suck you in! Doing all these crochet elements made this uniquely my own. It was such a wonderful feeling that I made each of these details come to life with crochet.
In the end, each guest had a small crochet take-away aside from their wedding favor. My bridesmaids, men of honor, groomsmen, ring bearer, and family, each had their flowers to have as a keepsake from our special day. One lucky guest caught the Throw Bouquet! Even the centerpiece flowers became souvenirs for some guests. We could not ask for more! This is what every bride should feel. I accomplished this incredible feat and brought a lot of joy not only to myself but to each guest who attended our wedding. It truly mattered in showing each person who attended how special they are and how much it meant to us that they were to celebrate our love.
In the end, I crocheted 140 centerpiece flowers, 70 bouquet flowers, 19 boutonniere flowers, 3 wrist corsages, 200 place card flowers, as well as the Calla Lilies to accent the greenery arrangement, the Henna Inspired Mandalaand lastly, I did make each of my girls a special wedding shawl which I will share in a separate blog. I did this work all in the months leading up to our wedding. It wasn’t easy, but it was so very special. I saved more than $1,500.00 USD by doing this myself.
Do-It-Yourself: Lovely But Not Easy
My advice for anyone planning to take on the task of DIY projects for your wedding would be to plan it out, give yourself plenty of time to tackle a project of this magnitude, know the commitment you are making because it can overwhelm you, and it is ok to get frustrated. Just don’t take on a project that consumes you to the point that you lose the joy in the reason you started this in the first place. With the right frame of mind, in the end, you will have a wedding that has the special added touches that make it your unique day with elements that are talked about for years! Always remember: This is YOUR special day do what feels right for YOU. Have fun and enjoy it all!
Watch this video tutorial to learn how to make wedding flowers:
A special thank you to the following:
Our amazing parents for supporting us and making all our dreams come true.
Our entire wedding party for helping us through this whole journey and being the best wedding party ever!!
All of our guests, you are so special to us, and we were so happy to celebrate our special day with each and every one of you!
This post contains affiliate links, which I may be compensated for when you make a purchase. That means if you click on any link and buy from the linked websites, I will receive a small percentage of the value of your order. The amount you pay is not changed. Thank you for all your support in clicking the links in my blog!! You all are so amazing!! ~Nadia
On Sunday November 5th, 2017, I had the pleasure of participating in the 2017 Collegiate Media Summit hosted by Bloomsburg University of Pennsylvania. This summit highlights professionals across the media industry. I was invited to speak via Skype to the attendees on how I became a blogger and teacher on YouTube. Although quite nervous, I found it to be a very good experience and was thrilled to take part.
I’ve got friends in HIGH places
My friend, Dr. Dennis Frohlich, assistant professor in the Department of Mass Communications at Bloomsburg University, approached me some time ago to be a part of the summit. Some of you may remember if you followed my earlier blog posts that Dennis and I actually began blogging and video logging about inflammatory bowel diseases many years ago after meeting online. Early in my diagnosis, I started blogging and making videos discussing my journey through Crohn’s disease. During that same time, Dennis also started a channel on YouTube to talk about his journey through ulcerative colitis. We corresponded over our similar journey through illness. Together we decided to combine our channels and work together. In 2009 we began the United Colon Vlog. Our vlog (video log) provided education and awareness about inflammatory bowel diseases and it solidified a lifelong friendship.
The birth of YARNutopia
Those early days of vlogging helped lay the foundation for me to segue into starting YARNutopia. We decided to dissolve the UCVlog after five years of pioneering to bring a spotlight to IBD. Dennis was on to bigger and better things as he worked toward graduate school, eventually earning his doctorate. I continued to struggle significantly with my illness. After SIX attempts of trying college and having to withdraw for medical reasons, I resigned myself to the realization this won’t work out for me. During a particularly dark moment, my mom gave me a ball of yarn and a crochet hook and the rest is history. YARNutopia was born!
Exciting, but nothing goes off without a hitch
My appearance in this Media Summit was to discuss how I have made my career on YouTube. The summit was bringing professionals together who have made their careers through some media platform. It was such a privilege to be included among so many esteemed professionals. It is one of those surreal moments when you have to pinch yourself to tell if it is real life. How am I part of this?! It was pretty exciting!
Unfortunately, I woke up on Sunday morning with a terribly sore throat and was hoarse. The night before, I attended a family wedding, and I was already feeling under the weather. Adrenaline carried me through the wedding and subsequent party afterward, but everything came crashing down by Sunday. Three Ricola throat lozenges, honey laced tea, and a salt water gargle allowed me to have some semblance of a voice and would have to do as I addressed a room full of participants and students.
I prepared an outline for discussion with the help of my mom. As prepared as I felt, nerves started to settle in. Dennis prepped me ahead of time and in our preparations, he let me know that it will seem as though I am talking to him for the most part. Although there were students present, Dennis let me know he would guide the presentation and that put me a little bit at ease.
One Hour. A lot to cover
The presentation was approximately an hour long. In that time, we covered how I began my YouTube channel with my dad, how my mom and I handle all the creative design, blog, marketing, and social media, what it took to gain followers, and producing revenue through advertising and affiliates. We touched briefly on the highs and lows of being a blogger and YouTuber. I also offered tips and tricks on ways those looking to get into blogging or posting on YouTube can navigate the process. Soon the hour flew by and we opened a discussion up to questions and answers from the students.
Several questions were asked and it made me think on my toes. I am not the best at that, and I also had a bit of difficulty hearing the students. In retrospect, I could have been a little more prepared for that part of the presentation, but I was very satisfied with the outcome.
Closing thoughts
After the presentation was over, I felt pretty exhilarated. I did it! This was a great event to practice public speaking and a wonderful learning experience for me. I realized there is room for growth, and I definitely can make some improvements if I have the opportunity for more speaking engagements in the future. I learned several things in this seminar, and it also has me thinking of new avenues to explore for YARNutopia.
I want to say a special Thank You to my good friend Dr. Dennis Frohlich and all the students and attendees of this media summit. It was a fantastic experience. I appreciate the invitation and opportunity to talk about YARNutopia and for them to provide the platform to do so. It was truly wonderful!
~Nadia
This post contains affiliate links, which I may be compensated for when you make a purchase. That means if you click on any link and buy from the linked websites, I will receive a small percentage of the value of your order. The amount you pay is not changed. Thank you for all your support in clicking the links in my blog!! You all are so amazing!! ~Nadia
My dad will continue to be the videographer, editor, and photographer for our videos when I move away.
Support YARNutopia today so we can continue to bring you clear, quality crochet tutorials even after I move into my new home!
There will be an added expense of more travel and hopefully this won’t deter our ability to provide consistent videos on a weekly basis.
Oh, baby, it’s cold outside! Winter is right around the corner! Get a head start on beating the cold with my chunky yarn Faux Fur Trapper Hat that is sure to cut the cold with all the furry detail! This contemporary spin on a classic design is sure to be a big hit with even the most picky fashionistas on your gift list!
Whether it’s for the slopes or heading outside on a chilly morn, this is the first thing you will want to grab on your way out the door! This versatile hat can be made with or without the faux fur. Get creative with your faux fur choice or add some fleece fabric and sew that on! Choose from a variety of colors and make one for everyone on your holiday list! This is a simple yet stylish pattern that is sure to see a lot of use in winter!
Watch this video tutorial to learn how to make this hat:
Enjoy this video and subscribe to my channel on YouTube for more tutorials on how to crochet!
Leave a comment, and share with your friends!
Pattern:
Designed by Nadia Fuad
Questions? Leave a comment! You may sell items made from my pattern, but please reference my name and Etsy Shop (YARNutopia). Please do not copy and post this pattern and claim it as your own.
Materials: -Lion Brand Hometown USA yarn in Los Angeles Tan (160 Yards)
-Red Heart Boutique Fur (13 yards)
-Size K-6.50mm Crochet Hook
-Yarn Needle
-Scissors
NOTES:
-I do not have smaller sizes for this hat, it is made for a teen/adult size.
-You can use any bulky yarn you want to use and any fur, I would recommend a K-6.50mm crochet hook, but you can use any hook to make it bigger or smaller (smaller hook, smaller hat)
Special Stitches:
Ch: chain
St(s): Stitch(es)
Sl st: slip stitch
SC: Single Crochet
DC: Double Crochet
TR: Treble Crochet
BLO: Work in the Back Loop Only
FPDC: Front Post Double Crochet
FPTR: Front Post Treble Crochet
Hat
With Tan Bulky Yarn
Ch 6, sl st to 1st ch to form a ring (or start with Magic Ring) Rnd 1: Ch up 3 (counts as DC), 9 DC into ring, sl st to ch up 3. (10) Rnd 2: Ch 3, FPDC around same st, [DC, FPDC] in each st around. Sl st to beg. ch up 3. (20) Rnd 3: Ch up 3, DC in same st, FPDC around next, [2 DC in next st, FPDC around FPDC], repeat around. sl st to beg. ch up 3. (30) Rnd 4: Ch up 3, DC in each st around. Sl st to beg ch up 3. (30) Rnd 5: (See video tutorial for visual instructions) Ch up 3, DC in next 3 sts, FPTR around FPDC from round 3, FPTR around next FPDC from round 3, DC in next 5 sts on round 4, *[FPTR around next FPDC from round 3] twice, DC in next 6 sts from round 4, Repeat from * around ending with DC in last 5 sts. Sl st to beg. ch up 3. Rnd 6: Ch up 3, DC in 3 sts, FPDC around BOTH FPTR’s decreasing them together. DC in 5, *FPDC around BOTH FPTR’s DC in 6 sts, Repeat from * around ending with DC in last 5. Sl st to beg. ch up 3. Rnd 7: Ch up 3, DC in each st and [DC, FPDC] in every FPDC. (40) Rnd 8: Ch up 3, DC in same st, 1 DC in next 3 sts, *2 DC in next, 1 DC in next 3 sts, repeat from * around. Sl st to beg. ch up 3. (50) Rnd 9: Ch up 3, *DC in each st until a st that is worked into a FPDC, FPTR in the FPDC from round 7, Repeat from * around. sl st to beg. ch up 3. (50) Rnd 10: Ch up 3, DC in each st and FPDC in every FPTR. (50) Rnd 11: Ch up 3, DC in each st and FPDC in every FPDC. (50)
Earflaps: Make 2 Row 1: Ch 4, sl st to beg ch to form a ring. Ch up 3, 9 DC in ring. Sl st to ch up 3. (10)
Row 2: Ch up 3, DC in same st, 2 DC in same st, leave last 2 sts unworked. Ch 3 Turn.
Row 3: DC in same st, DC in next, *2 DC in next, DC in next, repeat from * across
Fasten off with long tail for sewing.
Inner Earflap: Make 2.
Ch 6 (or as many chains that will cover the inside of the earflap) Row 1: SC in 2nd ch from hook and across Row 2-4: Ch 1, turn, SC in each st across
If you need to do more rows, continue to do more rows until you are satisfied. Then Fasten off and sew to earflap.
See video tutorial for visual instructions on sewing
Front of hat:
With Fur
Ch 10 (or as many chains that will cover the front of the hat) Row 1: SC in 2nd ch from hook and across Row 2-4: Ch 1, turn, SC in each st across
If you need to do more rows, continue to do more rows until you are satisfied. Then Fasten off and sew to hat.
See video tutorial for visual instructions on sewing
Make braids and poms for the top of the hat and the earflaps.
See video tutorial for visual instructions.
Weave in all ends!
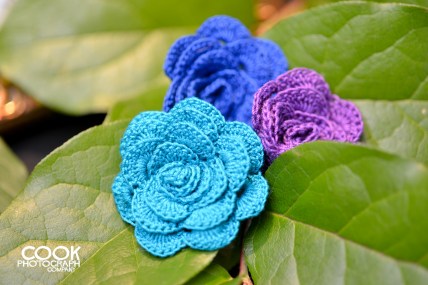
Inspired by the Coachella Festival flower crown filter on Snapchat, I designed this fun and ethereal headband. I filmed The Floral Dream Crown video tutorial and am excited to share it with all of you. Perfect for summertime festivals and events for all ages! Join me on Snapchat for behind the scenes look at YARNutopia!
This demonstration will show you how to create a variety of crochet flowers in different sizes combined to create this impressive headpiece.
This would look great as a bridal or bridesmaid headpiece, a little flower girl, or any young girl hair accessory. This would be cute for a photo prop on babies also! This crown works well for a hairband to wear to music festivals or any other fun summer event! Make a statement and stand out with this great head piece!
Follow along with this video tutorial to learn how to make this crown:
**You can always contact me via Facebook if you have any problems with the pattern. I am happy to help if you have any questions along the way.
Designed by Nadia Fuad
You may sell items made from my pattern, but please reference my website YARNutopia.com.
Please do not copy, sell, and/or post this pattern and claim it as your own.
My dad will continue to be the videographer, editor, and photographer for our videos when I move away.
Support YARNutopia today so we can continue to bring you clear, quality crochet tutorials even after I move into my new home!
There will be an added expense of more travel and hopefully this won’t deter our ability to provide consistent videos on a weekly basis.
NOTES:
-You can make as many flowers as you want and use any colors/yarn type that you want.
-If you cannot find a headband at the dollar store, you can crochet your own by checking out this link.
-You can use any type of yarn for this project. Gauge is not important.
Special stitches:
Ch(s): chain(s)
YO: Yarn Over
St(s): Stitch(es)
Sl st: slip stitch
SC: Single Crochet
HDC: Half-Double Crochet
DC: Double Crochet
Pattern:
Small Flower: Make 4
Before making your slip knot, leave a 6-8” tail;
ch 12
Row 1: sc in 4th ch from hook (first ch 1 sp made). * Ch 1, skip 1 ch, sc in next ch. Repeat from * to end.
Row 2: Ch 1, turn, 2sc and 1 sl st, in first ch 1 sp, 3 sc and 1 sl st in each of the next 4 ch 1 sps. Fasten off with long tail for sewing. Roll strip into a flower, stitch flower together at base.
Medium Flower: Make 2
Before making your slip knot, leave a 6-8” tail;
ch 34
Row 1: sc in 4th ch from hook (first ch 1 sp made). * Ch 1, skip 1 ch, sc in next ch. Repeat from * to end.
Row 2: Ch 1, turn, [2 sc and 1 sl st] in first ch 1 sp, [3sc, 1 sl st] in each of the next 3 ch 1 sps, [3 hdc, 1 sl st] in each of the next 4 ch 1 sps, [4 hdc, 1 sl st] in each of the next 4 ch 1 sps, [4 dc, 1 sl st] in each of the next 4 ch 1 sps. Fasten off with long tail for sewing. Roll strip into a flower, stitch flower together at base.
Large Flower: Make 2
Ch 5, join with sl st to 5th ch from hook to form a ring.
Rnd 1: Ch 1, working in ring, 1 sc, 1 hdc, 4 dc, 1 hdc, 2 sc, 1 hdc, 4 dc, 1 hdc, 1 sc, sl st on the 1st sc. (16 sts)
Rnd 2: Ch 1, sc in same st, (Ch 3, skip one st, sc on next st) repeat around, join. (8 ch-3 loops)
Rnd 3: sl st into first ch 3 sp, ch 1, [(Sc, hdc, 3 dc, hdc, sc) in ch-3 loop, sl st in sc] repeat around, join. (8 petals)
Fasten off with long tail for sewing.
Center of flower:
Ch 2
Rnd 1: 6 sc in 2nd ch from hook.
Fasten off, sew to center of Large flower
Extra Large Flower: Make 2
Before making your slip knot, leave a 6-8” tail;
Row 1: Ch 44 (Or any even number)
Row 2: sc in 4th ch from hook (first ch 1 sp made). * Ch 1, skip 1 ch, sc in next ch. Repeat from * to end.
Row 3: Ch 2, turn, skip the first stitch of the previous row, tr first ch sp, ch2, 2tr into same sp. 2DC, ch2, 2DC in each ch sp across. Fasten off and change color.
Row 4: [ch 3, 5dc] all in first ch 2 sp, *sk 2 sts and sc in between 3rd and 4th dc (see video tutorial for visual instructions), 6 dc in next ch 2 sp, repeat from * across. Fasten off. Roll strip into a flower, stitch flower together at base.
Leaf: Make 3
Ch 10
Row 1: Sl st in 2nd ch from hook, sc in next, hdc in next, dc in next 3, hdc in next, sc in next, sl st in last. fasten off with long tail for sewing.
Assembly Step:
Sew all pieces to your headband (See video tutorial for visual instructions), make it as fancy as you want!! TIP: Be sure to stretch out your headband when sewing on your pieces. That way the headband won’t show through when you put it on your head.
Enjoy!
This post contains affiliate links, which I may be compensated for when you make a purchase. That means if you click on any link and buy from the linked websites, I will receive a small percentage of the value of your order. The amount you pay is not changed. Thank you for all your support in clicking the links in my blog!! You all are so amazing!! ~Nadia
The yarn provided for this pattern is courtesy of Red Heart Yarns