Crochet Tutorial: Where Love Grows Afghan Block

Crochet Tutorial: Where Love Grows Afghan Block

This afghan block is part of the Wedding Blanket CAL that Marly Bird is hosting on her website!! See more details about it here!

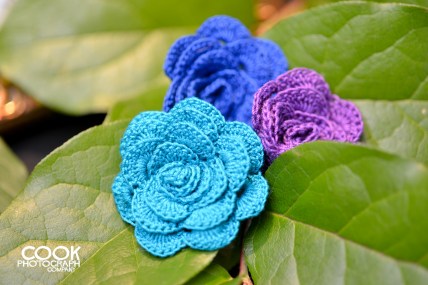
My contribution to this crochet-along is the “Where Love Grows Afghan Block.” It has a floral design to it and it is very fitting to a wedding theme of love and growing together in your relationship.

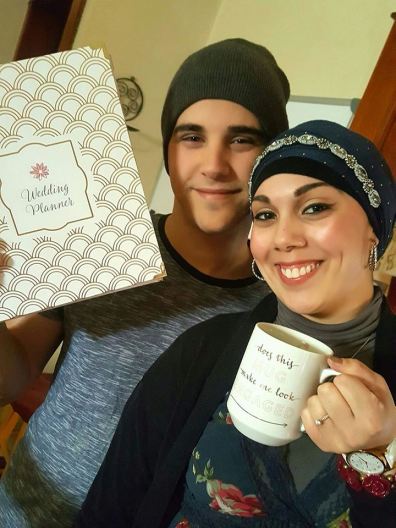
On the Red Heart team we have a wonderful leader of the Joy Creators, named Ally. Ally got married in May and we wanted to do something very special for her. I got the Joy Creators together and we each made a square to put together to make a wedding blanket for Ally and her husband.


Below is a photo of the whole blanket put together! All the crochet designers that were part of this crochet along had our afghan blocks sewn together to make this patchwork quilt into a beautiful wedding gift!


Follow along with this video tutorial to learn how to make this afghan block:


**You can always contact me via Facebook if you have any problems with the pattern. I am happy to help if you have any questions along the way.

***These patterns are copyright YARNutopia © so PLEASE DO NOT COPY, SHARE, ADJUST OR RESELL MY PATTERN. I wrote and tested this pattern myself, from beginning to end. It took a lot of time and work, and I would really like to have it remain “my pattern.”

***You can sell anything you make from my patterns, please just link back to my website YARNutopia.com. Thank you!

My dad will continue to be the videographer, editor, and photographer for our videos when I move away.
Support YARNutopia today so we can continue to bring you clear, quality crochet tutorials even after I move into my new home!
There will be an added expense of more travel and hopefully this won’t deter our ability to provide consistent videos on a weekly basis.

Donate Button with Credit Cards

Teacher: Nadia Fuad
Video and Editing: Fuad Azmat (My Daddy)
Share your work on Facebook!
Add me on Snapchat: YARNutopia
Follow me on Instagram
Visit My Ravelry Store and add this to your Favorites!
Follow me on Twitter: @YARNutopia
Enjoy this video and subscribe to my channel on YouTube for more tutorials on how to crochet!
Leave a comment, and share with your friends!

Pattern:

Designed by Nadia Fuad
You may sell items made from my pattern, but please reference my website YARNutopia.com.
Please do not copy, sell, and/or post this pattern and claim it as your own.

Materials you will need:
Red Heart Yarns Chic Sheep by Marly Bird in the colors VIP, Suede, and Linen
Size I-5.50mm Crochet Hook
Yarn Needle
Scissors

NOTES:
-You can make many of these into a blanket of any size. Use the Afghan Size Guide in this Blog Post
-The measurement for my square came out to be 12 inches
-You can use any colors you want. I used a Worsted Weight, Size 4 Medium Yarn but you can use any Double Knitting Yarn or any Aran Yarn as well.
-You do not have to change color so often, but sewing in those pesky ends is a nightmare. Be sure to sew them in as you go.

Special stitches:
Ch(s): chain(s)
YO: Yarn Over
St(s): Stitch(es)
Sl st: slip stitch
SK/Sk’d: Skip/Skipped
BLO: Back Loop Only
FLO: Front Loop Only
SC: Single Crochet
HDC: Half-Double Crochet
DC: Double Crochet
TR: Treble Crochet
Cluster: [YO, insert hook, YO, pull through, YO pull through 2 loops on your hook] 3 times, YO pull through all 4 loops on your hook
Beg. Cluster: [YO, insert hook, YO, pull through, YO pull through 2 loops on your hook] 2 times, YO pull through all 3 loops on your hook
LHDC: Long Half Double Crochet
LDC: Long Double Crochet

Pattern:

With Suede,
Start with a Magic Ring or Ch 4 and Sl st to first Ch to form a ring
Rnd 1: Ch 3 (Counts as DC here and throughout), 7 DC into ring, Sl st to first Ch 3 st. (8 sts)

Rnd 2: Ch 2, Beginning Cluster in same st, *Ch 2, Cluster in next st, repeat from * around, ending with Ch 2, Sl st to first cluster. Fasten off, change color to VIP. (8 cluster sts)

Rnd 3: With VIP, Attach yarn to any Ch 2 sp, Ch 1, * 3 SC in Ch 2 sp, SC in cluster st, repeat from * around, sl st to first SC, Fasten off and change color to Linen. (32 sc sts)

Rnd 4: With Linen, Work in BLO, Attach yarn to any SC, Ch 4 (Counts as DC + Ch 1 sp), *DC in next st, Ch 1, repeat from * around, ending with ch 1, sl st to 3rd ch of beginning ch 4. Fasten off. (32 sts)

Rnd 5: With Linen, Attach yarn to any FRONT LOOP of any st on Round 3 that was not worked into, (See video tutorial for visual instructions), RSC in each st around. Fasten off.

Rnd 6: In any ch sp of Round 4, Attach Suede. Ch 5 (Counts as DC + Ch 2 sp), *DC in next Ch sp, Ch 2, repeat from * around, ending with Ch 2, sl st to 3rd ch of beg. ch 5. Fasten off, change color to Linen. (32 sts)

Rnd 7: With Linen, Attach to any Ch 2 sp, Ch 1, 2 HDC in each Ch 2 sp around, Sl st to first HDC. Fasten off, change color to VIP. (64 sts)

Rnd 8: With VIP, Attach to any st, Ch 1, SC in first 4 sts, * Ch 5, Sk 4 sts, SC in next 4 sts, repeat from * around, ending with Ch 5, Sl st to 1st SC, do NOT fasten off. (8 Ch 5 sps created)

Rnd 9: Continue using VIP color, Sl st into next st and IN BETWEEN the 2 sts of the 4 SC grouping (See video tutorial for specific location), Ch 1, SC in same spot, *[3DC, 3TR, 3DC] in next ch 5 sp, SC between 2 middle SC of next 4 SC grouping, repeat from * around, sl st to first SC. Fasten off, change color to Linen. (If your work is curling at this point do not worry, it will flatten out in the next few rounds) (8 petals made)

Rnd 10: With Linen, Attach to any FIRST DC of a petal, work in BLO for this round, Ch 1, HDC in first 4 sts, *[HDC, Ch 2,  HDC] in next st, HDC in next 4 sts, Long HDC in same spot as SC from previous round, HDC in next 4 sts, repeat from * around, ending with LHDC in last st, sl st to first HDC. Fasten off, change color to Suede. (96 sts)

Rnd 11: With Suede, Attach to any LHDC, Work in THIRD LOOP of each st in this round, (See video tutorial for visual instructions), Ch 4 (Counts as TR), [2TR, Ch 2, 3 TR] in same st, * Sk 3 sts, SC in next 2 sts, SC in ch 2 sp, SC in next 2 sts, HDC in next 2 sts, DC in next st, TR in LHDC st, DC in next st, HDC in next 2 sts, SC in next 2 sts, SC in ch 2 sp, SC in next 2 sts, Sk 3 sts, [3TR, Ch 2, 3 TR] in LHDC st, repeat from * around, sl st to first Ch 4 st. do NOT fasten off. (92 sts around)

Rnd 12: Continue using Suede color, work in BOTH LOOPS of sts, In same st as join, Ch 3, DC in next 2 sts, * [2DC, Ch 2, 2 DC] in corner ch 2 sp, DC in next 3 sts, HDC in next 17 sts, DC in next 3 sts, repeat from * around, sl st to beginning ch 3 st. Fasten off, change color to VIP. (108 sts)

Rnd 13: With VIP, Attach yarn to any corner ch 2 sp, Ch 3, [DC, ch 2, 2 DC] in same corner sp, * Ch 1, Sk 1 st, DC in next st, repeat from * until next corner, [2 DC, ch 2, 2 DC] in corner, repeat from * around, sl st to beg. ch 3 st. Fasten off, change color to Suede.

Rnd 14: With Suede, Attach yarn to any corner ch 2 sp, Ch 1, *[SC, Ch 2, SC] in corner, SC in next 2 sts, [LDC in Sk st from previous round, SC in next st on Rnd 13] 14 times, LDC in Sk’d st from Previous Round, SC in next 2 sts, repeat from * around, sl st to first SC. Fasten off, change color to Linen.

Rnd 15: With Linen, attach yarn in any corner ch 2 sp, Ch 1, 3 SC in same corner sp, SC in each st around putting 3 SC in corner ch 2 sps, sl st to first SC, do NOT fasten off. (144 sts)

Rnd 16: Continue using Linen, Ch 1, SC in each st round putting 3 SC in middle SC of corners, sl st to first SC, do NOT fasten off. (152 sts)

Rnd 17: Repeat Round 16 (You can opt out of doing this round if your square is 12 inches after Round 16)

Fasten off, weave in all ends.

Block your square if needed.

Enjoy!!


This post contains affiliate links, which I may be compensated for when you make a purchase. That means if you click on any link and buy from the linked websites, I will receive a small percentage of the value of your order. The amount you pay is not changed. Thank you for all your support in clicking the links in my blog!! You all are so amazing!! ~Nadia

The yarn provided for this pattern is courtesy of Red Heart Yarns


Shop Red Heart, America's Favorite Yarn

Dance the Night Away

Dance the Night Away

One year ago, and the memories are fresh as if it were yesterday!! I think we can agree that Nate and my dad are pretty good on the dance floor.

See our First Dance here:

See our Father-Daughter Dance here:

(And how cool is the surprise dholi we had enter during the father-daughter dance?! Watch the video to see my surprise reaction. On a scale from 1-10 that was a solid 10 epic surprise)

How to Crochet Tutorial: Rose Flower Headband & Floral Wedding Bouquet

How to Crochet Tutorial: Rose Flower Headband & Floral Wedding Bouquet

On the 10th day of Christmas my true love gave to me….Flowers! Haha! I made a holiday headband using the same flower design I used in my bridal bouquets for my wedding earlier this year! I used a small bead detail to adorn the center for the perfect touch! Don’t need a headband? Don’t worry, this flower design is perfect for so many other projects!

Follow along with this video tutorial to learn how to make the flowers and leaves:


My dad will continue to be the videographer, editor, and photographer for our videos when I move away.
Support YARNutopia today so we can continue to bring you clear, quality crochet tutorials even after I move into my new home!
There will be an added expense of more travel and hopefully this won’t deter our ability to provide consistent videos on a weekly basis.

Donate Button with Credit Cards

**You can always contact me via Facebook if you have any problems with the pattern. I am happy to help if you have any questions along the way.

***These patterns are copyright YARNutopia © so PLEASE DO NOT COPY, SHARE, ADJUST OR RESELL MY PATTERN. I wrote and tested this pattern myself, from beginning to end. It took a lot of time and work, and I would really like to have it remain “my pattern.”

***You can sell anything you make from my patterns, please just link back to my website YARNutopia.com. Thank you!

Teacher: Nadia Fuad
Video and Editing: Fuad Azmat (My Daddy)
Share your work on Facebook!
Add me on Snapchat: YARNutopia
Follow me on Instagram
Visit My Ravelry Store and add this to your Favorites!
Follow me on Twitter: @YARNutopia
Enjoy this video and subscribe to my channel on YouTube for more tutorials on how to crochet!
Leave a comment, and share with your friends!

Pattern:

Designed by Nadia Fuad
You *may* sell items made from my pattern, but please reference my website YARNutopia.com.
Please do not copy, sell, and/or post this pattern and claim it as your own.

Materials you will need:
Aunt Lydia’s Crochet Thread
Headband
-Hot Glue
Pearly Beads
1.00mm Crochet Hook
Yarn Needle
Scissors

NOTES:
-Use a larger hook to make this larger.

Special stitches:
Ch(s): chain(s)
YO: Yarn Over
BLO: Back Loop Only
St(s): Stitch(es)
Sl st: slip stitch
SK: Skip
SC: Single Crochet
DC: Double Crochet
HDC: Half Double Crochet
TR: Treble Crochet

Pattern:

If you have any confusion or difficulty with reading this pattern, please watch the video tutorial to have visual instructions.

Flower

Ch 64 or any multiple of 3+4
Row 1: DC in 4th ch from hook, *Sk 2 chs, [DC, Ch 2, DC] in the next ch, repeat from * across, ending with [DC, CH 2, DC] in last ch, turn.

Row 2: Sl st into ch 2 sp, Ch 3, [DC, Ch 2, DC] in same sp, *Ch 2, [2 DC, Ch 2, 2 DC] in next ch 2 sp, repeat from * across ending with [2 DC, Ch 2, 2 DC] in last ch 2 sp, turn.

Row 3: 10 DC in first Ch 2 sp, *SC in next Ch 2 sp, 10 DC in next ch 2 sp, repeat from * across, ending with SC in last st.
Fasten off with long tail for sewing.

Assembly:
Roll strip into flower and sew it all up in the back. Weave in all ends. (See video tutorial for visual instructions)

Leaf:

Ch 15
Round 1: Sl st in 2nd ch from hook, SC in next, HDC in next, DC in next, TR in next, DTR in next 4 chs, TR in next, DC in next, HDC in next, SC in next, Sl st in last, ch 1, work on opposite side of foundation chain, Sl st back into the last ch, SC in next stitch, HDC in next, DC in next, TR in next, DTR in next 4 sts, TR in next, DC in next, HDC in next, SC in next, Sl st in last.

Rnd 2: SC in each st around working around floral wire to stiffen the edge of the leaf.
Fasten off, weave in ends. Cut the wire and bend it to the back.

See video tutorial on how to create the headband look.

Enjoy!!

This post contains affiliate links, which I may be compensated for when you make a purchase. That means if you click on any link and buy from the linked websites, I will receive a small percentage of the value of your order. The amount you pay is not changed. Thank you for all your support in clicking the links in my blog!! You all are so amazing!! ~Nadia

The yarn provided for this pattern is courtesy of Red Heart Yarns

Gifts for my Bridesmaids: Wrapped in Jewels

Gifts for my Bridesmaids: Wrapped in Jewels

I have shared the details that I crocheted for my wedding, but I held back one very important project that I made for my bridesmaids. Back in December 2017, I made the Wrapped in Jewels Shawls for each of my girls. Using Red Heart Yarns Ombré Yarn, I chose colors that best suited the color dress each of my bridesmaids would be wearing. I also made a deep red one for myself to match my gown.

I made the shawls early on and gifted one to each of them upon their arrival to the wedding. Nida was traveling from Texas and she would be wearing deep teal for my wedding, Sarah was traveling from Comoros, Africa and she would be in dark navy blue, and Samantha was wearing magenta and although she was here in Wisconsin, she still had a more than three hour drive to join me for our epic wedding weekend. By Thursday before the wedding everyone arrived safely and the festivities began!

My side of the wedding party consisted of both my brothers serving as “men of honor,” my sister-in-law, Samantha, was my matron of honor, Nida and Sarah both bridesmaids and my nephew was our little ring bearer. With everyone together for the first time in over a year, we decided to do a ‘bachelorette’ night and headed out for hibachi and sushi. Before heading out the door, I had gifts to share with everyone to thank them for making the trip and being there for our special day.

Although each “Glad you are here” bag consisted of a few fun items for all, the one thing I was most proud of was the handmade shawls I had made for the girls. I could already imagine how amazing they would look dressed in their gowns and wrapped in the shawls. It was on my “must have” photo list!

It did not disappoint! Here are a few photos of my girls and I on my wedding! These could not have turned out more perfect than this!

This shawl was such a wonderful keepsake from the most special weekend of my life. Each of the girls were in tears and excited to have a matching shawl to wear with the dress. These came in handy that evening when the temps dipped down with the sunset! Rather than lugging around a heavy coat we could wrap up and keep out the chill as we enjoyed the reception on the patio and headed out afterward to continue celebrating!

Now each of the girls has this special memento as a reminder of our wedding.

If you are getting married, or know of someone who would love this shawl, this one is very special and will be a hit with anyone who is on the receiving end of such a fabulous gift! Enjoy!

This post contains affiliate links, which I may be compensated for when you make a purchase. That means if you click on any link and buy from the linked websites, I will receive a small percentage of the value of your order. The amount you pay is not changed. Thank you for all your support in clicking the links in my blog!! You all are so amazing!! ~Nadia

The yarn provided for this pattern is courtesy of Red Heart Yarns


My dad will continue to be the videographer, editor, and photographer for our videos when I move away.
Support YARNutopia today so we can continue to bring you clear, quality crochet tutorials even after I move into my new home!
There will be an added expense of more travel and hopefully this won’t deter our ability to provide consistent videos on a weekly basis.

Donate Button with Credit Cards

It’s All in the Details: Crochet Wedding Flowers

It’s All in the Details: Crochet Wedding Flowers

When planning a wedding, one of the very first things you consider is the type of wedding you want and the budget to go along with your dream. It isn’t always easy to have those two things come together seamlessly unless you have all the resources available without the concern of finances. That’s why DIY (or do-it-yourself) is a great way to cut costs and bring some of those wedding expenses down – and dreams to life – using your own creativity. Be aware – there’s a cost to that too, just not always in dollars.

It Starts With YES!

When Nate proposed, we were in Amsterdam, Netherlands on a high – figuratively not literally. (read about it here) Excited from the thrill of getting engaged on this European trip, planning a wedding in that moment was not on the forefront of our minds. We hadn’t even chosen a date for our wedding until weeks following our engagement. I am such a planner, so I needed time to organize our wedding with guests from overseas, so we decided on March 17, 2018, St. Patrick’s Day. This was the perfect day to have our Pakistani/Irish fusion wedding. I wanted the Pakistani features and Nate is Irish, so he wanted to incorporate some Irish elements into our special day.

Looking a year ahead gave us much needed time to sort out details for this fusion wedding and put finances on paper. Thankfully, our parents were able to help, but how much would this all cost?

We visited vendors which was exciting and full of promise. Yet, when we started to talk dollars and cents, we began to realize that we needed to scale down considerably on some of our “wants.”  Our budget was limited. One of the more shocking realizations was finding out that for flowers; personal flowers such as bouquets, boutonnieres, and corsages along with centerpiece arrangements and other floral décor, would cost over $2000 USD. As much as I LOVE fresh flowers, spending $2000 on that one detail was out of the question.

Famous Last Words

Ideas began to formulate. I knew I wanted to incorporate elements of crochet into my wedding, and the more I considered it, the more it made sense for me to make all of the flowers. I knew it would be a lofty goal. Hand crocheting 200+ flowers for all my floral elements, as well as 200 place card meal flowers, was no easy task. But spending $2000 on bouquets and arrangement fresh flowers, which will wilt and be discarded was hard to contemplate. I could save a huge chunk of money if I did these myself. So, it was decided almost a year ahead of time, I would crochet the flowers. I had plenty of time, right?

I think I remember vaguely in the fog of my over-zealous wedding-muddled mind, Nate saying to me,

“Are you sure you want to do that? I don’t want you to get too stressed out…..” Brides and stress? Phfft…

Oh, how prophetic that conversation would be.

My flip response was something on the lines of,

“No worries, I won’t get stressed. It’s a year away. I have plenty of time.” Eye-roll please…

The Best Laid Plans…

Eleven months in advance may seem like plenty of time to take on a project like this. That is if you have NOTHING to do BUT this. I started out pretty well. I decided on using Red Heart Yarns Aunt Lydia’s Thread in the colors of my bridesmaids’ dresses for their bouquets and a throw bouquet. I would pair the groomsmen’s boutonnieres in coordinating colors. My bouquet would be shades of red and Nate would have a matching flower to mine. I could get a jump start on place card flowers once I decided on the coinciding meal. I would crochet similar coordinating flowers to use for my table centerpieces. Easy peasy lemon squeezy. Puhll-eeaaazzze…I got this!

I mapped out the year. I could crochet three flowers a day which would put me on a course to finish in plenty of time for the wedding. It would give me an ample time-frame to make bouquets, plan those centerpieces, decide on any other arrangements, and color code all the seating place cards. The only thing is, I had to stay on task. One missed day meant the next day I had to make six flowers. One missed week meant making 21 flowers to catch up. Do you get my drift? Don’t even ask what it required to catch up on a lost month. There are no words…

(If you are looking for a tutorial on how to make these flowers, click here)

Fast forward to six weeks before the wedding and my fingers felt like they were falling off due to the insane flower making schedule I had going on. Every plan and deadline shot to hell. I even sliced my hand with that tiny 1mm crochet hook I was using! Haha! I remember at 2 a.m one morning, my eyes going crossed and mind delirious, thinking up curse words while miscounting my stitches, and repeating over and over that I will NEVER crochet with thread or make another flower in MY LIFE ever again. I must have asked myself a hundred times…WHY!? Why did I decide to do this?!

Honestly….This is why….

This Is What Dreams Are Made Of

I am such a detail person. It comes from my mama. And just like my mama, I believe those tiny details matter. Every single one of these details mattered to me. I would not have done it otherwise. Looking back, I know I complained, I may have even cried, but the results of all the hard work and late nights paid off. Each detail, each flower, each element came together in perfect harmony on our wedding day and it was so worth it! So, so worth it! Details, details, details….

The bouquets I designed consisted of 12-14 crochet flowers in the final assembly. I accented the burst of color using gold beads, gold tulle, gold ribbon, and gold jewels to wrap the handle of the bouquet holders I chose. I crocheted roses for my bridal bouquet and crocheted an assortment of handmade flowers for the bridesmaids and the throw bouquet. My sister-in-law/maid-of-honor and I still have the scars from the blisters burned on our hands from the hot glue! Bouquet assembly was not easy!

Each boutonniere consisted of a coordinating crocheted single flower attached to a stem and leaf. For Nate’s two younger brother’s, I created a trio of crocheted small flowers as an alternate look since they were our ushers and groomsmen! Even our little ring bearer had his own!


The wrist corsages for my mom and Nate’s Grandma were a single flower crocheted in gold thread and fastened to gold glitter elastic wrist bands.

Each centerpiece was a combination of Moroccan Lanterns alternating with floating candles on opposite tables. Small votive candles accented each table, along with the gold framed table number we added Salal Lemon Leaf and Evergreen Huckleberry for a splash of deep green on our black table cloth linens. I accented the leaves with a combination of three crochet flowers on one side and an accent flower on the opposite side of the arrangement for a splash of crochet color and balance.

For the last table detail, we added small place card holders that were tiny replicas of brass oil lamps. Each name card was paired with a tiny crochet flower detail indicating the meal choice of each guest and inserted into the place card holder. I had four meal options, and each option had a color coordinated flower that matched the meal choice of each guest. Each place card was printed with our guests’ names, and I attached a tiny flower on the end with a gold brad using a paper hole-punch. This tiny, but impressive, element was a huge hit with our guests!


It Doesn’t Stop There

Aside from the details that adorned our tables, we had a couple other crochet specifics that I incorporated into our wedding day. Since it was a Pakistani/Irish Fusion wedding a few live flower arrangements had elements of plants indigenous to Ireland. Bells of Ireland mixed with Fringe Cups, Burdock, Thistle, Ladies Mantle, Clover and an assortment of other greens decorated our reception room. I decided to add crochet Calla Lilies to this greenery mix! I found an amazing pattern by Happy Patty and purchased it from her Etsy Shop! I fell in love with these Irish fused greenery arrangements even more with this added detail. Bittersweet Florist was fun to work with and loved the idea of adding crochet Callas. They had never seen crochet lilies before!

It may seem like an overwhelming amount of crochet flowers and crochet elements added to the wedding day. I did not want it to look like too many crocheted components pulled together, hoping it appeared as attractive as imagined when I started on this project.  When we put it all together, it wasn’t at all over the top or too much. It was just the right amount. I even added the Henna Inspired Mandala as a table top cover in our reception area. I used it under some Huckleberry leaves to accent our seating chart table. Subtle yet lovely…a tiny splash of crochet color made it just the perfect element to add in this one spot.

It’s All in the Details

It took a lot of planning, but that’s my thing. I love planning, and details can make all the difference. Like I mentioned, I am a detail oriented person and being a bride didn’t change any of this. In fact, it amped it up! Just be careful not to get caught up in too many little things. It can suck you in!  Doing all these crochet elements made this uniquely my own. It was such a wonderful feeling that I made each of these details come to life with crochet.

In the end, each guest had a small crochet take-away aside from their wedding favor. My bridesmaids, men of honor, groomsmen, ring bearer, and family, each had their flowers to have as a keepsake from our special day. One lucky guest caught the Throw Bouquet! Even the centerpiece flowers became souvenirs for some guests. We could not ask for more! This is what every bride should feel. I accomplished this incredible feat and brought a lot of joy not only to myself but to each guest who attended our wedding. It truly mattered in showing each person who attended how special they are and how much it meant to us that they were to celebrate our love.

In the end, I crocheted 140 centerpiece flowers, 70 bouquet flowers, 19 boutonniere flowers, 3 wrist corsages, 200 place card flowers, as well as the Calla Lilies to accent the greenery arrangement, the Henna Inspired Mandala and lastly, I did make each of my girls a special wedding shawl which I will share in a separate blog. I did this work all in the months leading up to our wedding. It wasn’t easy, but it was so very special. I saved more than $1,500.00 USD by doing this myself.

Do-It-Yourself: Lovely But Not Easy

My advice for anyone planning to take on the task of DIY projects for your wedding would be to plan it out, give yourself plenty of time to tackle a project of this magnitude, know the commitment you are making because it can overwhelm you, and it is ok to get frustrated. Just don’t take on a project that consumes you to the point that you lose the joy in the reason you started this in the first place. With the right frame of mind, in the end, you will have a wedding that has the special added touches that make it your unique day with elements that are talked about for years! Always remember: This is YOUR special day do what feels right for YOU. Have fun and enjoy it all!

Watch this video tutorial to learn how to make wedding flowers:

A special thank you to the following:

Our amazing parents for supporting us and making all our dreams come true.

Our entire wedding party for helping us through this whole journey and being the best wedding party ever!!

All of our guests, you are so special to us, and we were so happy to celebrate our special day with each and every one of you!

Cook Photograph Company for the wonderful photos (See more of our wedding photos on their Facebook Page here)

Bittersweet Floral for the lovely Irish greens added to our reception hall

Nite Lights Entertainment for the AH-MAZING Music, Lighting, and Photo Booth! That was the best party I have ever been to!!

The Waterfront Restaurant and Tavern for such a great venue to celebrate our wedding at! Everything was so elegant and regal.

This post contains affiliate links, which I may be compensated for when you make a purchase. That means if you click on any link and buy from the linked websites, I will receive a small percentage of the value of your order. The amount you pay is not changed. Thank you for all your support in clicking the links in my blog!! You all are so amazing!! ~Nadia


Wedding Plans: 8 Weeks Left

Wedding Plans: 8 Weeks Left

There are eight weeks left before our wedding, and this week the invitations were sent! I will be waiting for the RSVPs to come in and will be busy crocheting the color coded “meal flowers” immediately.
My colors are all jewel tones – an amethyst purple, dark sapphire blue, and an emerald/teal green and of course gold. Each flower indicates a coordinating meal and will be attached to each escort card.


Our reception will be a plated dinner and our selections are the following:

Chicken Option:
(Nadia’s Favorite Food)
Chicken (Murgh) Makhani
A Pakistani dish consisting of a spiced curry mixture of cream, tomato, and butter,
blended together with full flavored roasted boneless chicken pieces served with Basmati rice.

Beef/Seafood Option:
(Nate’s Favorite Food)
Steak/Salmon
6 oz. center cut sirloin steak with king salmon, paired with house whipped Yukon gold potatoes and fresh garlic hericot vert

Vegetarian Option:
(Combined Favorite)
Classic Pesto Linguini
Linguini in light pesto cream with artichoke hearts, sun-dried tomatoes, spinach, onions, and shaved parmesan served with garlic toast

For all kids, we will be serving signature Mac & Cheese.

Before planning a wedding, one never realizes the details that go into coordinating such an event!

Since we are having a Pakistani/Irish fusion wedding held on St. Patrick’s Day weekend, there are fun details from both of our cultures being incorporated into our special day.

My Mehndi is being held a day before our wedding and this event is a fun day for the ladies.  The Henna Ceremony, or the Rasm-e-henna ceremony, typically takes place one or two days prior to the main wedding day. Mehndi is a form of body art from Ancient India, in which decorative designs are created on a person’s body, using a paste, created from the powdered dry leaves of the henna plant. The henna is symbolically placed on the bride’s hands and feet by a professional mehndi artist. The designs are very intricate. Often hidden within the mehndi pattern the name or initials of the groom are applied. In Pakistan, the Mehndi is often one of the most important pre-wedding ceremonies. This ritual is supposed to bring good luck and longevity to the bride’s married life.


The wedding day will all be held at the same place with our ceremony being held in one part of the venue and reception and dinner in the banquet room.

The Walima (Groom’s Reception) is a meal that is held the day after the wedding. It is a feast of traditional Pakistani foods. It is at this ceremony that the bride and groom are formally and publicly showcased as a married couple.

Thankfully we are able to do much of the wedding DIY ourselves. My mom and I have been on the go for the past week, (well since I got engaged, but more so in the past week!) and we have been able to check a lot off the to-do list. We are definitely do-ers and planners! Nate has been sooo incredibly helpful as well, and of course, my dad weighs in to share ideas about the Pakistani parts of our wedding.

We met with our amazing DJ and planned out the music for the best dance party!

I may have mentioned in an earlier blog post that I plan to make all my flowers myself. I have been working on all the flowers for the bouquets, boutonnières, corsages, and centerpieces.


We started to put together an arrangement this past weekend to come up with how to incorporate the crochet flowers into our centerpieces. This was just a rough start, but we are loving how they look against the Lemon Leaf greenery. I have gotten a good start on the flowers and have about 150-175 left to crochet aside from those tiny meal flowers which I will know more when those RSVPs come in.


I crocheted my girls the Wrapped In Jewels Shawl which I will be gifting to them at our Rehearsal dinner. I shared those with you at the end of last year, and I was able to cross that off my list. I also have the Henna Inspired Mandalas that I crocheted and hope to somehow incorporate those into the weekend but not sure where.

Details, details, details!! I love the creative parts of the planning, but the logistics are giving me a touch of worry trying to keep everything straight and organized. So far, it is all coming together very well. My excitement is growing by the day! More updates to come!! Thank you for joining me on this journey!!

~Nadia

My dad will continue to be the videographer, editor, and photographer for our videos when I move away.
Support YARNutopia today so we can continue to bring you clear, quality crochet tutorials even after I get married and move into my new home! There will be an added expense of more travel and hopefully this won’t deter our ability to provide consistent videos on a weekly basis.

Donate Button with Credit Cards


Aunt Lydia’s Crochet Thread Patterns Redheart Now Has Crochet Thread Red Heart Blog – laikas.info

Crochet Tutorial: Wrapped in Jewels Shawl

Crochet Tutorial: Wrapped in Jewels Shawl

My wedding is in March 2018!! I chose regal jewel tone colors for my bridesmaids. Each one of my girls will be gifted my Wrapped In Jewels Shawl accented with pearlized beads and created in their coordinate colors! This beautiful ombre shawl uses Red Heart Super Saver Ombre to create this elegant and striking gradient color. Getting married in Wisconsin in March means those temps are still going to be a bit chilly! My girls standing by my side will be wrapped in a warm hug on my wedding day and beyond. This is a great gift for anyone.

Grab your hooks and this beautiful ombre yarn and get yours started today! Don’t have this yarn? This lovely shawl would look amazing in any color. Imagine ivory as another bridal alternative or match your bridesmaids in a different tone. This is one piece you cannot go wrong with!


Follow along with this video tutorial to learn how to make this shawl:

My dad will continue to be the videographer, editor, and photographer for our videos when I move away.
Support YARNutopia today so we can continue to bring you clear, quality crochet tutorials even after I move into my new home!
There will be an added expense of more travel and hopefully this won’t deter our ability to provide consistent videos on a weekly basis.

Donate Button with Credit Cards

**You can always contact me via Facebook if you have any problems with the pattern. I am happy to help if you have any questions along the way.

***These patterns are copyright YARNutopia © so PLEASE DO NOT COPY, SHARE, ADJUST OR RESELL MY PATTERN. I wrote and tested this pattern myself, from beginning to end. It took a lot of time and work, and I would really like to have it remain “my pattern.”

***You can sell anything you make from my patterns, please just link back to my website YARNutopia.com. Thank you!

Teacher: Nadia Fuad
Video and Editing: Fuad Azmat (My Daddy)
Share your work on Facebook!
Add me on Snapchat: YARNutopia
Follow me on Instagram
Visit My Ravelry Store and add this to your Favorites!
Follow me on Twitter: @YARNutopia
Enjoy this video and subscribe to my channel on YouTube for more tutorials on how to crochet!
Leave a comment, and share with your friends!

Pattern:

Designed by Nadia Fuad
You may sell items made from my pattern, but please reference my website YARNutopia.com.
Please do not copy, sell, and/or post this pattern and claim it as your own.


Materials you will need:
Red Heart Super Saver Ombre Yarn in 2 balls (900 yards of yarn) of Anemone (I made 3 other shawls using the colors: Purple, Deep Teal, and True Blue)
Size I-5.50mm Crochet Hook
Sewing Needles
Transparent Thread
Darice Beads
Yarn Needle
Measuring Tape
Scissors


NOTES:
-This is worked from the top down
-The measurements are: approx. 50 inches across and about 34 inches long. You can make this bigger or smaller if you want since it is a repeat pattern.
-You can use any type of yarn for this project. Gauge is not important.
-I used approximately 900 yards of yarn for this project. (2 skeins of the Ombre yarn)
-If you want to make this shawl larger, you would do Rows 1-46 and then repeat Rows 26-46 and then go onto row 47-50 for the border.

Special stitches:
Ch(s): chain(s)
YO: Yarn Over
St(s): Stitch(es)
Sl st: slip stitch
SC: Single Crochet
HDC: Half-Double Crochet
DC: Double Crochet
FPSC: Front Post Single Crochet
BPSC: Back Post Single Crochet

Pattern:

Ch 4, sl st to first ch to form a ring
Row 1: Ch 3 (counts as DC), [4DC, ch 2, 5 DC] in ring, ch 1, turn. (10 sts)

Row 2: 2 DC in 1st st, [SK next st, DC in next, DC in Sk’d st working around DC] 2 times, [2DC, ch 2, 2 DC] in ch 2 sp, [SK next st, DC in next, DC in sk’d st working around DC] 2 times, 2 DC in last st, ch 1, turn. (16 sts)

Row 3: 2 SC in 1st st, FPSC in each st until ch 2 sp, [2SC, ch 2, 2 SC] in ch 2 sp, FPSC in each st until last st, 2 SC in last st, ch 1, turn. (22 sts)

Row 4: 2 DC in first st, *SK next st, DC in next st, DC in sk’d st working around DC,** repeat from * until ch 2 sp, [2DC, ch 2, 2 DC] in ch 2 sp, repeat from * to ** until last st, 2 DC in last st, ch 1, turn. (28 sts)

Row 5: *SK next st, DC in next st, DC in sk’d st working around DC,** repeat from * until ch 2 sp, [2DC, ch 2, 2 DC] in ch 2 sp, repeat from * to **, ch 1, turn. (32 sts)

Row 6: 2 SC in 1st st, BPSC on each st until ch 2 sp, [2 SC, ch 2, 2 SC] in ch 2 sp, BPSC in each st until last st, 2 SC in last st, ch 1, turn. (36 sts)

Row 7: Repeat Row 4. (44 sts)

Row 8: 2 SC in 1st st, SC in each st until ch 2 sp, [2SC, ch 2, 2 SC] in ch 2 sp, SC in each st until last st, 2 SC in last st, ch 1, turn. (50 sts)

Row 9: 1 DC in each st across putting [2 DC, ch 2, 2 DC] in ch 2 sp, turn. (54 sts)

Row 10: Ch 3, Star stitch 13 times, skip next st, [2 DC, ch 2, 2 DC] in ch 2 sp (see video tutorial on how to start this stitch), Star stitch 13 times, HDC in last st, ch 2, turn. (30 sts)

Row 11: SC in first st, 2 SC in each “eye” of each 13 star stitches, SC in next 2 sts, [2 SC, CH 2, 2 SC] in ch 2 sp, DC in next 2 sts, 2 SC in each “eye” of each 13 star stitches, turn. (60 sts)

Row 12: Ch 3, Star stitch 15 times, skip next st, [2 DC, ch 2, 2 DC] in ch 2 sp (see video tutorial on how to start this stitch), Star stitch 14 times, HDC in last st, ch 1, turn. (34 sts)

Row 13: 2 SC in 1st st, 2 SC in each “eye” of each 14 star stitches, SC in next 2 sts, [2 SC, CH 2, 2 SC] in ch 2 sp, SC in next 2 sts, 2 SC in each “eye” of each 15 star stitches, ch 1, turn. (68 sts)

Row 14: 2 DC in first st, DC in each st across putting [2 DC, ch 2, 2 DC] in ch 2 sp, DC in each st to last st, 2 DC in last st, ch 1, turn. (74 sts)

Row 15:  2 SC in 1st st, FPSC on each st until ch 2 sp, [2 SC, ch 2, 2 SC] in ch 2 sp, FPSC in each st until last st, 2 SC in last st, ch 1, turn. (80 sts)

Row 16: 2 DC in 1st st, [Ch 1, Skip 1 st, DC in next st] until ch 2 sp, Ch 1, [2 DC, CH 2, 2 DC] in ch 2 sp, [Ch 1, Skip 1 st, DC in next st] until last 2 sts, ch 1, sk 1, 2 DC in last st, ch 1, turn. (46 sts)

Row 17: 2 DC in first 2 sts,  [Ch 1, Skip ch sp, DC in next st] until ch 2 sp, Ch 1, [2 DC, CH 2, 2 DC] in ch 2 sp, [Ch 1, Skip 1 st, DC in next st] until last 2 sts, ch 1, 2 DC in last 2 sts, ch 1, turn. (52 sts)

Row 18: 2 DC in 1st st, Ch 1, Skip 1 st, DC in next st, Ch 1, Sk next DC and Ch 1 sp, DC in next st, [Ch 1, Skip ch sp, DC in next st] until ch 2 sp, ch 1, [2 DC, ch 2, 2 DC] in ch 2 sp, [Ch 1, Skip 1 st, DC in next st] until last 4 sts, ch 1, sk ch sp and 4th from last st, DC in next, Ch 1, sk 1, 2 DC in last st, ch 1, turn. (52 sts)

Row 19:  2 DC in first 2 sts,  [Ch 1, Skip ch sp, DC in next st] until ch 2 sp, Ch 1, [2 DC, CH 2, 2 DC] in ch 2 sp, [Ch 1, Skip 1 st, DC in next st] until last 2 sts, ch 1, 2 DC in last 2 sts, ch 1, turn. (58 sts)

Row 20: 2 DC in 1st st, Ch 1, Skip 1 st, DC in next st, Ch 1, Sk next DC and Ch 1 sp, DC in next st, [Ch 1, Skip ch sp, DC in next st] until ch 2 sp, ch 1, [2 DC, ch 2, 2 DC] in ch 2 sp, [Ch 1, Skip 1 st, DC in next st] until last 4 sts, ch 1, sk ch sp and 4th from last st, DC in next, Ch 1, sk 1, 2 DC in last st, ch 1, turn. (58 sts)

Row 21: 2 DC in first st, DC in each ch 1 sp and in each DC st until ch 2 sp, [2 DC ch 2, 2 DC] in ch 2 sp, DC in each ch 1 sp and in each DC st until last st, 2 DC in last st, ch 1, turn. (116 sts)

Row 22: 2 SC in 1st st, BPSC on each st until ch 2 sp, [2 SC, ch 2, 2 SC] in ch 2 sp, BPSC in each st until last st, 2 SC in last st, ch 1, turn. (122 sts)

Row 23: 2 DC in first st, *SK next st, DC in next st, DC in sk’d st working around DC,** repeat from * until ch 2 sp, [2DC, ch 2, 2 DC] in ch 2 sp, repeat from * to ** until last st, 2 DC in last st, ch 1, turn. (128 sts)

Row 24: *SK next st, DC in next st, DC in sk’d st working around DC,** repeat from * until ch 2 sp, [2DC, ch 2, 2 DC] in ch 2 sp, repeat from * to **, ch 1, turn. (132 sts)

Row 25: *SK next st, DC in next st, DC in sk’d st working around DC,** repeat from * until ch 2 sp, [2DC, ch 2, 2 DC] in ch 2 sp, repeat from * to **, ch 1, turn. (136 sts)

Row 26: *SK next st, DC in next st, DC in sk’d st working around DC,** repeat from * until ch 2 sp, [2DC, ch 2, 2 DC] in ch 2 sp, repeat from * to **, ch 1, turn. (140 sts)

Row 27: *SK next st, DC in next st, DC in sk’d st working around DC,** repeat from * until ch 2 sp, [2DC, ch 2, 2 DC] in ch 2 sp, repeat from * to **, ch 1, turn. (144 sts)

Row 28: 2 SC in 1st st, BPSC on each st until ch 2 sp, [2 SC, ch 2, 2 SC] in ch 2 sp, BPSC in each st until last st, 2 SC in last st, ch 1, turn. (150 sts)

Row 29: Repeat Row 10 (See video tutorial to start this row). (78 sts)

Row 30: Repeat Row 11. (156 sts)

Row 31: Repeat Row 12. (82 sts)

Row 32: Repeat Row 13. (164 sts)

Row 33: Repeat Row 14. (170 sts)

Row 34: Repeat Row 22. (176 sts)

Row 35: Repeat Row 16. (94 sts)

Row 36: Repeat Row 17. (100 sts)

Row 37: Repeat Row 18. (100 sts)

Row 38: Repeat Row 19. (106 sts)

Row 39: Repeat Row 20. (106 sts)

Row 40: Repeat Row 21. (212 sts)

Row 41: Repeat Row 3. (218 sts)

Row 42: Repeat Row 23. (224 sts)

Row 43: Repeat Row 24. (228 sts)

Row 44: Repeat Row 25. (232 sts)

Row 45: Repeat Row 26. (236 sts)

Row 46: Repeat Row 27. (240 sts)

Row 47: 2 DC in first st, 1 DC in each st across putting [2 DC, ch 2, 2 DC] in ch 2 sp and 2 DC in last st, ch 1, turn.

Row 48: Repeat Row 47, continue to DC on long edge of shawl as well to clean up the edge. (See video tutorial for visual instructions) sl st to first DC.
Note: I did SC along the edge closer to the center rows because there was a curve so I tried to straighten out this long edge of the shawl. (I show how I did this in the video tutorial)

Border:
Rnd 49: Ch 1, HDC in 1st st, [CH 1, sk 1 st, HDC in next] until ch 2 sp, [2 HDC, ch 2, 2 HDC] in ch 2 sp, [CH 1, sk 1 st, HDC in next] until end, continue to HDC across the long edge, sl st to first HDC.

Rnd 50: Sl st in first Ch 1 sp, ch 1, SC in same sp, *[3DC, Picot, 3DC] in next ch 1 sp, SC in next 2 ch 1 sps,** repeat from * until point ch 2 sp, (see video tutorial if you only have 1 space to SC into instead of 2 sps before the point)  SC in ch sp before the point, [3 DC, Picot, 3 DC] in point ch sp, SC in next ch sp,repeat from * to ** until end.
(See video tutorial if this is a little confusing)
Fasten off, weave in all ends.

Assembly:
Sew beads into shawl using transparent thread and beads.
See video tutorial for visual instructions on sewing beads to shawl.

Enjoy!


This post contains affiliate links, which I may be compensated for when you make a purchase. That means if you click on any link and buy from the linked websites, I will receive a small percentage of the value of your order. The amount you pay is not changed. Thank you for all your support in clicking the links in my blog!! You all are so amazing!! ~Nadia

The yarn provided for this pattern is courtesy of Red Heart Yarns

We’re tying the knot with yarn!

On March 4th, 2017, while traveling through Europe, Nate surprised me with a spontaneous proposal in the Amsterdam Schipol Airport. As we were heading to the bathrooms (haha!) he got down on one knee and asked me to marry him!

He was shaking, I was shaking, I was crying, and of course, I said YES! We’ve been talking about it for some time now and all the plans we were making were leading to this exciting event.

It was very fitting that we had this private moment that included the two of us, my brother and my mom who was able to capture these lovely photos.


No matter how tired we were from all the traveling, our joy carried us through our 13 hour layover where we ventured into Amsterdam city for a celebration dinner.


Upon arrival back to the United States, and of course after letting my close friends and family know this exciting news, we started making immediate plans for our wedding.


We are looking ahead and planning an early 2018 wedding celebration. We recently had some engagement photos taken and made our formal announcement on our personal social media accounts. We now wish to share it with all the YARNutopians!


Photo credit: Fuad Azmat (My daddy!)

As we journey ahead in the next year planning our event, we are excited to tie in elements of our cultures and OF COURSE, elements of crochet! I am going a different route on my dress, as many have already asked me if I was going to crochet my wedding gown, but I am absolutely 100% going to incorporate other small details of crochet for this special day.

I’m excited to share this year-long journey with my amazing YARNutopia family and I will be creating tutorials of fun elements that I plan to use on the big day!

I am excited to hear suggestions on crochet projects that you have used for your special events! I’m always open to hearing, so please feel free to share your ideas!! This will be a fun way to share this together!

Please join us in sharing our joy and happiness as we move onto this new and exciting chapter of our lives!

Love,
Nadia and Nate

Crochet Tutorial: Dolls-Bride and Groom

Crochet Tutorial: Dolls-Bride and Groom

I was recently planning a bridal shower for my brother’s fiancé and wanted to do something special using crochet. I ran across a blog, Amigurumi Askina, featuring a bride and groom doll set. The pattern happened to be in Turkish so I used a bit of translation and modifications and made up my own pattern to create this set of dolls. My tutorial videos are in two parts. The first part demonstrates the bride, and part two shows how to make the groom.
Bride and Groom

These adorable dolls are great to feature at a bridal shower or wedding, and you can modify them to make a prince & a princess, a king & a queen, just a boy & a girl, and, with marriage equality, it would even be cute to make two brides or two grooms!

Bride

Groom

Another thing you could customize are the features of each doll. You could change the eye color, hair color, skin tone, flower colors, dress color, and suit color. You can add personal touches to emulate the person you are trying to make. You can get creative with these, the possibilities are endless!!

The final product is not your typical tiny amigurumi. These measure approximately 8-10 inches tall (20-25 cm).

Anybody would be happy to receive such a unique and special gift! This is not an easy project, as I say in my video, I would recommend an intermediate to advanced level crocheter to attempt this, but feel free if you want a little bit of a challenge!

This is how I displayed the dolls at the bridal shower. Using the groom pattern, I modified it to make a little boy to represent my nephew.
Family

Before I share the video and pattern, I want to share with you a personal moment of my nephew playing with the dolls. His parents are the ones getting married this summer and he was playing “wedding.” haha! He even made the bride and groom kiss! It was priceless!
Playing Wedding

Part 1: Bride

Part 2: Groom


My dad will continue to be the videographer, editor, and photographer for our videos when I move away.
Support YARNutopia today so we can continue to bring you clear, quality crochet tutorials even after I move into my new home!
There will be an added expense of more travel and hopefully this won’t deter our ability to provide consistent videos on a weekly basis.

Donate Button with Credit Cards

Share your finished work on my Facebook page!

Designed by Nadia Fuad
Questions? Leave a comment!
You may sell items made from my pattern, but please reference my name and Etsy Shop (YARNutopia).
Please do not copy and post this pattern and claim it as your own.
Thank you, and happy hooking!

 Materials:

Red Heart Super Saver Medium (worsted) weight yarn: Black, White, Cream colored (skin), Red, Golden or Brown (hair color)
Ribbon
Tulle
Small Beads
Polyfil
Size E-3.50 mm
Yarn Needles
Scissors

Special Stitches:

Ch: chain

Sl st: slip stitch

DC: Double Crochet

DC2Tog: Double crochet decrease

Sc: single crochet

SC2TOG: single crochet decrease

Popcorn stitch: yarn over, go into next st, yarn over, pull through, yarn over go into same st, yarn over pull through, yarn over, go into same st, yarn over pull through (you should have 7 loops on your hook), yarn over and pull through all 7 loops.

RS: Right Side

WS: Wrong Side

Special Instructions:

-Pattern for head, hair, body, arms are worked in continuous rounds.

-For the bouquet, I took the Red Heart Yarn 10 ply and pulled it apart in half, and used that. You can use thin red thread if you prefer for the flowers.

-For embroidering the face, I also pulled the yarn apart, but you can use thread/floss for the face as well.

Bride:

Head:

With beige (skin tone)
ch 2

Rnd 1: Sc 6 in 2nd ch from hook. (6)

Rnd 2: Sc 2 in each st. (12)

Rnd 3: (Sc 2 in next st, sc in next st) 6 times. (18)

Rnd 4: (Sc 2 in next st, sc in next 2 sts) 6 times. (24)

Rnd 5: (Sc 2 in next st, sc in next 3 sts) 6 times. (30)

Rnd 6: (Sc 2 in next st, sc in next 4 sts) 6 times. (36)

Rnds 7-16: Sc in each st. (36)

Rnd 17: (Sc2tog, sc in next 4 sts) 6 times. (30)

Assembly step:
Embroider a nose with the same color yarn in the center of the face. Embroider black: eyebrows, eyes, eyelashes. Embroider with red, lips. Then start stuffing the head and continue crocheting.

See video for assembly assistance and see photo for guide.

Rnd 18: (Sc2tog, sc in next 3 sts) 6 times. (24)

Rnd 19: (Sc2tog, sc in next 2 sts) 6 times. (18)
Rnd 20: (Sc2tog, sc in next st) 6 times. (12)

Stuff in any more polyfil that can fit and fasten off with long tail for sewing.

Hair:

With hair color (in mine I used golden)

ch 2

Rnd 1: Sc 6 in 2nd ch from hook. (6)

Rnd 2: Sc 2 in each st. (12)

Rnd 3: (Sc 2 in next st, sc in next st) 6 times. (18)

Rnd 4: (Sc 2 in next st, sc in next 2 sts) 6 times. (24)

Rnd 5: (Sc 2 in next st, sc in next 3 sts) 6 times. (30)

Rnd 6: (Sc 2 in next st, sc in next 4 sts) 6 times. (36)

Rnd 7-13: Sc in each st. (36)

Rnd 14: sc in next 10 sts, dc in next 10 sts, sl st in next 2 sts, dc in next 10 sts, sl st until the end of the round

Fasten off with long tail for sewing.

Bun:

With same hair color

ch 2

Rnd 1: Sc 6 in 2nd ch from hook. (6)

Rnd 2: Sc 2 in each st. (12)

Rnd 3: (Sc 2 in next st, sc in next st) 6 times. (18)

Rnd 4: (Sc 2 in next st, sc in next 2 sts) 6 times. (24)

Rnds 5-9: Sc in each st (24)

Fasten off with long tail for sewing. Add stuffing.

Assembly step:

Sew hair to stuffed head. Sew bun to top center of the back of head (use photo for guide)

Ears: (make 2)

Ch 2

4dc in 2nd ch from hook. Fasten off with long tail, sew to each side of head.


Legs and Body:

Legs:

With beige

ch 2

Rnd 1: Sc 6 in 2nd ch from hook. (6)

Rnd 2: Sc 2 in each st. (12)

Rnd 3: (Sc 2 in next st, sc in next st) 6 times. (18)

Rnd 4: (Sc 2 in next st, sc in next 2 sts) 6 times. (24)

Rnds 5-7: Sc in each st (24)

Rnd 8: (Sc2tog, sc in next 2 sts) 6 times. (18)

Rnd 9: Sc2tog, sc in the next 16 sts. (17)

Rnd 10: Sc2tog, sc in the next 15 sts. (16)

Rnd 11: Sc2tog, sc in the next 14 sts. (15)

Rnds 12-21: Sc in each st. (15)

For one of the legs, fasten off.

For the second leg, do not fasten off! You will continue to work this leg to join the two together.

Body:

Now you will join the two legs together, and form one body.

Rnd 22: Sc in each st of round 21 of the leg you are working on. Then, sc in each st of round 21 of the other leg. (30)

Rnd 23-29: Sc in each st (30)

Assembly step:

Stuff both legs and continue working.

Rnd 30: sc2tog, sc in the next 13, sc2tog, sc in the next 13. (28)

Rnd 31: sc2tog, sc in the next 12, sc2tog, sc in the next 12. (26)

Rnd 32: sc in each st. (26)

Rnd 33: sc2tog, sc in the next 11, sc2tog, sc in the next 11. (24)

Rnd 34:  (Sc2tog, sc in next 2 sts) 6 times. (18)

Rnd 35: sc in each st. (18)

Assembly Step:

Stuff the rest of the body completely and continue working.

Rnd 36: (Sc2tog, sc in next st) 6 times. (12)

Fasten off with long tail for sewing.

Assembly step:

Sew head to body.

Arms: (Make 2)

With beige (same skin tone)

Ch 2

Rnd 1: sc 6 in 2nd ch from hook. (6)

Rnd 2: Sc 2 in each st. (12)

Rnd 3: sc in each st. (12)

Rnd 4:  Popcorn stitch, sc in next 11 sts. (12)

Rnd 5: sc in each st. (12)

Rnd 6: (sc2tog, sc in next 2 sts) 3 times. (9)

Rnds 7-14: sc in each st. (9)

Assembly Step:

Slightly stuff hand part, and less stuffing in arm.

Rnds 15-20: sc in each st. (9)

Fasten off with long tail for sewing.

Sew to each side of body.

Dress:

With White (or whatever color you want your dress to be)

Ch 24, wrap chain around bride chest and sl st to first ch to form ring.

Rnd 1: ch 1 sc in each ch around, sl st to beginning sc, ch 2

Rnd 2: dc in each st around. Sl st to beginning dc, ch 2

Rnd 3: 2 sc in first st, sc in next 3 sts, *2sc in next st, sc in next 3 sts. Repeat from * around. Sl st to beginning sc, ch 2. (30)

Rnd 4: 2 sc in first st, sc in next 4 sts. *2sc in next st, sc in next 4 sts. Repeat from * around. Sl st to beginning sc, ch 2. (36)

Rnd 5: 2 sc in first st, sc in next 5 sts. *2sc in next st, sc in next 5 sts. Repeat from * around. Sl st to beginning sc, ch 2. (42)

Rnd 6: DC 2 in each st around, sl st to beginning dc, ch 2. (84)

Rnd 7-18: Dc in each st around, sl st to beginning dc, ch 2. (84)

Fasten off.

Sew in all ends.

Flowers: Make 3

With Red Thread, watch video on how to thin out Red Heart Yarn.

Ch 16

3dc in 3rd ch from hook, *sl st in next ch, 3dc in next ch, sl st in next ch. Repeat from * across. (7 petals)

Fasten off with long tail for sewing.

Bouquet holder

With White,

Ch 2

Rnd 1: Sc 6 in 2nd ch from hook (6)

Rnd 2-5: Sc in each st around. (6)

Rnd 6: Sc 2 in each st. (12)

Rnd 7: (Dc 2 in next st, Dc in next st) 6 times. (18)

Fasten off with long tail

Sew to hand.

Sew flowers into bouquet holder.

Assembly:

Sew 1 bead into center of each flower. Sew 1 bead into each ear, put 10 beads on a string and wrap around neck for a necklace.

Cut a square of tulle, poke a hole into it and wrap it around the bun in the hair for the veil.

Tie ribbon around waist and around bun.

Groom:

Head:

With beige (skin tone)
ch 2

Rnd 1: Sc 6 in 2nd ch from hook. (6)

Rnd 2: Sc 2 in each st. (12)

Rnd 3: (Sc 2 in next st, sc in next st) 6 times. (18)

Rnd 4: (Sc 2 in next st, sc in next 2 sts) 6 times. (24)

Rnd 5: (Sc 2 in next st, sc in next 3 sts) 6 times. (30)

Rnd 6: (Sc 2 in next st, sc in next 4 sts) 6 times (36)

Rnd 7: (Sc 2 in next st, sc in next 5 sts) 6 times. (42)

Rnds 8-17: Sc in each st. (42)

Rnd 18: (Sc2tog, sc in next 5 sts) 6 times. (36)

Assembly step:
Embroider a nose with the same color yarn in the center of the face. Embroider black: eyebrows, lips, eyes. Then start stuffing the head and continue crocheting.

See video for assembly assistance and see photo for guide.

Rnd 19: (Sc2tog, sc in next 4 sts) 6 times. (30)

Rnd 20: (Sc2tog, sc in next 3 sts) 6 times. (24)

Rnd 21: (Sc2tog, sc in next 2 sts) 6 times. (18)
Rnd 22: (Sc2tog, sc in next st) 6 times. (12)

Stuff in any more polyfil that can fit and fasten off with long tail for sewing.

Hair:

With hair color (in mine I used dark brown)

ch 2

Rnd 1: Sc 6 in 2nd ch from hook. (6)

Rnd 2: Sc 2 in each st. (12)

Rnd 3: (Sc 2 in next st, sc in next st) 6 times. (18)

Rnd 4: (Sc 2 in next st, sc in next 2 sts) 6 times. (24)

Rnd 5: (Sc 2 in next st, sc in next 3 sts) 6 times. (30)

Rnd 6: (Sc 2 in next st, sc in next 4 sts) 6 times (36)

Rnd 7: (Sc 2 in next st, sc in next 5 sts) 6 times. (42)

Rnd 8-12: Sc in each st. (42)

Rnd 13: sc in next 10 sts, dc in next 10 sts, ch 4, dc in 2nd ch from hook and in the next 2 sts, dc in next 10 sts on round 11, sl st until the end of the round

Fasten off with long tail for sewing.

Ears: (make 2)

With Skin Tone (beige)

Ch 2

4dc in 2nd ch from hook. Fasten off with long tail, sew to each side of head.

Legs and Body:

Legs:

With black

ch 2

Rnd 1: Sc 6 in 2nd ch from hook. (6)

Rnd 2: Sc 2 in each st. (12)

Rnd 3: (Sc 2 in next st, sc in next st) 6 times. (18)

Rnd 4: (Sc 2 in next st, sc in next 2 sts) 6 times. (24)

Rnds 5-7: Sc in each st (24)

Rnd 8: (Sc2tog, sc in next 2 sts) 6 times. (18)

Rnd 9: Sc2tog, sc in the next 16 sts. (17)

Rnd 10: Sc2tog, sc in the next 15 sts. (16)

Rnd 11: Sc2tog, sc in the next 14 sts. (15)

Rnd 12: in BLO, sc in each st. (15)

Rnds 13-24: in Both Loops now, Sc in each st. (15)

For one of the legs, fasten off.

For the second leg, do not fasten off! You will continue to work this leg to join the two together.

Stuff both legs and continue working.

Body:

Now you will join the two legs together, and form one body.

Continue With black

Rnd 25: Sc in each st of round 21 of the leg you are working on. Then, sc in each st of round 21 of the other leg. (30)

Rnds 26-27: Sc in each st (30)

Rnd 28: (Sc 2 in next st, sc in next 4 sts) 6 times. (36)

Change color to White

Rnds 29-31: sc in each st. (36)

Rnd 32: (Sc2tog, sc in next 4 sts) 6 times. (30)

Assembly step:

Stuff both legs and continue working.

Rnd 33: sc2tog, sc in the next 13, sc2tog, sc in the next 13. (28)

Rnd 34: sc2tog, sc in the next 12, sc2tog, sc in the next 12. (26)

Rnd 35: sc in each st. (26)

Rnd 36: sc2tog, sc in the next 11, sc2tog, sc in the next 11. (24)

Rnd 37:  (Sc2tog, sc in next 2 sts) 6 times. (18)

Rnd 38: sc in each st. (18)

Assembly Step:

Stuff the rest of the body completely and continue working.

Rnd 39: (Sc2tog, sc in next st) 6 times. (12)

Fasten off with long tail for sewing.

Assembly step:

Sew head to body. Stuff any little bit that may need to be added.

Jacket:

I recommend watching the video for the Jacket portion.

With Black,

Ch 40 (or enough to fit around the waist of the body—where the white starts)

Row 1: Dc in 3rd ch from hook and across, ch 2, turn (38 dc)

Row 2-3: dc across, ch 2, turn (38)

Row 5: dc2tog, dc across until the last 2 sts, dc2tog on last 2 sts. (36)

Row 6: dc2tog, dc across until the last 2 sts, dc2tog on last 2 sts (34)

Row 7: dc2tog, dc across until the last 2 sts, dc2tog on last 2 sts (32)

(If you need jacket longer, just repeat the last row until it is long enough. I ended up doing this repeat for the last row in my video: *dc2tog, dc, repeat from * across.) It may only take you 5 or 6 rows for your jacket to be long enough.

Fasten off with long tail for sewing.

Assembly step:

Sew jacket around body and sew it closed and sew it to body to secure it in place.

Arms: (Make 2)

With beige (same skin tone)

Ch 2

Rnd 1: sc 6 in 2nd ch from hook. (6)

Rnd 2: Sc 2 in each st. (12)

Rnd 3: sc in each st. (12)

Rnd 4:  Popcorn stitch, sc in next 11 sts. (12)

Rnd 5: sc in each st. (12)

Change to black

Rnd 6: (sc2tog, sc in next 2 sts) 3 times. (9)

Rnds 7-20: sc in each st. (9)

Assembly Step:

Slightly stuff hand part, and less stuffing in arm.

Rnds 15-20: Sc in each st. (9)

Fasten off with long tail for sewing.

Sew arms to outside of jacket on each side of body.

Bow Tie:

With Black,

Ch 5

Row 1: Sc in 2nd ch from hook and across.

Fasten off with long tail.

Take long tail and sew it to the center of the bow, wrap yarn around the center a couple times. Then sew to neck to secure it.

Assembly step:

Sew 2 beads in front of jacket for buttons.

This post contains affiliate links, which I may be compensated for when you make a purchase. That means if you click on any link and buy from the linked websites, I will receive a small percentage of the value of your order. The amount you pay is not changed. Thank you for all your support in clicking the links in my blog!! You all are so amazing!! ~Nadia

The yarn provided for this pattern is courtesy of Red Heart Yarns

***These patterns are copyright YARNutopia © so PLEASE DO NOT COPY, SHARE, ADJUST OR RESELL MY PATTERN. I wrote and tested this pattern myself, from beginning to end. It took a lot of time and work, and I would really like to have it remain “my pattern.” Thank you!

Teacher: Nadia Fuad
Video and Editing: Fuad Azmat

Share your work on Facebook!

Shop Here

Add me on Snapchat: YARNutopia

Follow me on Instagram

Follow me on Twitter: @YARNutopia

Enjoy this video and subscribe to my channel on YouTube for more tutorials on how to crochet!
Leave a comment, and share with your friends!

Happy Hookin’
~Nadia


This Week's Coupon at Michaels.com