We would like to introduce our new baby boy to our YARNutopia community. There are NO words to express how much we are in love with this precious little peanut and how it feels to be first time parents; so instead of doing that at this time, we ask you to please enjoy these exclusive beautiful photos – many of which are being shared here for the very first time.
He arrived a little earlier than expected, and although nothing about his delivery was easy, in the end, holding him in our arms was so worth it! Oh. MY. Gosh. THE LOVE!
Nate and I are overwhelmed with joy and want to share our happiness with our online family community. As soon as I am feeling better, I will write a little more about this entire experience in detail!
So many people tried to tell us how this would feel. NOTHING compares to the real thing. NOTHING!! WE ARE SO IN LOVE WITH HIM!
Name: Nasir Nathan
Born June 13th, 2019 at 12:15pm
Weight: 6 lbs, 12 oz.
Length: 18.9 inches
Things we observed so far: He has his Daddy’s face and wavy dark hair, but he has Mommy’s nose and dimples. He has long fingers like Mommy but Daddy’s toes lol. As we continue to discover one another, we look forward to finding more of these amazing connections. It is the most profound feeling ever to meet this tiny human, see pieces of ourselves in him, and know that we made him!
This past Sunday, my Aunt and my Mom organized a baby shower for Nate and me. To say it was amazing is such an understatement! Not only did my family have so much in store for us, there were epic surprises to be showered on us as well.
After opening our gifts from family and friends, my mom made an announcement that there were more gifts. Confused, I wasn’t sure what she meant.
A quick background
I am part of a large online blogger community. In our private group, this blogger community shares ideas and support for one another. Besides my personal family, these ladies feel like family even though we haven’t met in real life. I feel like we know one another despite that we haven’t met. We talk almost daily and check in with one another. We share patterns and advice, we count on each other in our shared desire to grow our craft. We have a sisterhood that transcends the miles and continents.
So, when my mom announced that this incredible group of ladies had conspired to bring their own version of an online baby shower to my family baby shower, I was so overwhelmed with joy and shock! It felt so amazing to find out that together, they reached out to be a part of this special day. They coordinated through Marly Bird to send surprise packages to my mom and my aunt. Each package was a gift for our sweet baby boy.
Both Nate and I could not believe it! We had NO CLUE! Seriously, my mom is the best at keeping secrets because I talk to her a half dozen times a day and NOT ONCE did she even hint there was this in store for us at the shower!! As soon as my Aunt Gail brought this giant box full of gifts I started getting emotional all over again!
Each crochet designer/blogger created something extraordinarily special for this baby. Below, please join me in this video as I open these wonderful gifts. Please understand that in this moment I was so emotional and overwhelmed. Tears flowed freely, my nose was running wild, and I kept repeating how awesome it was and how much in shock this felt!
I am in complete awe of these amazing women. Not only are they spectacular designers and creators, but I have the joy of calling each of them my FRIEND! WE are so lucky. I am so lucky. This baby is so lucky and so loved.
From the bottom of my full heart, THANK YOU!! There are no words to describe this feeling. I am so grateful for your gifts of time and creativity. Thank you for your gift of love and friendship. Again, my heart is so full.
On a side note. In the last frame of the video I was hugging a teddy bear. Some of you may not know that at the end of March we lost my Grandpa Bob. In January, he was told by his doctors he had about six months to live. He had hopes to live long enough to meet my baby. My grandpa was so supportive and caring through my journey through illness and life, and he wanted to be here to see me through this special time. God had other plans for him. He passed away on March 24th, 2019.
My mom took one of his shirts and sent it in to a designer on Etsy. She made a memory teddy bear out of my grandpa’s shirt. My mom had a photo of my grandpa and me, and in it he wore that same shirt. She gifted both together – the photo in a frame and this sweet bear to put in the nursery. This gift was so special and although my Grandpa won’t be here, a small part of him will always be with us.
You can’t go wrong with this ensemble!! Perfect for any baby on your gift giving list or any special baby event! Change up the colors for a boy or a girl! There’s definitely something to love in this set! These pieces can be made any time of year! Make one or make all four pieces below. Click the links or the photos to be redirected to their written patterns and video tutorials. All crochet patterns in this post are FREE!
On the 7th Day of Christmas, my true love models for me, this Shred the Slopes Hat that is perfect for when you go ski. Or in his case, snowboarding, but that doesn’t rhyme. haha! Let’s just say it’s perfect for any cold weather conditions! This fabulous hat is the next project in our holiday series. This hat uses Herringbone Half Double Crochets to make a simple and fabulous design!
Watch this video tutorial to learn how to make this hat:
My dad will continue to be the videographer, editor, and photographer for our videos when I move away.
Support YARNutopia today so we can continue to bring you clear, quality crochet tutorials even after I move into my new home!
There will be an added expense of more travel and hopefully this won’t deter our ability to provide consistent videos on a weekly basis.
**You can always contact me via Facebook if you have any problems with the pattern. I am happy to help if you have any questions along the way.
***You can sell anything you make from my patterns, please just link back to my website YARNutopia.com. Thank you!
Teacher: Nadia Fuad
Video and Editing: Fuad Azmat (My Daddy)
Share your work on Facebook!
Add me on Snapchat: YARNutopia
Follow me on Instagram
Visit My Ravelry Store and add this to your Favorites!
Follow me on Twitter: @YARNutopia
Enjoy this video and subscribe to my channel on YouTube for more tutorials on how to crochet!
Leave a comment, and share with your friends!
Pattern:
Designed by Nadia Fuad You *may* sell items made from my pattern, but please reference my website YARNutopia.com.
Please do not copy, sell, and/or post this pattern and claim it as your own.
NOTES:
-This hat is worked flat and then seamed up the back.
-This hat uses Herringbone Half Double Crochet stitches
-This hat is a unisex design
-This hat can be made in any size. Simply start with any amount of chains that you want the height of your hat to be. Click here to get the size chart
-The finished hat measures 26 inches around when stretched and is 10 inches long.
Special stitches:
Ch(s): chain(s)
YO: Yarn Over
St(s): Stitch(es)
Sl st: slip stitch
SK: Skip
SC: Single Crochet
HDC: Half Double Crochet
HHDC: Herringbone Half Double Crochet
BLO: Back Loop Only
FLO: Front Loop Only
Pattern:
If you have any confusion or difficulty with reading this pattern, please watch the video tutorial to have visual instructions.
Ch 35 or any amount for the measurement you need to make a hat. Click here to get the size chart Row 1: HHDC in 3rd ch from hook and across. Ch 1, turn. (34 sts)
Rows 2-6: Working in BLO, HHDC in each st across, ch 1, turn.
Rows 7-10: Working in Both Loops, SC in each st across, ch 1, turn.
Rows 11-16: Working in BLO, HHDC in each st across, ch 1, turn.
Rows 17-20: Working in Both Loops, SC in each st across, ch 1, turn.
Rows 21-26: Working in BLO, HHDC in each st across, ch 1, turn.
Rows 27-30: Working in Both Loops, SC in each st across, ch 1, turn.
Rows 31-36: Working in BLO, HHDC in each st across, ch 1, turn.
Rows 37-40: Working in Both Loops, SC in each st across, ch 1, turn.
You could fasten off here or make it wider.
Rows 41-46: Working in BLO, HHDC in each st across, ch 1, turn.
Rows 47-50: Working in Both Loops, SC in each st across, ch 1, turn.
Fasten off with long tail for sewing.
Assembly:
Sew the back seam closed, Make pom and sew to top of hat, SC around bottom edge of hat to clean up the edges.
This post contains affiliate links, which I may be compensated for when you make a purchase. That means if you click on any link and buy from the linked websites, I will receive a small percentage of the value of your order. The amount you pay is not changed. Thank you for all your support in clicking the links in my blog!! You all are so amazing!! ~Nadia
It starts with a chill in the air and dew on the grass, the time of the year when we begin to add an extra layer for warmth. Why not do that in style for someone you love? With a touch of old-fashioned elegance and sophisticated elements of Jay Gatsby, The Classic Man Scarf is the perfect accessory for the man in your life. I have a personal bias with this particular model, being that he happens to be the man in MY life! This scarf is very versatile and can be worn in a multitude of ways as shown in these photos. The length provides possibility for many different looks.
I combined a variety of stitches and textures to create this lovely piece that is sure to please even the most fashion conscious individual. Using the waffle stitch, half double crochet ribbed stitches, and waves, this multi-textured scarf is a perfect design for anyone. My design was made with three colors of soft yarn giving it all the comfort and warmth needed when we can’t get away from the cold weather.
Whether it’s a cool autumn day and Jack Frost is nipping at your nose or there is a Polar Vortex chilling you to the bone, The Classic Man Scarf is the perfect accessory for all those times you need to keep yourself nice and toasty, but still look fantastic doing it!
No photo shoot is complete without a few fun bloopers! We work hard, but play hard too! Enjoy!
My dad will continue to be the videographer, editor, and photographer for our videos when I move away.
Support YARNutopia today so we can continue to bring you clear, quality crochet tutorials even after I move into my new home!
There will be an added expense of more travel and hopefully this won’t deter our ability to provide consistent videos on a weekly basis.
Follow along with this video tutorial to learn how to make this scarf:
Enjoy this video and subscribe to my channel on YouTube for more tutorials on how to crochet!
Leave a comment, and share with your friends!
Pattern:
Designed by Nadia Fuad
Questions? Leave a comment! You may sell items made from my pattern, but please reference my name and Etsy Shop (YARNutopia). Please do not copy and post this pattern and claim it as your own.
NOTES:
-You can use any type of yarn you want for this project as long as you have about 510 yards of yarn.
-You can use as many colors as you want and you don’t have to make this a masculine scarf if you want to make it in feminine colors, this would be pretty for anybody!
-This scarf measures 66 inches (167 cm) long, but you can continue the repeat and make it bigger if you want.
-The main part (wavy stitch) of this scarf is in multiples of 14+2 so you can make this as big as you want.
Special Stitches:
Ch: chain
St(s): Stitch(es)
Sl st: slip stitch
SC: Single Crochet
DC: Double Crochet
TR: Treble Crochet
BLO: Work in the Back Loop Only
FPDC: Front Post Double Crochet
BPDC: Back Post Double Crochet
Scarf Main portion (Wavy)
With Charcoal
Ch 184 (Or any multiple of 14 + 2) Row 1: SC in 2nd ch from hook, [SC in next, HDC in next 2, DC in next 2, TR in next 3, DC in next 2, HDC in next 2, SC in next 2], repeat across. SC in last st. Row 2: Ch 1, turn, sc in 1st st, *SC in next, HDC in next 2, DC in next 2, TR in next 3, DC in next 2, HDC in next 2, SC in next 2, repeat from * across. SC in last st. turn. Row 3: With Black, Work in the 3rd Loop of each st, ch up 3, DC in each st across. (See video tutorial to see where 3rd loop is) Row 4: With Charcoal: Sl St in each St across. Row 5: Ch 4 (counts as TR), *TR in next, DC in next 2, HDC in next 2, SC in next 3, HDC in next 2, DC in next 2, TR in next 3, repeat from * across. End with TR in last st. Row 6: Repeat Row 5 Row 7: Repeat Row 3 with Black yarn Row 8: Repeat Row 4 Row 9-16: Repeat Rows 1-8 Once more Row 17: Repeat Row 1 with Charcoal Row 18: Repeat Row 2 Round 19: Ch up 3, DC in same st, work down the short side of the scarf, DC 32 sts evenly down the side (see video tutorial for specifics on where to place sts), when you get to the foundation row,
Sides: Row 1: With Blue: Start in the middle DC in corner. Ch 1, HDC in each st to next corner middle DC (32 sts)
Row 2: CH 1, HDC in each st across.
Rows 3-7: Repeat Row 2
Change Color
Row 8: Ch 3 (counts as DC), DC across, turn. (32)
Row 9: Ch 3, [DC in next st, FPDC in next, DC in next 2] 10 times, ch 3 turn.
Row 10: DC in next 2 sts, [FPDC in next 2 sts, DC in next st] 9 times, DC in last 2 sts.
Rows 11-20: Repeat Rows 9 and 10
Row 21: DC across. Fasten off. Weave in all ends.
Enjoy!!
“Being a true gentleman never goes out of fashion.” ~Unknown
This post contains affiliate links, which I may be compensated for when you make a purchase. That means if you click on any link and buy from the linked websites, I will receive a small percentage of the value of your order. The amount you pay is not changed. Thank you for all your support in clicking the links in my blog!! You all are so amazing!! ~Nadia
The yarn provided for this pattern is courtesy of Red Heart Yarns
As our “All Things Boy” week draws to a close, we end with a pair of Baby Boy Knickers with Suspenders. This tiny pair of pants are sure to bring out many ‘oohs’ and ‘ahhs’ because they are just that cute!
Here they are paired with a little t-shirt onesie.
These would look adorable with any pairing!
These are very versatile. You do not have to add the suspenders. You can add a drawstring. You can make these as big or as small as you’d like! I give information for larger sizes in the NOTES section, below.
Check out the other videos I filmed this week to complete this whole ensemble!
View this video tutorial to learn how to make these little knickers:
My dad will continue to be the videographer, editor, and photographer for our videos when I move away.
Support YARNutopia today so we can continue to bring you clear, quality crochet tutorials even after I move into my new home!
There will be an added expense of more travel and hopefully this won’t deter our ability to provide consistent videos on a weekly basis.
***You can sell anything you make from my patterns, please just link back to my website YARNutopia.com. Thank you!
Teacher: Nadia Fuad
Video and Editing: Fuad Azmat (My Daddy)
Share your work on Facebook!
Add me on Snapchat: YARNutopia
Follow me on Instagram
Visit My Ravelry Store and add this to your Favorites!
Follow me on Twitter: @YARNutopia
Enjoy this video and subscribe to my channel on YouTube for more tutorials on how to crochet!
Leave a comment, and share with your friends!
Designed by Nadia Fuad
You may sell items made from my pattern, but please reference my website YARNutopia.com.
Please do not copy, sell, and/or post this pattern and claim it as your own.
NOTES:
-To make this smaller or bigger, use a smaller or bigger hook size. I do not have stitch counts to make these larger or smaller though. Sorry!!
-To make these bigger, make sure your beginning chain is an even number.
–**See this chart for measurements for smaller or larger sizes**
-These pants will fit up to a 6 month old baby
-The Ch 2 at the beginning of each round does NOT count as a stitch. Sl st to beginning DC of the round to attach.
-DISCLAIMER: THIS GARMENT HAS BUTTONS AND STRAPS. THESE CAN BE CHOKING HAZARDS TO LITTLE INFANTS. PLEASE USE DISCRETION WHEN DECIDING TO ADD THIS FEATURE.
Special stitches:
Ch(s): chain(s)
St(s): Stitch(es)
Sl st: slip stitch
SC: Single Crochet
DC: Double Crochet
FPDC: Front Post Double Crochet
BPDC: Back Post Double Crochet
Pattern:
Waistband:
With Bone:
Ch 60 (or any amount that will measure the waist of the baby you are making this for–also make sure it’s an even number)
Attach to the 1st ch to form a ring and ch up 2. Rnd 1: DC in each ch around. Sl st to beginning DC. ch 2. (60 dc)
Rnd 2: [FPDC, BPDC] 30 times. Sl st to beginning fpdc. Ch 2. (30 FPDC, 30 BPDC)
Rnd 3: Repeat Round 2.
Fasten off, weave in ends.
Flip it around to work on the foundation row. (See video tutorial for visual instructions)
**You can repeat round 2 to make your waistband however big you want. When your waistband is the desired length, go on to making the Bottom of the Pants.**
Bottom of Pants: Rnd 1: Attach new color in any st. Ch up 2, DC in each st around. Sl st to beginning DC, ch 2. (60 DC)
Rnd 2-10 (or however many rounds you want to do for your length): DC in each st around, Sl st to beginning DC, Ch 2. (60 DC)
Once your piece is as long as you want, go on to work the first leg.
First leg: Place stitch marker at halfway point (Stitch number 30) See video tutorial for visual instructions Rnd 1: DC in each of the first 30 sts until you hit the stitch marker. DC in same stitch as the stitch marker, leave the rest of the stitches unworked. Sl st to beginning DC, Ch 2. (30 DC)
Rnd 2-10 (or however many rounds you want to do for your length): DC in each st around, sl st to beginning DC, ch 2. (30 DC)
After round 10, attach new color Rnd 11-13: SC in each st around. Sl st to beginning SC. (30 SC)
Fasten off and weave in ends.
Second Leg: Rnd 1: Attach yarn with LONG STRAGLER (used for sewing later–see video tutorial for explanation) to one of the unworked stitches from round 10 of the Bottom of the Pants. DC in each st around, sl st to beginning DC, Ch 2. (30 DC) (See video tutorial for this round.)
Repeat Rounds 2-13 for the First Leg.
Fasten off and weave in ends.
Assembly Step:
Sew the hole between the legs (See video tutorial for visual instructions)
Straps: Make 2
Ch 62 (or however many chs you made for your waistband +2) Row 1: DC in 3rd ch from hook and across. Fasten off with long tail for sewing.
Assembly Step:
Sew straps and buttons to pants. (see video tutorial for visual instructions, and use photos for guide)
Weave in all ends.
Enjoy!
This post contains affiliate links, which I may be compensated for when you make a purchase. That means if you click on any link and buy from the linked websites, I will receive a small percentage of the value of your order. The amount you pay is not changed. Thank you for all your support in clicking the links in my blog!! You all are so amazing!! ~Nadia
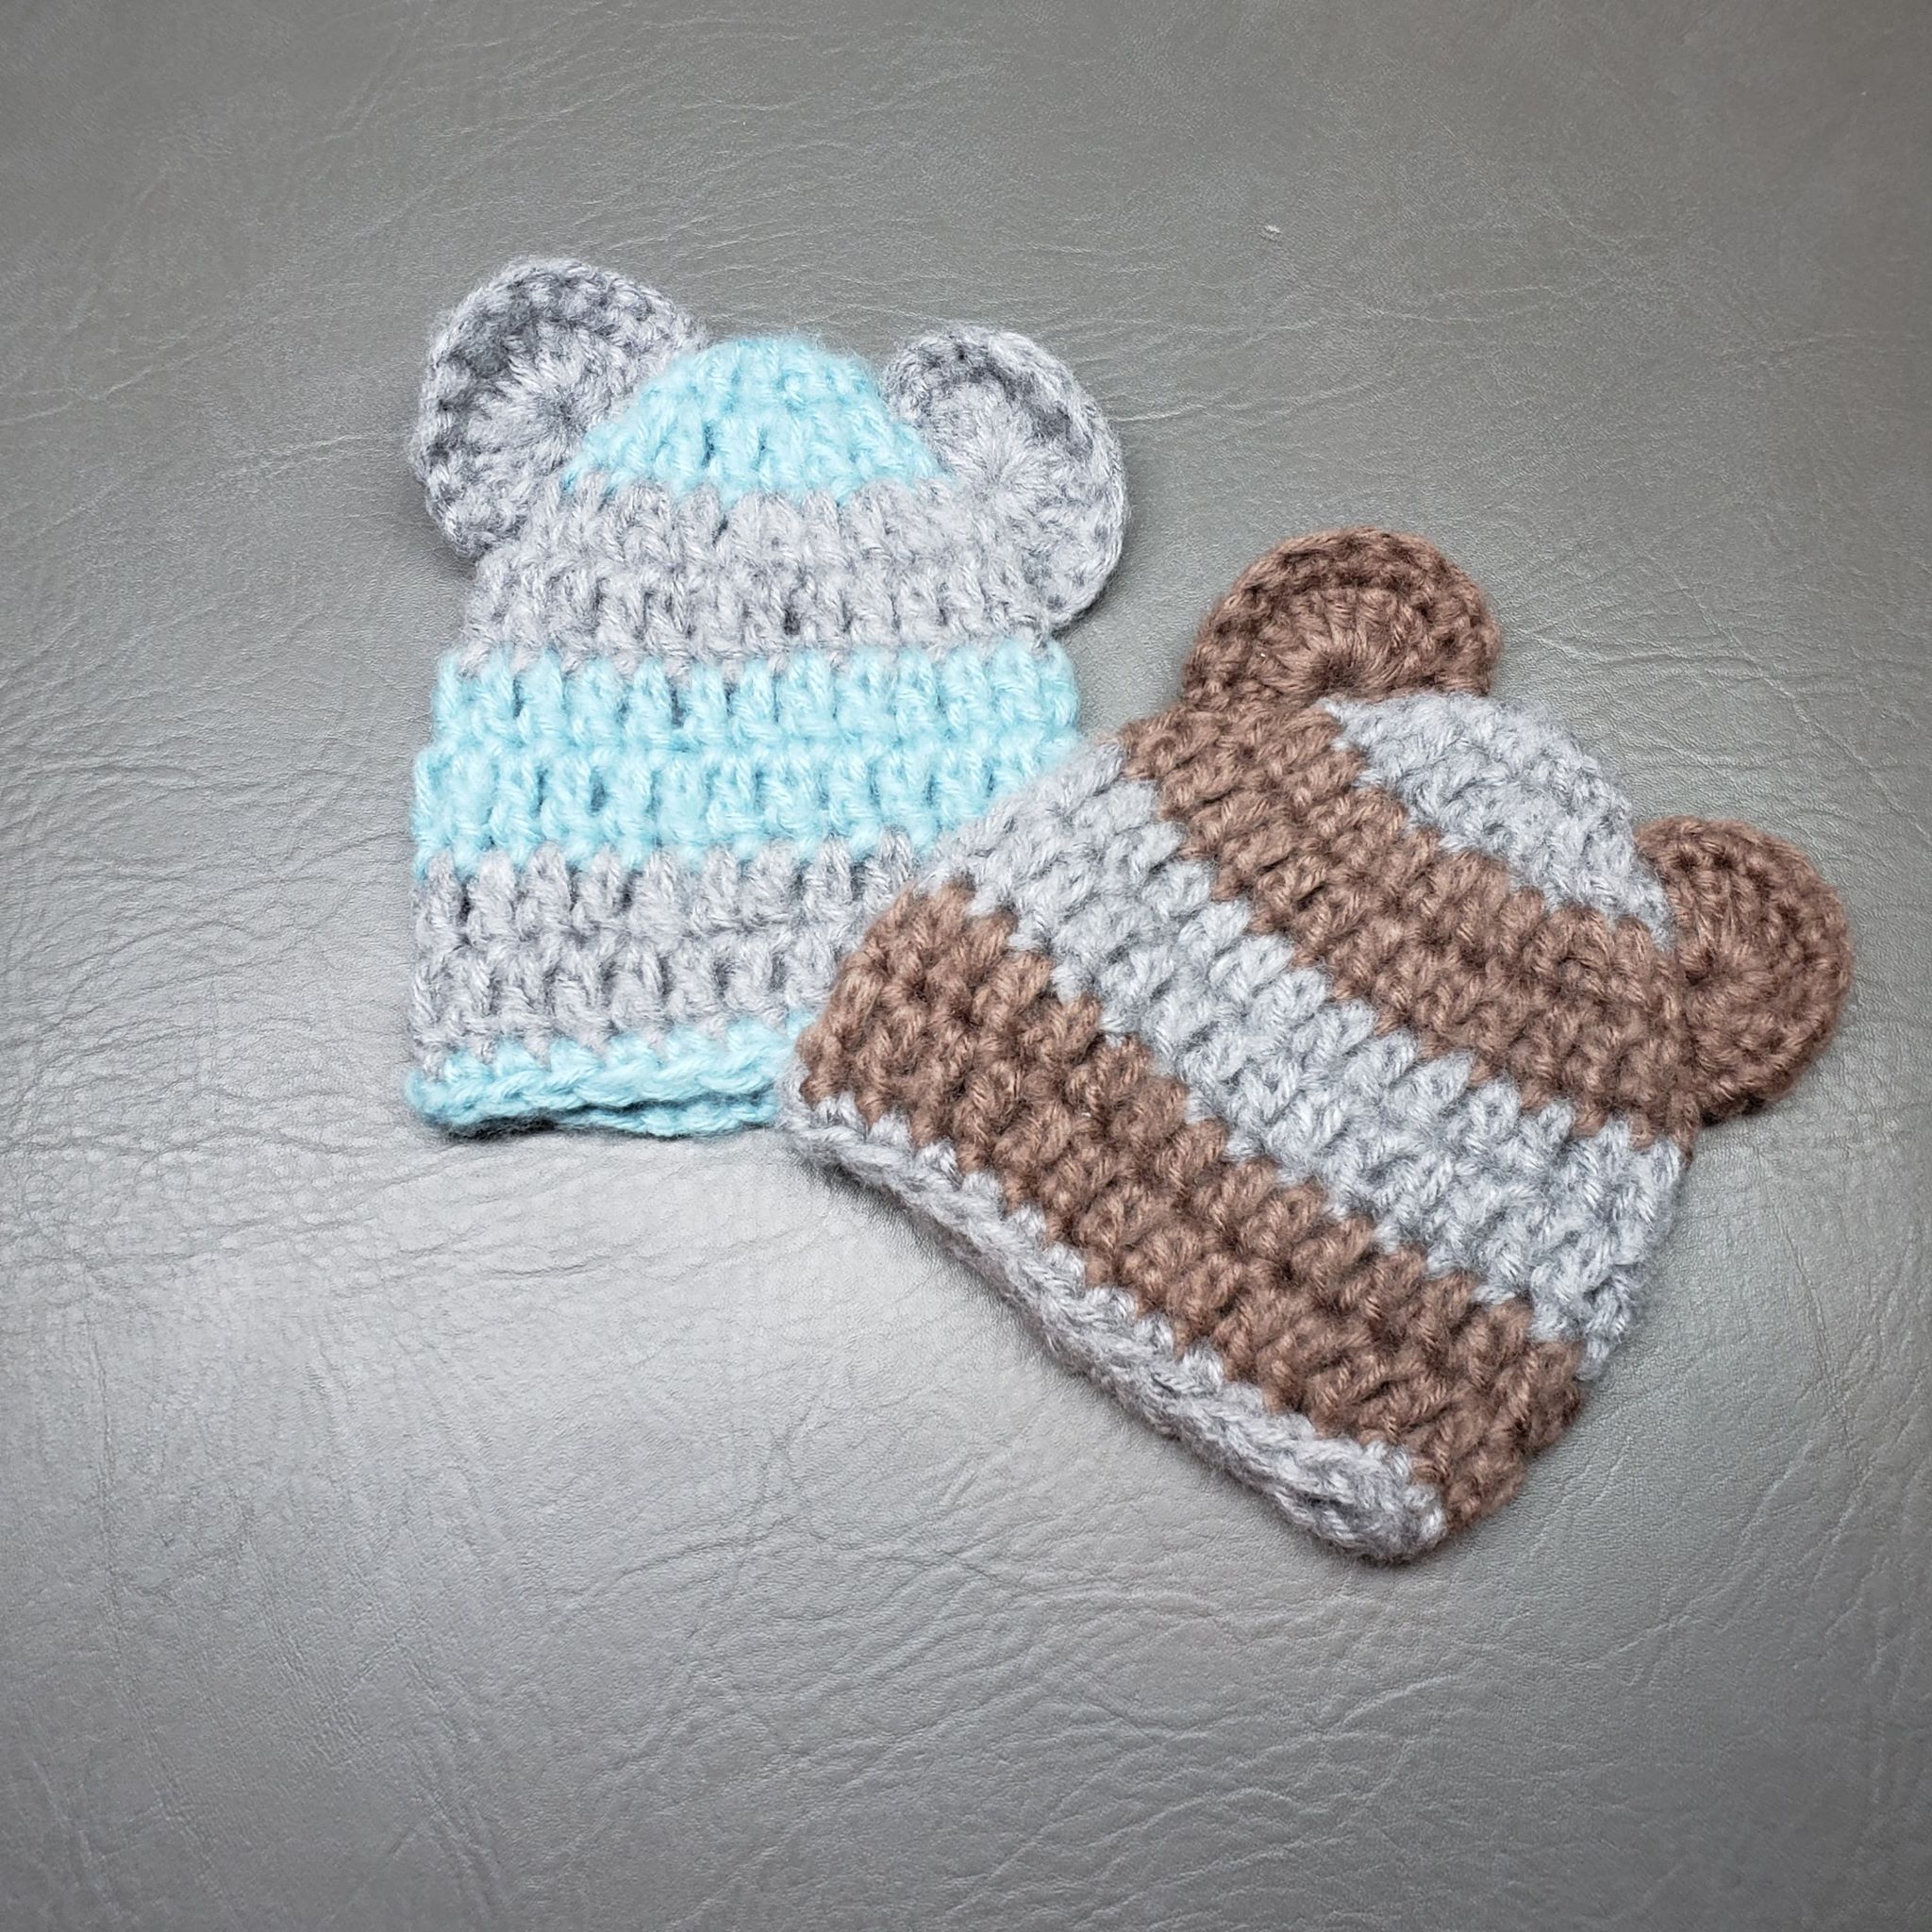
This darling basket weave baby boy hat is the second piece to our little boy layette set we have been working on. This cute little cap is using a new stitch giving a bit of pattern and texture to our set. As we continue with these items, they can be altered to fit a little boy or little girl simply by changing colors. It is a very versatile hat.
View this video tutorial to learn how to make this hat:
My dad will continue to be the videographer, editor, and photographer for our videos when I move away.
Support YARNutopia today so we can continue to bring you clear, quality crochet tutorials even after I move into my new home!
There will be an added expense of more travel and hopefully this won’t deter our ability to provide consistent videos on a weekly basis.
***You can sell anything you make from my patterns, please just link back to my website YARNutopia.com. Thank you!
Teacher: Nadia Fuad
Video and Editing: Fuad Azmat (My Daddy)
Share your work on Facebook!
Add me on Snapchat: YARNutopia
Follow me on Instagram
Visit My Ravelry Store and add this to your Favorites!
Follow me on Twitter: @YARNutopia
Enjoy this video and subscribe to my channel on YouTube for more tutorials on how to crochet!
Leave a comment, and share with your friends!
Pattern:
Designed by Nadia Fuad
You may sell items made from my pattern, but please reference my website YARNutopia.com.
Please do not copy, sell, and/or post this pattern and claim it as your own.
NOTES:
-To make this smaller or bigger, use a smaller or bigger hook size
-This Sweater will fit a child up to 18 months. It is quite stretchy.
-This is made from the top down
-If you work in multiples of 10, then you can make this bigger or smaller.
-Finished measurements for the hat in the video tutorial: 16 inches (40cm) in circumference, 7 inches (18cm) tall.
Special stitches:
Ch(s): chain(s)
St(s): Stitch(es)
Sl st: slip stitch
SC: Single Crochet
DC: Double Crochet
FPDC: Front Post Double Crochet
BPDC: Back Post Double Crochet
Pattern:
Ch 3 Round 1: 10 DC in 3rd Ch from Hook (10)
Round 2: 2 DC in each around, join to first DC, ch 2 (20 DC)
Round 3: 2 DC, DC in next, repeat around, join, ch 2 (30 DC)
Round 4: 2 DC, DC in next 2, repeat around (40 DC)
Round 5: 2 DC, DC in next 3, repeat around, join, ch 2 (50 DC)
Round 6: 2 DC, DC in next 4, repeat around, join, ch 2 (60 DC)
Round 7: DC in each st around, join to first DC, ch 2 (60 DC)
Round 8: FPDC around next 5 sts, BPDC around next 5 sts, Repeat around, sl st to beginning FPDC, Ch 2. (30 FPDC, 30 BPDC) (See video tutorial for visual instructions on where to start this round exactly).
Round 9-12: Repeat Round 8
Round 13: BPDC around next 5 sts, FPDC around next 5 sts, Repeat around, sl st to beginning BPDC, Ch 2. (30 BPDC, 30 FPDC) (See video tutorial for visual instructions on where to start this round exactly).
Rounds 14-17: Repeat Round 13
Rounds 18-22: Repeat Round 8
Change to Blue
Round 23: HDC in each st around. Sl st to beginning.
Fasten off. Weave in ends.
Enjoy!
“A baby is a blessing. A gift from heaven above, a precious little angel to cherish and to love.” ~Unknown
~Nadia
This post contains affiliate links, which I may be compensated for when you make a purchase. That means if you click on any link and buy from the linked websites, I will receive a small percentage of the value of your order. The amount you pay is not changed. Thank you for all your support in clicking the links in my blog!! You all are so amazing!! ~Nadia
This infant pullover hoodie is a very versatile piece for any baby layette. This simple, essential part of a baby boy wardrobe can be used in a variety of ways, making it one of the most well used items you will ever create.
Whether it is a cool summer night and you need a little cover-up to guard from the chill, or layered on a winter day to feel like they are wrapped up in warmth, this little hoodie can be used all year round. There are not many items which can be that multi-functional.
Using the softest fibers, I have created this basic piece that can be adapted to be gender friendly for a little boy or girl. You can get creative and add your own adaptations of this pattern by putting on a pocket or applique. The sky’s the limit with creativity of this great pullover!
Follow along with this video tutorial to learn how to make this sweater:
My dad will continue to be the videographer, editor, and photographer for our videos when I move away.
Support YARNutopia today so we can continue to bring you clear, quality crochet tutorials even after I move into my new home!
There will be an added expense of more travel and hopefully this won’t deter our ability to provide consistent videos on a weekly basis.
***You can sell anything you make from my patterns, please just link back to my website YARNutopia.com. Thank you!
Teacher: Nadia Fuad Video and Editing: Fuad Azmat (My Daddy)
Share your work on Facebook!
Add me on Snapchat: YARNutopia
Follow me on Instagram
Visit My Ravelry Store and add this to your Favorites!
Follow me on Twitter: @YARNutopia
Enjoy this video and subscribe to my channel on YouTube for more tutorials on how to crochet!
Leave a comment, and share with your friends!
Pattern:
Designed by Nadia Fuad
You may sell items made from my pattern, but please reference my website YARNutopia.com.
Please do not copy, sell, and/or post this pattern and claim it as your own.
NOTES:
-To make this smaller or bigger, use a smaller or bigger hook size. I do not have the stitch numbers for larger sizes.
-This Sweater will fit a child up to 9-10 months. It is quite stretchy.
-This is made from the neck down, then sleeves, and hood last
-Final dimensions: Length (shoulder to bottom): 12 Inches, Sleeve Length: 10 Inches, Waist: 17 Inches Circumference.
-This can be made longer or shorter by repeating the rounds.
Special stitches:
Ch(s): chain(s)
St(s): Stitch(es)
Sl st: slip stitch
SC: Single Crochet
DC: Double Crochet
V-Stitch: DC, ch 1, DC in same space
Sweater:
With Bone
Ch 50, Sl st to first ch to form a ring
Ch up 2 Rnd 1: DC in same ch as ch up 2, DC in next 6 chs, V-Stitch in next ch, DC in next 9 chs, V-Stitch in next ch, DC in next 14 chs, V-Stitch in next ch, DC in next 9 chs, V-Stitch in next ch, DC in next 7 chs. Sl st to beginning dc of the round. Ch 2. (54 DC, 4 Ch 1 sps)
Rnd 2: DC in each DC, V-Stitch in each ch 1 sp of the V-Stitches. Sl st to beginning dc of the round, ch 2. (62 DC, 4 ch 1 sps)
Rnd 3: DC in each DC, V-Stitch in each ch 1 sp of the V-Stitches. Sl st to beginning dc of the round, ch 2. (70 DC, 4 ch 1 sps)
Rnd 4: DC in each DC, V-Stitch in each ch 1 sp of the V-Stitches. Sl st to beginning dc of the round, ch 2. (78 DC, 4 ch 1 sps)
Rnd 5: DC in each DC, V-Stitch in each ch 1 sp of the V-Stitches. Sl st to beginning dc of the round, ch 2. (86 DC, 4 ch 1 sps)
Rnd 6: DC in each DC, V-Stitch in each ch 1 sp of the V-Stitches. Sl st to beginning dc of the round, ch 2. (94 DC, 4 ch 1 sps)
Rnd 7: DC in each DC until the V-Stitch, Join first and second V-Stitch with DC, DC in each st to the next V-Stitch, Join the next 2 V-Stitches together with a DC, DC in the rest of the stitches to the end. Sl st to beginning dc of the round, ch 2. (See video tutorial for clarification and visual instructions) (54 DC)
Rnd 8-12: DC in each st around, Sl st to beginning dc of the round, ch 2. (Skipping the stitches we skipped for the arm holes) (54 DC)
After round 12, change to Blue
Rnd 13: DC in each st around, Sl st to beginning dc of the round, ch 2. (54 DC)
Change to Bone
Rnd 14: DC in each st around, Sl st to beginning dc of the round, ch 2. (54 DC)
Change to Blue
Rnd 15: DC in each st around, Sl st to beginning dc of the round, ch 2. (54 DC)
Change to Bone
Rnd 16-18: DC in each st around, Sl st to beginning dc of the round, ch 2. (54 DC)
Fasten off after round 18.
Weave in ends.
Sleeves:
Attach Main Color yarn under arm where you attached the V-Stitches (See video tutorial at minute 28:53 for visual instructions)
Ch 2 Rnd 1: DC in each st around, Sl st to beginning dc of the round, ch 2. (23 DC) Rnd 2-5: Repeat Round 1 (23)
Change to Blue after round 5 Rnd 6: DC in each st around, Sl st to beginning dc of the round, ch 2. (23)
Change to Bone Rnd 7: DC in each st around, Sl st to beginning dc of the round, ch 2. (23)
Change to Blue Rnd 8: DC in each st around, Sl st to beginning dc of the round, ch 2. (23)
Change to Bone Rnds 9-11: DC in each st around, Sl st to beginning dc of the round, ch 2. (23)
Fasten off after round 11. Weave in ends. Repeat the same for the 2nd sleeve.
Hood:
Mark 10th st from the left of the V-Stitch on the front of the sweater (See video tutorial for visual instructions) Row 1: In BLO, Ch up 2, DC in same st, DC in the next 3 sts (in BLO), Now working in BOTH LOOPS, DC in each st to first V-Stitch. DC2TOG, DC in each st to next V-Stitch, DC2TOG, DC in each st to next V-Stitch, DC2TOG, DC in each st to next V-Stitch, DC2TOG, DC in the rest of the stitches and work the last 4 sts in the FRONT LOOPS where the first 4 sts where placed. (Again, I recommend viewing the video tutorial for this portion) Ch 2, turn. (50 DC)
Row 2-15: DC in each st across, Ch 2, turn. (50 DC)
Fasten off with Long tail for sewing.
Assembly Step:
Fold hood in half and sew top seam (View video tutorial for visual instructions)
SC around hood with Accent Color (blue). Fasten off, Weave in all ends
Enjoy!
“Good seasons start with good beginnings.” ~Sparky Anderson
~Nadia
This post contains affiliate links, which I may be compensated for when you make a purchase. That means if you click on any link and buy from the linked websites, I will receive a small percentage of the value of your order. The amount you pay is not changed. Thank you for all your support in clicking the links in my blog!! You all are so amazing!! ~Nadia
Recently I posted a video tutorial for the Ribbon and Bow hat. In continuation of the “bow-tastic” theme, I bring you another baby tutorial showing you how to crochet a pair of peep-toe baby sandals using inspiration from this pattern by Hut’s Crochet. I really liked her instructions on the bottoms and sides, but I adapted my own pattern for the top and bow.
Here the video tutorial for the baby sandals/slippers.
If you want to make your bow bigger or smaller, watch this video tutorial I filmed a while back to show you how!
These cute sandals are the perfect accent to any infant outfit and go so well with the bow hat. It makes the perfect set to give as a gift! This is another quick and easy project, perfect for a beginner or any seasoned crocheter to accomplish in an afternoon!
Without the bow, these would make cute little boy slippers as well. You can change things up and make a flower, add a button, or any other embellishment! Get creative, and have fun!
I was recently planning a bridal shower for my brother’s fiancé and wanted to do something special using crochet. I ran across a blog, Amigurumi Askina, featuring a bride and groom doll set. The pattern happened to be in Turkish so I used a bit of translation and modifications and made up my own pattern to create this set of dolls. My tutorial videos are in two parts. The first part demonstrates the bride, and part two shows how to make the groom.
These adorable dolls are great to feature at a bridal shower or wedding, and you can modify them to make a prince & a princess, a king & a queen, just a boy & a girl, and, with marriage equality, it would even be cute to make two brides or two grooms!
Another thing you could customize are the features of each doll. You could change the eye color, hair color, skin tone, flower colors, dress color, and suit color. You can add personal touches to emulate the person you are trying to make. You can get creative with these, the possibilities are endless!!
The final product is not your typical tiny amigurumi. These measure approximately 8-10 inches tall (20-25 cm).
Anybody would be happy to receive such a unique and special gift! This is not an easy project, as I say in my video, I would recommend an intermediate to advanced level crocheter to attempt this, but feel free if you want a little bit of a challenge!
This is how I displayed the dolls at the bridal shower. Using the groom pattern, I modified it to make a little boy to represent my nephew.
Before I share the video and pattern, I want to share with you a personal moment of my nephew playing with the dolls. His parents are the ones getting married this summer and he was playing “wedding.” haha! He even made the bride and groom kiss! It was priceless!
Part 1: Bride
Part 2: Groom
My dad will continue to be the videographer, editor, and photographer for our videos when I move away.
Support YARNutopia today so we can continue to bring you clear, quality crochet tutorials even after I move into my new home!
There will be an added expense of more travel and hopefully this won’t deter our ability to provide consistent videos on a weekly basis.
Designed by Nadia Fuad
Questions? Leave a comment! You may sell items made from my pattern, but please reference my name and Etsy Shop (YARNutopia). Please do not copy and post this pattern and claim it as your own. Thank you, and happy hooking!
Popcorn stitch: yarn over, go into next st, yarn over, pull through, yarn over go into same st, yarn over pull through, yarn over, go into same st, yarn over pull through (you should have 7 loops on your hook), yarn over and pull through all 7 loops.
RS: Right Side
WS: Wrong Side
Special Instructions:
-Pattern for head, hair, body, arms are worked in continuous rounds.
-For the bouquet, I took the Red Heart Yarn 10 ply and pulled it apart in half, and used that. You can use thin red thread if you prefer for the flowers.
-For embroidering the face, I also pulled the yarn apart, but you can use thread/floss for the face as well.
Bride:
Head:
With beige (skin tone) ch 2
Rnd 1: Sc 6 in 2nd ch from hook. (6)
Rnd 2: Sc 2 in each st. (12)
Rnd 3: (Sc 2 in next st, sc in next st) 6 times. (18)
Rnd 4: (Sc 2 in next st, sc in next 2 sts) 6 times. (24)
Rnd 5: (Sc 2 in next st, sc in next 3 sts) 6 times. (30)
Rnd 6: (Sc 2 in next st, sc in next 4 sts) 6 times. (36)
Rnds 7-16: Sc in each st. (36)
Rnd 17: (Sc2tog, sc in next 4 sts) 6 times. (30)
Assembly step: Embroider a nose with the same color yarn in the center of the face. Embroider black: eyebrows, eyes, eyelashes. Embroider with red, lips. Then start stuffing the head and continue crocheting.
See video for assembly assistance and see photo for guide.
Rnd 18: (Sc2tog, sc in next 3 sts) 6 times. (24)
Rnd 19: (Sc2tog, sc in next 2 sts) 6 times. (18)
Rnd 20: (Sc2tog, sc in next st) 6 times. (12)
Stuff in any more polyfil that can fit and fasten off with long tail for sewing.
Hair:
With hair color (in mine I used golden)
ch 2
Rnd 1: Sc 6 in 2nd ch from hook. (6)
Rnd 2: Sc 2 in each st. (12)
Rnd 3: (Sc 2 in next st, sc in next st) 6 times. (18)
Rnd 4: (Sc 2 in next st, sc in next 2 sts) 6 times. (24)
Rnd 5: (Sc 2 in next st, sc in next 3 sts) 6 times. (30)
Rnd 6: (Sc 2 in next st, sc in next 4 sts) 6 times. (36)
Rnd 7-13: Sc in each st. (36)
Rnd 14: sc in next 10 sts, dc in next 10 sts, sl st in next 2 sts, dc in next 10 sts, sl st until the end of the round
Fasten off with long tail for sewing.
Bun:
With same hair color
ch 2
Rnd 1: Sc 6 in 2nd ch from hook. (6)
Rnd 2: Sc 2 in each st. (12)
Rnd 3: (Sc 2 in next st, sc in next st) 6 times. (18)
Rnd 4: (Sc 2 in next st, sc in next 2 sts) 6 times. (24)
Rnds 5-9: Sc in each st (24)
Fasten off with long tail for sewing. Add stuffing.
Assembly step:
Sew hair to stuffed head. Sew bun to top center of the back of head (use photo for guide)
Ears: (make 2)
Ch 2
4dc in 2nd ch from hook. Fasten off with long tail, sew to each side of head.
Legs and Body:
Legs:
With beige
ch 2
Rnd 1: Sc 6 in 2nd ch from hook. (6)
Rnd 2: Sc 2 in each st. (12)
Rnd 3: (Sc 2 in next st, sc in next st) 6 times. (18)
Rnd 4: (Sc 2 in next st, sc in next 2 sts) 6 times. (24)
Rnds 5-7: Sc in each st (24)
Rnd 8: (Sc2tog, sc in next 2 sts) 6 times. (18)
Rnd 9: Sc2tog, sc in the next 16 sts. (17)
Rnd 10: Sc2tog, sc in the next 15 sts. (16)
Rnd 11: Sc2tog, sc in the next 14 sts. (15)
Rnds 12-21: Sc in each st. (15)
For one of the legs, fasten off.
For the second leg, do not fasten off! You will continue to work this leg to join the two together.
Body:
Now you will join the two legs together, and form one body.
Rnd 22: Sc in each st of round 21 of the leg you are working on. Then, sc in each st of round 21 of the other leg. (30)
Rnd 23-29: Sc in each st (30)
Assembly step:
Stuff both legs and continue working.
Rnd 30: sc2tog, sc in the next 13, sc2tog, sc in the next 13. (28)
Rnd 31: sc2tog, sc in the next 12, sc2tog, sc in the next 12. (26)
Rnd 32: sc in each st. (26)
Rnd 33: sc2tog, sc in the next 11, sc2tog, sc in the next 11. (24)
Rnd 34: (Sc2tog, sc in next 2 sts) 6 times. (18)
Rnd 35: sc in each st. (18)
Assembly Step:
Stuff the rest of the body completely and continue working.
Rnd 36: (Sc2tog, sc in next st) 6 times. (12)
Fasten off with long tail for sewing.
Assembly step:
Sew head to body.
Arms: (Make 2)
With beige (same skin tone)
Ch 2
Rnd 1: sc 6 in 2nd ch from hook. (6)
Rnd 2: Sc 2 in each st. (12)
Rnd 3: sc in each st. (12)
Rnd 4: Popcorn stitch, sc in next 11 sts. (12)
Rnd 5: sc in each st. (12)
Rnd 6: (sc2tog, sc in next 2 sts) 3 times. (9)
Rnds 7-14: sc in each st. (9)
Assembly Step:
Slightly stuff hand part, and less stuffing in arm.
Rnds 15-20: sc in each st. (9)
Fasten off with long tail for sewing.
Sew to each side of body.
Dress:
With White (or whatever color you want your dress to be)
Ch 24, wrap chain around bride chest and sl st to first ch to form ring.
Rnd 1: ch 1 sc in each ch around, sl st to beginning sc, ch 2
Rnd 2: dc in each st around. Sl st to beginning dc, ch 2
Rnd 3: 2 sc in first st, sc in next 3 sts, *2sc in next st, sc in next 3 sts. Repeat from * around. Sl st to beginning sc, ch 2. (30)
Rnd 4: 2 sc in first st, sc in next 4 sts. *2sc in next st, sc in next 4 sts. Repeat from * around. Sl st to beginning sc, ch 2. (36)
Rnd 5: 2 sc in first st, sc in next 5 sts. *2sc in next st, sc in next 5 sts. Repeat from * around. Sl st to beginning sc, ch 2. (42)
Rnd 6: DC 2 in each st around, sl st to beginning dc, ch 2. (84)
Rnd 7-18: Dc in each st around, sl st to beginning dc, ch 2. (84)
Fasten off.
Sew in all ends.
Flowers: Make 3
With Red Thread, watch video on how to thin out Red Heart Yarn.
Ch 16
3dc in 3rd ch from hook, *sl st in next ch, 3dc in next ch, sl st in next ch. Repeat from * across. (7 petals)
Fasten off with long tail for sewing.
Bouquet holder
With White,
Ch 2
Rnd 1: Sc 6 in 2nd ch from hook (6)
Rnd 2-5: Sc in each st around. (6)
Rnd 6: Sc 2 in each st. (12)
Rnd 7: (Dc 2 in next st, Dc in next st) 6 times. (18)
Fasten off with long tail
Sew to hand.
Sew flowers into bouquet holder.
Assembly:
Sew 1 bead into center of each flower. Sew 1 bead into each ear, put 10 beads on a string and wrap around neck for a necklace.
Cut a square of tulle, poke a hole into it and wrap it around the bun in the hair for the veil.
Tie ribbon around waist and around bun.
Groom:
Head:
With beige (skin tone)
ch 2
Rnd 1: Sc 6 in 2nd ch from hook. (6)
Rnd 2: Sc 2 in each st. (12)
Rnd 3: (Sc 2 in next st, sc in next st) 6 times. (18)
Rnd 4: (Sc 2 in next st, sc in next 2 sts) 6 times. (24)
Rnd 5: (Sc 2 in next st, sc in next 3 sts) 6 times. (30)
Rnd 6: (Sc 2 in next st, sc in next 4 sts) 6 times (36)
Rnd 7: (Sc 2 in next st, sc in next 5 sts) 6 times. (42)
Rnds 8-17: Sc in each st. (42)
Rnd 18: (Sc2tog, sc in next 5 sts) 6 times. (36)
Assembly step: Embroider a nose with the same color yarn in the center of the face. Embroider black: eyebrows, lips, eyes. Then start stuffing the head and continue crocheting.
See video for assembly assistance and see photo for guide.
Rnd 19: (Sc2tog, sc in next 4 sts) 6 times. (30)
Rnd 20: (Sc2tog, sc in next 3 sts) 6 times. (24)
Rnd 21: (Sc2tog, sc in next 2 sts) 6 times. (18)
Rnd 22: (Sc2tog, sc in next st) 6 times. (12)
Stuff in any more polyfil that can fit and fasten off with long tail for sewing.
Hair:
With hair color (in mine I used dark brown)
ch 2
Rnd 1: Sc 6 in 2nd ch from hook. (6)
Rnd 2: Sc 2 in each st. (12)
Rnd 3: (Sc 2 in next st, sc in next st) 6 times. (18)
Rnd 4: (Sc 2 in next st, sc in next 2 sts) 6 times. (24)
Rnd 5: (Sc 2 in next st, sc in next 3 sts) 6 times. (30)
Rnd 6: (Sc 2 in next st, sc in next 4 sts) 6 times (36)
Rnd 7: (Sc 2 in next st, sc in next 5 sts) 6 times. (42)
Rnd 8-12: Sc in each st. (42)
Rnd 13: sc in next 10 sts, dc in next 10 sts, ch 4, dc in 2nd ch from hook and in the next 2 sts, dc in next 10 sts on round 11, sl st until the end of the round
Fasten off with long tail for sewing.
Ears: (make 2)
With Skin Tone (beige)
Ch 2
4dc in 2nd ch from hook. Fasten off with long tail, sew to each side of head.
Legs and Body:
Legs:
With black
ch 2
Rnd 1: Sc 6 in 2nd ch from hook. (6)
Rnd 2: Sc 2 in each st. (12)
Rnd 3: (Sc 2 in next st, sc in next st) 6 times. (18)
Rnd 4: (Sc 2 in next st, sc in next 2 sts) 6 times. (24)
Rnds 5-7: Sc in each st (24)
Rnd 8: (Sc2tog, sc in next 2 sts) 6 times. (18)
Rnd 9: Sc2tog, sc in the next 16 sts. (17)
Rnd 10: Sc2tog, sc in the next 15 sts. (16)
Rnd 11: Sc2tog, sc in the next 14 sts. (15)
Rnd 12: in BLO, sc in each st. (15)
Rnds 13-24: in Both Loops now, Sc in each st. (15)
For one of the legs, fasten off.
For the second leg, do not fasten off! You will continue to work this leg to join the two together.
Stuff both legs and continue working.
Body:
Now you will join the two legs together, and form one body.
Continue With black
Rnd 25: Sc in each st of round 21 of the leg you are working on. Then, sc in each st of round 21 of the other leg. (30)
Rnds 26-27: Sc in each st (30)
Rnd 28: (Sc 2 in next st, sc in next 4 sts) 6 times. (36)
Change color to White
Rnds 29-31: sc in each st. (36)
Rnd 32: (Sc2tog, sc in next 4 sts) 6 times. (30)
Assembly step:
Stuff both legs and continue working.
Rnd 33: sc2tog, sc in the next 13, sc2tog, sc in the next 13. (28)
Rnd 34: sc2tog, sc in the next 12, sc2tog, sc in the next 12. (26)
Rnd 35: sc in each st. (26)
Rnd 36: sc2tog, sc in the next 11, sc2tog, sc in the next 11. (24)
Rnd 37: (Sc2tog, sc in next 2 sts) 6 times. (18)
Rnd 38: sc in each st. (18)
Assembly Step:
Stuff the rest of the body completely and continue working.
Rnd 39: (Sc2tog, sc in next st) 6 times. (12)
Fasten off with long tail for sewing.
Assembly step:
Sew head to body. Stuff any little bit that may need to be added.
Jacket:
I recommend watching the video for the Jacket portion.
With Black,
Ch 40 (or enough to fit around the waist of the body—where the white starts)
Row 1: Dc in 3rd ch from hook and across, ch 2, turn (38 dc)
Row 2-3: dc across, ch 2, turn (38)
Row 5: dc2tog, dc across until the last 2 sts, dc2tog on last 2 sts. (36)
Row 6: dc2tog, dc across until the last 2 sts, dc2tog on last 2 sts (34)
Row 7: dc2tog, dc across until the last 2 sts, dc2tog on last 2 sts (32)
(If you need jacket longer, just repeat the last row until it is long enough. I ended up doing this repeat for the last row in my video: *dc2tog, dc, repeat from * across.) It may only take you 5 or 6 rows for your jacket to be long enough.
Fasten off with long tail for sewing.
Assembly step:
Sew jacket around body and sew it closed and sew it to body to secure it in place.
Arms: (Make 2)
With beige (same skin tone)
Ch 2
Rnd 1: sc 6 in 2nd ch from hook. (6)
Rnd 2: Sc 2 in each st. (12)
Rnd 3: sc in each st. (12)
Rnd 4: Popcorn stitch, sc in next 11 sts. (12)
Rnd 5: sc in each st. (12)
Change to black
Rnd 6: (sc2tog, sc in next 2 sts) 3 times. (9)
Rnds 7-20: sc in each st. (9)
Assembly Step:
Slightly stuff hand part, and less stuffing in arm.
Rnds 15-20: Sc in each st. (9)
Fasten off with long tail for sewing.
Sew arms to outside of jacket on each side of body.
Bow Tie:
With Black,
Ch 5
Row 1: Sc in 2nd ch from hook and across.
Fasten off with long tail.
Take long tail and sew it to the center of the bow, wrap yarn around the center a couple times. Then sew to neck to secure it.
Assembly step:
Sew 2 beads in front of jacket for buttons.
This post contains affiliate links, which I may be compensated for when you make a purchase. That means if you click on any link and buy from the linked websites, I will receive a small percentage of the value of your order. The amount you pay is not changed. Thank you for all your support in clicking the links in my blog!! You all are so amazing!! ~Nadia
The yarn provided for this pattern is courtesy of Red Heart Yarns


