I was approached by St. Jude’s Hospital, and was invited to participate in a collab with The Dollar General for a Holiday Decorating Challenge. I was thrilled to be involved in such a unique activity that benefits such a great cause!
Giving Back this Holiday
As many of you know, St. Jude’s Hospital is forefront in treating childhood cancer, and you can help by heading to a Dollar General store this season and support the Thanks and Giving Campaign each time you shop and make a donation at the checkout! Below, you will see the challenge that was presented and find out how we met this task! It was a lot of creative fun!
The challenge we were given: Create a holiday table-scape, entry way, mantle, or DIY holiday craft on a $25.00(usd) budget and all purchases must be made at a Dollar General store.
BRING. IT. ON!
I love a test like this, and I love doing home décor DIY on a shoestring! So, this invitation was met with a lot of excitement to see what we could come up with.
Let’s get it started
I solicited the help of my mom to create some fantastic ideas that anyone can make for their home this holiday. We put together two different ensembles. One table centerpiece and one buffet tabletop arrangement. I share with you a few photos of the supplies and steps taken to assemble these decorations. I spent around $20.00 on each arrangement using the same items in each – plus or minus a piece or two that I purchased and added to embellish each specific arrangement.
This shows the versatility of my purchases that you are able to use them in years to come. By adding a few different details, you can create a completely new look!! My only other additions were things I found in nature such as sticks, branches, or greenery from our pine tree and no additional cost was added by these additions. I also used four small votive glasses to hold the mini candles in that I already had in my own cupboard.
Our first holiday-scape: A table centerpiece
Let’s see how this all came together! First the photos below were a series of my purchases. There are several Dollar General Stores near where my parents live in Rural Wisconsin. I also have one Dollar General Store near me. We collaborated purchases from three different Dollar General Stores. Most of the stores have identical inventory, but we did find a few fun new inventory in each as well. So, if you have more than one Dollar General near you, check them all out for variety, and don’t forget to donate to St. Jude’s Hospital at each checkout. Here are the supplies purchased and worked with to make our decorations:
When I made my purchases, I did so with a variety of possibilities in mind. However, after my arrangements were created, some of my purchases were NOT used and I did NOT include these in my final budget.
Once I had all my items purchased, I began to put pieces together to build a nice table-scape. I started with creating some height for my piece, by taking my purchased poster board and made tall cones. I used gold spray paint to prime the trees and some green tissue paper to create some texture. These original conical trees I kept green for my first centerpiece.
I created height and length to my table using the cone trees and sticks as well as adding some flameless candlelight to create some warm ambiance. This beautiful arrangement really brings a holiday tabletop to life! It is so inviting!
Here is the breakdown on cost for this table centerpiece:
The cone shaped trees:
$1.50 for poster board
$3.00 for metallic paint
$1.00 for tissue paper
$1.00 for star ornaments
Centerpiece props included
$2.00 two sets of 2 tealights @ $1 each
$2.00 two candle rings @ $1 each
$1.00 modgepodge for paper mache
$3.00 green/white garland
$5.00 faerie lights
$1.00 pine cones
Things I had already:
Sticks
Clear votive cups (4)
Total: $20.50
Our Second Arrangement: A holiday tabletop-scape
I used my homemade “trees” and I later used my gold spray paint to cover the green tissue paper and to add more metallic gold to my second arrangement. I added some jewel embellishments to turn my green trees into beautiful jeweled gold trees. I was so happy with this result. In this second arrangement we cut some pine boughs from our outdoor pine tree and built the arrangement with this beautiful greenery that cost us nothing!
I also took an old empty salsa jar to make a vase! Way to re-purpose! I also added some red elastic string to add some shiny detail. I again used my spray paint to paint a fun branch I used to bring a focal point to my arrangement. I love how this turned out!
Below you can view the finished ensemble
Here is the price breakdown on arrangement #2:
The tablescape on the buffet:
$1.50 Poster board for cones
$3.00 Metallic Gold Paint
$1.00 Star Ornaments
$1.00 Tissue Paper to create texture
$2.00 Pearl details for tree @ $1 per pack
$2.00 Crystal Jewel details for tree @ $1 per pack
$1.00 for elastic red string – I used one spool
$5.00 one strand of faerie lights
$2.00 two sets of two tealights for $1.00 each
$3.00 box of red ornaments
$1.00 box of pinecones
Things I had to build arrangement
Pine branches for greenery
Sticks – spray painted gold
votive cups (4)
Total: $22.50
As you can see demonstrated by the above, you can create a lovely holiday decoration on a budget and make a striking statement without a major investment. There was even room in our budget for more if I wanted to expand or add any additional items to embellish these beautiful decorations.
I want to thank St. Jude’s hospital and Dollar General for the opportunity to be included in this activity. I had so much fun participating and doing this for such a good cause. This holiday please support important causes. Give back and give thanks at this time of the year and always.
On the 8th Day of Christmas I bring to you this sweet treat!! These Candy Curl Swirl Ornaments are such a quick and easy craft you can add to your tree and make it “lolli-POP” this holiday season! Follow along with the video tutorial and written instructions below.
Follow along with this video tutorial to learn how to make this candy curl swirl ornament:
My dad will continue to be the videographer, editor, and photographer for our videos when I move away.
Support YARNutopia today so we can continue to bring you clear, quality crochet tutorials even after I move into my new home!
There will be an added expense of more travel and hopefully this won’t deter our ability to provide consistent videos on a weekly basis.
Teacher: Nadia Fuad
Video and Editing: Fuad Azmat (My Daddy)
Share your work on Facebook!
Add me on Snapchat: YARNutopia
Follow me on Marly Bird’s Chic Sheep yarn
Visit My Ravelry Store and add this to your Favorites!
Follow me on Twitter: @YARNutopia
Enjoy this video and subscribe to my channel on YouTube for more tutorials on how to crochet!
Leave a comment, and share with your friends!
Pattern:
Designed by Nadia Fuad You *may* sell items made from my pattern, but please reference my website YARNutopia.com.
Please do not copy, sell, and/or post this pattern and claim it as your own.
NOTES:
-Use a smaller hook to make these smaller
-Use a bigger hook to make these bigger
Special stitches:
Ch(s): chain(s)
YO: Yarn Over
BLO: Back Loop Only
FLO: Front Loop Only
St(s): Stitch(es)
Sl st: slip stitch
SK: Skip
SC: Single Crochet
HDC: Half Double Crochet
Pattern:
If you have any confusion or difficulty with reading this pattern, please watch the video tutorial that is linked above in this blog post to have visual instructions.
Candy:
With first color,
Ch 46
Row 1: SC in 2nd Ch and each ch across. (45 sts) Fasten off color, turn your work.
Row 2: Attach New color and SC across, Fasten off color, Turn your work.
Rows 3-5: Repeat Row 2.
Fasten off, weave in all ends.
Assembly step:
Curl/Swirl candy to shape and use thread to sew it down (See video tutorial for visual instructions)
Hang on your tree!
Enjoy!!
This post contains affiliate links, which I may be compensated for when you make a purchase. That means if you click on any link and buy from the linked websites, I will receive a small percentage of the value of your order. The amount you pay is not changed. Thank you for all your support in clicking the links in my blog!! You all are so amazing!! ~Nadia
The yarn provided for this pattern is courtesy of Yarnspirations
Our 7th day of Christmas brings more holiday decor! This rustic wall hanging has elements of crochet and craft mixed with elements of the outdoors. Follow through my step by step instructions and make your own wall hanging today.
The Materials I used are as follows:
Red Heart Super Saver Yarn in Gold and Green
Chic Sheep Yarn (Red Heart) in Linen
3 Pinecones (from outside)
A Large Stick from outside
Cinnamon Sticks
Scissors
Size H-5.00mm Crochet Hook
Step 1: I tied yarn to the stick on each end to make it be able to hang on a hook
Step 2: I crocheted the stars and tree (See pattern below)
Step 3: I used the Linen yarn and tied the pinecones, cinnamon sticks, stars and tree to the wall hanging using the Linen colored yarn.
It was so easy! I finished in an hour!!
Patterns:
Star:
Rnd 1: Ch 3, 10 dc in 3rd Ch from hook, sl st to first st. (10)
Rnd 2: Ch 2, 2 dc each st around, sl st to first st. (20)
Rnd 3: Ch 1, *hdc in next st, [2 dc, ch 3, 2 dc] in next st, hdc in next st, sl st in next st*, repeat from * around, end with Sl st in last st. Sl st to first st to close round. Fasten off, Weave in ends. (5 points made)
On the 6th Day of Christmas, give a little holiday cheer in a cup! Here is the Argyle Cup Cozy made for the coffee drinker in your life! Cup cozies are one of the easiest and most appreciated hand-made gifts you can give this season. Pair this with a travel mug and a gift card to the local coffee shop for the perfect teacher gift, gift for coach, or anyone else that deserves something special! This awesome gift can be made in any favorite color combination and will be so well received this holiday. Who doesn’t like the gift of a warm beverage during the coldest season? Make yours today and start checking off some of those gifts.
Follow along with this video tutorial to learn how to make this project:
My dad will continue to be the videographer, editor, and photographer for our videos when I move away.
Support YARNutopia today so we can continue to bring you clear, quality crochet tutorials even after I move into my new home!
There will be an added expense of more travel and hopefully this won’t deter our ability to provide consistent videos on a weekly basis.
Teacher: Nadia Fuad
Video and Editing: Fuad Azmat (My Daddy)
Share your work on Facebook!
Add me on Snapchat: YARNutopia
Follow me on Marly Bird’s Chic Sheep yarn
Visit My Ravelry Store and add this to your Favorites!
Follow me on Twitter: @YARNutopia
Enjoy this video and subscribe to my channel on YouTube for more tutorials on how to crochet!
Leave a comment, and share with your friends!
Pattern:
Designed by Nadia Fuad You *may* sell items made from my pattern, but please reference my website YARNutopia.com.
Please do not copy, sell, and/or post this pattern and claim it as your own.
On the 6th Day of Christmas, give a little holiday cheer in a cup! Here is the Argyle Cup Cozy made for the coffee drinker in your life! Cup cozies are one of the easiest and most appreciated hand-made gifts you can give this season. Pair this with a travel mug and a gift card to the local coffee shop for the perfect teacher gift, gift for coach, or anyone else that deserves something special! This awesome gift can be made in any favorite color combination and will be so well received this holiday. Who doesn’t like the gift of a warm beverage during the coldest season? Make yours today and start checking off some of those gifts.
My dad will continue to be the videographer, editor, and photographer for our videos when I move away.
Support YARNutopia today so we can continue to bring you clear, quality crochet tutorials even after I move into my new home!
There will be an added expense of more travel and hopefully this won’t deter our ability to provide consistent videos on a weekly basis.
Teacher: Nadia Fuad
Video and Editing: Fuad Azmat (My Daddy)
Share your work on Facebook!
Add me on Snapchat: YARNutopia
Follow me on Marly Bird’s Chic Sheep yarn
Visit My Ravelry Store and add this to your Favorites!
Follow me on Twitter: @YARNutopia
Enjoy this video and subscribe to my channel on YouTube for more tutorials on how to crochet!
Leave a comment, and share with your friends!
Pattern:
Designed by Nadia Fuad You *may* sell items made from my pattern, but please reference my website YARNutopia.com.
Please do not copy, sell, and/or post this pattern and claim it as your own.
NOTES:
-Use a smaller hook to make these smaller
-Use a bigger hook to make these bigger
Special stitches:
Ch(s): chain(s)
YO: Yarn Over
BLO: Back Loop Only
FLO: Front Loop Only
St(s): Stitch(es)
Sl st: slip stitch
SK: Skip
SC: Single Crochet
HDC: Half Double Crochet
Pattern:
If you have any confusion or difficulty with reading this pattern, please watch the video tutorial that is linked above in this blog post to have visual instructions.
Mug Cozy:
Ch 30, sl st to first ch to form a circle, ch 1 Rnd 1: HDC in each ch around, sl st to first HDC.
Rnd 2: Ch 1, HDC in each st around. Sl st to first HDC.
Rnds 3-9: Ch 1, SC in each st around, Sl st to first SC.
Rnd 10: Ch 1, HDC in each st around, Sl st to first HDC.
Rnd 11: Repeat Round 10.
Fasten off, weave in all ends.
Assembly step:
Cut 4 large diamonds, and 4 small diamonds out of Felt and sew them onto your mug cozy using the video tutorial or photos to guide you using metallic yarn.
Enjoy!!
This post contains affiliate links, which I may be compensated for when you make a purchase. That means if you click on any link and buy from the linked websites, I will receive a small percentage of the value of your order. The amount you pay is not changed. Thank you for all your support in clicking the links in my blog!! You all are so amazing!! ~Nadia
The yarn provided for this pattern is courtesy of Yarnspirations
If anyone is looking for a rustic holiday decoration, I have just the thing for you! I did these easy jute covered balloon balls and they turned out so awesome. Below you can see my step by step process from start to finish. This idea has me thinking in all kinds of creative directions using string art to decorate for the holidays. I may have to make more! In the meantime check out my picture tutorial and follow along today.
First I gathered all the supplies I needed. (See photo above)
Water Balloons, Scissors, Paint brush, Mod Podge, and Jute.
I also used rubber gloves and a tupperware container that are not pictured.
I blew up the balloons to be mini balls, and then I added the Mod Podge to the tupperware container.
I proceeded to dunk the jute into the mod podge and then wrap it around the balloon using my rubber gloves for protection.
I wrapped about 20 times.
Then I used the paint brush to reinforce the mod podge to the jute.
I let it dry for 24 hours.
Once it was all dry, I popped the balloon and removed it from the middle of the ball.
The jute stayed in place!! Woohoo!! I then used a tweezer to get any extra mod podge out of the gaps and make the ball look cleaner.
I added an ornament hook to the ball and hung it on my tree!
I know many of you have a little one on your holiday gift giving list, and I have a great quick project for you! The Beanie with Bling is next on our series! On the 4th day of Christmas we have something special for the sweet littles in our lives! I made this cute beanie for my niece! This bow topped winter hat, dressed up with a pretty piece of bling is just perfect for this sweet girl! She wears it well and LOVES it! Look at those poses she makes! This free crochet pattern has a written tutorial along with a video for instructions so anyone can make this! I am telling you now, who ever gets this for Christmas will LOVE it! Go make yours now by following my instructions below! The written instructions are linked in the graphics of this post.
Watch this video tutorial to learn how to make this hat:
My dad will continue to be the videographer, editor, and photographer for our videos when I move away.
Support YARNutopia today so we can continue to bring you clear, quality crochet tutorials even after I move into my new home!
There will be an added expense of more travel and hopefully this won’t deter our ability to provide consistent videos on a weekly basis.
Teacher: Nadia Fuad
Video and Editing: Fuad Azmat (My Daddy)
Share your work on Facebook!
Add me on Snapchat: YARNutopia
Follow me on Marly Bird’s Chic Sheep yarn
Visit My Ravelry Store and add this to your Favorites!
Follow me on Twitter: @YARNutopia
Enjoy this video and subscribe to my channel on YouTube for more tutorials on how to crochet!
Leave a comment, and share with your friends!
Pattern:
Designed by Nadia Fuad You *may* sell items made from my pattern, but please reference my website YARNutopia.com.
Please do not copy, sell, and/or post this pattern and claim it as your own.
NOTES:
-Use a smaller hook to make these smaller
-Use a bigger hook to make these bigger
-You can do as many rows of the increase part of this pattern as you want to make it as wide as you want.
I know many of you have a little one on your holiday gift giving list, and I have a great quick project for you! The Beanie with Bling is next on our series! On the 4th day of Christmas we have something special for the sweet littles in our lives! I made this cute beanie for my niece! This bow topped winter hat, dressed up with a pretty piece of bling is just perfect for this sweet girl! She wears it well and LOVES it! Look at those poses she makes! This free crochet pattern has a written tutorial along with a video for instructions so anyone can make this! I am telling you now, who ever gets this for Christmas will LOVE it! Go make yours now by following my instructions below!
My dad will continue to be the videographer, editor, and photographer for our videos when I move away.
Support YARNutopia today so we can continue to bring you clear, quality crochet tutorials even after I move into my new home!
There will be an added expense of more travel and hopefully this won’t deter our ability to provide consistent videos on a weekly basis.
Teacher: Nadia Fuad
Video and Editing: Fuad Azmat (My Daddy)
Share your work on Facebook!
Add me on Snapchat: YARNutopia
Follow me on Marly Bird’s Chic Sheep yarn
Visit My Ravelry Store and add this to your Favorites!
Follow me on Twitter: @YARNutopia
Enjoy this video and subscribe to my channel on YouTube for more tutorials on how to crochet!
Leave a comment, and share with your friends!
Pattern:
Designed by Nadia Fuad You *may* sell items made from my pattern, but please reference my website YARNutopia.com.
Please do not copy, sell, and/or post this pattern and claim it as your own.
NOTES:
-Use a smaller hook to make these smaller
-Use a bigger hook to make these bigger
-You can do as many rows of the increase part of this pattern as you want to make it as wide as you want.
Special stitches:
Ch(s): chain(s)
YO: Yarn Over
BLO: Back Loop Only
FLO: Front Loop Only
St(s): Stitch(es)
Sl st: slip stitch
SK: Skip
SC: Single Crochet
HDC: Half Double Crochet
DC: Double Crochet
Pattern:
If you have any confusion or difficulty with reading this pattern, please watch the video tutorial that is linked above in this blog post to have visual instructions.
Hat:
Ch 31 Row 1: HDC in 2nd Ch from hook and next 4 chs, DC in next 20 chs, SC in last 5 chs, Ch 1, Turn. (30)
Row 2: SC in 1st 5 sts, DC in next 20 sts, Working in BLO, HDC in last 5 sts, Ch 1, turn. (30)
Row 3: Working in BLO, HDC in first 5 sts, Working in Both Loops, DC in next 20 sts, SC in last 5 sts, Ch 1, turn.
Rows 4-35: Repeat Rows 2 & 3
Fasten off with long tail for sewing.
Sew up back of hat and cinch the top closed by sewing it. See video tutorial for visual instructions.
Bow:
Work in BLO and in continuous rounds
Ch 45
Rnd 1: SC in first Ch to form a ring, SC in each ch around, do not attach, continue to work in continuous rounds and in BLO
Rnds 2-12: SC in each st around.
Fasten off with long tail.
Cinch Center together and wrap yarn around. Sew button to center of bow.
Attach bow to top of hat.
See video tutorial for visual instructions
Enjoy!!
This post contains affiliate links, which I may be compensated for when you make a purchase. That means if you click on any link and buy from the linked websites, I will receive a small percentage of the value of your order. The amount you pay is not changed. Thank you for all your support in clicking the links in my blog!! You all are so amazing!! ~Nadia
The yarn provided for this pattern is courtesy of Yarnspirations
In observance of Crohn’s and Colitis Awareness Week (December 1-7), I wanted to share a little bit about my story to help anyone who is unsure how devastating these diseases can be, and to help everyone learn more so they might better understand their impact on a person who lives with this every. single. day.
I have had more than a dozen major surgeries and thousands of medical procedures that require me to be biopsied, explored, cut, stitched, stapled, and pieced back together. This disease has affected every part of my body. I have spent years of my life hospitalized trying to fight this disease. I have lost my large intestine, parts of my small intestine, my rectum, my anus, and a few other parts of my anatomy, forcing me to live with a permanent ileostomy. What is an ostomy you might ask? An ostomy is when part of the intestine is pulled through the abdomen wall allowing waste to empy into an ostomy appliance or bag on the outside of the body.
Although my ostomy saved my life, it also destroyed parts of my self esteem, it caused an enormous amount of anxiety, and oftentimes, depression. As much as I’d rather focus on the positives, one bad day, week, or month can pull you right back into the abyss of some pretty heavy feelings. Thankfully, there are now more good days than bad and without my ostomy, I would not be here as a daughter, a sister, a wife, a mother, a niece, a cousin, an auntie, a crochet teacher, a friend and an advocate.
I remember the days when I wanted to just give up. When I sobbed and hurt; when I begged for Allah to have mercy on me and let me just find relief. I remember the days after surgery when I had to relearn to sit-up, to walk, go to the bathroom in a new way, to take care of all my wounds, to treat all the infections, to fight my way through sepsis, infusions, experimental treatments, failed medications, hearing the good news and the bad, the numerous doctors and labs, the constant feelings of being scared, the bag leaks and the humiliation of being covered in poop in
a public place, and ALL. THAT. PAIN.
This disease has not been kind to me, nor has it been kind to the 5 million people around the world who suffer every day from Crohn’s disease or ulcerative colitis. Every year, I pray and fight and campaign and rally for a cure. Each year passes and although it feels closer, it still feels so far away.
This illness is just part of my story. Even if it has dominated my life for more than ten years, it isn’t all of it. There is so much more to my life than this miserable sickness, and thankfully I am still here to live the best parts of my story.
Every step this crooked, crazy journey has taken me on, landed me right where I am today. I would have never had the opportunity to know this kind of joy or feel this kind of love, if this disease had defeated me.
There are millions of people at the mercy of these illnesses. Although my fight continues, I consider myself lucky. Many are not as lucky as me. I am lucky not because of the treacherous medical path this has taken me on, but lucky because it has brought me here.
Please take a moment to share my story. To spread the word about these life altering diseases. Crohn’s disease and ulcerative colitis are debilitating to many who live with these diseases. This deserves more than a week of awareness. We deserve to find a permanent cure. Please help us find one. I have so much to live for. I want to always be here to watch this little boy grow..
The Winding Ribbon Tree Ornament is decorated with beads to give nice detail to our 3rd in our 12 days of Christmas series! Today I have a very simple, but VERY lovely ornament tutorial.
This is a picture tutorial and pattern showing step by step the creating and assembly process.
By simply making a crochet ribbon by doing a Foundation Half Double Crochet and curling it back and forth, separating each section by beads, you end up with this tiny tree. I did a Foundation Half Double Crochet of 120 stitches.
Follow along with this video to learn how to do the Foundation Half Double Crochet:
Perfect for hanging on the branches of your Christmas tree or adorning the top of your holiday gifts, this easy handmade detail will be sure to wow everyone this season!
This entire process from start to finish will take you less than 30 minutes, but looks like you spent a lot more time than that making this ornament.
Make these in a variety of colors to give your tree a bright and festive look!
This post contains affiliate links, which I may be compensated for when you make a purchase. That means if you click on any link and buy from the linked websites, I will receive a small percentage of the value of your order. The amount you pay is not changed. Thank you for all your support in clicking the links in my blog!! You all are so amazing!! ~Nadia
The yarn provided for this pattern is courtesy of Yarnspirations
Next up in the 12 Days of Christmas project, I have this Corner to Corner Holiday Hotpad. This is the time of year when we gather with friends and family in our homes or in our community. We share our table and time. A beautiful way to dress up the table is to make these lovely potholders to protect the tabletop from the hot food. Disclaimer The Corner to Corner stitch has some small openings in the stitch. This is ONLY for protecting your table and NOT for using to grab hot dishes from the oven. These are made from cotton and would also work as washcloths. Any way you wish to use these, they make a wonderful gift.
Watch this video tutorial to learn how to make this project:
My dad will continue to be the videographer, editor, and photographer for our videos when I move away.
Support YARNutopia today so we can continue to bring you clear, quality crochet tutorials even after I move into my new home!
There will be an added expense of more travel and hopefully this won’t deter our ability to provide consistent videos on a weekly basis.
Teacher: Nadia Fuad
Video and Editing: Fuad Azmat (My Daddy)
Share your work on Facebook!
Add me on Snapchat: YARNutopia
Follow me on Marly Bird’s Chic Sheep yarn
Visit My Ravelry Store and add this to your Favorites!
Follow me on Twitter: @YARNutopia
Enjoy this video and subscribe to my channel on YouTube for more tutorials on how to crochet!
Leave a comment, and share with your friends!
Pattern:
Designed by Nadia Fuad You *may* sell items made from my pattern, but please reference my website YARNutopia.com.
Please do not copy, sell, and/or post this pattern and claim it as your own.
NOTES:
-Use a smaller hook to make these smaller
-Use a bigger hook to make these bigger
-You can do as many rows of the increase part of this pattern as you want to make it as long/wide as you want.
Next up in the 12 Days of Christmas project, I have this Corner to Corner Holiday Hotpad. This is the time of year when we gather with friends and family in our homes or in our community. We share our table and time. A beautiful way to dress up the table is to make these lovely potholders to protect the tabletop from the hot food. Disclaimer The Corner to Corner stitch has some small openings in the stitch. This is ONLY for protecting your table and NOT for using to grab hot dishes from the oven. These are made from cotton and would also work as washcloths. Any way you wish to use these, they make a wonderful gift.
My dad will continue to be the videographer, editor, and photographer for our videos when I move away.
Support YARNutopia today so we can continue to bring you clear, quality crochet tutorials even after I move into my new home!
There will be an added expense of more travel and hopefully this won’t deter our ability to provide consistent videos on a weekly basis.
Teacher: Nadia Fuad
Video and Editing: Fuad Azmat (My Daddy)
Share your work on Facebook!
Add me on Snapchat: YARNutopia
Follow me on Marly Bird’s Chic Sheep yarn
Visit My Ravelry Store and add this to your Favorites!
Follow me on Twitter: @YARNutopia
Enjoy this video and subscribe to my channel on YouTube for more tutorials on how to crochet!
Leave a comment, and share with your friends!
Pattern:
Designed by Nadia Fuad You *may* sell items made from my pattern, but please reference my website YARNutopia.com.
Please do not copy, sell, and/or post this pattern and claim it as your own.
NOTES:
-Use a smaller hook to make these smaller
-Use a bigger hook to make these bigger
-You can do as many rows of the increase part of this pattern as you want to make it as long/wide as you want.
-This pattern is worked using the diagonal box stitch (c2c) in half double crochet stitches.
Special stitches:
Ch(s): chain(s)
YO: Yarn Over
BLO: Back Loop Only
FLO: Front Loop Only
St(s): Stitch(es)
Sl st: slip stitch
SK: Skip
SC: Single Crochet
HDC: Half Double Crochet
DC: Double Crochet
Ch2Sp: Chain 2 Space
Pattern:
If you have any confusion or difficulty with reading this pattern, please watch the video tutorial that is linked above in this blog post to have visual instructions.
Hotpad:
(Change color each row for the first 12 Rows)
Ch 5 Row 1: HDC in 3rd ch from hook and in each of next 2 Chs, Change color (See video tutorial for visual instructions)
From now on, you’ll start increasing 1 box stitch in each row.
Row 2: Turn your work. ch 5, HDC in 3rd ch from hook and in each of next 2 Chs (first box st of the 2nd row made), sk all 3 sts of next box, sl st into Ch2Sp of that box st; ch 2, work 3 hdc in same Ch2Sp (2nd. Box st of the 2nd row made). Change color.
Row 3: Turn your work, Ch 5, HDC in 3rd Ch from hook and each of the next 2 Chs. (first box st of the 3rd row made) *sk all 3 sts of next box st and sl st into the Ch2Sp at left of that box st, ch 2, work 3 hdc in same Ch2Sp . (2nd. Box st of the 3rd row made); repeat from * for the next box St (3rd. Box st of the 3rd row made).
Continue repeating Row 3 increasing 1 box st each row, Change color each row as per the photo/video tutorial.
After Row 12, you will start decreasing each row and no more color changes.
First Decrease Row (Row 13):
Turn your work. DO NOT chain 5 anymore.
Row 13: Sl st loosely into top of each HDC st of the last box stitch made in the previous row, then sl st into next Ch2Sp of last box st from previous row, Ch 2, work 3 HDC into same Ch2Sp (First box st of decrease row made); *Sk the 3 sts of next box st and sl st into the Ch2Sp at left of that box st, ch 2, make 3 HDC into same Ch2Sp, repeat from * until you reach to the last box st of previous row. Join with sl st to Ch2Sp of last block st from previous row.
Next Decrease Row (here Rows 14-23): Repeat the steps from row 13, each row decreasing 1 box st each row until you get to 1 box st by row 23.
Fasten off, weave in ends.
Border:
Rnd 1: Attach yarn to any corner, Ch 1, SC in same corner, Ch 2, SC in the corner again, [Ch 2, *SC in
between the next 2 block Sts, Ch 2, repeat from * until next corner**, work (1 sc, 2ch, 1 sc) in next
corner] x 4 times, but at 4th repeat (on 4th side) end at **, join with sl st to first St.
Rnd 2: Sl st into Ch 2 sp of first corner, Ch 2, *5 DC into ch2 sp of first corner, SC into
next Ch 2 sp, *5 DC in next ch 2 sp, SC in next Ch 2 sp, repeat from * around, sl st to first SC. Fasten off. Weave in ends.
Enjoy!!
This post contains affiliate links, which I may be compensated for when you make a purchase. That means if you click on any link and buy from the linked websites, I will receive a small percentage of the value of your order. The amount you pay is not changed. Thank you for all your support in clicking the links in my blog!! You all are so amazing!! ~Nadia
The yarn provided for this pattern is courtesy of Yarnspirations
Is there a reader in your life who loves physical books and hasn’t moved to all digital methods when it comes to reading? Then I have the perfect gift for you! My Shell Stitch Lace Bookmark is so beautiful and so delicate, it is perfect in the pages of a favorite book. This bookmark is vintage inspired and will awe anyone on your gift giving list. Made with thread, this lacy look is stunning! Wrap this up with a favorite novel and you will win the heart of every reader you know!
Watch this video tutorial to learn how to make this project:
My dad will continue to be the videographer, editor, and photographer for our videos when I move away.
Support YARNutopia today so we can continue to bring you clear, quality crochet tutorials even after I move into my new home!
There will be an added expense of more travel and hopefully this won’t deter our ability to provide consistent videos on a weekly basis.
Teacher: Nadia Fuad
Video and Editing: Fuad Azmat (My Daddy)
Share your work on Facebook!
Add me on Snapchat: YARNutopia
Follow me on Instagram
Visit My Ravelry Store and add this to your Favorites!
Follow me on Twitter: @YARNutopia
Enjoy this video and subscribe to my channel on YouTube for more tutorials on how to crochet!
Leave a comment, and share with your friends!
Pattern:
Designed by Nadia Fuad You *may* sell items made from my pattern, but please reference my website YARNutopia.com.
Please do not copy, sell, and/or post this pattern and claim it as your own.
NOTES:
-Use a smaller hook to make these smaller
-Use a bigger hook to make these bigger
-You can do as many rows of this pattern as you want to make it as long as you want.
We are launching our 12 Days of Christmas crafts with a beautiful handmade bookmark. Do you know someone who loves to read? For all the book lovers in your life, you can make this beautiful Shell Stitch Lace Bookmarker. Pair this with a best seller book and you will be sure to awe the most distinguished book enthusiast on your list!
My dad will continue to be the videographer, editor, and photographer for our videos when I move away.
Support YARNutopia today so we can continue to bring you clear, quality crochet tutorials even after I move into my new home!
There will be an added expense of more travel and hopefully this won’t deter our ability to provide consistent videos on a weekly basis.
Teacher: Nadia Fuad
Video and Editing: Fuad Azmat (My Daddy)
Share your work on Facebook!
Add me on Snapchat: YARNutopia
Follow me on Marly Bird’s Chic Sheep yarn
Visit My Ravelry Store and add this to your Favorites!
Follow me on Twitter: @YARNutopia
Enjoy this video and subscribe to my channel on YouTube for more tutorials on how to crochet!
Leave a comment, and share with your friends!
Pattern:
Designed by Nadia Fuad You *may* sell items made from my pattern, but please reference my website YARNutopia.com.
Please do not copy, sell, and/or post this pattern and claim it as your own.
NOTES:
-Use a smaller hook to make these smaller
-Use a bigger hook to make these bigger
-You can do as many rows of this pattern as you want to make it as long as you want.
Special stitches:
Ch(s): chain(s)
YO: Yarn Over
BLO: Back Loop Only
FLO: Front Loop Only
St(s): Stitch(es)
Sl st: slip stitch
SK: Skip
SC: Single Crochet
HDC: Half Double Crochet
DC: Double Crochet
TR: Treble Crochet
Shell: [DC, Ch 1, DC, Ch 1, DC, Ch 1, DC] in same stitch
Pattern:
If you have any confusion or difficulty with reading this pattern, please watch the video tutorial that is linked above in this blog post to have visual instructions.
With Thread and 1mm crochet hook
Ch 35
Row 1: HDC in 3rd Ch from hook, * Sk 3 chs, [DC, Ch 1, DC, Ch 1, DC, Ch 1, DC] in next Ch (Shell made), Sk 3 Chs, HDC in next Ch, Repeat From * across, ending with HDC in last Ch. Turn.
Row 2: Ch 3, [DC, Ch 1, DC] in first st, *HDC in Center Ch of next Shell, Shell in next HDC, Repeat from * across, ending with [DC, Ch 1, 2 DC] in last St. Turn.
Row 3: Ch 2, HDC in first st, *Shell in next HDC , HDC in center of next Shell, Repeat from * ending with HDC in last st. Turn.
Rows 4-29: Repeat Rows 2 and 3
Row 30: Ch 3, *SC in center of next shell, Ch 3, HDC in next HDC, Repeat from * across, ending with HDC in last st.
Fasten off, weave in ends.
Attach many strands of yarn in the top center of your bookmark and make a braid. Tie off and cut the tassel to make it neat.
Enjoy!!
This post contains affiliate links, which I may be compensated for when you make a purchase. That means if you click on any link and buy from the linked websites, I will receive a small percentage of the value of your order. The amount you pay is not changed. Thank you for all your support in clicking the links in my blog!! You all are so amazing!! ~Nadia
The yarn provided for this pattern is courtesy of Red Heart Yarns
Introducing my Family Fair Isle Hat. This is a fun pattern for everyone! OOOH Yeah! This is the perfect hat for the season, for the family, for ANYONE on your gift giving list-and don’t forget to make one for yourself! I have provided you the pattern to make one in several sizes-baby, youth, teen/adult, XL adult, and I took the guess-work out of this pattern for you. In our family photos, I have done a variation on the color scheme in each hat using the beautiful colors provided by Marly Bird’s Chic Sheep yarn. Find the selection of colors here! You can find the perfect combination for everyone.
One of the loveliest things about this pattern is the versatility. Not only can you make it in any size, you can use a yarn pom, no pom,or a furry pom found here. You can keep the earflaps or make it a simple beanie or ski hat and leave them off. You can put braids or tassels on the earflaps – MAKE IT YOUR OWN! But, if you do, be sure to share those photos on my Facebook page, tag me on Instagram, or Snapchat me your pics! I can’t wait to see what you do.
If you are giving a handmade gift this hat alone or paired with a matching set of my Fair Isle Knee High Socks would make anyone delighted to find these under the tree. Be sure to check out my knee high socks here and get started on these great patterns today!
Follow along with this video tutorial to learn how to make this hat:
My dad will continue to be the videographer, editor, and photographer for our videos when I move away.
Support YARNutopia today so we can continue to bring you clear, quality crochet tutorials even after I move into my new home!
There will be an added expense of more travel and hopefully this won’t deter our ability to provide consistent videos on a weekly basis.
Teacher: Nadia Fuad
Video and Editing: Fuad Azmat (My Daddy)
Share your work on Facebook!
Add me on Snapchat: YARNutopia
Follow me on Instagram
Visit My Ravelry Store and add this to your Favorites!
Follow me on Twitter: @YARNutopia
Enjoy this video and subscribe to my channel on YouTube for more tutorials on how to crochet!
Leave a comment, and share with your friends!
Pattern:
Designed by Nadia Fuad You *may* sell items made from my pattern, but please reference my website YARNutopia.com.
Please do not copy, sell, and/or post this pattern and claim it as your own.
NOTES:
-Use a smaller hook to make these smaller
-Use a bigger hook to make these bigger
-You can do as many rows of this pattern as you want to make it as tall as you want.
-This hat is in a multiple of 4 so make your foundation chain in a multiple of 4 that fits around your head.
-Work your Single Crochet Stitches into the CENTER of the stitch and NOT in the top loops. See the video tutorial to see exactly the location you should insert your hook into the stitches.
Small: Fits Size 3-6 Months
Medium: Fits Child
Large: Fits an adult (female)
X-Large: Fits large adult (male)
Introducing my Family Fair Isle Hat. This is a fun pattern for everyone! OOOH Yeah! This is the perfect hat for the season, for the family, for ANYONE on your gift giving list-and don’t forget to make one for yourself! I have provided you the pattern to make one in several sizes-baby, youth, teen/adult, XL adult, and I took the guess-work out of this pattern for you. In our family photos, I have done a variation on the color scheme in each hat using the beautiful colors provided by Marly Bird’s Chic Sheep yarn. Find the selection of colors here! You can find the perfect combination for everyone.
One of the loveliest things about this pattern is the versatility. Not only can you make it in any size, you can use a yarn pom, no pom,or a furry pom found here. You can keep the earflaps or make it a simple beanie or ski hat and leave them off. You can put braids or tassels on the earflaps – MAKE IT YOUR OWN! But, if you do, be sure to share those photos on my Facebook page, tag me on Instagram, or Snapchat me your pics! I can’t wait to see what you do.
If you are giving a handmade gift this hat alone or paired with a matching set of my Fair Isle Knee High Socks would make anyone delighted to find these under the tree. Be sure to check out my knee high socks here and get started on these great patterns today!
My dad will continue to be the videographer, editor, and photographer for our videos when I move away.
Support YARNutopia today so we can continue to bring you clear, quality crochet tutorials even after I move into my new home!
There will be an added expense of more travel and hopefully this won’t deter our ability to provide consistent videos on a weekly basis.
Teacher: Nadia Fuad
Video and Editing: Fuad Azmat (My Daddy)
Share your work on Facebook!
Add me on Snapchat: YARNutopia
Follow me on Marly Bird’s Chic Sheep yarn
Visit My Ravelry Store and add this to your Favorites!
Follow me on Twitter: @YARNutopia
Enjoy this video and subscribe to my channel on YouTube for more tutorials on how to crochet!
Leave a comment, and share with your friends!
Pattern:
Designed by Nadia Fuad You *may* sell items made from my pattern, but please reference my website YARNutopia.com.
Please do not copy, sell, and/or post this pattern and claim it as your own.
NOTES:
-Use a smaller hook to make these smaller
-Use a bigger hook to make these bigger
-You can do as many rows of this pattern as you want to make it as tall as you want.
-This hat is in a multiple of 4 so make your foundation chain in a multiple of 4 that fits around your head.
-Work your Single Crochet Stitches into the CENTER of the stitch and NOT in the top loops. See the video tutorial to see exactly the location you should insert your hook into the stitches.
Small: Fits Size 3-6 Months
Medium: Fits Child
Large: Fits an adult (female)
X-Large: Fits large adult (male)
Special stitches:
Ch(s): chain(s)
YO: Yarn Over
BLO: Back Loop Only
FLO: Front Loop Only
St(s): Stitch(es)
Sl st: slip stitch
SK: Skip
SC: Single Crochet
HDC: Half Double Crochet
DC: Double Crochet
FPHDC: Front Post Half Double Crochet
BPHDC: Back Post Half Double Crochet
SC2TOG: Single Crochet Decrease
HDC2TOG: Half Double Crochet Decrease
Pattern:
If you have any confusion or difficulty with reading this pattern, please watch the video tutorial that is linked above in this blog post to have visual instructions.
With Brim Color (I used Polo in my hat)
Small: Chain 56 Medium: Chain 72 Large: Chain 80 (this is the size I demonstrated in the video tutorial) X-Large: Ch 96
(You can chain any multiple of 4 that fits around your head and make this pattern according to the instructions)
Rnd 1: Sl st to your first chain to form a large ring, Ch 1, HDC in each Ch around, sl st to the first HDC, Ch 1. (56, 72, 80, or 96 sts)
Rnds 2-5: FPHDC on first st, *BPHDC on next st, FPHDC on next st, repeat from * around ending with BPHDC on last st, sl st to first st, Ch 1.
Fasten off brim and change color to Linen
Attach Linen to any stitch around. Ch 1
Rnd 6: SC in each st around working in the top of the stitch, do not join (continue to work in continuous rounds for the rest of this hat
Rnds 7-8: SC into each st around (see video tutorial for visual instruction on working INTO the stitch and not in the top loops of the stitch) This will create the Knit looking stitches.
NOTE: Work OVER THE TOP of your unused yarn when changing colors so frequently during the rounds. This will save you from having to sew in so many loose ends. (See video tutorial on this technique)
Fasten off Linen and change to your main color. I used Lipstick red in my main color of the hat.
Rnd 9: Attach Lipstick Red to any stitch around, Ch 1, SC INTO each st around.
Rnd 10: SC with Main Color in first 3 sts, *Change to Linen after the 3rd stitch and put ONE SC of Linen in the next stitch, Change color right away back to your main color, and make a SC in each of the next 3 sts, repeat from * around ending with a SC of Linen in the last stitch, switch back to your main color right away for the next round. (If this is written confusing, please see the video tutorial for visual instructions).
It is quite difficult to explain in writing, until you know what’s being explained. Moving on.
Rnd 11: With your main color, SC INTO each st around (you will not be changing color at all during this round)
Rnd 12: With your main color, SC in the first st, Change to Linen after that first st, * put ONE SC of Linen in the next st, Change color right away back to your main color, and make a SC in each of the next 3 sts, Change color to Linen after the 3rd st, repeat from * around, ending with SC of Main color in the last 2 sts, Do not change color for the next round.
Small: Rnds 13-26: Repeat Rounds 9-12
Medium: Rnds 13-34: Repeat Rounds 9-12
Large: Rnds 13-38: Repeat Rounds 9-12
X-Large: Rnds 13-46: Repeat Rounds 9-12
Cut your Linen yarn, you will no longer need it.
The next round after you are finished with the fair isle design:
All sizes: [SC in next 2 sts, SC2TOG] repeat around. (This decreases the top to cinch it closed)
Last round: [SC in next st, SC2TOG] repeat around (decreased more)
Fasten off with long tail for sewing.
Cinch the top closed with the yarn you cut and tie it off to close the top of the hat.
add a pom to the top of the hat.
Earflaps: MAKE 2
All sizes:
Ch 13 Row 1: HDC in 2nd ch and each ch across, Ch 1, Turn. (12)
Rows 2-5: HDC in each st across, Ch 1, Turn. (12)
Row 6: HDC2TOG, HDC in next 8 sts, HDC2TOG, Ch 1, Turn. (10)
Row 7: HDC in each st across, ch 1, turn. (10)
Row 8: HDC2TOG, HDC in next 6 sts, HDC2TOG, Ch 1, Turn. (8)
Row 9: HDC in each st across, Ch 1, Turn. (8)
Row 10: HDC2TOG, HDC in next 4 sts, HDC2TOG, Ch 1, Turn. (6)
Row 11: SC across and continue to SC around entire piece.
Fasten off, weave in ends.
Sew to the inside of the brim on either side of the hat (See video tutorial for visual instructions)
Add braids to each earflap
Weave in the rest of your ends.
Enjoy!!
This post contains affiliate links, which I may be compensated for when you make a purchase. That means if you click on any link and buy from the linked websites, I will receive a small percentage of the value of your order. The amount you pay is not changed. Thank you for all your support in clicking the links in my blog!! You all are so amazing!! ~Nadia
The yarn provided for this pattern is courtesy of Red Heart Yarns
I woke up this morning to so many wonderful birthday messages! After I posted a video of Nasir and his sweet baby giggles yesterday on Facebook, I I received so much love and so many wishes!
I decided to share the videos here in my blog for everyone to enjoy. Thank you all so much for your heartfelt messages of love and sweet wishes for a happy birthday. It really meant a lot to me and each one was so well received. Even more, thank you for the sweetness you share with me about Nasir, about your own babies, and about your encouragement to me as a new mom. You have no idea how much it all means to me. I hold each comment and good wish close to my heart.
Whether we were playing or changing his stinky diaper, he was just full of smiles and laughter!
I worked most of the day on some new projects! Here is a quick sneak peak of a new pattern on my hook! I will be releasing this early next week!
After we spent the day filming some new tutorials, we headed out for some birthday treats.
All day my sweet boy was giggling and being so silly!! He was such a good boy even long after his bedtime! But at the end of the day, he was ready for bed in his big boy crib. (We just transitioned from the bassinet)’
Thank you again for making my birthday so special!!
This fabulous earflap hat was an alternate hat that I made for Nasir’s Halloween costume, but it’s just so cute, I had to share it!! Even if you didn’t use it for a costume, your little one can wear a crown and stay warm out in the cold with a cute hat too! Enjoy the pattern and video tutorial!
Here’s our family photo of our costumes:
Follow along with this video tutorial to learn how to make this hat:
My dad will continue to be the videographer, editor, and photographer for our videos when I move away.
Support YARNutopia today so we can continue to bring you clear, quality crochet tutorials even after I move into my new home!
There will be an added expense of more travel and hopefully this won’t deter our ability to provide consistent videos on a weekly basis.
Teacher: Nadia Fuad
Video and Editing: Fuad Azmat (My Daddy)
Share your work on Facebook!
Add me on Snapchat: YARNutopia
Follow me on Instagram
Visit My Ravelry Store and add this to your Favorites!
Follow me on Twitter: @YARNutopia
Enjoy this video and subscribe to my channel on YouTube for more tutorials on how to crochet!
Leave a comment, and share with your friends!
Pattern:
Designed by Nadia Fuad You *may* sell items made from my pattern, but please reference my website YARNutopia.com.
Please do not copy, sell, and/or post this pattern and claim it as your own.
NOTES:
-Use a smaller hook to make these smaller
-Use a bigger hook to make these bigger
-You can do as many rows of this pattern as you want to make it as long as you want.
-You can do a Single Crochet or a Reverse Single Crochet around the edge to clean it up and make it have a nice finished look
This fabulous earflap hat was an alternate hat that I made for Nasir’s Halloween costume, but it’s just so cute, I had to share it!! Even if you didn’t use it for a costume, your little one can wear a crown and stay warm out in the cold with a cute hat too! Enjoy the pattern and video tutorial!
Here’s our family photo of our costumes:
My dad will continue to be the videographer, editor, and photographer for our videos when I move away.
Support YARNutopia today so we can continue to bring you clear, quality crochet tutorials even after I move into my new home!
There will be an added expense of more travel and hopefully this won’t deter our ability to provide consistent videos on a weekly basis.
Teacher: Nadia Fuad
Video and Editing: Fuad Azmat (My Daddy)
Share your work on Facebook!
Add me on Snapchat: YARNutopia
Follow me on Instagram
Visit My Ravelry Store and add this to your Favorites!
Follow me on Twitter: @YARNutopia
Enjoy this video and subscribe to my channel on YouTube for more tutorials on how to crochet!
Leave a comment, and share with your friends!
Pattern:
Designed by Nadia Fuad You *may* sell items made from my pattern, but please reference my website YARNutopia.com.
Please do not copy, sell, and/or post this pattern and claim it as your own.
NOTES:
-Use a smaller hook to make these smaller
-Use a bigger hook to make these bigger
Special stitches:
Ch(s): chain(s)
YO: Yarn Over
BLO: Back Loop Only
FLO: Front Loop Only
St(s): Stitch(es)
Sl st: slip stitch
SK: Skip
SC: Single Crochet
HDC: Half Double Crochet
DC: Double Crochet
Pattern:
If you have any confusion or difficulty with reading this pattern, please watch the video tutorial that is linked above in this blog post to have visual instructions.
Hat:
With Aran
Ch 2
Rnd 1: 9 HDC in 2nd ch from hook, sl st to first st, ch 1. (9)
Rnd 2: 2 HDC in each st around, sl st to first st, Ch 1. (18)
Rnd 3: [2 HDC in next st, HDC in next st] 9 times, sl st to first st, ch 1. (27)
Rnd 4: [2 HDC in next st, HDC in next 2 sts] 9 times, sl st to first st, ch 1. (36)
Rnd 5: [2 HDC in next st, HDC in next 3 sts] 9 times, sl st to first st, ch 1. (45)
Rnd 6: [2 HDC in next st, HDC in next 4 sts] 9 times, sl st to first st, ch 1. (54)
Rnds 7-13: HDC in each st around, sl st to first st, ch 1. (54)
Rnd 14: *FPHDC on next st, BPHDC on next st, repeat from * around, sl st to first st, Ch 1. (54)
Rnds 15-16: Repeat Rnd 14.
Fasten off, weave in ends.
Earflaps:Make 2 in Aran
Ch 11
Row 1: SC in 2nd Ch from hook and across, ch 1, turn. (10)
Row 2: SC in each st across, ch 1, turn. (10)
Row 3: SC2TOG, SC in each st until 2 sts remain, SC2TOG, Ch 1, turn. (8)
Row 4: Repeat Row 2.
Row 5: Repeat Row 3. (6)
Row 6: Repeat Row 2.
Row 7: Repeat Row 3. (4)
Row 8: SC across and continue to SC around entire piece.
Fasten off, Weave in ends.
Sew earflaps to hat (See video tutorial for visual instructions)
Optional: Add braids to the earflaps.
Crown:
With Gold
Row 1: FDC 54 or chain 56, DC in 3rd ch from hook and across. (54 sts) Sl st to first st to form a large ring
Row 2: Ch 1, SC in 1st st, * Sk 2 sts, [3DC, Ch 2, 3DC] in next st, Sk 2 sts, SC in next st, repeat from * around, sl st to first st.
Fasten off with long tail for sewing.
Optional: Crochet around the bottom of the hat with Hygge Fur for an extra embellishment.
Sew your crown closed at the bottom and sew the crown to the hat. (See the video tutorial for visual instructions)
Weave in the rest of your ends.
Enjoy!!
This post contains affiliate links, which I may be compensated for when you make a purchase. That means if you click on any link and buy from the linked websites, I will receive a small percentage of the value of your order. The amount you pay is not changed. Thank you for all your support in clicking the links in my blog!! You all are so amazing!! ~Nadia
The yarn provided for this pattern is courtesy of Red Heart Yarns
When your little monster needs a pair of boots with claws, look no further. Here are my version of the Monster Feet Baby Booties, and are they delightful! Perfect for gift giving or costumes, these booties will be a hit for everyone!
The pair here was designed for the Max costume worn by my son for Halloween, but don’t hesitate to change these up to make them your own and match any outfit or accessorize any costume.
Here’s our family photo of our costumes:
There is no video tutorial available for these booties, but if you watch the feet part of the Elephant Baby Booties, they are the same foot part of those slippers..
Also, the toes/claws are the same as the Beast Claws on the Beast Gloves you can find here.
My dad will continue to be the videographer, editor, and photographer for our videos when I move away.
Support YARNutopia today so we can continue to bring you clear, quality crochet tutorials even after I move into my new home!
There will be an added expense of more travel and hopefully this won’t deter our ability to provide consistent videos on a weekly basis.
Teacher: Nadia Fuad
Video and Editing: Fuad Azmat (My Daddy)
Share your work on Facebook!
Add me on Snapchat: YARNutopia
Follow me on Instagram
Visit My Ravelry Store and add this to your Favorites!
Follow me on Twitter: @YARNutopia
Enjoy this video and subscribe to my channel on YouTube for more tutorials on how to crochet!
Leave a comment, and share with your friends!
Pattern:
Designed by Nadia Fuad You *may* sell items made from my pattern, but please reference my website YARNutopia.com.
Please do not copy, sell, and/or post this pattern and claim it as your own.
NOTES:
-Use a smaller hook to make these smaller
-Use a bigger hook to make these bigger
Special stitches:
Ch(s): chain(s)
YO: Yarn Over
BLO: Back Loop Only
FLO: Front Loop Only
St(s): Stitch(es)
Sl st: slip stitch
SK: Skip
SC: Single Crochet
HDC: Half Double Crochet
DC: Double Crochet
Pattern:
If you have any confusion or difficulty with reading this pattern, please watch the video tutorial that is linked above in this blog post to have visual instructions.
Booties: Make 2
Chain 10 Rnd 1: 2sc into 2nd ch from hook. Sc in next 5 st. Hdc in next 2. 8Dc in last ch. Working on other side, hdc in next 2, sc in next 5, 2 sc in last stitch where beginning 2 sc are. Don’t join. (26 sts)
Rnd 2: 2 sc in 1st st from last row, 2 sc in next. Sc 7, hdc in next, 2hdc in each of the next 6 stitches, hdc in next, Sc 7, 2 sc in last 2 stitches. Do not join – (36 sts)
Rnd 3: Sc in next 2 stitches, 2 sc in next. Sc10, 2sc in next 2 stitches, sc in next 6, 2 sc in next 2 stitches. Sc 10, 2sc in next. Sc in last 2 stitches. Fasten off (42 sts)
Rnd 4: Attach Yarn to BLO of the stitch you fastened off in, sc in BLO of each stitch around. Join to 1st sc. Ch 1 (42 sts)
Rnd 5: Sc in same as join, and in each sc around. Join, ch1. (42 sts)
Rnd 6: Hdc in same as join and in each stitch around, join with ss to 1st hdc (42 sts)
Rnd 7: Sc in same st as join, sc in next stitch, sc2tog, sc 7, hdc2tog 10 times, sc 7, sc2tog, sc in last 2 stitches. Join, ch1. Don’t turn. (30 sts)
Rnds 10-12: Ch 1, HDC in each st around, sl st to first st.
Fasten off after Rnd 12. Weave in ends.
Claws: Make 6 or however many you want (Work in continuous rounds)
Ch 2
Rnd 1: SC 4 in 2nd ch from hook. (4)
Rnd 2: SC in each st. (4)
Rnd 3: 2 SC in next st, 1 sc in next 3 sts. (5)
Rnd 4: 2 SC in next st, 1 sc in next 4 sts. (6)
Rnd 5: 2 SC in next st, 1 sc in next 5 sts. (7)
Rnd 6: 2 SC in next st, 1 sc in next 6 sts. (8)
Fasten off with long tail for sewing.
Sew claws to the tips of the booties.
Weave in the rest of your ends.
Enjoy!!
This post contains affiliate links, which I may be compensated for when you make a purchase. That means if you click on any link and buy from the linked websites, I will receive a small percentage of the value of your order. The amount you pay is not changed. Thank you for all your support in clicking the links in my blog!! You all are so amazing!! ~Nadia
The yarn provided for this pattern is courtesy of Red Heart Yarns
Here is the next piece in the costume ensemble. The Sweet Dreams Baby Bonnet and Crown is a two-piece project and each of these pieces can be made independently! Need a bonnet? (check) Need a crown? (check) This video tutorial and pattern has you covered for both! You can make one or the other or combine them to make ONE fantastic headpiece for your baby! Just like the character Max from the book “Where The Wild Things Are,” your little one can transform into royalty and be the king (or queen) of your world!
Here’s our family photo of our costumes:
My dad will continue to be the videographer, editor, and photographer for our videos when I move away.
Support YARNutopia today so we can continue to bring you clear, quality crochet tutorials even after I move into my new home!
There will be an added expense of more travel and hopefully this won’t deter our ability to provide consistent videos on a weekly basis.
Teacher: Nadia Fuad
Video and Editing: Fuad Azmat (My Daddy)
Share your work on Facebook!
Add me on Snapchat: YARNutopia
Follow me on Instagram
Visit My Ravelry Store and add this to your Favorites!
Follow me on Twitter: @YARNutopia
Enjoy this video and subscribe to my channel on YouTube for more tutorials on how to crochet!
Leave a comment, and share with your friends!
Pattern:
Designed by Nadia Fuad You *may* sell items made from my pattern, but please reference my website YARNutopia.com.
Please do not copy, sell, and/or post this pattern and claim it as your own.
NOTES:
-Use a smaller hook to make these smaller
-Use a bigger hook to make these bigger
Special stitches:
Ch(s): chain(s)
YO: Yarn Over
BLO: Back Loop Only
FLO: Front Loop Only
St(s): Stitch(es)
Sl st: slip stitch
SK: Skip
SC: Single Crochet
HDC: Half Double Crochet
DC: Double Crochet
Pattern:
If you have any confusion or difficulty with reading this pattern, please watch the video tutorial that is linked above in this blog post to have visual instructions.
Crown:
With Gold
Ch 55 or any multiple of 9 +1
Row 1: HDC in 2nd ch from hook and across, Ch 1, Turn. (54)
Rows 2-5: HDC in each st across, Ch 1, Turn. (54)
Do not fasten off
You will now be making each point of the crown
Row 1: SC in 9 sts, leave the rest unworked, Ch 1, turn. (9)
Row 2: SC in each st across, Ch 1, Turn. (9)
Row 3: SC2TOG, SC in each st until 2 sts remain, SC2TOG, Ch 1, Turn. (7)
Row 4: SC in each st across, Ch 1, Turn. (7)
Row 5: Repeat Row 3. (5)
Row 6: Repeat Row 4. (5)
Row 7: Repeat Row 3. (3)
Row 8: Repeat Row 4. (3)
Row 9: SC3TOG, Do not turn,
Sl st down the side of the point back down to Row 5 of the strap part of the crown (See video tutorial for visual instructions)
Repeat Rows 1-9 for the rest of the points. (See Video tutorial for visual instructions)
Do not fasten off, CH 1, and SC along the top edge to clean it up. Fasten off with long tail for sewing.
Sew your crown closed, sew fur to the bottom edge of your crown.
Weave in the rest of your ends.
Enjoy!!
This post contains affiliate links, which I may be compensated for when you make a purchase. That means if you click on any link and buy from the linked websites, I will receive a small percentage of the value of your order. The amount you pay is not changed. Thank you for all your support in clicking the links in my blog!! You all are so amazing!! ~Nadia
The yarn provided for this pattern is courtesy of Red Heart Yarns
Here is the next piece in the costume ensemble. The Sweet Dreams Baby Bonnet and Crown is a two-piece project and each of these pieces can be made independently! Need a bonnet? (check) Need a crown? (check) This video tutorial and pattern has you covered for both! You can make one or the other or combine them to make ONE fantastic headpiece for your baby! Just like the character Max from the book “Where The Wild Things Are,” your little one can transform into royalty and be the king (or queen) of your world!
Here’s our family photo of our costumes:
Follow along with this video tutorial to learn how to make this crown:
My dad will continue to be the videographer, editor, and photographer for our videos when I move away.
Support YARNutopia today so we can continue to bring you clear, quality crochet tutorials even after I move into my new home!
There will be an added expense of more travel and hopefully this won’t deter our ability to provide consistent videos on a weekly basis.
Teacher: Nadia Fuad
Video and Editing: Fuad Azmat (My Daddy)
Share your work on Facebook!
Add me on Snapchat: YARNutopia
Follow me on Instagram
Visit My Ravelry Store and add this to your Favorites!
Follow me on Twitter: @YARNutopia
Enjoy this video and subscribe to my channel on YouTube for more tutorials on how to crochet!
Leave a comment, and share with your friends!
Pattern:
Designed by Nadia Fuad You *may* sell items made from my pattern, but please reference my website YARNutopia.com.
Please do not copy, sell, and/or post this pattern and claim it as your own.
NOTES:
-Use a smaller hook to make these smaller
-Use a bigger hook to make these bigger
-You can do as many rows of this pattern as you want to make it as long as you want.
-You can do a Single Crochet or a Reverse Single Crochet around the edge to clean it up and make it have a nice finished look
Here is the next piece in the costume ensemble. The Sweet Dreams Baby Bonnet and Crown is a two-piece project and each of these pieces can be made independently! Need a bonnet? (check) Need a crown? (check) This video tutorial and pattern has you covered for both! You can make one or the other or combine them to make ONE fantastic headpiece for your baby! Just like the character Max from the book “Where The Wild Things Are,” your little one can transform into royalty and be the king (or queen) of your world!
Here’s our family photo of our costumes:
Follow along with this video tutorial to learn how to make this bonnet:
My dad will continue to be the videographer, editor, and photographer for our videos when I move away.
Support YARNutopia today so we can continue to bring you clear, quality crochet tutorials even after I move into my new home!
There will be an added expense of more travel and hopefully this won’t deter our ability to provide consistent videos on a weekly basis.
Teacher: Nadia Fuad
Video and Editing: Fuad Azmat (My Daddy)
Share your work on Facebook!
Add me on Snapchat: YARNutopia
Follow me on Instagram
Visit My Ravelry Store and add this to your Favorites!
Follow me on Twitter: @YARNutopia
Enjoy this video and subscribe to my channel on YouTube for more tutorials on how to crochet!
Leave a comment, and share with your friends!
Pattern:
Designed by Nadia Fuad You *may* sell items made from my pattern, but please reference my website YARNutopia.com.
Please do not copy, sell, and/or post this pattern and claim it as your own.
NOTES:
-Use a smaller hook to make these smaller
-Use a bigger hook to make these bigger
-You can do as many rows of this pattern as you want to make it as long as you want.
-You can do a Single Crochet or a Reverse Single Crochet around the edge to clean it up and make it have a nice finished look
Here is the next piece in the costume ensemble. The Sweet Dreams Baby Bonnet and Crown is a two-piece project and each of these pieces can be made independently! Need a bonnet? (check) Need a crown? (check) This video tutorial and pattern has you covered for both! You can make one or the other or combine them to make ONE fantastic headpiece for your baby! Just like the character Max from the book “Where The Wild Things Are,” your little one can transform into royalty and be the king (or queen) of your world!
Here’s our family photo of our costumes:
My dad will continue to be the videographer, editor, and photographer for our videos when I move away.
Support YARNutopia today so we can continue to bring you clear, quality crochet tutorials even after I move into my new home!
There will be an added expense of more travel and hopefully this won’t deter our ability to provide consistent videos on a weekly basis.
Teacher: Nadia Fuad
Video and Editing: Fuad Azmat (My Daddy)
Share your work on Facebook!
Add me on Snapchat: YARNutopia
Follow me on Instagram
Visit My Ravelry Store and add this to your Favorites!
Follow me on Twitter: @YARNutopia
Enjoy this video and subscribe to my channel on YouTube for more tutorials on how to crochet!
Leave a comment, and share with your friends!
Pattern:
Designed by Nadia Fuad You *may* sell items made from my pattern, but please reference my website YARNutopia.com.
Please do not copy, sell, and/or post this pattern and claim it as your own.
NOTES:
-Use a smaller hook to make these smaller
-Use a bigger hook to make these bigger
Special stitches:
Ch(s): chain(s)
YO: Yarn Over
BLO: Back Loop Only
FLO: Front Loop Only
St(s): Stitch(es)
Sl st: slip stitch
SK: Skip
SC: Single Crochet
HDC: Half Double Crochet
DC: Double Crochet
Pattern:
If you have any confusion or difficulty with reading this pattern, please watch the video tutorial that is linked above in this blog post to have visual instructions.
Bonnet:
Ch 2
Rnd 1: 9 HDC in 2nd Ch from hook, Sl st to first st, TURN. (9)
Rnd 2: Ch 1, 2 HDC in each st around, sl st to first st, TURN (18)
Rnd 3: Ch 1, [2 HDC in next st, HDC in next st] 9 times, sl st to first st, TURN. (27)
Rnd 4: Ch 1, [2 HDC in next st, HDC in next 2 sts] 9 times, sl st to first st, TURN. (36)
Rnd 5: Ch 1, [2 HDC in next st, HDC in next 3 sts] 9 times, sl st to first st, TURN. (45)
Rnd 6: Ch 1, [2 HDC in next st, HDC in next 4 sts] 9 times, sl st to first st, TURN. (54)
You will now work in rows:
Row 7: Ch 1, HDC in next 48 sts, leave the rest unworked, TURN. (48)
Rows 8-17: Ch 1, HDC in each st across, TURN. (48)
Do not fasten off
Work down the side of the bonnet to make the chin strap:
Row 1: Ch 1, HDC evenly 10 sts down 8 rows, TURN. (See video tutorial for visual instructions)
Rows 2-8: Ch 1, HDC in each st across, TURN. (10 sts)
Fasten off, weave in ends.
Attach yarn to other side of bonnet for the other chin strap piece (see video tutorial for placement)
Row 1: Ch 1, HDC evenly 10 sts down 8 rows, TURN. (See video tutorial for visual instructions)
Rows 2-8: Ch 1, HDC in each st across, TURN. (10 sts)
Fasten off, weave in ends.
Sew buttons to one side of the chin strap on the inside. (See video tutorial for placement)
Weave in the rest of your ends.
Enjoy!!
This post contains affiliate links, which I may be compensated for when you make a purchase. That means if you click on any link and buy from the linked websites, I will receive a small percentage of the value of your order. The amount you pay is not changed. Thank you for all your support in clicking the links in my blog!! You all are so amazing!! ~Nadia
The yarn provided for this pattern is courtesy of Red Heart Yarns
Halloween is the one holiday that I plan for all year long! The idea, the design, and the process can take a good portion of my time. When I started this tradition of making my annual costume, it was a challenge, but it was just me. Now we are three! Here is a two in one pattern for our monster hats. Because with three costumes, I have to think smarter not work harder! Hahahaha!
Scroll down to see the video tutorial beneath the photos.
Here’s our family photo of our costumes:
Watch this video tutorial to learn how to make this hat:
My dad will continue to be the videographer, editor, and photographer for our videos when I move away.
Support YARNutopia today so we can continue to bring you clear, quality crochet tutorials even after I move into my new home!
There will be an added expense of more travel and hopefully this won’t deter our ability to provide consistent videos on a weekly basis.
Teacher: Nadia Fuad
Video and Editing: Fuad Azmat (My Daddy)
Share your work on Facebook!
Add me on Snapchat: YARNutopia
Follow me on Instagram
Visit My Ravelry Store and add this to your Favorites!
Follow me on Twitter: @YARNutopia
Enjoy this video and subscribe to my channel on YouTube for more tutorials on how to crochet!
Leave a comment, and share with your friends!
Pattern:
Designed by Nadia Fuad You *may* sell items made from my pattern, but please reference my website YARNutopia.com.
Please do not copy, sell, and/or post this pattern and claim it as your own.
NOTES:
-Use a smaller hook to make these smaller
-Use a bigger hook to make these bigger
-Use 3 strands of yarn at the same time when making the shell of the hat (Shown in video tutorial)
-This hat will fit any adult
-The video tutorial shows how to attach all the pieces and the hair, check it out by clicking the link to view the video.
Halloween is the one holiday that I plan for all year long! The idea, the design, and the process can take a good portion of my time. When I started this tradition of making my annual costume, it was a challenge, but it was just me. Now we are three! Here is a two in one pattern for our monster hats. Because with three costumes, I have to think smarter not work harder! Hahahaha!
Here’s our family photo of our costumes:
My dad will continue to be the videographer, editor, and photographer for our videos when I move away.
Support YARNutopia today so we can continue to bring you clear, quality crochet tutorials even after I move into my new home!
There will be an added expense of more travel and hopefully this won’t deter our ability to provide consistent videos on a weekly basis.
Teacher: Nadia Fuad
Video and Editing: Fuad Azmat (My Daddy)
Share your work on Facebook!
Add me on Snapchat: YARNutopia
Follow me on Instagram
Visit My Ravelry Store and add this to your Favorites!
Follow me on Twitter: @YARNutopia
Enjoy this video and subscribe to my channel on YouTube for more tutorials on how to crochet!
Leave a comment, and share with your friends!
Pattern:
Designed by Nadia Fuad You *may* sell items made from my pattern, but please reference my website YARNutopia.com.
Please do not copy, sell, and/or post this pattern and claim it as your own.
NOTES:
-Use a smaller hook to make these smaller
-Use a bigger hook to make these bigger
-Use 3 strands of yarn at the same time when making the shell of the hat (Shown in video tutorial)
-This hat will fit any adult
-The video tutorial shows how to attach all the pieces and the hair, check it out by clicking the link to view the video.
Special stitches:
Ch(s): chain(s)
YO: Yarn Over
BLO: Back Loop Only
FLO: Front Loop Only
St(s): Stitch(es)
Sl st: slip stitch
SK: Skip
SC: Single Crochet
HDC: Half Double Crochet
DC: Double Crochet
DC2TOG: Double Crochet Decrease
HDC2TOG: Half Double Crochet Decrease
SC2TOG: Single Crochet Decrease
Pattern:
If you have any confusion or difficulty with reading this pattern, please watch the video tutorial that is linked above in this blog post to have visual instructions.
Hat:
Using Red Heart Super Saver in Charcoal and Hygge Fur in Smokey
Use 1 strand of Charcoal and 2 Strands of Smokey (3 strands total)
Ch 3 Rnd 1: 9 DC in 3rd Ch from hook, Sl st to first st. (9)
Rnd 2: Ch 2 (does not count as a stitch), 2 DC in each st around, sl st to first st. (18)
Rnd 3: Ch 2, [2 DC in next st, DC in next st] 9 times, sl st to first st. (27)
Rnd 4: Ch 2, [2 DC in next st, DC in next 2 sts] 9 times, sl st to first st. (36)
Rnd 5: Ch 2, [2 DC in next st, DC in next 3 sts] 9 times, sl st to first st. (45)
Rnd 6: Ch 2, [2 DC in next st, DC in next 4 sts] 9 times, sl st to first st. (54)
Rnd 7: Ch 2, [2 DC in next st, DC in next 8 sts] 6 times, sl st to first st. (60)
Rnd 8: Ch 2, [2 DC in next st, DC in next 9 sts] 6 times, sl st to first st. (66)
Rnds 9-13: Ch 2, DC in each st around, Sl st to first st. (66)
Do not fasten off
Go onto making first earflap
Earflap 1: Row 1: Ch 2, DC in next 12 sts, Ch 2, turn. (12)
Rows 2-3: DC in each st across, Ch 2, Turn. (12)
Row 4: DC2TOG, DC in each st until 2 sts remain, DC2TOG on last 2 sts, Ch 2, turn. (10)
Attach yarn and Ch 2 Repeat Rows 1-9 from first earflap.
Fasten off, weave in ends.
Face:
With Buff
Ch 26 Row 1: HDC in 2nd Ch from hook and across, Ch 1, turn. (25) Rows 2-5: HDC in each st across, Ch 1 turn. Rows 6-12: HDC2TOG, HDC in each st until 2 sts remain, HDC2TOG, Ch 1, turn.
After Row 12, continue to SC around entire piece.
Fasten off with long tail for sewing.
Eyes:
With Yellow
Work in BLO and in continuous rounds
Ch 2 Rnd 1: 6 SC in 2nd Ch from hook. (6) Rnd 2: 2 SC in each st around. (12) Rnd 3: [2 SC in next st, SC in next st] 6 times. (18) Rnds 4-6: SC in each st around. (18)
Fasten off with long tail for sewing.
Make 2 eyes
Add safety eyes and stuff the eyes. Sew the eyes to the face part of the hat.
Nose:
With Carrot
Work in BLO and in continuous rounds
Ch 2 Rnd 1: 6 SC in 2nd Ch from hook. (6) Rnd 2: 2 SC in each st around. (12) Rnd 3: [2 SC in next st, SC in next st] 6 times. (18) Rnd 4: [2 SC in next st, SC in next 2 sts] 6 times. (24) Rnd 5: SC in each st around. (24) Rnd 6: [SC2TOG, SC in next 2 sts] 6 times. (18) Rnd 7: SC in each st around. (18) Rnd 8: [SC2TOG, SC in next st] 6 times. (12) Rnd 9: SC in each st around.
Fasten off with long tail for sewing
Stuff the nose with polyfil and then create nostrils after you stuff the nose. (See video tutorial on this technique)
Sew this nose to the face part of the hat.
Teeth:
With White
Ch 30
*Sl st in 2nd Ch from hook, SC in next ch, HDC in next ch, DC in next ch, Sk 2 Chs, Sl st in next ch, Ch 5, repeat from * across. Fasten off with long tail for sewing. Sew to bottom of face (see video tutorial for tips on sewing)
Horns (for male hat)
With Aran
Make 2
Work in continuous rounds
Ch 2 Rnd 1: 4 SC in 2nd Ch from hook. (4) Rnd 2: [SC in next st, 2 SC in next st] twice. Rnd 3: SC in next st, 2 SC in next st, SC in next 2 sts, 2 SC in next st, SC in last st. (8) Rnds 4-5: SC in each st around Rnd 6: SC in next st, 2 SC in next st, SC in next 3 sts, 2 SC in next st, SC in last 2 sts. (10) Rnds 7-8: SC in each st around. Rnd 9: SC in next st, 2 SC in next st, SC in next 4 sts, 2 SC in next st, SC in last 3 sts. Rnds 10-12: 2 SC in 1st st, SC in next 4 sts, SC2TOG, SC in last 5 sts Rnd 13: 2 SC in 1st st, SC in next 2 sts, 2 SC in next st, SC in next st, SC2TOG, SC in next 2 sts, 2 SC in next st, SC in last 2 sts. (14) Rnds 14-15: SC in each st around. (14)
Fasten off with long tail for sewing
Stuff horns and sew to hat.
Eyelids (for female hat)
With Buff
Ch 3 Row 1: 6 DC in 3rd Ch from hook, Ch 2, Turn. (6) Row 2: 2 DC in each st across. (12)
Fasten off with long tail for sewing
Make 2 eyelids and sew above eyes on face.
For the female hat, Add hair to the head by tying strands of yarn on the top of the head
See video tutorial for hair application.
Sew face to hat
Weave in any extra ends.
Enjoy!!
This post contains affiliate links, which I may be compensated for when you make a purchase. That means if you click on any link and buy from the linked websites, I will receive a small percentage of the value of your order. The amount you pay is not changed. Thank you for all your support in clicking the links in my blog!! You all are so amazing!! ~Nadia
The yarn provided for this pattern is courtesy of Red Heart Yarns
Uptown means of, in, or characteristic of the residential area of a city or town. Which brings us to the perfect setting for The Uptown Blanket Scarf I made!
This piece can be worn anywhere, but definitely has an urban fashion feel that wraps you up and protects you from the hustle and bustle as you brave the cold weather! If you’re on your way to work, classes, outdoor travel, you name it, this scarf will keep you warm. Don’t be left out in the cold! Grab your hooks and 2 skeins of Comfort Yarn by Red Heart Yarns and make one for yourself or someone you love today!
My dad will continue to be the videographer, editor, and photographer for our videos when I move away.
Support YARNutopia today so we can continue to bring you clear, quality crochet tutorials even after I move into my new home!
There will be an added expense of more travel and hopefully this won’t deter our ability to provide consistent videos on a weekly basis.
Teacher: Nadia Fuad
Video and Editing: Fuad Azmat (My Daddy)
Share your work on Facebook!
Add me on Snapchat: YARNutopia
Follow me on Instagram
Visit My Ravelry Store and add this to your Favorites!
Follow me on Twitter: @YARNutopia
Enjoy this video and subscribe to my channel on YouTube for more tutorials on how to crochet!
Leave a comment, and share with your friends!
Pattern:
Designed by Nadia Fuad You *may* sell items made from my pattern, but please reference my website YARNutopia.com.
Please do not copy, sell, and/or post this pattern and claim it as your own.
NOTES:
-Use a smaller hook to make these smaller
-Use a bigger hook to make these bigger
-You can do as many rows of this pattern as you want to make it as long as you want.
-You can do a Single Crochet or a Reverse Single Crochet around the edge to clean it up and make it have a nice finished look
As soon as the summer ends and the temperature starts to change, I get started on all my fall and winter fashion pieces. I love creating new designs for Nate, but this piece isn’t just for the guys in your life! This can be made for anyone. Here, I am using Comfort yarn from Red Heart Yarns. This yarn is perfect for this Diamond Trellis stitch! It gives it dimension and texture to create a wonderful look. It also provides warmth without being too heavy. Blanket scarves are becoming more and more popular. I love the extra wide look of this piece.
Don’t need a scarf? You can take this pattern and by repeating it, turn this into a great blanket. How’s that for versatility?
My dad will continue to be the videographer, editor, and photographer for our videos when I move away.
Support YARNutopia today so we can continue to bring you clear, quality crochet tutorials even after I move into my new home!
There will be an added expense of more travel and hopefully this won’t deter our ability to provide consistent videos on a weekly basis.
Teacher: Nadia Fuad
Video and Editing: Fuad Azmat (My Daddy)
Share your work on Facebook!
Add me on Snapchat: YARNutopia
Follow me on Instagram
Visit My Ravelry Store and add this to your Favorites!
Follow me on Twitter: @YARNutopia
Enjoy this video and subscribe to my channel on YouTube for more tutorials on how to crochet!
Leave a comment, and share with your friends!
Pattern:
Designed by Nadia Fuad You *may* sell items made from my pattern, but please reference my website YARNutopia.com.
Please do not copy, sell, and/or post this pattern and claim it as your own.
NOTES:
-Use a smaller hook to make these smaller
-Use a bigger hook to make these bigger
-You can do as many rows of this pattern as you want to make it as long as you want.
-You can do a Single Crochet or a Reverse Single Crochet around the edge to clean it up and make it have a nice finished look
Special stitches:
Ch(s): chain(s)
YO: Yarn Over
BLO: Back Loop Only
FLO: Front Loop Only
St(s): Stitch(es)
Sl st: slip stitch
SK: Skip
SC: Single Crochet
HDC: Half Double Crochet
DC: Double Crochet
TR: Treble Crochet
FPTR: Front Post Treble Crochet
FPTR2TOG: Front Post Treble Crochet 2 Together
Pattern:
If you have any confusion or difficulty with reading this pattern, please watch the video tutorial that is linked above in this blog post to have visual instructions.
Ch 38 or any multiple of 4+2 Row 1: SC in 2nd ch from hook and across, turn. (38)
Row 2: Ch 2 (does not count as a st), DC in each st across, turn. (38)
Row 3: Ch 1, SC in 1st st, FPTR on 2nd SC from Row 1, SC in next 3 sts on Row 2, FPTR2TOG on 2nd St from Row 1 AND 4th St on Row 1, (See video tutorial for visual instructions), *SC in next 3 sts on Row 2, FPTR2TOG on same st as previous FP stitch, and the next 4th stitch, repeat from * across, ending with FPTR where your previous FP stitch is, and SC in last st, turn. (See video tutorial for visual instructions)
Row 4: Ch 2, DC in each st across, turn.
Row 5: Ch 1, SC in first 3 sts, *FPTR2TOG on the FPTR2TOG sts from 2 rows beneath (See video tutorial on how to make them the diagonal look), SC in next 3 sts , repeat from * across ending with SC in last 3 sts, turn.
Rnd 6: Ch 2, DC in each st across, turn.
Rnd 7: Ch 1, SC in first st, *FPTR2TOG on the FPTR2TOG sts from 2 rows beneath, SC in next 3 sts, repeat from * across, ending with SC in last st, turn.
Rows 8-201: Repeat Rows 4-7 as much as you want to achieve the length you want. Mine ended up being 8 feet long.
Continue to SC around entire scarf
You can do a reverse SC if you’d like to instead of a regular SC
You can also add fringe to the ends of this scarf to spice it up as well!
Get creative with it!!
Fasten off and Weave in all ends.
Enjoy!!
This post contains affiliate links, which I may be compensated for when you make a purchase. That means if you click on any link and buy from the linked websites, I will receive a small percentage of the value of your order. The amount you pay is not changed. Thank you for all your support in clicking the links in my blog!! You all are so amazing!! ~Nadia
The yarn provided for this pattern is courtesy of Red Heart Yarns
This Sweet Dream Romper has been designed to be part of our Halloween costume. I am planning to release pieces of this ensemble from now through mid-October. Each piece will complete our three cosplay costumes that we designed for “Where The Wild Things Are,” a book by Maurice Sendak. Nasir is going to be Max. Here is the first installment to his costume. This one-piece romper , although made for this purpose, was actually designed with versatility in mind. I considered the other possibilities this could be used for. This could be added to a winter baby layette set. You could change the buttons or eliminate them, make it in any color, or sew on leather knee patches for when a baby crawls.
So many options in one piece! I have released the written pattern that you can find here. Below is the video tutorial for The Sweet Dream Romper. Enjoy!
Each year, we try to find a fun and exciting costumes for Halloween, and I love to take you on this journey with me. As each piece of the costume is released, I will update my blog to bring more and more pieces to life. Be sure to follow along to see all these updates!
The first installment of this year’s Halloween costume, is this Sweet Dream Romper. Although my intent is to use this outfit for Nasir’s cosplay costume as Max from the book “Where The Wild Things Are,” you will be able to follow through my video tutorial to create one of your own as part of a baby layette. You can change the colors, add knee patches, use smaller buttons or eliminate the buttons altogether. The creative ideas with this fall & winter pattern are endless! One thing I think we can all agree on is that Nas will be the perfect Max. 😍 He’s already happy about it!
My dad will continue to be the videographer, editor, and photographer for our videos when I move away.
Support YARNutopia today so we can continue to bring you clear, quality crochet tutorials even after I move into my new home!
There will be an added expense of more travel and hopefully this won’t deter our ability to provide consistent videos on a weekly basis.
***You can sell anything you make from my patterns, please just link back to my website YARNutopia.com. Thank you!
Teacher: Nadia Fuad
Video and Editing: Fuad Azmat (My Daddy) Share your work on Facebook!
Add me on Snapchat: YARNutopia Follow me on Instagram
Visit My Ravelry Storeand add this to your Favorites!
Follow me on Twitter: @YARNutopia
Enjoy this video and subscribe to my channel on YouTube for more tutorials on how to crochet!
Leave a comment, and share with your friends!
Designed by Nadia Fuad
You may sell items made from my pattern, but please reference my website YARNutopia.com.
Please do not copy, sell, and/or post this pattern and claim it as your own.
NOTES:
-To make this smaller or bigger, use a smaller or bigger hook size
-This is made from the bottom up
-This romper will fit a 3-6 month old baby
-See the video tutorial for sizing information.
Special stitches:
Ch(s): chain(s)
St(s): Stitch(es)
Sk: Skip
Sl st: slip stitch
SC: Single Crochet
DC: Double Crochet
HDC: Half Double Crochet
HDC2TOG: Half Double Crochet Decrease
BLO: Back Loop Only
FLO: Front Loop Only
Pattern:
Legs:
Make 2
Ch 27, Sl st to first ch to form a ring
Rnd 1: Ch 1, HDC in each ch around, sl st to 1st st, turn. (27)
Rnds 2-15: Ch 1, HDC in each st around, Sl st to first st, turn. (27)
Fasten off Leg 1 with a long tail for sewing later, Do NOT fasten off Leg 2
Attaching the legs:
Making body
Rnd 16: Working on Leg 2, Ch 1, HDC in each st around, Ch 3, HDC in each st on Leg 1, Ch 3, Sl st to first st on Leg 2, Turn. (54 sts, 2 ch 3 sps)
Rnd 17: Ch 1, HDC in each st and each ch around, sl st to first st, turn. (60)
Rnds 18-46: Ch 1, HDC in each st around, sl st to first st, Turn. (60)
Do not fasten off, continue with the first strap
Left Back Strap:
Row 1: Sl st in next 4 sts, Ch 1, HDC in 10 sts, ch 1, turn. (10)
Row 2: HDC in each st across, ch 1, turn. (10)
Row 3: HDC2TOG, HDC in next 6 sts, HDC2TOG, ch 1, turn. (8)
Row 4: HDC in each st across, Ch 1, turn. (8)
Row 5: HDC2TOG, HDC in next 4 sts, HDC2TOG, ch 1, turn. (6)
Rows 6-9: HDC in each st across, Ch 1, Turn. (6)
Row 10: HDC in first 2 sts, Ch 2, Sk 2 sts HDC in last 2 sts, ch 1, turn. (button hole made)
Row 11: HDC in each st and each ch across. (6)
Fasten off, weave in ends.
Left Front Strap:
Skip 6 sts on row 46 of body
Attach yarn to next st
Row 1: Ch 1, HDC in 10 sts, ch 1, turn. (10)
Row 2: HDC in each st across, ch 1, turn. (10)
Row 3: HDC2TOG, HDC in next 6 sts, HDC2TOG, ch 1, turn. (8)
Row 4: HDC in each st across, Ch 1, turn. (8)
Row 5: HDC2TOG, HDC in next 4 sts, HDC2TOG, ch 1, turn. (6)
Rows 6-9: HDC in each st across, Ch 1, Turn. (6)
Fasten off, weave in ends.
Right Front Strap:
Skip 4 sts on row 46 of body
Attach yarn to next st
Row 1: Ch 1, HDC in 10 sts, ch 1, turn. (10)
Row 2: HDC in each st across, ch 1, turn. (10)
Row 3: HDC2TOG, HDC in next 6 sts, HDC2TOG, ch 1, turn. (8)
Row 4: HDC in each st across, Ch 1, turn. (8)
Row 5: HDC2TOG, HDC in next 4 sts, HDC2TOG, ch 1, turn. (6)
Rows 6-9: HDC in each st across, Ch 1, Turn. (6)
Fasten off, weave in ends.
Right Back Strap:
Skip 6 sts on row 46 of body
Attach yarn to next st
Row 1: Sl st in next 4 sts, Ch 1, HDC in 10 sts, ch 1, turn. (10)
Row 2: HDC in each st across, ch 1, turn. (10)
Row 3: HDC2TOG, HDC in next 6 sts, HDC2TOG, ch 1, turn. (8)
Row 4: HDC in each st across, Ch 1, turn. (8)
Row 5: HDC2TOG, HDC in next 4 sts, HDC2TOG, ch 1, turn. (6)
Rows 6-9: HDC in each st across, Ch 1, Turn. (6)
Row 10: HDC in first 2 sts, Ch 2, Sk 2 sts HDC in last 2 sts, ch 1, turn. (button hole made)
Row 11: HDC in each st and each ch across. (6)
Fasten off, weave in ends.
Ankle Cuffs
Do the same thing for both legs
Mark 3 sts evenly around the ankle,
Attach yarn to any stitch on ankle Rnd 1: Ch 1, HDC in each st around, put a HDC2TOG stitch on the stitches you marked to decrease, sl st to first st when you get back around, ch 1 (Do not turn) (24)
Rnd 2: FPHDC on next st, BPHDC on next st, repeat from * around, sl st to first st, ch 1. (24)
Rnds 3-5: FPHDC on FPHDC sts, BPHDC n BPHDC sts, all the way around, sl st to first st, ch 1. (24)
Fasten off, weave in all ends
**Add buttons to the top straps, add buttons to the front of romper.**
Enjoy!
~Nadia
This post contains affiliate links, which I may be compensated for when you make a purchase. That means if you click on any link and buy from the linked websites, I will receive a small percentage of the value of your order. The amount you pay is not changed. Thank you for all your support in clicking the links in my blog!! You all are so amazing!! ~Nadia
The yarn provided for this pattern is courtesy of Red Heart Yarns
I was browsing through Instagram,and I came across a fun living-room set up that was decorated in shades of grey and white. There were a lot of yarn accents including a collection of throw pillows throughout the room. Several were fun knit or crochet looking patterns that really caught my eye. It really started to give me some inspiration.
Some of you may recall, last Halloween, Nate and I wore cosplay costumes inspired by Willy Wonka. Part of the set up we had included the Candy Swirl Pillows. Today, after seeing all the fun ways to dress up a room with throw pillows, I decided to embellish my already existing pillows with some poms to give them a little fun boho flair! This is the Candy Swirl Pillow Remix! Simply put, I took an old pillow, with a little bit of tweaking, I made it new again! How fun it is to add a small detail and change the look of this project!
Here is a step by step photo tutorial of how I made my poms.
I received this cute pom maker from pommaker.com, so I am using that today. You can click the first photo below to shop for these fabulous pom makers!
First I wrapped the yarn around each of the wooden pieces (there are instructions in the pom making kit to walk you through)
Then I cut the yarn.
Once they are both wrapped and cut, I put the outer pieces on the spokes of the inner wooden pieces.
Then I squeezed with one hand, and cut the strands down the middle with my other hand.
That’s what it looks like when all the pieces are cut! I had to be sure not to let go of it at this point!
Then I took a long strand of yarn and tied a few knots around the center of these little strands, as you can see in the photo below.
Then I popped off all the pieces and a pom was made!!
I trimmed any longer strands to make it a perfect pom!
Here is the pillow I made and added poms to the outer edge!
See the full video tutorial on how to make this pillow here:
My dad will continue to be the videographer, editor, and photographer for our videos when I move away.
Support YARNutopia today so we can continue to bring you clear, quality crochet tutorials even after I move into my new home!
There will be an added expense of more travel and hopefully this won’t deter our ability to provide consistent videos on a weekly basis.
Designed by Nadia Fuad
Questions? Leave a comment!
You may sell items made from my pattern, but please reference my name and Etsy Shop (YARNutopia).
Please do not copy and post this pattern and claim it as your own.
Enjoy this video and subscribe to my channel on YouTube for more tutorials on how to crochet!
Leave a comment, and share with your friends!
This post contains affiliate links, which I may be compensated for when you make a purchase. That means if you click on any link and buy from the linked websites, I will receive a small percentage of the value of your order. The amount you pay is not changed. Thank you for all your support in clicking the links in my blog!! You all are so amazing!! ~Nadia
Have you ever wanted to try a bit of weaving? How about incorporating a little weaving with your crochet? My Chain Weaver Slouchy hat brings these two crafts together to make one great project! Perfect for cooler nights that are soon to be upon us here in the North, this slouchy hat is very easy to work up and finish in a short few hours. Change the colors to match any cold weather ensemble and this hat will make a great gift!
See the video tutorial and written instructions below!
Follow along with this video tutorial to learn how to make this hat:
My dad will continue to be the videographer, editor, and photographer for our videos when I move away.
Support YARNutopia today so we can continue to bring you clear, quality crochet tutorials even after I move into my new home!
There will be an added expense of more travel and hopefully this won’t deter our ability to provide consistent videos on a weekly basis.
***You can sell anything you make from my patterns, please just link back to my website YARNutopia.com. Thank you!
Teacher: Nadia Fuad
Video and Editing: Fuad Azmat (My Daddy) Share your work on Facebook!
Add me on Snapchat: YARNutopia Follow me on Instagram
Visit My Ravelry Storeand add this to your Favorites!
Follow me on Twitter: @YARNutopia
Enjoy this video and subscribe to my channel on YouTube for more tutorials on how to crochet!
Leave a comment, and share with your friends!
Designed by Nadia Fuad
You may sell items made from my pattern, but please reference my website YARNutopia.com.
Please do not copy, sell, and/or post this pattern and claim it as your own.
NOTES:
-To make this smaller or bigger, use a smaller or bigger hook size
-This is made from the top down
-This hat will fit any adult person
-See the video tutorial for sizing information.
Special stitches:
Ch(s): chain(s)
St(s): Stitch(es)
Sk: Skip
Sl st: slip stitch
SC: Single Crochet
DC: Double Crochet
HDC: Half Double Crochet
BLO: Back Loop Only
FLO: Front Loop Only
Pattern:
With Dusty Grey
Ch 3
Rnd 1: 9 DC in 3rd ch from hook, sl st to first DC. (9)
Rnd 2: Ch 2 (does not count as a st), 2 DC in each st around, sl st to first DC. (18)
Rnd 3: Ch 2, [2 DC in next st, DC in next st] 9 times, sl st to first DC. (27)
Rnd 4: Ch 5 (counts as DC + Ch 2 Sp), * DC in next st, Ch 2, repeat from * around, sl st to 3rd ch of beg. ch 5. (27)
Rnd 5: Sl st into Ch 2 sp, Ch 5, *DC in next Ch 2 Sp, Ch 2, Repeat from * around, Sl st to 3rd Ch of beg. ch 5. (27)
Rnd 6: Sl st into Ch 2 sp, Ch 4 (counts as DC + Ch 1 sp), * DC in next DC st, Ch 1, DC in next Ch 2 sp, Ch 1, repeat from * around, sl st to 3rd Ch of beg. ch 4. (54)
Rnd 7: Sl st into ch sp, Ch 5 (counts as DC + Ch 2 sp), * DC in next Ch sp, Ch 2, repeat from * around, sl st to 3rd ch of beg. ch 5. (54)
Rnds 8-16: Repeat Rnd 7
Rnd 17: Sl st into ch sp, Ch 1, SC in same ch sp, SC in each ch 2 sp around (this will cinch the brim in tighter), do not sl st to first st, work in continuous rounds and in BLO for the rest of this hat.
Rnds 18-24: SC in each st around working in BLO and continuous rounds.
Fasten off, weave in all ends.
(See video tutorial for visual instructions if you get stuck on this part)
Adding the colorful chains:
To add the chains, just create long chains and weave them in and out of the DC sts on each row. Below I share how many chains I made for each row, but yours might be different depending on the tension of your chains. (See video tutorial for visual instructions on how to weave the chains in and out of the sts)
Rnd 4: 54 Chains
Rnd 5: 75 Chains
Rnd 6: 98 Chains
Rnd 7: 108 Chains
Rnd 8: 120 Chains
Rnd 9: 140 Chains
Rnd 10: 148 Chains
Rnd 11: 150 Chains
Rnd 12: 148 Chains
Rnd 13: 148 Chains
Rnd 14: 150 Chains
Rnd 15: 100 Chains
Rnd 16: 78 Chains
Be sure to weave in all your ends!
Enjoy!
~Nadia
This post contains affiliate links, which I may be compensated for when you make a purchase. That means if you click on any link and buy from the linked websites, I will receive a small percentage of the value of your order. The amount you pay is not changed. Thank you for all your support in clicking the links in my blog!! You all are so amazing!! ~Nadia
The yarn provided for this pattern is courtesy of Red Heart Yarns
For those of us who are all about wearing fabulous accessories, let me present The Bow-tastic Hat!! This hat allows for you to interchange the bow in order to match your #OOTD (outfit of the day)!! This winter wear provides lots of chances to take one item and change it up to match several things in your child’s (or your own) wardrobe without investing in numerous looks! Perfect for keeping things to a minimum while getting the maximum looks from one great piece!
Please check the “NOTES” section of my pattern to find ways to adjust the sizing on this hat.
Follow along with this video tutorial to learn how to make this hat:
My dad will continue to be the videographer, editor, and photographer for our videos when I move away.
Support YARNutopia today so we can continue to bring you clear, quality crochet tutorials even after I move into my new home!
There will be an added expense of more travel and hopefully this won’t deter our ability to provide consistent videos on a weekly basis.
***You can sell anything you make from my patterns, please just link back to my website YARNutopia.com. Thank you!
Teacher: Nadia Fuad
Video and Editing: Fuad Azmat (My Daddy) Share your work on Facebook!
Add me on Snapchat: YARNutopia Follow me on Instagram
Visit My Ravelry Storeand add this to your Favorites!
Follow me on Twitter: @YARNutopia
Enjoy this video and subscribe to my channel on YouTube for more tutorials on how to crochet!
Leave a comment, and share with your friends!
Designed by Nadia Fuad
You may sell items made from my pattern, but please reference my website YARNutopia.com.
Please do not copy, sell, and/or post this pattern and claim it as your own.
NOTES:
-To make this smaller or bigger, use a smaller or bigger hook size
-This is made from the bottom up
-If you work in multiples of 6, then you can make this bigger or smaller.
-This hat will fit any baby that is 6-12 months old
-See the video tutorial for larger sizing information.
–For larger sizes, make your brim any of the following number of rows: 54 rows, 60 rows, 66 rows, 72 rows and then when you are working the top of the hat, SC around the brim that same number of stitches as the amount of rows in your brim that you have. Then, when you are ready to decrease the top to close it up, decrease in the amount of 6 stitches each row until you get to 54 stitches around, then follow the instructions for the rest of the decreasing in the pattern/video tutorial.
Special stitches:
Ch(s): chain(s)
St(s): Stitch(es)
Sk: Skip
Sl st: slip stitch
SC: Single Crochet
DC: Double Crochet
HDC: Half Double Crochet
BLO: Back Loop Only
FLO: Front Loop Only
Pattern:
Brim of Hat:
Work in BLO for the whole brim
With Hygge Charm in Shooting Star
Ch 21
Row 1: SC in 2nd Ch from hook and across, ch 1, turn. (20)
Rows 2-25: SC in each st across, ch 1, turn. (20)
Row 26: SC in first 4 sts, Ch 3, Sk 3 sts, SC in the rest of the sts on the row, Ch 1, turn.
Row 27: SC in each st and each ch across, ch 1, turn. (20)
Rows 28-31: SC in each st across, Ch 1, turn. (20)
Row 32: Repeat Row 26
Row 33: Repeat Row 27
Rows 34-54: SC in each st across, ch 1, turn. (20)
Fasten off with long tail for sewing
Assembly Step:
Sew the brim closed (see video tutorial for visual instructions)
Weave in your ends.
Top part of hat: (with same yarn as the brim)
Make sure the Ch 3 holes are toward the bottom half of your brim, attach yarn to the opposite end of the side of the brim (see video tutorial for visual instructions)
work in BOTH LOOPS of this section of the hat, Work in continuous rounds (insert a stitch marker if you need to mark the beginning of your rounds)
Rnd 1: SC 60 sts evenly around the brim of the hat. (if you made more rows of your brim, be sure to SC any multiple of 6 on this round)
Rnds 2-15: SC in each st around. (60)
(for larger sizes, do a few more rounds before decreasing)
If you have more than 60 sts, decrease 6 sts evenly every round until you get to 54 sts, then go onto round 17 instructions.
Rnd 16: [SC2TOG, SC in next 8 sts] 6 times. (54)
Rnd 17: [SC2TOG, SC in next 4 sts] 9 times. (45)
Rnd 18: [SC2TOG, SC in next 3 sts] 9 times. (36)
Rnd 19: [SC2TOG, SC in next 2 sts] 9 times. (27)
Rnd 20: [SC2TOG, SC in next st] 9 times. (18)
Rnd 21: [SC2TOG] 9 times. (9)
Fasten off with long tail, sew top of hat closed.
Sew a fur pom to the top of the hat.
Ear Flaps:
Make 2 in your main color
Ch 5
Row 1: SC in 2nd ch and across, ch 1, turn. (4)
Row 2: 2 SC in first st, SC in each st until 1 st is remaining, 2 SC in last st, ch 1, turn. (6)
Row 3: SC across, ch 1, turn. (6)
Row 4: Repeat Row 2. (8)
Row 5: Repeat Row 3. (8)
Row 6: Repeat Row 2. (10)
Row 7: Repeat Row 3. (10)
Row 8: Repeat Row 2. (12)
Rows 9-16: SC in each st across, Ch 1, Turn.
Continue to SC around the piece. Fasten off with long tail for sewing.
Sew to each side of the hat on the inside of the brim (See video tutorial for visual instructions.
Add braided tassels to the ear flaps (optional)
Bow:
Using Red Heart Yarns With Love Metallic
Work in BLO and in continuous rounds.
Ch 48
Rnd 1: Bring chain around to the first ch, SC in 1st ch and next 19 chs, Sl st in next 4 chs, SC in next 20 chs, Sl st in last 4 chs. Rnds 2-8: SC in 20 sts, Sl st in 4 sts, SC in 20 sts, Sl st in last 4 sts.
Fasten off and weave in all ends.
Slide the bow through the chain 3 holes on the brim of the hat.
Enjoy!
~Nadia
This post contains affiliate links, which I may be compensated for when you make a purchase. That means if you click on any link and buy from the linked websites, I will receive a small percentage of the value of your order. The amount you pay is not changed. Thank you for all your support in clicking the links in my blog!! You all are so amazing!! ~Nadia
The yarn provided for this pattern is courtesy of Red Heart Yarns
Below is a fun checklist of things found in a yarn bag! We carry our lives around in our totes and this game gives points for all the things we can find in there! Take a moment to go through your bags and tally your points for this activity. What is the craziest thing you have in your bag today?? How many points did you get??
Here’s My Score: 148 Points!
This activity was prompted because I was cleaning up my bag and found some packets of hot sauce and a diaper in my yarn tote! LOL I realized that I can’t be the only one who has this problem. I remembered playing a “What’s In Your Bag?” game at a bridal shower some time ago, and decided to make a game out of this to share with all of you!
I was finally in the studio filming, and of course my first new project fresh-off-the-hook is my Misfit Monster Hat for my sweet boy! I *know* you can’t wait to make one of your own! The instructions for additional sizes are listed in the pattern and shared in the video tutorial below!
View this video tutorial to learn how to make this hat:
My dad will continue to be the videographer, editor, and photographer for our videos when I move away.
Support YARNutopia today so we can continue to bring you clear, quality crochet tutorials even after I move into my new home!
There will be an added expense of more travel and hopefully this won’t deter our ability to provide consistent videos on a weekly basis.
***You can sell anything you make from my patterns, please just link back to my website YARNutopia.com. Thank you!
Teacher: Nadia Fuad
Video and Editing: Fuad Azmat (My Daddy) Share your work on Facebook!
Add me on Snapchat: YARNutopia Follow me on Instagram
Visit My Ravelry Storeand add this to your Favorites!
Follow me on Twitter: @YARNutopia
Enjoy this video and subscribe to my channel on YouTube for more tutorials on how to crochet!
Leave a comment, and share with your friends!
Pattern:
Designed by Nadia Fuad
You may sell items made from my pattern, but please reference my website YARNutopia.com.
Please do not copy, sell, and/or post this pattern and claim it as your own.
NOTES:
-To make this smaller or bigger, use a smaller or bigger hook size
-This is made from the top down
-If you work in multiples of 9, then you can make this bigger or smaller.
-This hat will fit any baby that is 3-6 months old
-See the video tutorial for larger sizing information.
Special stitches:
Ch(s): chain(s)
St(s): Stitch(es)
Sl st: slip stitch
SC: Single Crochet
DC: Double Crochet
HDC: Half Double Crochet
Pattern: Shell of Hat:
With Main Color
Ch 2 Round 1: 9 HDC in 2nd Ch from Hook, Sl st to first st, Turn. (9)
Round 2: Ch 1, 2 HDC in each st around, Sl st to first st, Turn. (18)
Rnd 3: Ch 1, [2 HDC in next st, HDC in next st] 9 times, Sl st to first st, Turn. (27)
Rnd 4: Ch 1, [2 HDC in next st, HDC in next 2 sts] 9 times, Sl st to first st, Turn. (36)
Rnd 5: Ch 1, [2 HDC in next st, HDC in next 3 sts] 9 times, Sl st to first st, Turn. (45)
Rnd 6: Ch 1, [2 HDC in next st, HDC in next 4 sts] 9 times, Sl st to first st, Turn. (54)
For larger sizes, increase with the established pattern. For Child Size: increase to 72 sts, For Teen Size: increase to 90 sts, For Adult Size Increase to 99 sts. Then go on to making the next row.
Rnd 7: Ch 1, HDC in 6 sts, Ch 6, Sk 6 Sts, HDC in 24 Sts, Ch 6, Sk 6 sts, HDC in last 12 sts, Sl st to first st, Turn. (For this round, if you are making larger sizes, just mark 6 stitches on each side of the circle to make the horns and create your ch 6 spaces across from each other)
Rnd 8: Ch 1, HDC in each st and in each Ch around, sl st to first st, turn. (54)
Rnds 9-20: Ch 1, HDC in each st around, sl st to first st, Turn. (54)
Continue to make more rows if you want your beanie longer.
Fasten off. Weave in ends.
Horns:
Attach main color to one of the open holes on the hat (See video tutorial for visual instructions)
Rnd 1: Ch 1, HDC 12 sts evenly around hole opening, Sl st to first st, Turn. (12)
Rnd 2: Ch 1, HDC in each st around, sl st to first st, turn. (12)
Rnd 3: Mark the stitch toward the crown of the hat (see video tutorial for specific location), Ch 1, HDC in each st until the marked st, HDC2TOG, HDC in the rest of the sts on the round, sl st to first st, turn. Move stitch marker up where your decrease stitch is located. (11)
Rnd 4: Ch 1, HDC in each st until the marked st, HDC2TOG, HDC in the rest of the sts on the round, sl st to first st, turn. Move stitch marker up where your decrease stitch is located. (10)
Rnds 5-8: Repeat Round 4 until you have 6 sts left.
Fasten off with long tail, Sew the end of the horn closed.
Repeat this for the other horn so you have two horns.
If you have a gaping hole at the base of your horns, use extra yarn to sew those holes closed. See the video tutorial to learn what I am referring to in this part.
Eyes: Make 2
With Warm Brown
Ch 2
Rnd 1: 6 SC in 2nd Ch from hook, Sl st to first st, fasten off. (6)
Rnd 2: With Chamomile White, Attach to any stitch, Ch 1, 2 SC in each st around, sl st to first st, fasten off. (12)
Rnd 3: With Glow Worm, Attach to any stitch, Ch 1, [2 SC in next st, SC in next st] 6 times, sl st to first st, Fasten off. (18)
Rnd 4: With Flamingo, Attach to any stitch, Ch 1, [2 SC in next st, SC in next 2 sts] 6 times, sl st to first st, Fasten off with long tail for sewing. (24)
Assembly Step:
After you make both eyes, Sew them to the hat using the long tail you cut for sewing. To make the extra yellow detail, take yellow yarn and wrap it around and around sewing the eye to the hat. (See video tutorial for visual instructions)
Teeth:
With Chamomile or any white yarn
Ch 5
Sl st in 2nd ch from hook, Sc in next, HDC in next, DC in last, *Ch 6, Sl st in 2nd Ch from hook, SC in next, HDC in next, DC in next, Leave the next ch unworked, repeat from * 2 more times until you have 4 sharp teeth, continue to SC along the flat edge of teeth. Fasten off with long tail for sewing.
Assembly Step:
Sew teeth to hat. (See video tutorial for visual instructions)
Weave in the rest of your ends.
Enjoy!
“A baby is a blessing. A gift from heaven above, a precious little angel to cherish and to love.” ~Unknown
~Nadia
This post contains affiliate links, which I may be compensated for when you make a purchase. That means if you click on any link and buy from the linked websites, I will receive a small percentage of the value of your order. The amount you pay is not changed. Thank you for all your support in clicking the links in my blog!! You all are so amazing!! ~Nadia
The yarn provided for this pattern is courtesy of Red Heart Yarns
My Boho Scarf Headband is an EASY project that is perfect for summer! Whether it is to keep your hair off of your face or out of your eyes for any reason, this cute boho scarf is a little accessory to add to your summer (or all year-round) wardrobe. This design was made with Scrubby Smoothie cotton yarn by Red Heart Yarns, but these can be made with any fiber! It is a versatile design and will be fun to play around with!
Follow along with this video tutorial to learn how to make this headband:
My dad will continue to be the videographer, editor, and photographer for our videos when I move away.
Support YARNutopia today so we can continue to bring you clear, quality crochet tutorials even after I move into my new home!
There will be an added expense of more travel and hopefully this won’t deter our ability to provide consistent videos on a weekly basis.
**You can always contact me via Facebook if you have any problems with the pattern. I am happy to help if you have any questions along the way.
Designed by Nadia Fuad
You may sell items made from my pattern, but please reference my website YARNutopia.com.
Please do not copy, sell, and/or post this pattern and claim it as your own.
NOTES:
-This is worked from the top down
-You can make this bigger or smaller if you want since it is a repeat pattern.
-You can use any type of yarn for this project. Gauge is not important.
Special stitches:
Ch(s): chain(s)
YO: Yarn Over
St(s): Stitch(es)
Sl st: slip stitch
SC: Single Crochet
HDC: Half-Double Crochet
DC: Double Crochet
TC: Treble Crochet
FSC: Foundation Single Crochet
Cluster: YO, Insert hook in st, YO pull through, YO, pull through 2 loops, YO, insert hook back into st, YO pull through, YO, pull through 2 loops, YO, insert hook back into st, YO pull through, YO pull through 2 loops, YO pull through 4 loops. Cluster made.
Pattern:
Ch 5, sl st to first ch to form a ring
Row 1: Ch 4, (Counts as TC), [4TR, Ch 3, 5 TR] in ring, turn. (10 TR)
Row 2: Ch 3, (counts as DC), 2 DC in same st as ch up 3, DC in each st until you get to the ch 3 sp, 5 DC in ch 3 sp, DC in each of the next sts until you get to the last st, 3 DC in last st, turn. (19 DC)
Row 3: Ch 4, 2 TC in same st as ch up 4, *ch 1, sk next st, TC in next st, repeat from * until you get to the middle st of the 5 dc group in center. (TR, ch 3, TR) in middle st, [TR, ch 1, sk next st] repeat until last st. 3 TR in last st. (16 TR)
Row 4: Repeat Row 2. (33 DC)
Row 5: Ch 3, 2 DC in same st as ch up 3, [ch 1, sk next st, cluster st in next st] repeat until you get to the middle st of the 5 dc group in center, ch 1, [TR, ch 3, TR] in center st, [ch 1, sk next st, cluster in next st] repeat until last st, 3 DC in last st. Turn. (You should have 6DC, 16 ch 1 sps, 14 (or 16) clusters, 2TR, and 1 ch 3 sp) If you end up with a few extra stitches it’s okay. Just make sure you have 3 sts in the first and last st on this row.
Row 6: Repeat Row 2. (47 DC)
Row 7: Ch 4, 2 TR in same st as ch up 4, [sk next st, TR in next st, TR in skipped st] repeat until you get to the center dc of 5 dc group in center, [TR, ch 3, TR] in middle st, [sk next st, TR in next st, TR in skipped st] repeat until the end, 3 TR in last st. Turn. (52 TR)
Row 12: Repeat Row 6. (91 DC)
Fasten off, weave in all ends.
Straps:
FSC 30
SC across LONG edge of Bandana Triangle (See video tutorial for specific location)
FSC 30
Fasten off, weave in ends.
Enjoy!
This post contains affiliate links, which I may be compensated for when you make a purchase. That means if you click on any link and buy from the linked websites, I will receive a small percentage of the value of your order. The amount you pay is not changed. Thank you for all your support in clicking the links in my blog!! You all are so amazing!! ~Nadia
The yarn provided for this pattern is courtesy of Red Heart Yarns
It has been 4 weeks since Nasir was born. He came into this world a true miracle and is perfect in every way. I am overjoyed that he is here, happy, healthy and growing like crazy. His due date was June 30th and throughout my high-risk pregnancy, it was understood that with so many health issues, surgeries, and not having a rectum or anus, the probability for me to deliver him in a traditional birth was going to be out of the question. I was told by not one, two, or three doctors but EVERY doctor on the team, that it would be the safest for me to have him via c-section and to do it a week before his due date. Although this didn’t coincide with my idea of the “ideal birth plan,” I ONLY cared about having a safe and healthy delivery for me and safe birth for him. It doesn’t matter how our babies enter the world, it only matters that they arrive safely in our arms!
High Risk Pregnancy
Throughout my pregnancy, many of you are aware that I had numerous issues not only with my Crohn’s disease but also that I had to cease all my medications that keep my disease in remission. I also had severe Symphysis Pubis Dysfunction, I had problems with tearing my adhesions and scar tissue from previous abdominal surgeries, I have a Septate Uterus, I had terrible sciatica, I had anemia, I lacked the nutritional support for myself and Nas because I don’t have my large intestine or parts of my small intestine, and I had a herniated ostomy that prolapsed. Because my anatomy isn’t like most, my intestine pooled to one side of my body and my baby was restricting the digestive flow. I also had the general issues of constant heartburn and swelling like a lot of moms-to-be deal with. I tried to be grateful, thankful, happy, joyful, and appreciative for this miracle; and I was. However, I won’t sugar-coat it, I was freaking miserable in my body. I hurt every single day and probably complained to Nate or my mom incessantly EVERY. SINGLE. DAY. all while keeping a smile on my face and forging ahead because I kept telling myself that if this is the sacrifice I have to make to have him here, then I can do this! It was only temporary. My “this too shall pass” mantra was on repeat every moment of every day. I was miserable. But, just to be clear, I would do it ALL over in a heartbeat for this outcome. Nasir is magical…
Things weren’t going well
Over a month before I was to deliver, I was rushed by ambulance from the hospital in La Crosse, Wisconsin up to Mayo Clinic Hospital in Rochester, Minnesota because I had a severe infection and could not keep anything in. I needed IV support and to be monitored because they thought our baby would make an appearance MUCH earlier than we thought. I was so scared. I was alone in the ambulance with the lights and sirens going as we rushed down the highway. I knew Nate was somewhere in a car behind me, my mom also, but being alone and not knowing what would happen was terrifying.
Thankfully, the doctors were able to hold off delivering Nas and just treat the infection. I was hospitalized for about a week before going home, but we were advised that due to the complicated nature of my pregnancy, I would be on “bed rest” (which couldn’t actually be bed rest because I have a history of forming blood clots), so I took it really easy. The doctors recommended I move to temporary housing in Rochester to be closer to the hospital, and I was there a few days before things began to decline again. Read more about our Temporary Transition here.
We couldn’t wait any longer
Although I was advised to hold off on delivering Nasir for as long as possible to give him the best chance for development, the doctors also understood the gravity of my health situation and knew it would be dangerous to wait too long. Not long after my hospitalization, I was still having problems and was not doing well. I woke up on the Wednesday before he was born feeling terrible. My entire body felt like I had one big bruise covering every inch of my skin. EVERYTHING hurt. The slightest touch hurt, and I was swelling up like a balloon. I called, and the doctors said to meet them up at the hospital. My mom took me in because Nate was at work. After a short examination, the doctors suspected that my infection set off a full body flare of my Crohn’s disease. They couldn’t wait any longer. If they didn’t deliver him soon, I might have gone into labor and could have potentially faced a threatening situation where it would be too late to assemble the ENTIRE team of doctors necessary to bring Nasir into this world and keep me safe in the process. Not only was my disease creating a serious health risk, the baby was breech. There was no time left. It would be way too perilous to wait and risk going into labor and a vaginal delivery. Delivery was scheduled immediately for next morning.
I crumbled under the weight of everything and started to cry.
I wanted more time for him to develop. I was scared for him, what if something went wrong, I was worried about the risks, and the surgery and, and, and….and then I took a deep breath.
I called Nate at work.
“You need to come to Rochester right now. They are going to deliver our baby tomorrow morning…”
“Are you serious? Is this for real?”
“Yes, just please come as soon as you can. I need you…”
I don’t know if Nate could even think after that phone call, if he could even concentrate enough to finish his work for the day, or if he was on autopilot all the way up to Rochester. He made it up there by 10 pm that night and we stayed up nearly all night talking. He kept reassuring me the entire time that everything will be OK.
An assembly of sixteen
When Nate and I arrived at the hospital the next day, along with my mom, dad, and my brother, I was ushered into a room immediately. I was a bundle of nervous energy but also ready to meet my baby!!
Shortly after arriving, I was given an IV and little by little the entire assembly of doctors and nurses ushered in team by team to see me. All in all there would be 16 medical staff in the room with us to deliver Nasir. HOLY MACARONI!! 16!!! I was only allowed one other person with me, and of course that was Nate. I was then taken into the OR alone while he was told to get garbed up.
While I was in the OR, it was freezing. More IVs were placed. There were so many lights, so many machines, so many instruments, and so many people. I started to shake uncontrollably. I was given an epidural and a spinal, but the placement was giving me issues. They kept telling me to sit still. I couldn’t stop shaking. I hugged a pillow tightly to my front while they put the needles in my spine. It took forever. At one point, I felt a severe pain in my hip. They hit a nerve and my leg involuntarily shot out and kicked without me doing it. Yeah, this wasn’t working. They moved it a little higher in my spine and it was better.
From there, things moved so fast.
I was put on a table with my arms spread out wide. I had all the IVs in me, they erected a curtain up in front of me. So many people ushered in and out. The anesthesiologists, the surgery team, the OB-GYN team, the colorectal team, the nurses..SO MANY people! That team of 16 was in full action!
I wanted Nate and asked them to check on him. They said he was outside pacing. I wanted him with me, and it wasn’t much longer and he was able to come back into the OR. As soon as he walked in, they started to open me up. The doctors were wonderful about talking me through every step. I had the best cheerleader by my side. Nate was incredible. The anesthesia team was also very supportive and kept encouraging me softly, cheering for me, kept me comfortable, and just made me feel safe. I get choked up just thinking of these moments–moments I wanted to be fully present to remember.
I started to feel a severe pain in my right shoulder and started to get afraid. I told the doctor and they said they had my uterus out. The uterus is connected to the nerves in the shoulder and the pain I was experiencing was called “referred pain.”
He’s here!
It was only moments later when we heard our baby’s tiny cries. Nate started sobbing, I started sobbing. They lifted him over the screen so we could see him. My first thought was how tiny he was. They quickly moved him to the warming table so Nate could trim the cord and the team moved fast to get all the baby stats. Within moments, they brought this tiny naked baby to me and laid him on my chest. I could barely see or breathe I was crying so hard. HE WAS BEAUTIFUL. So precious. My miracle.
It took some time for the surgeons to close me up because they had to clear out scar tissue from former surgeries. They excised my old scar from the time I had the wound vac, and cleaned all of that tissue to make my incision a cleaner closure. It took quite a while, but I wasn’t even paying a moment of attention to that. Instead I was counting toes and fingers, memorizing my little boys face, and through my tears and laughter, I was rejoicing in this miracle.
As I was wheeled into a recovery room, Nate went to tell my family that our baby arrived. We wanted a few minutes alone to relish our first moments as a family of three. We also had an overflow of emotion that was just indescribable and we wanted to bask in the intimacy of sharing these very personal feelings together.
I remember when they lifted our baby over the screen after we heard his cries. I recall looking at him and instantly knowing that his name in my heart would be Nasir, but I didn’t say anything. To be fair, I wanted to hear Nate’s thoughts about his name. As soon as I asked him what our baby’s name should be, he said Nasir! We both felt it. We both knew. His name is Nasir Nathan.
Nasir is a Pakistani/Arabic name that means “Victorious,” and there is no more appropriate name fitting to this little boy than that. After all I have been through, all the health struggles and trials, I look at him and I know it was all for this moment.
I am often asked if one of my patterns can be resized. I know that it can become frustrating to see a pattern you love and yet, not be able to make it in the size you need. I do try to make most patterns in a variety of sizes to accommodate all, but sometimes, the pattern I design is size specific. I don’t have a variation or the stitch counts to make it in other sizes. Today’s blog is JUST A GUIDELINE to show you how changing your hook size can make a pattern slightly smaller or bigger JUST by changing this one detail.
Experimenting!
I decided to do a quick trial experiment because, not only do I love to crochet, I love to get answers to longstanding questions. The question posed to me quite often is: Can I make this pattern bigger or smaller?
If I don’t have the pattern adapted to various sizes, I have offered the suggestion to try different hook sizes.
Here I give you a better visual on how much changing the hook size does increase or decrease the size of your piece.
In this experiment, I took six different hooks:
1. D-3.25mm crochet hook
2. F-3.75mm crochet hook
3. G-4.25mm crochet hook
4. H-5.00mm crochet hook
5. J-6.00mm crochet hook
6. K-6.50mm crochet hook
I then crocheted THE EXACT SAME granny square using each different hook. (See this pattern here for the granny square pattern)
I used Red Heart With Love yarn in color Jadeite (worsted weight) Size 4 Medium (equal to DK or Aran yarn).
Once I completed each square, I placed all together using a US quarter coin as a point of reference to show proportion.
Each square increased somewhat in size but also, notice the stitching is not as tight as you increase the size.
The difference in size from the first square using a D-3.25mm hook to the last square using the K-6.50mm hook is a difference of 3 inches (~8cm)
Visuals Help!
If you are like me, it is so much easier to have a visual to be able to put into perspective how much change happens just by changing your hook. It helps so much to see it right in front of your eyes rather than trying to picture it in your mind how much difference this will make.
This trick may not work for ALL patterns but for some, this adjustment will be very handy in making something just a bit smaller or larger.
Keep in mind, this doesn’t allow for HUGE variations in size but just enough for some to get the desired result if you want to go a bit up or down on a specific pattern.
Also, remember, the larger you go, the looser and open the stitches will appear.
Share with us your experience if YOU have tried resizing by changing your hook gauge. Let us know how that helped you make a pattern smaller or larger. We’d love to hear from you!
Below are photos of each square by itself using the quarter as a point of reference.
This afghan block is part of the Wedding Blanket CAL that Marly Bird is hosting on her website!! See more details about it here!
My contribution to this crochet-along is the “Where Love Grows Afghan Block.” It has a floral design to it and it is very fitting to a wedding theme of love and growing together in your relationship.
On the Red Heart team we have a wonderful leader of the Joy Creators, named Ally. Ally got married in May and we wanted to do something very special for her. I got the Joy Creators together and we each made a square to put together to make a wedding blanket for Ally and her husband.
Below is a photo of the whole blanket put together! All the crochet designers that were part of this crochet along had our afghan blocks sewn together to make this patchwork quilt into a beautiful wedding gift!
Follow along with this video tutorial to learn how to make this afghan block:
**You can always contact me via Facebook if you have any problems with the pattern. I am happy to help if you have any questions along the way.
***You can sell anything you make from my patterns, please just link back to my website YARNutopia.com. Thank you!
My dad will continue to be the videographer, editor, and photographer for our videos when I move away.
Support YARNutopia today so we can continue to bring you clear, quality crochet tutorials even after I move into my new home!
There will be an added expense of more travel and hopefully this won’t deter our ability to provide consistent videos on a weekly basis.
Teacher: Nadia Fuad
Video and Editing: Fuad Azmat (My Daddy)
Share your work on Facebook!
Add me on Snapchat: YARNutopia
Follow me on Instagram
Visit My Ravelry Store and add this to your Favorites!
Follow me on Twitter: @YARNutopia
Enjoy this video and subscribe to my channel on YouTube for more tutorials on how to crochet!
Leave a comment, and share with your friends!
Pattern:
Designed by Nadia Fuad
You may sell items made from my pattern, but please reference my website YARNutopia.com.
Please do not copy, sell, and/or post this pattern and claim it as your own.
NOTES:
-You can make many of these into a blanket of any size. Use the Afghan Size Guide in this Blog Post
-The measurement for my square came out to be 12 inches
-You can use any colors you want. I used a Worsted Weight, Size 4 Medium Yarn but you can use any Double Knitting Yarn or any Aran Yarn as well.
-You do not have to change color so often, but sewing in those pesky ends is a nightmare. Be sure to sew them in as you go.
Special stitches:
Ch(s): chain(s)
YO: Yarn Over
St(s): Stitch(es)
Sl st: slip stitch
SK/Sk’d: Skip/Skipped
BLO: Back Loop Only
FLO: Front Loop Only
SC: Single Crochet
HDC: Half-Double Crochet
DC: Double Crochet
TR: Treble Crochet
Cluster: [YO, insert hook, YO, pull through, YO pull through 2 loops on your hook] 3 times, YO pull through all 4 loops on your hook
Beg. Cluster: [YO, insert hook, YO, pull through, YO pull through 2 loops on your hook] 2 times, YO pull through all 3 loops on your hook
LHDC: Long Half Double Crochet
LDC: Long Double Crochet
Pattern:
With Suede,
Start with a Magic Ring or Ch 4 and Sl st to first Ch to form a ring Rnd 1: Ch 3 (Counts as DC here and throughout), 7 DC into ring, Sl st to first Ch 3 st. (8 sts)
Rnd 2: Ch 2, Beginning Cluster in same st, *Ch 2, Cluster in next st, repeat from * around, ending with Ch 2, Sl st to first cluster. Fasten off, change color to VIP. (8 cluster sts)
Rnd 3: With VIP, Attach yarn to any Ch 2 sp, Ch 1, * 3 SC in Ch 2 sp, SC in cluster st, repeat from * around, sl st to first SC, Fasten off and change color to Linen. (32 sc sts)
Rnd 4: With Linen, Work in BLO, Attach yarn to any SC, Ch 4 (Counts as DC + Ch 1 sp), *DC in next st, Ch 1, repeat from * around, ending with ch 1, sl st to 3rd ch of beginning ch 4. Fasten off. (32 sts)
Rnd 5: With Linen, Attach yarn to any FRONT LOOP of any st on Round 3 that was not worked into, (See video tutorial for visual instructions), RSC in each st around. Fasten off.
Rnd 6: In any ch sp of Round 4, Attach Suede. Ch 5 (Counts as DC + Ch 2 sp), *DC in next Ch sp, Ch 2, repeat from * around, ending with Ch 2, sl st to 3rd ch of beg. ch 5. Fasten off, change color to Linen. (32 sts)
Rnd 7: With Linen, Attach to any Ch 2 sp, Ch 1, 2 HDC in each Ch 2 sp around, Sl st to first HDC. Fasten off, change color to VIP. (64 sts)
Rnd 8: With VIP, Attach to any st, Ch 1, SC in first 4 sts, * Ch 5, Sk 4 sts, SC in next 4 sts, repeat from * around, ending with Ch 5, Sl st to 1st SC, do NOT fasten off. (8 Ch 5 sps created)
Rnd 9: Continue using VIP color, Sl st into next st and IN BETWEEN the 2 sts of the 4 SC grouping (See video tutorial for specific location), Ch 1, SC in same spot, *[3DC, 3TR, 3DC] in next ch 5 sp, SC between 2 middle SC of next 4 SC grouping, repeat from * around, sl st to first SC. Fasten off, change color to Linen. (If your work is curling at this point do not worry, it will flatten out in the next few rounds) (8 petals made)
Rnd 10: With Linen, Attach to any FIRST DC of a petal, work in BLO for this round, Ch 1, HDC in first 4 sts, *[HDC, Ch 2, HDC] in next st, HDC in next 4 sts, Long HDC in same spot as SC from previous round, HDC in next 4 sts, repeat from * around, ending with LHDC in last st, sl st to first HDC. Fasten off, change color to Suede. (96 sts)
Rnd 11: With Suede, Attach to any LHDC, Work in THIRD LOOP of each st in this round, (See video tutorial for visual instructions), Ch 4 (Counts as TR), [2TR, Ch 2, 3 TR] in same st, * Sk 3 sts, SC in next 2 sts, SC in ch 2 sp, SC in next 2 sts, HDC in next 2 sts, DC in next st, TR in LHDC st, DC in next st, HDC in next 2 sts, SC in next 2 sts, SC in ch 2 sp, SC in next 2 sts, Sk 3 sts, [3TR, Ch 2, 3 TR] in LHDC st, repeat from * around, sl st to first Ch 4 st. do NOT fasten off. (92 sts around)
Rnd 12: Continue using Suede color, work in BOTH LOOPS of sts, In same st as join, Ch 3, DC in next 2 sts, * [2DC, Ch 2, 2 DC] in corner ch 2 sp, DC in next 3 sts, HDC in next 17 sts, DC in next 3 sts, repeat from * around, sl st to beginning ch 3 st. Fasten off, change color to VIP. (108 sts)
Rnd 13: With VIP, Attach yarn to any corner ch 2 sp, Ch 3, [DC, ch 2, 2 DC] in same corner sp, * Ch 1, Sk 1 st, DC in next st, repeat from * until next corner, [2 DC, ch 2, 2 DC] in corner, repeat from * around, sl st to beg. ch 3 st. Fasten off, change color to Suede.
Rnd 14: With Suede, Attach yarn to any corner ch 2 sp, Ch 1, *[SC, Ch 2, SC] in corner, SC in next 2 sts, [LDC in Sk st from previous round, SC in next st on Rnd 13] 14 times, LDC in Sk’d st from Previous Round, SC in next 2 sts, repeat from * around, sl st to first SC. Fasten off, change color to Linen.
Rnd 15: With Linen, attach yarn in any corner ch 2 sp, Ch 1, 3 SC in same corner sp, SC in each st around putting 3 SC in corner ch 2 sps, sl st to first SC, do NOT fasten off. (144 sts)
Rnd 16: Continue using Linen, Ch 1, SC in each st round putting 3 SC in middle SC of corners, sl st to first SC, do NOT fasten off. (152 sts)
Rnd 17: Repeat Round 16 (You can opt out of doing this round if your square is 12 inches after Round 16)
Fasten off, weave in all ends.
Block your square if needed.
Enjoy!!
This post contains affiliate links, which I may be compensated for when you make a purchase. That means if you click on any link and buy from the linked websites, I will receive a small percentage of the value of your order. The amount you pay is not changed. Thank you for all your support in clicking the links in my blog!! You all are so amazing!! ~Nadia
The yarn provided for this pattern is courtesy of Red Heart Yarns
We would like to introduce our new baby boy to our YARNutopia community. There are NO words to express how much we are in love with this precious little peanut and how it feels to be first time parents; so instead of doing that at this time, we ask you to please enjoy these exclusive beautiful photos – many of which are being shared here for the very first time.
He arrived a little earlier than expected, and although nothing about his delivery was easy, in the end, holding him in our arms was so worth it! Oh. MY. Gosh. THE LOVE!
Nate and I are overwhelmed with joy and want to share our happiness with our online family community. As soon as I am feeling better, I will write a little more about this entire experience in detail!
So many people tried to tell us how this would feel. NOTHING compares to the real thing. NOTHING!! WE ARE SO IN LOVE WITH HIM!
Name: Nasir Nathan
Born June 13th, 2019 at 12:15pm
Weight: 6 lbs, 12 oz.
Length: 18.9 inches
Things we observed so far: He has his Daddy’s face and wavy dark hair, but he has Mommy’s nose and dimples. He has long fingers like Mommy but Daddy’s toes lol. As we continue to discover one another, we look forward to finding more of these amazing connections. It is the most profound feeling ever to meet this tiny human, see pieces of ourselves in him, and know that we made him!
Many of you have seen my videos on YouTube and commented on the type of crochet hook I am using in a majority of my tutorials. My dad started mass producing these crochet hooks after so many inquiries flooded in. Each hook handle, as demonstrated in this video tutorial, is individually crafted and designed. A great deal of time is spent on every single hook handle.
These special crochet hooks are ergonomically created to fit perfectly into the palm of your hand. I use these in each and every video we film.
I spent much of my early crochet years in the hospital. My mom taught me the basics, and I used crochet as a time pass for those long stays trapped in a hospital bed. I loved watching YouTube just like many of you. I watched the Crochet Crowd, Moogly, and Naztazia and learned more advanced techniques through their tutorials.
I started noticing when using a traditional aluminum crochet hook, my finger and wrist joints would start to pain while holding the thin hook. Most of the pain was in part from being so ill. The disease, and side effects of my medications caused bone deterioration and joint problems. It wasn’t unusual to have swollen hands and rusty joints almost every day. My dad saw my struggle, and when I would tell him it hurt to crochet, we started to brainstorm ways to make things easier.
My dad is not a master craftsman. He didn’t even own many power tools. He didn’t carve or do woodworking, yet, he decided to experiment a little and began to design handles for my crochet hooks. In fact, his early introduction to the world of wood craft had him on a first name basis with the local Emergency Room doctors from all the mishaps he encountered trying to perfect his design. Eventually, he was able to craft this final design, have less trips to the ER, and rarely ends up with stitches anymore!
Not only are these the most comfortable in my hand, but due to those arthritic effects from long term illness, the joints in my hand and wrist feel better with this handle when I work. These handles make it so much easier to crochet for a duration of time and reduce the stress on my joints.
This blog is in part a plug for the hooks my dad makes because, why not? Besides filming and editing my video tutorials, he works so hard to make each and every one of these crochet hooks as demonstrated in his documentary video. Each individual hook is made exactly like shown. The time and care put in to each one is unsurpassed! Just check out the testimonials on his Etsy Shop to hear what others have to say.
More than a shameless plug for this product, this blog is about a dad who cares so much about his daughter that he found a way to make her passion easier on her. He designed this amazing hook handle so that I don’t hurt any more. He took to learning wood crafting and carving, taught himself how to use all these power tools and even sacrificed his own hands to make mine feel better. Those numerous ER trips to get stitches in his hands are testament to how far he would go to make me happy and pain-free.
With Father’s Day approaching, let’s remember the selfless sacrifices our dads have made. The hard work and dedication they show us and their unending acts of love they provide. I am pretty lucky to have one of the best! Thanks, Daddy for everything!
As some of you may have noticed, I have been somewhat MIA on my social media and on my blog for a little bit. I have been posting and have been a little active, just not as much as I usually am. There’s a reason for that.
Last week, I ended up in the hospital. I was having a lot of issues with my body and baby, so I went into the Emergency Room. The doctors here in La Crosse, WI did not feel confident, and the scope of my issues were outside of the range they felt comfortable dealing with. They felt things were emergent to either med-flight or rush me to Mayo Hospital in Rochester, Minnesota.
It was decided that was going to be rushed by ambulance, but Nate could not accompany me on the ride. He came behind and my mom met us up at Mayo Hospital. I was in the hospital for nearly a week with several complications making it impossible for me to manage at home.
It was decided that upon release from the hospital, I could return home short term while a social worker from the hospital would work on a short term relocation plan for me. For these last few weeks before delivery, I will be staying in Rochester near the hospital in an extended stay apartment. This way, I will be close by the hospital in case anything emergent happens again.
What is going on?
In the recent blog where I shared my pregnancy photos, I mentioned that the doctors have taken me off of all my medications that help to keep my Crohn’s disease under control while I work towards remission. Now, off of the medication, my body has started to get weaker. I ended up with an infection and the infection put my body into a full-on flare.
Since I don’t have a large intestine, my small intestine has to learn the job of what its old companion had done. I have to draw my nourishment, vitamins, minerals, fluids, and much more from my small intestine similarly to what the body does with the large intestine. Not only do I rely on that intake, that same intake is what is helping to keep baby healthy. When I got sick last week, the function of the small intestine failed me, and my body was having a difficult time absorbing ANYTHING. This made it difficult to keep food down, my body was severely dehydrated, and some of my blood test numbers were dropping making it difficult to keep my nourishment markers where they needed to be.
Because I am pregnant, normal options for treatment aren’t always viable because they can affect the baby. There were so many limitations that the doctors could treat me with. It took some time and patience, but we were able to find a way for me to gain some control over my body without causing more stress to me or baby. At least, for now, it was enough to go home and prepare for this upcoming relocation.
What will this mean for YARNutopia?
I am home for a few days. Soon, I will transition to an apartment closer to the hospital in Minnesota. I will stay there temporarily until our baby is born. Nate will be with me on the weekends, and my mom will be coming to stay with me during the weekdays, as I can’t be alone. All my care will continue through Mayo Clinic in Rochester.
(Pictured above is a photo of my mom and me in the hospital last week)
(Pictured above is me, feeling better)
Because of this transition, I won’t be able to be as active or as present on my social media sites. I won’t be checking out completely though! No way! I love my social media! I will, however, be taking a small step back to get things under control with my health and prepare for delivery. There are LOTS of appointments, checkups, and tests to be done in these last few weeks! But don’t worry! I will do what I can, when I can! So, please keep checking the Facebook page, click on the links I share, share photos of your work. I’ll be crocheting to pass some time, and I hope to keep on keeping on. I will be sure to check in as often as I can!!
I will also try to update you as much as possible. Until baby arrives, the most I will be doing is trying to keep as healthy as I can so he can be inside growing and developing. We need him to be the strongest he can be! We are almost to his due date, so we are hoping for a not so bumpy ride to get there! Haha!
In the next few weeks, I am still hopeful to post some new blogs, a few new posts, and whatever I can do, but in the meantime, I will pull from the archives some great classic patterns, some oldies but goodies, and I will share work from my fellow designers! And once baby is here and I am recovered, I will be back better and stronger than ever!
This past Sunday, my Aunt and my Mom organized a baby shower for Nate and me. To say it was amazing is such an understatement! Not only did my family have so much in store for us, there were epic surprises to be showered on us as well.
After opening our gifts from family and friends, my mom made an announcement that there were more gifts. Confused, I wasn’t sure what she meant.
A quick background
I am part of a large online blogger community. In our private group, this blogger community shares ideas and support for one another. Besides my personal family, these ladies feel like family even though we haven’t met in real life. I feel like we know one another despite that we haven’t met. We talk almost daily and check in with one another. We share patterns and advice, we count on each other in our shared desire to grow our craft. We have a sisterhood that transcends the miles and continents.
So, when my mom announced that this incredible group of ladies had conspired to bring their own version of an online baby shower to my family baby shower, I was so overwhelmed with joy and shock! It felt so amazing to find out that together, they reached out to be a part of this special day. They coordinated through Marly Bird to send surprise packages to my mom and my aunt. Each package was a gift for our sweet baby boy.
Both Nate and I could not believe it! We had NO CLUE! Seriously, my mom is the best at keeping secrets because I talk to her a half dozen times a day and NOT ONCE did she even hint there was this in store for us at the shower!! As soon as my Aunt Gail brought this giant box full of gifts I started getting emotional all over again!
Each crochet designer/blogger created something extraordinarily special for this baby. Below, please join me in this video as I open these wonderful gifts. Please understand that in this moment I was so emotional and overwhelmed. Tears flowed freely, my nose was running wild, and I kept repeating how awesome it was and how much in shock this felt!
I am in complete awe of these amazing women. Not only are they spectacular designers and creators, but I have the joy of calling each of them my FRIEND! WE are so lucky. I am so lucky. This baby is so lucky and so loved.
From the bottom of my full heart, THANK YOU!! There are no words to describe this feeling. I am so grateful for your gifts of time and creativity. Thank you for your gift of love and friendship. Again, my heart is so full.
On a side note. In the last frame of the video I was hugging a teddy bear. Some of you may not know that at the end of March we lost my Grandpa Bob. In January, he was told by his doctors he had about six months to live. He had hopes to live long enough to meet my baby. My grandpa was so supportive and caring through my journey through illness and life, and he wanted to be here to see me through this special time. God had other plans for him. He passed away on March 24th, 2019.
My mom took one of his shirts and sent it in to a designer on Etsy. She made a memory teddy bear out of my grandpa’s shirt. My mom had a photo of my grandpa and me, and in it he wore that same shirt. She gifted both together – the photo in a frame and this sweet bear to put in the nursery. This gift was so special and although my Grandpa won’t be here, a small part of him will always be with us.
We all love a comfortable pair of house slippers. The guys in our lives are no exception. With Father’s Day right around the corner, why not make Dad a pair of these fantastic Chunky Boot Slippers. Perfect for putting your feet up and relaxing around the house. Add a leather or vinyl non-skid bottom to make them more versatile and avoid slipping. These chunky boots are squishy soft and would be perfect for anyone!
Follow along with this video tutorial to learn how to make these slippers:
My dad will continue to be the videographer, editor, and photographer for our videos when I move away.
Support YARNutopia today so we can continue to bring you clear, quality crochet tutorials even after I move into my new home!
There will be an added expense of more travel and hopefully this won’t deter our ability to provide consistent videos on a weekly basis.
Teacher: Nadia Fuad
Video and Editing: Fuad Azmat (My Daddy)
Share your work on Facebook!
Add me on Snapchat: YARNutopia
Follow me on Instagram
Visit My Ravelry Store and add this to your Favorites!
Follow me on Twitter: @YARNutopia
Enjoy this video and subscribe to my channel on YouTube for more tutorials on how to crochet!
Leave a comment, and share with your friends!
Pattern:
Designed by Nadia Fuad You *may* sell items made from my pattern, but please reference my website YARNutopia.com.
Please do not copy, sell, and/or post this pattern and claim it as your own.
NOTES:
-Use a smaller hook to make these smaller
-Use a bigger hook to make these bigger
-Watch the FULL introduction of the video tutorial for frequently asked questions and watch the full video for tips on how to make these smaller or bigger.
-The written pattern is for a size 10/10.5 US Men’s Size Shoe. You can adjust the size for measurements.
-This project uses 150 yards of BULKY yarn.
-Sew on patches of leather to the bottom of your slippers to make them non-skid.
-You can also put strips of hot-glue on the bottom of your slippers to make them non-skid
-For larger sizing tips and tricks, see written instructions below or video tutorial.
Special stitches:
Ch(s): chain(s)
YO: Yarn Over
RS: Right Side
WS: Wrong Side
St(s): Stitch(es)
Sl st: slip stitch
SK: Skip
SC: Single Crochet
SC2TOG: Single Crochet Decrease
Pattern:
If you have any confusion or difficulty with reading this pattern, please watch the video tutorial to have visual instructions.
Make 2
Sole:
With your main color (Steel):
Ch 4
Row 1: 2 SC in 2nd Ch from hook, 2 SC in each of the next 2 Chs, Ch 1, Turn. (6)
Row 2: 2 SC in 1st st, SC in each st to last st, 2 SC in last st, Ch 1, turn. (8)
Row 3: Repeat Row 2. (10)
Rows 4-12: SC in each st across, Ch 1, turn. (10)
(FOR LARGER SIZES: Do more rows of single crochets for a longer length before going onto the next row)
Row 13: Repeat Row 2. (12)
Rows 14-20: SC in each st across, Ch 1, turn. (12)
(FOR LARGER SIZES: Do more rows of single crochets for a longer length before going onto the next row)
Row 21: SC2TOG, SC in each st until 2 sts remain, SC2TOG, Ch 1, turn. (10)
Row 22: Repeat Row 21. (8)
Row 23: Repeat Row 21. (6)
Row 24: Repeat Row 21. (4)
Do not fasten off, continue to SC around entire Sole.
Fasten off. Weave in ends.
Assembly step:
With Sapphire blue, Slip Stitch around the last round of of the Sole (See video tutorial for visual instructions)
Sides of Slipper:
Attach Steel again, to the BLO of the last round of the sole (See video tutorial for specific location)
Rnd 1: Ch 1, SC in each St around, sl st to first st, ch 1. (I had 50 sts around, but you might have more or less) Rnd 2: SC in each st around. Sl st to first st. Fasten off, weave in ends.
Scroll down to see the rest of the pattern.
Top of Foot:
With your main color (Steel)
Ch 7 Row 1: SC in 2nd Ch from hook and across, ch 1, turn. (6)
Row 2: SC in each st across, ch 1, turn. (6)
Row 3: 2 SC in 1st st, SC in next 4 sts, 2 SC in last st, Ch 1, turn. (8)
Row 4: 2 SC in 1st st, SC in next 6 sts, 2 SC in last st, Ch 1, turn. (10)
Row 5: 2 SC in 1st st, SC in next 8 sts, 2 SC in last st, Ch 1, turn. (12)
Row 6-14: SC in each st across, ch 1, turn. (12)
If you need to make less rows if your feet are smaller or more rows to make it longer, you can continue until you are satisfied with the length, then go onto the instructions for dividing the leg opening.
Divide for Leg Opening: Right Side: Row 1: SC in 1st 5 sts, Ch 1, turn. (5) Row 2-10: SC across, ch 1, turn. (5)
Fasten off. Weave in ends.
Left Side: Row 1: Sk 2 sts on Row 14 of foot, SC in remaining 5 sts, Ch 1, turn. (5) Row 2-10: SC across, Ch 1, turn. (5)
Fasten off with long tail for sewing.
Assembly Step:
Sew both backs of legs together, INSIDE OUT. (See video tutorial for visual instructions on how to sew these pieces together)
Weave in all ends.
SINGLE CROCHET around the bottom edge of the “Top part of the foot” (See video tutorial for visual instructions)
Using the Single Crochet Method and the Sapphire Blue yarn, Single Crochet the top part of the foot to the bottom part of the foot. Weave in all ends.
Ankle:
With your main color (Steel):
Ch 6 Row 1: SC in 2nd Ch and across, Ch 1, Turn. (5) Rows 2-23: SC in each st across, Ch 1, turn. (5)
Fasten off with long tail for sewing.
Sew to top hole of shoe, and sew up the back seam (See video tutorial for visual instructions)
With Sapphire Blue, SC evenly around ankle, Fasten off. Weave in all ends.
Make another one to complete the pair!
Enjoy!!
This post contains affiliate links, which I may be compensated for when you make a purchase. That means if you click on any link and buy from the linked websites, I will receive a small percentage of the value of your order. The amount you pay is not changed. Thank you for all your support in clicking the links in my blog!! You all are so amazing!! ~Nadia
The yarn provided for this pattern is courtesy of Red Heart Yarns
Last week, we took a tour of my new nursery that my mom and I set up. (see it here!!) It was so much fun to see the colors come to life, the artwork get hung, and the crib readied for baby’s arrival.
Today, I am introducing the Happy Hues Sampler Baby Blanket. This luxurious blanket was made in the hues of my nursery. Yours can be made in any combo of color or why not use this project for a great stash buster!? You will love this project so much!
I have provided you instructions on how to expand the size of this blanket to fit any size bed. Whether it be all colorful or just a combination of tones that fit the decor of a specific room, this blanket will make the perfect addition to any home or nursery. Join me and get started today!
Watch this video tutorial to learn how to make this blanket:
**You can always contact me via Facebook if you have any problems with the pattern. I am happy to help if you have any questions along the way.
***You can sell anything you make from my patterns, please just link back to my website YARNutopia.com. Thank you!
My dad will continue to be the videographer, editor, and photographer for our videos when I move away.
Support YARNutopia today so we can continue to bring you clear, quality crochet tutorials even after I move into my new home!
There will be an added expense of more travel and hopefully this won’t deter our ability to provide consistent videos on a weekly basis.
Teacher: Nadia Fuad
Video and Editing: Fuad Azmat (My Daddy)
Share your work on Facebook!
Add me on Snapchat: YARNutopia
Follow me on Instagram
Visit My Ravelry Store and add this to your Favorites!
Follow me on Twitter: @YARNutopia
Enjoy this video and subscribe to my channel on YouTube for more tutorials on how to crochet!
Leave a comment, and share with your friends!
Pattern:
Designed by Nadia Fuad
You may sell items made from my pattern, but please reference my website YARNutopia.com.
Please do not copy, sell, and/or post this pattern and claim it as your own.
NOTES:
-You can make this blanket any size. Use the Afghan Size Guide in this Blog Post
-The measurements for my blanket came out to be approximately 45 inches X 50 Inches
-You can make this blanket any size by making your beginning chain an even number.
-You can use any colors you want. I used a Worsted Weight, Size 4 Medium Yarn but you can use any Double Knitting Yarn or any Aran Yarn as well.
-This blanket took me approximately 3 days to complete.
-You do not have to change color so often, but sewing in those pesky ends is a nightmare. Be sure to sew them in as you go, but if you are not changing color as often as I do in the video tutorial, you can carry your yarn up the rows on the sides because when we make our border, we cover the sides anyway.
-Ch 3 at the beginning of a row counts as a stitch unless otherwise specified (See video tutorial for explanation, especially when working treble crochet rows)
-If you do not have the same exact stitch count as me (if you are off by a few stitches, do not worry about it, it is OK, the border will hide any imperfections on the edges)
Special stitches:
Ch(s): chain(s)
YO: Yarn Over
St(s): Stitch(es)
Sl st: slip stitch
SK: Skip
SC: Single Crochet
HDC: Half-Double Crochet
DC: Double Crochet
TR: Treble Crochet
PS: Puff Stitch: *YO, insert hook into st, YO, pull through, repeat from * until you have 7 loops on your hook. YO pull through all 7 loops.
Pattern:
Change color every row.
With Charcoal Ch 132 Row 1: Dc in 3rd ch from hook and across, turn. (130)
Row 2: With White, Ch 3 (counts as stitch here and throughout), Sk 1 st, *DC in next st, DC in sk’d st working behind the DC you just made, Sk next st, repeat from * across ending with DC in last st, turn. (130)
Row 3: With Denim, Ch 1, SC in same st, *Ch 2, Sk 2 sts, SC in next st, repeat from * across ending with SC in last st, turn. (44 SC, 43 Ch 2 sps)
Row 4: With Dusty Gray, In first SC st, Ch up 3 (counts as st), put 3 DC in each Ch 2 sp across, (if you have 129 sts, add one more stitch at the end) turn. (130 sts)
Row 5: With Country Blue, Attach yarn to first st, Ch 1, SC in same st, *TR in next st, SC in next st, repeat from * across ending with SC in last st, turn. (130 sts)
Row 6: With White, Ch 1, HDC in each st across, Turn. (130 sts)
Row 7: With Charcoal, Ch 1, HDC in 1st st, Puff st in next st, *Ch 1, Puff st in next st, repeat from * across ending with HDC in last st, turn. (66 sts)
Row 8: With Country Blue, Attach yarn to first st, Ch 3 (counts as st), DC in same st, DC in each Ch 1 sp across ending with 2 DC in last st, turn. (130 sts)
Row 9: Repeat Row 2 with color Dusty Grey
Row 10: repeat Row 3 with color Denim
Row 11: repeat Row 4 with Charcoal
Row 12: repeat Row 5 with White (Be sure this round you are looking at the BACK side of your work)
Row 13: repeat Row 6 with Denim
Row 14: repeat Row 7 with Dusty Grey
Row 15: repeat Row 8 with Country Blue
Repeat Rows 2-15 with the same color sequence
End on row 78
or make this blanket as long as you want!
BORDER:
Rnd 1: SC around entire blanket putting 3 sc in each corner. Sl st to first sc.
Rnd 2: Ch 3, 2 DC in same st, *sk 2 sts, 3 DC in next st, repeat from * around putting [3DC, ch 2, 3DC] in corners, sl st to first st when finished with this round.
Rnd 3: sl st in next 2 sts and into gap between groupings, Ch 3, [2DC, ch 2, 3 DC] in same gap, *SC in next gap between groupings, [3DC, ch 2, 3DC] in next gap between groupings, repeat from * around putting [3DC, ch 2, 3DC] in corners, sl st to first st when finished with this round.
That border is amazing and can be put on any blanket!!
Weave in all ends.
Enjoy!
This post contains affiliate links, which I may be compensated for when you make a purchase. That means if you click on any link and buy from the linked websites, I will receive a small percentage of the value of your order. The amount you pay is not changed. Thank you for all your support in clicking the links in my blog!! You all are so amazing!! ~Nadia
The yarn provided for this pattern is courtesy of Red Heart Yarns
Here’s a look at our baby’s nursery!! We’re expecting his arrival in June 2019 and here’s his new room! It’s a work-in-progress, but this is how far we’ve gotten on his “crib” so far!!
Head to the beach with this boho-inspired swimsuit cover-up! Not heading to the beach? Why not wear this Sand-n-Sea Beach Tunic over a tank top with Jean cut-offs or over your favorite sundress! Really you can NOT go wrong with this top! Next time you head to the water, you will want to have this stylish cover-up as part of you beach wardrobe.
The chains and fringe give this fabulous piece a free flowing look that is perfect for the warm summer!!
Also check out my Sassy Summer Bikini!! You can make the entire ensemble – bikini and coverup using Willow Yarns! Now rush over to their website and fill up those online shopping carts with these perfect summer fibers!
My dad will continue to be the videographer, editor, and photographer for our videos when I move away.
Support YARNutopia today so we can continue to bring you clear, quality crochet tutorials even after I move into my new home!
There will be an added expense of more travel and hopefully this won’t deter our ability to provide consistent videos on a weekly basis.
Watch this video tutorial to learn how to make this tunic:
**You can always contact me via Facebook if you have any problems with the pattern. I am happy to help if you have any questions along the way.
***You can sell anything you make from my patterns, please just link back to my website YARNutopia.com. Thank you!
Teacher: Nadia Fuad
Video and Editing: Fuad Azmat (My Daddy)
Share your work on Facebook!
Add me on Snapchat: YARNutopia
Follow me on Instagram
Visit My Ravelry Store and add this to your Favorites!
Follow me on Twitter: @YARNutopia
Enjoy this video and subscribe to my channel on YouTube for more tutorials on how to crochet!
Leave a comment, and share with your friends!
Designed by Nadia Fuad You *may* sell items made from my pattern, but please reference my website YARNutopia.com.
Please do not copy, sell, and/or post this pattern and claim it as your own.
NOTES:
-Use a smaller hook to make these smaller
-Use a bigger hook to make these bigger
-Watch the FULL introduction of the video tutorial for frequently asked questions and watch the full video for tips on how to make this smaller or bigger.
-This tunic measures 32 inches wide and 23 inches long. See video tutorial to learn how to make this larger.
Special stitches:
Ch(s): chain(s)
YO: Yarn Over
St(s): Stitch(es)
Sl st: slip stitch
SC: Single Crochet
DC: Double Crochet
Pattern:
If you have any confusion or difficulty with reading this pattern, please watch the video tutorial to have visual instructions.
Tunic:
Front Panel and Back Panel: (These instructions are for ONE panel, make 2 exactly the same–See video tutorial for visual instructions)
Ch 142 or any multiple of 20 + 2 Row 1: DC in 3rd Ch from hook and next 19 chs, *Ch 20, Sk 20 chs, DC in next 20 chs, repeat from * across ending with DC in last 20 chs, ch 2, turn.
Row 2: DC in first 20 sts, *Ch 20, Sk ch 20 sp, DC in next 20 sts, repeat from * across, ending with DC in last 20 sts, Ch 2, turn.
Rows 3-50: Repeat Row 2 (you can go beyond Row 50 if you want to make yours longer)
Assembly Step:
Make 2 of these panels exactly the same way. Once the front panel and back panel are made, sew the shoulders and up the sides leaving space for arm-holes (see video tutorial for specific instructions on how to sew this closed)
Add fringe to the sides and around the arm holes. Weave in loose ends.
Enjoy!!
This post contains affiliate links, which I may be compensated for when you make a purchase. That means if you click on any link and buy from the linked websites, I will receive a small percentage of the value of your order. The amount you pay is not changed. Thank you for all your support in clicking the links in my blog!! You all are so amazing!! ~Nadia
The yarn provided for this pattern is courtesy of Willow Yarns
Life is busy and there is never enough time in the day for most of us. Between jobs, family, appointments, and obligations, most of us are left with less and less time in a day for enjoyment. Crochet projects get started and set aside forgotten. Oftentimes, we take on a project in hopes to complete it by a specific deadline – a wedding, birthday, or holiday. It is in this time of hustle and bustle, a little time management can go a long way! Let me show you how!
Here are some of my tips to help maximize the time you have and make the day as productive as possible.
Set your goals. Now let’s plan a way to support and reach those goals!
Prioritize your day/week/month: When we begin a project, most of us have more than just the project deadline ahead of us. Know what time frame you are working with and determine the other activities you need to juggle simultaneously with these projects. Getting a planner is a great way to keep yourself organized. Several apps can be useful or I use a planner like this one here.One glance at the week ahead can give me an idea of how I can plan out my projects around other things I am juggling in life. Work and work related activities, appointments, family activities, and plans with friends-it is all right there in my planner!
Another great tip is to invest in a white board! I have one and write my daily “to do list.” My white board is near my office where I spend most of my time. I see it nearly all day long. When I get busy, it is hard to remember everything I have to do, so seeing it RIGHT in front of me every time I walk past is a great way to keep me on task! Once I complete a task, I erase it. I LOVE seeing those “to-dos” disappear every day!
Always plan ahead: Know what is necessary to reach these goals and be sure to have your project supplies available. How many times have you started a project and then ran out of supplies and needed something and now you have to stop working or put your project off until you have what you need. Plan it out, write a list, and shop for supplies, double check.
Get rid of things that distract you. Are you drawn in by social media and realize that you just spent 45 minutes with time sunk on Facebook or Instagram? Ummm me neither haha! But for those that get distracted by social media, television, or even the birds on the feeders outside the window, remove those distractions NOW! I am NOT saying permanently, NO-keep your bird feeders filled with birds!! I am saying this; Set a timer for 20 minutes or an hour (or the allotted time you’re planning on working on your project) now, put your phone in the other room, shut off TV if it is a distraction, close the curtains-do what you need to do in order to have that one hour free and clear to work. Sometimes, I only have time to set my timer for 20 minutes and push myself just to concentrate for that 20 minutes, shut my mind off to everything else and get to work! I try to capitalize on those timed sessions! Remember to have your supplies all available before getting started.
Sometimes you have to just say NO. We all want to be the kind of person that can do it all. However, sometimes that is not possible, and there comes a time that to be the most productive in our own lives we have to say NO to things. Not everything, just the things that bog our schedules down to the point where there is no time for enjoyment. It’s ok-give yourself permission to say NO and tell yourself it is ok!
Last on our list is TAKE CARE OF YOU!! No matter how much you want to finish a project, no project is worth going bonkers stressing over it! There might not be enough time in a day. It is ok! Look at your week and plan it out in days-Tuesday/Thursday or Monday/Wednesday projects, or maybe just weekend projects. Whatever you have time for, don’t put extra pressure on yourself that you HAVE to get it done NOW even on a deadline. Pace yourself, plan ahead, and give yourself permission to relax. I promise, with some effective time management, you can accomplish your goals!
Now that you have some great tips, you will have much more time to do what you love!
This post contains affiliate links, which I may be compensated for when you make a purchase. That means if you click on any link and buy from the linked websites, I will receive a small percentage of the value of your order. The amount you pay is not changed. Thank you for all your support in clicking the links in my blog!! You all are so amazing!! ~Nadia
I tried a new project that is simple enough for the beginner and fun for the seasoned crocheter! The Star Ring Rattle is perfect for any baby nursery, gift, or layette!
My dad will continue to be the videographer, editor, and photographer for our videos when I move away.
Support YARNutopia today so we can continue to bring you clear, quality crochet tutorials even after I move into my new home!
There will be an added expense of more travel and hopefully this won’t deter our ability to provide consistent videos on a weekly basis.
Watch this video tutorial to learn how to make this project:
**You can always contact me via Facebook if you have any problems with the pattern. I am happy to help if you have any questions along the way.
***You can sell anything you make from my patterns, please just link back to my website YARNutopia.com. Thank you!
Teacher: Nadia Fuad
Video and Editing: Fuad Azmat (My Daddy)
Share your work on Facebook!
Add me on Snapchat: YARNutopia
Follow me on Instagram
Visit My Ravelry Store and add this to your Favorites!
Follow me on Twitter: @YARNutopia
Enjoy this video and subscribe to my channel on YouTube for more tutorials on how to crochet!
Leave a comment, and share with your friends!
Designed by Nadia Fuad You *may* sell items made from my pattern, but please reference my website YARNutopia.com.
Please do not copy, sell, and/or post this pattern and claim it as your own.
NOTES:
-Use a smaller hook to make these smaller
-Use a bigger hook to make these bigger
-Watch the FULL introduction of the video tutorial for frequently asked questions and watch the full video for tips on how to make this smaller or bigger.
Special stitches:
Ch(s): chain(s)
YO: Yarn Over
St(s): Stitch(es)
Sl st: slip stitch
SC: Single Crochet
HDC: Half Double Crochet
DC: Double Crochet
SC2TOG: Single Crochet Decrease
SC3TOG: Single Crochet 3 Stitches Together
Pattern:
If you have any confusion or difficulty with reading this pattern, please watch the video tutorial to have visual instructions.
Star: (MAKE 2)
Ch 2 (or start with magic ring) Rnd 1: 9 SC in 2nd Ch from hook, Sl st to first SC, Ch 1, TURN.
Rnd 2: 2 SC in each st around, sl st to first SC, Ch 1, TURN. (18 sts)
Rnd 3: [2 SC in next st, SC in next st] 9 times, sl st to first SC, Ch 1, TURN. (27)
Rnd 4: [2 SC in next st, SC in next 2 sts] 9 times, sl st to first SC, Ch 1, TURN. (36)
Rnd 5: [2 SC in next st, SC in next 3 sts] 9 times, sl st to first SC, Ch 1, TURN. (45)
Now you will be making the points of the star, you will be working in rows. (See video tutorial for visual instructions)
Row 1: SC in 9 sts, leave the rest unworked, ch 1, turn. (9)
Row 2: SC in each of the 9 sts across, ch 1, turn. (9)
Row 3: SC2TOG, SC in next 5 sts, SC2TOG, ch 1, turn. (7)
Row 4: SC in each of the 7 sts across, ch 1, turn. (7)
Row 5: SC2TOG, SC in next 3 sts, SC2TOG, ch 1, turn. (5)
Row 6: SC in each of the 5 sts across, ch 1, turn. (5)
Row 7: SC2TOG, SC in next st, SC2TOG, ch 1, turn. (3)
Row 8: SC in each of the 3 sts across, ch 1, turn. (3)
Row 9: SC3TOG, ch 1. DO NOT TURN
Continue to Sl st down the side of the point back to Round 5 of the circle
Repeat Rows 1-9 of the point starting in the very next st.
Repeat this until you have all 5 points made.
On the first star, fasten off.
on the second star, DO NOT fasten off
Assembly step:
SC around both stars attaching them together (See video tutorial for visual instructions).
Before Fully closing the star, be sure to add stuffing and the rattle inside.
Strap:
With another color, Start with long tail before you make your slip knot to start this section.
Ch 6 Row 1: SC in 2nd Ch from hook and across, ch 1, turn. (5)
Rows 2-20: SC in each st across, ch 1, turn. (5)
When you finish row 20, Fasten off with long tail for sewing.
Assembly:
Wrap the strap around the teething ring and sew it together
Sew the other side of the strap to the star. Weave in all ends.
Enjoy!!
This post contains affiliate links, which I may be compensated for when you make a purchase. That means if you click on any link and buy from the linked websites, I will receive a small percentage of the value of your order. The amount you pay is not changed. Thank you for all your support in clicking the links in my blog!! You all are so amazing!! ~Nadia
The yarn provided for this pattern is courtesy of Red Heart Yarns
Using the Fair Isle crochet stitch, I created these knee high socks!! This design makes the contrasting color look like mini hearts!! These socks are so incredibly warm and fashionable! I have made socks working from the cuff down to the toes, but this sock is created starting from the toes and working its way up the leg! These fun socks can be made in all sorts of color combinations! Go wild with your imagination! Enjoy this fun pattern!
Follow along with this video tutorial to learn how to make these socks:
My dad will continue to be the videographer, editor, and photographer for our videos.
Support YARNutopia today so we can continue to bring you clear, quality crochet tutorials even after I move into my new home!
There will be an added expense of more travel and hopefully this won’t deter our ability to provide consistent videos on a weekly basis.
Pattern:
Designed by Nadia Fuad
Questions? Leave a Comment! You may sell items made from my pattern, but please reference my website YARNutopia.com. Please do not copy, sell, and/or post this pattern and claim it as your own.
NOTES:
-These socks are worked from the bottom up.
-You can use any worsted weight or double knitting type of yarn. Go to YARNSUB.com and type in Amore and all the substitutions that are equal to this type of yarn will show up.
-These socks measure–Sole: 10 inches (24 cm), Length from Toe to Cuff: 21.5 inches (54 cm), Length of leg part only–cuff to heel: 13.5 inches (35 cm)
-These socks will fit a size 6-9 American Woman’s Shoe Size foot. The video tutorial explains how to make these larger or smaller with very few simple steps. Please watch the entire video tutorial to learn how to do this for other sizes.
-To make these smaller or larger, just make sure your increases are all in a multiple of 4 (I explain this in the video tutorial)
-The CH 2 or CH 1 at the beginning of a round does NOT count as a stitch. Sl st to the beginning stitch of that round to go onto the next round.
-The majority of these socks are worked in continuous rounds. Mark your rounds with a stitch marker for each round so you do not lose your spot.
-Work over the top of your previous color strand when making the fair isle stitching
-If you see any mistakes in the pattern, please leave a comment to this post and I will fix any errors.
-Work INTO the stitch, and NOT at the top of the stitch (video tutorial shows this method)
-SEW IN YOUR LOOSE ENDS AS YOU GO! YOU WILL THANK YOURSELF LATER.
Ch: chain St(s): Stitch(es) Sl st: slip stitch SC: Single Crochet DC: Double Crochet FPDC: Front Post Double Crochet BPDC: Back Post Double Crochet SC2TOG: Single Crochet Decrease
Socks:
The video tutorial demonstrates the Left Sock Only. Right Sock instructions are written with the left sock pattern below.
Work in continuous rounds throughout this pattern.
Work over the top of your yarn strands when you change color.
Work INTO the stitch, NOT at the top of the stitch (see video tutorial for visual instructions)
Both Socks:
Starting with Red
Ch 11
Rnd 1: SC in 2nd ch from hook and across, put 3 SC in last Ch, continue working on opposite side of foundation chain, SC across, put 2 SC in last st. (21 sts)
Rnd 2: SC in 10 sts, 2 SC in next st, SC in 10 sts, 2 SC in last st. (23)
Place stitch markers on each side of the sock, this is where you will put increase stitches. Rnd 3: SC in each stitch until you get to a marked stitch, put 2 SC in the marked St.
Rnds 4-11: Repeat Round 3 until you have 41 stitches (you will increase each round by 2 stitches)
After Round 11, if you have more or less than 41 stitches, just be sure you have a multiple of 4+1 (example: 40 is a multiple of 4, plus 1 = 41 sts)
If you end up having to do more rounds, it’s ok, just go onto the instructions for round 12 next.
Rnd 12: SC in each st around (change color after last stitch to go onto Round 13) (41 sts)
Rnd 13: Change color to Chamomile, SC in each st around. (41 sts)
From now on, I will refer to Rooibos as “Red” and Chamomile as “White” in this written pattern
Rnd 14: With White, SC2TOG, SC in next 2 sts, *Change color, SC with Red, Change color, SC in 3 sts with White, repeat from * around. (40 sts)
At this point, you should have a multiple of 4 stitches around (if you do not have 40 stitches, be sure to have a multiple of 4)
Rnd 15: With White, SC in each st around. (40 sts)
Rnd 16: With White, SC in 1 st, *change color to Red, SC in 1 st, Change color to White, SC in next 3 sts, repeat from * around ending with SC in last 2 sts with White.
Rnd 17: With White, SC in each st around. (40 sts)
Rnd 18: With White, SC in next 3 sts, *Change color to Red, SC in 1 st, Change color to white, SC in next 3 sts, repeat from * around ending with one st in Red on the last st.
Rnds 19-43: Repeat Rounds 15-18 as many times as you need to get the length of the top of the foot you need. END ON A REPEAT OF ROW 15 before moving onto the next section. If you do more or less rows, that is ok, FASTEN OFF when you are done with this part and jump to the instructions for the leg part next. You will create the heel hole after you have the length you need in this section.
If any of this is confusing in writing, please view the video tutorial for clear instructions.
Heel Hole and Leg part:
Mark 20 sts on the TOP side of the sock (see video tutorial to see where top side is)
These instructions start at 56 minutes and 40 seconds into the video tutorial.
Right Foot: Heel Hole and Leg:
Rnd 1: Start in a stitch that is up 1 and over to the left 1 of a red stitch from the previous round (see video tutorial for specific location) In that stitch, attach your yarn and do the fair isle stitching (also known as: the established pattern) across 20 sts, end with a white stitch, Chain 18 loosely with White, skip 20 sts, continue to work in continuous rounds and go onto round 2 next.
Rnd 2: With White, SC in each st and each ch around. (38 sts)
Rnd 3: With White, SC in next 3 sts, *Change color to Red, SC in 1 st, Change color to white, SC in next 3 sts, repeat from * around ending with one st in Red on the last st. (if this does not line up with your fair isle stitches, just do the fair isle design as established, just keep note of what you started this round with and ended with because you will be repeating this round in the future)
Rnd 4: With White, SC in each st around.
Rnd 5: Fair Isle Stitches: With White, SC in 1 st, *change color to Red, SC in 1 st, Change color to White, SC in next 3 sts, repeat from * around ending with SC in last 2 sts with White.
Rnd 6: With White, SC in each st around AND put an EXTRA stitch in the last st. (increase made) (39 sts)
Rnds 7-10: repeat Rounds 3-6 one time.
Rnd 11: With White, SC in next 3 sts, *Change color to Red, SC in 1 st, Change color to white, SC in next 3 sts, repeat from * around.
Rnd 12: With White, SC in each st around AND put an EXTRA stitch in the last st. (increase made) (39 sts)
Rnd 13: With White, SC in 1 st, *change color to Red, SC in 1 st, Change color to White, SC in next 3 sts, repeat from * around.
Rnd 14: With White, SC in each st around AND put an EXTRA stitch in the last st. (increase made) (39 sts)
Since the increase is made, the ends of your rounds will turn out differently each time. Start your rounds EXACTLY THE SAME as instructed. See video tutorial for explanation.
Rnds 15-35: Repeat Rounds 11-14 for however long you need to so this part fits around your calf of your leg. I had 52 sts at the end of Round 35. You will need to end on a repeat of Round 11 before going onto the next round.
If you need to repeat this part more or less, just be sure your stitch count is a multiple of 4.
Rnd 36: With White, SC in each st and each ch around. (do not increase any more)
Rnd 37: Repeat Round 11
Rnd 38: With White, SC in each st and each ch around.
Rnd 39: Repeat Round 13
Left Foot Heel Hole and Leg:
Rnd 1: Start in a stitch that is up 1 and over to the left 1 of a red stitch from the previous round (see video tutorial for specific location) In that stitch, attach your yarn and SC in that stitch, Chain 18 loosely, Sk 20 sts, SC in NEXT st working the fair isle stitches on the rest of the sts on this round.
Rnd 2: With White, SC in each st and each ch around. (38 sts)
Rnd 3: With White, SC in first 2 sts, *Change color to Red, SC in next st, Change color to White, SC in next 3 sts, repeat from * around.
(When doing Round 3, you MAY have to add another stitch in somewhere to make the fair isle stitches line up correctly, if you do not, that’s ok, but if you do, that is also ok–nobody will notice, just use your judgement on if your fair isle stitches are lining up)
Rnd 4: With White, SC in each st and each ch around.
Rnd 5: With White, SC in first 4 sts, *Change color to Red, SC in next st, Change color to White, SC in next 3 sts, repeat from * around. (38 sts)
Rnd 6: With White, SC in each st around AND put an EXTRA stitch in the last st. (increase made) (39 sts)
Rnds 7-10: repeat Rounds 3-6 one time.
Rnd 11: With White, SC in first 2 sts, *Change color to Red, SC in next st, Change color to White, SC in next 3 sts, repeat from * around.
Rnd 12: With White, SC in each st around AND put an EXTRA stitch in the last st. (increase made) (40 sts)
Rnd 13: With White, SC in first 4 sts, *Change color to Red, SC in next st, Change color to White, SC in next 3 sts, repeat from * around.
Rnd 14: With White, SC in each st around AND put an EXTRA stitch in the last st. (increase made) (41 sts)
Rnds 15-35: Repeat Rounds 11-14 for however long you need to so this part fits around your calf of your leg. I had 52 sts at the end of Round 35. You will need to end on a repeat of Round 11 before going onto the next round.
If you need to repeat this part more or less, just be sure your stitch count is a multiple of 4.
Rnd 36: With White, SC in each st and each ch around. (do not increase any more)
Rnd 37: Repeat Round 11
Rnd 38: With White, SC in each st and each ch around.
Rnd 39: Repeat Round 13
BOTH SOCKS:
Rounds 40-86: Repeat Rounds 36-39 on the sock you are working on. End on a repeat of round 36 or 38 (plain SC with White Row)
You can continue this repeat until you want to make the cuff–For shorter legs, end earlier, for longer legs, continue the repeat.
Fasten off after you are done with the length and ready to make the cuff.
Next, go onto making the cuff.
Cuff:
Both Socks:
Attach Red to any stitch on back of sock.
Work in the top of the stitches on this part, not IN the stitch like you were for the fair isle design. Rnd 1: Ch 2 (does not count as anything), DC in same st and each st around, sl st to first DC. Rnd 2: Ch 2, FPDC on first St, *BPDC on next st, FPDC on next st, repeat from * around, sl st to first FPDC. Rnds 3-4: Repeat Round 2
Fasten off. Weave in ends.
Heel:
Both Socks
With Red
Attach yarn on bottom sole side in center (see video tutorial for specific location) Rnd 1: Ch 1, SC 38 sts evenly around the Heel Hole, sl st to first SC.
Rnd 2: Ch 1, SC in first 7 sts, SC2TOG, SC in next st, SC2TOG, SC in 14 sts, SC2TOG, SC in next st, SC2TOG, SC in last 7 sts, sl st to first st. (34 sts)
Rnd 3: Ch 1, SC in each st around, sl st to first st. (34)
Rnd 4: Ch 1, SC in first 6 sts, SC2TOG, SC in next st, SC2TOG, SC in 12 sts, SC2TOG, SC in next st, SC2TOG, SC in last 6 sts, sl st to first st. (30 sts)
Rnd 5: Ch 1, SC in first 5 sts, SC2TOG, SC in next st, SC2TOG, SC in 10 sts, SC2TOG, SC in next st, SC2TOG, SC in last 5 sts, sl st to first st. (26 sts)
Rnd 6: Ch 1, SC in first 4 sts, SC2TOG, SC in next st, SC2TOG, SC in 8 sts, SC2TOG, SC in next st, SC2TOG, SC in last 4 sts, sl st to first st. (22 sts)
Rnd 7: Ch 1, SC in first 3 sts, SC2TOG, SC in next st, SC2TOG, SC in 6 sts, SC2TOG, SC in next st, SC2TOG, SC in last 3 sts, sl st to first st. (18 sts)
Rnd 8: Ch 1, SC in first 2 sts, SC2TOG, SC in next st, SC2TOG, SC in 4 sts, SC2TOG, SC in next st, SC2TOG, SC in last 2 sts, sl st to first st. (14 sts)
Fasten off with long tail for sewing
Assembly Step:
Turn sock inside out, Sew heel hole closed. Fasten off, weave in all ends.
Enjoy!
***You can always contact me via Facebook if you have any problems with the pattern. I am happy to help if you have any questions along the way.
Enjoy this video and subscribe to my channel on YouTube for more tutorials on how to crochet!
Leave a comment, and share with your friends!
This post contains affiliate links, which means if you click on the link and buy from the linked websites, I will receive a small percentage of the value of your order. The amount you pay is not changed.
This post contains affiliate links, which I may be compensated for when you make a purchase. That means if you click on any link and buy from the linked websites, I will receive a small percentage of the value of your order. The amount you pay is not changed. Thank you for all your support in clicking the links in my blog!! You all are so amazing!! ~Nadia
The yarn provided for this pattern is courtesy of Red Heart Yarns


 Holiday Hot Pad – FREE Crochet Video Tutorial")


")


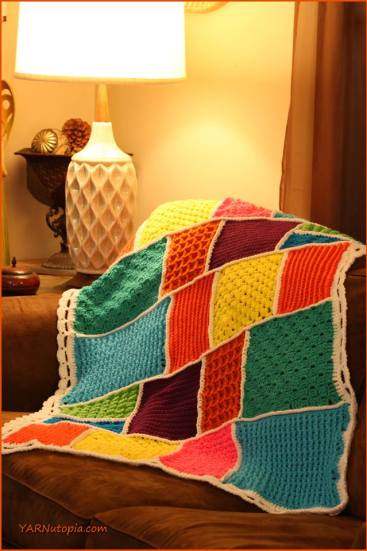


